Tomcat是由Apache软件基金会下属的Jakarta项目开发的一个Servlet容器,按照
Sun Microsystems提供的技术规范,实现了对Servlet和JavaServer Page(JSP)
的支持,并提供了作为Web服务器的一些特有功能,如Tomcat管理和控制平台、
安全局管理和Tomcat阀等。由于Tomcat本身也内含了一个HTTP服务器,它也可
以被视作一个单独的Web服务器。但是,不能将Tomcat和Apache Web服务器混
淆,Apache Web Server是一个用C语言实现的HTTP web server;这两个HTTP
web server不是捆绑在一起的。Apache Tomcat包含了一个配置管理工具,也可
以通过编辑XML格式的配置文件来进行配置。 摘自-wiki
规划
apache + mod_jk / mod_proxy 172.16.43.1(salve1.king.com)
jdk , tomcat 172.16.43.2(salve2.king.com)
jdk , tomcat 172.16.43.3(salve2.king.com)
1 .基本配置 jdk , tomcat (slave2.king.com , slave3.king.com)
|
1
2
3
4
5
6
7
8
9
10
11
12
13
14
15
16
17
18
19
20
21
22
23
24
25
26
27
28
|
i) 准备jdk , tomcat的bin包
jdk-7u9-linux-x64.rpm
apache-tomcat-7.0.42.
tar
.gz
#
ii) 安装配置jdk
rpm -ivh jdk-7u9-linux-x64.rpm
vim
/etc/profile
.d
/java
.sh
export
JAVA_HOME=
/usr/java/latest
export
PATH=$JAVA_HOME
/bin
:$PATH
# 退出编辑后重新执行该脚本导出环境变量
.
/etc/profile
.d
/java
.sh
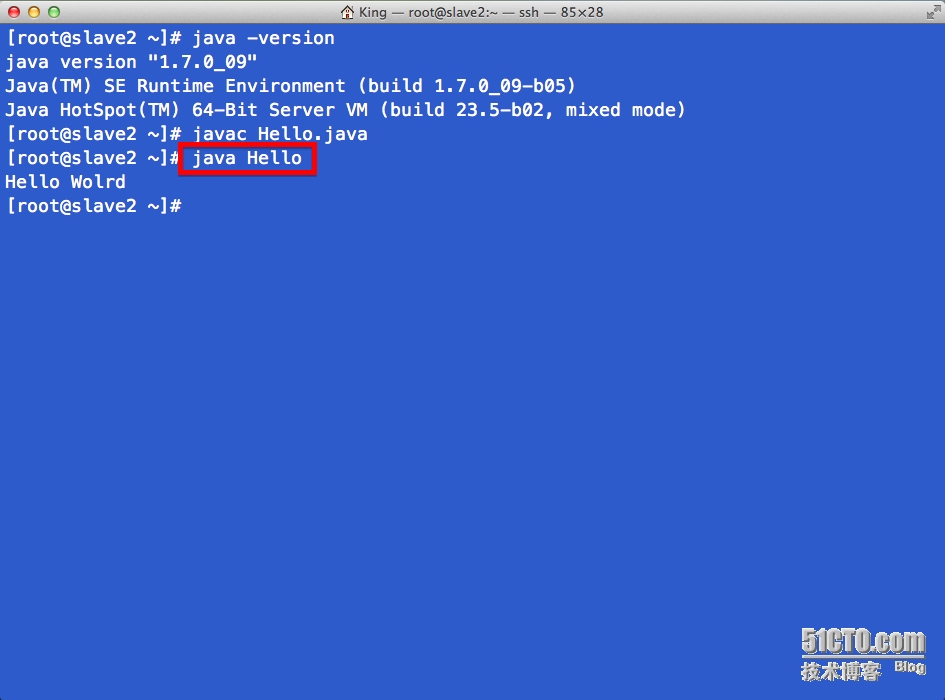
java --version
# 可以看到如下信息
[root@slave2 ~]
# java -version
java version
"1.7.0_09"
Java(TM) SE Runtime Environment (build 1.7.0_09-b05)
Java HotSpot(TM) 64-Bit Server VM (build 23.5-b02, mixed mode)
# 最后利用javac编译helloworld确保成功
vim Hello.java
public class Hello {
public static void main(String[] args) {
System.out.println(
"Hello Wolrd"
);
}
}
# 编译java代码
javac Hello.java
# 运行java代码 , 注意这里是 类名
java Hello
|
|
1
2
3
4
5
6
7
8
9
10
11
12
13
14
15
16
17
18
19
20
21
22
23
24
25
26
27
28
29
30
31
32
33
34
35
|
iii) 配置安装tomcat
tar
xf apache-tomcat-7.0.42.
tar
.gz -C
/usr/local
ln
-sv
/usr/local/apache-tomcat-7
.0.42
/usr/local/tomcat
#
vim
/etc/init
.d
/tomcat
#!/bin/sh
# Tomcat init script for Linux.
#
# chkconfig: 2345 96 14
# description: The Apache Tomcat servlet/JSP container.
# JAVA_OPTS='-Xms64m -Xmx128m'
JAVA_HOME=
/usr/java/latest
CATALINA_HOME=
/usr/local/tomcat
export
JAVA_HOME CATALINA_HOME
#
case
$1
in
start)
exec
$CATALINA_HOME
/bin/catalina
.sh start ;;
stop)
exec
$CATALINA_HOME
/bin/catalina
.sh stop;;
restart)
$CATALINA_HOME
/bin/catalina
.sh stop
sleep
2
exec
$CATALINA_HOME
/bin/catalina
.sh start ;;
*)
echo
"Usage: `basename $0` {start|stop|restart}"
exit
1
;;
esac
#
# 编辑完毕后添加tomcat服务开机启动
chmod
+x
/etc/init
.d
/tomcat
chkconfig --add tomcat
chkconfig tomcat on
service tomcat start
|
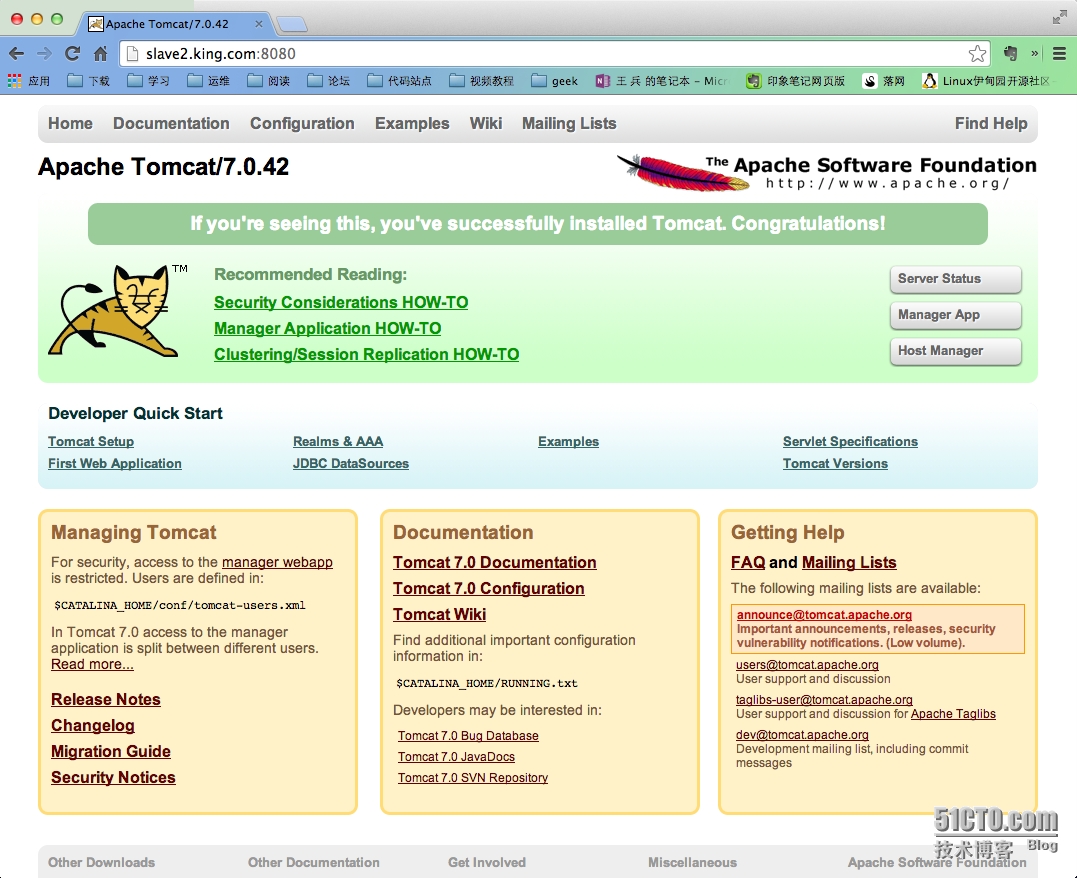
# 测试不改任何配置文件,tomcat默认监听在8080端口,直接访问
2. 反代配置 apache + mod_jk(ajp) / mod_proxy(ajp , http) + tomcat
|
1
2
3
4
|
i) 准备apache , tomcat-connectors(mod_jk)的源码包 (salve1.king.com)
# mod_proxy是apache的原生模块
httpd-2.4.9.
tar
.bz2
tomcat-connectors-1.2.37-src.
tar
.gz
|
|
1
2
3
4
5
6
7
8
9
10
11
12
13
14
15
16
17
18
19
20
21
22
23
24
25
26
27
28
29
30
31
32
33
34
35
36
37
38
39
40
41
42
43
44
45
46
47
48
49
50
51
52
53
54
55
56
57
58
59
60
61
62
63
64
65
66
67
68
69
70
71
72
73
74
75
76
77
78
79
80
81
82
83
84
85
86
87
88
89
90
91
92
93
94
95
96
97
98
99
100
101
102
103
104
105
106
107
108
109
110
111
112
113
114
115
116
117
118
119
120
121
122
123
124
125
126
127
128
129
130
131
132
133
134
135
136
|
ii) 安装配置apache基于mod_jk(ajp协议)的反向代理 (salve1.king.com)
编译需要依赖 pcre-devel-7.8-6.el6.bz2 apr-1.5.0.bz2 apr-util-1.5.3.bz2
按需进行依次编译安装
tar
xf pcre-devel-7.8-6.el6.bz2
cd
pcre-devel-7.8-6
.
/configure
--prefix=
/usr/local/pcre
make
&&
make
install
#
tar
xf apr-1.5.0.
tar
.bz2
cd
apr-1.5.0
.
/configure
--prefix=
/usr/local/apr
make
&&
make
install
#
tar
xf apr-util-1.5.3.
tar
.bz2
cd
apr-util-1.5.3
.
/configure
--prefix=
/usr/local/apr-util
--with-apr=
/usr/local/apr
make
&&
make
install
#
# 安装之前请确保系统之前预装的httpd已被卸载
rpm -e httpd --nodeps
tar
xf httpd-2.4.9.
tar
.bz2
cd
httpd-2.4.9
.
/configure
--prefix=
/usr/local/apache
--sysconfdir=
/etc/httpd
--
enable
-so --
enable
-ssl --
enable
-cgi --
enable
-rewrite --with-zlib --with-pcre --with-apr=
/usr/local/apr
--with-apr-util=
/usr/local/apr-util
--
enable
-mpms-shared=all --with-mpm=event --
enable
-proxy --
enable
-proxy-http --
enable
-proxy-ajp --
enable
-proxy-balancer --
enable
-lbmethod-heartbeat --
enable
-heartbeat --
enable
-slotmem-shm --
enable
-slotmem-plain --
enable
-watchdog
make
&&
make
install
#
# 编辑/etc/httpd/httpd.conf,添加如下行即可:
PidFile
"/var/run/httpd.pid"
# 32行
# 将如下模块启动,否则无法启动httpd
LoadModule slotmem_shm_module modules
/mod_slotmem_shm
.so
#128
#
# 启动脚本如下 vim /etc/rc.d/init.d/httpd
#!/bin/bash
#
# httpd Startup script for the Apache HTTP Server
#
# chkconfig: - 85 15
# description: The Apache HTTP Server is an efficient and extensible \
# server implementing the current HTTP standards.
# processname: httpd
# config: /etc/httpd/conf/httpd.conf
# config: /etc/sysconfig/httpd
# pidfile: /var/run/httpd/httpd.pid
#
.
/etc/rc
.d
/init
.d
/functions
if
[ -f
/etc/sysconfig/httpd
];
then
.
/etc/sysconfig/httpd
fi
HTTPD_LANG=${HTTPD_LANG-
"C"
}
INITLOG_ARGS=
""
apachectl=
/usr/local/apache/bin/apachectl
# 修改apachectl路径
httpd=
/usr/local/apache/bin/httpd
# 修改httpd bin路径
prog=httpd
pidfile=${PIDFILE-
/var/run/httpd
.pid}
lockfile=${LOCKFILE-
/var/lock/subsys/httpd
}
RETVAL=0
STOP_TIMEOUT=${STOP_TIMEOUT-10}
start() {
echo
-n $
"Starting $prog: "
LANG=$HTTPD_LANG daemon --pidfile=${pidfile} $httpd $OPTIONS
RETVAL=$?
echo
[ $RETVAL = 0 ] &&
touch
${lockfile}
return
$RETVAL
}
stop() {
echo
-n $
"Stopping $prog: "
killproc -p ${pidfile} -d ${STOP_TIMEOUT} $httpd
RETVAL=$?
echo
[ $RETVAL = 0 ] &&
rm
-f ${lockfile} ${pidfile}
}
reload() {
echo
-n $
"Reloading $prog: "
if
! LANG=$HTTPD_LANG $httpd $OPTIONS -t >&
/dev/null
;
then
RETVAL=6
echo
$
"not reloading due to configuration syntax error"
failure $
"not reloading $httpd due to configuration syntax error"
else
# Force LSB behaviour from killproc
LSB=1 killproc -p ${pidfile} $httpd -HUP
RETVAL=$?
if
[ $RETVAL -
eq
7 ];
then
failure $
"httpd shutdown"
fi
fi
echo
}
# See how we were called.
case
"$1"
in
start)
start
;;
stop)
stop
;;
status)
status -p ${pidfile} $httpd
RETVAL=$?
;;
restart)
stop
start
;;
condrestart|try-restart)
if
status -p ${pidfile} $httpd >&
/dev/null
;
then
stop
start
fi
;;
force-reload|reload)
reload
;;
graceful|help|configtest|fullstatus)
$apachectl $@
RETVAL=$?
;;
*)
echo
$
"Usage: $prog {start|stop|restart|condrestart|try-restart|force-reload|reload|status|fullstatus|graceful|help|configtest}"
RETVAL=2
esac
exit
$RETVAL
#
# 而后为此脚本赋予执行权限:
chmod
+x
/etc/rc
.d
/init
.d
/httpd
#
# 加入服务列表:
chkconfig --add httpd
#
# mod_jk安装配置
tar
xf tomcat-connectors-1.2.37-src.
tar
.gz
cd
tomcat-connectors-1.2.37-src
/native/
.
/configure
--with-apxs=
/usr/local/apache/bin/apxs
make
&&
make
install
#
# 启动httpd
service httpd start
|
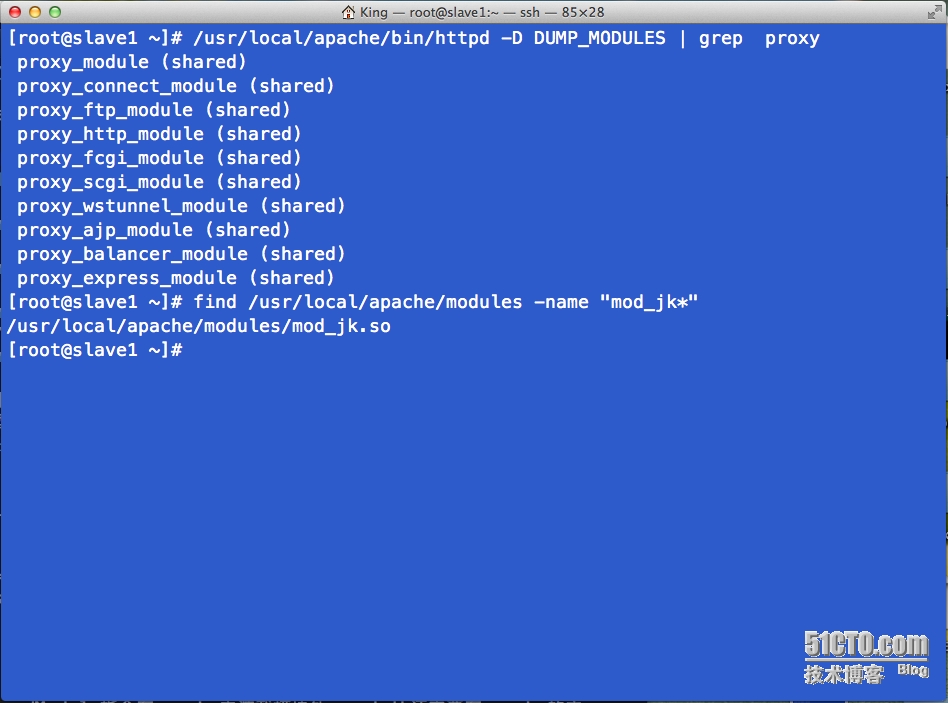
# httpd安装好后需要观察如下模块是否已经就绪
|
1
2
3
4
5
6
7
8
9
10
11
12
13
14
15
16
17
18
19
20
21
22
23
24
25
|
iii) mod_jk(ajp协议)反代tomcat示例 (slave1.king.com)
vim
/etc/httpd/extra/httpd-jk
.conf
# Load the mod_jk
LoadModule jk_module modules
/mod_jk
.so
JkWorkersFile
/etc/httpd/extra/workers
.properties
JkLogFile logs
/mod_jk
.log
JkLogLevel debug
JkMount /* tomcat1
JkMount
/status/
stat1
#
vim
/etc/httpd/extra/workers
.properties
worker.list=tomcat1,stat1
worker.tomcat1.port=8009
worker.tomcat1.host=172.16.43.2
worker.tomcat1.
type
=ajp13
worker.tomcat1.lbfactor=1
worker.stat1.
type
= status
#
vim
/etc/httpd/httpd
.conf
DirectoryIndex index.jsp
# 249行
Include
/etc/httpd/extra/httpd-jk
.conf
# 446行
#
vim
/usr/local/tomcat/conf/server
.xml (slave2.king.com , slave3.king.com)
<Engine name=
"Catalina"
defaultHost=
"localhost"
jvmRoute=
"tomcat1"
>
# 103行
# 两个节点分别重启 httpd , tomcat 服务
|
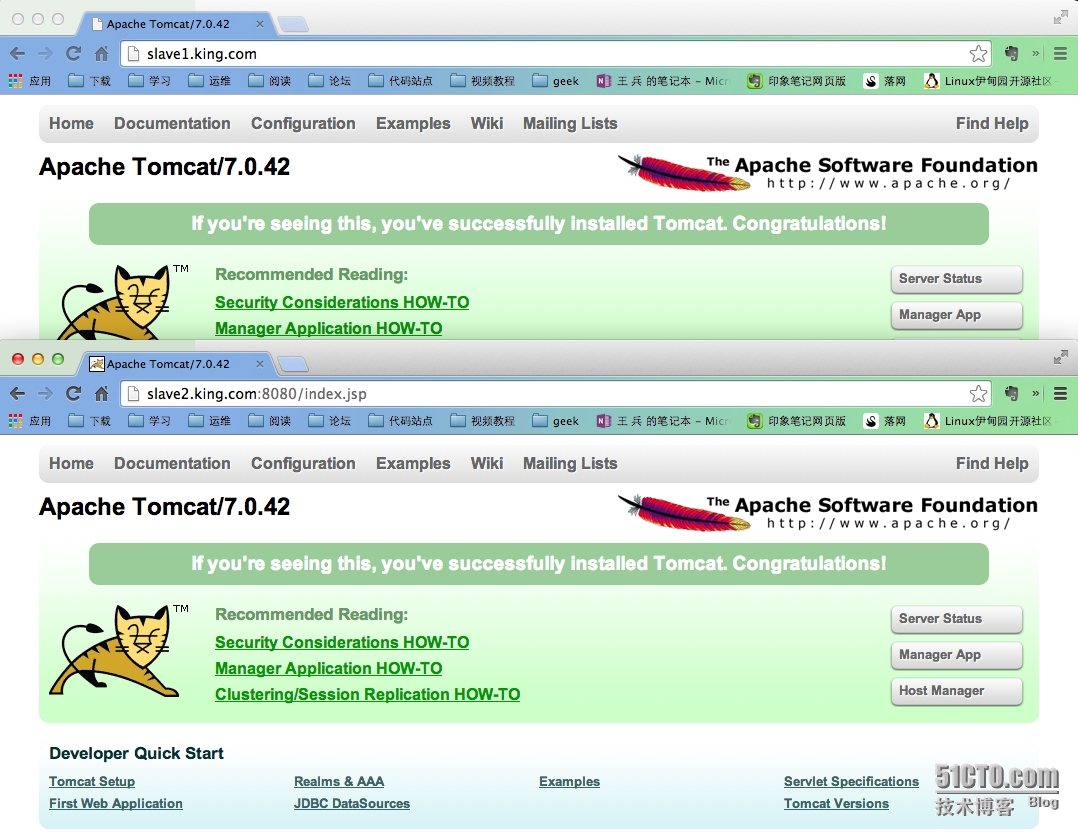
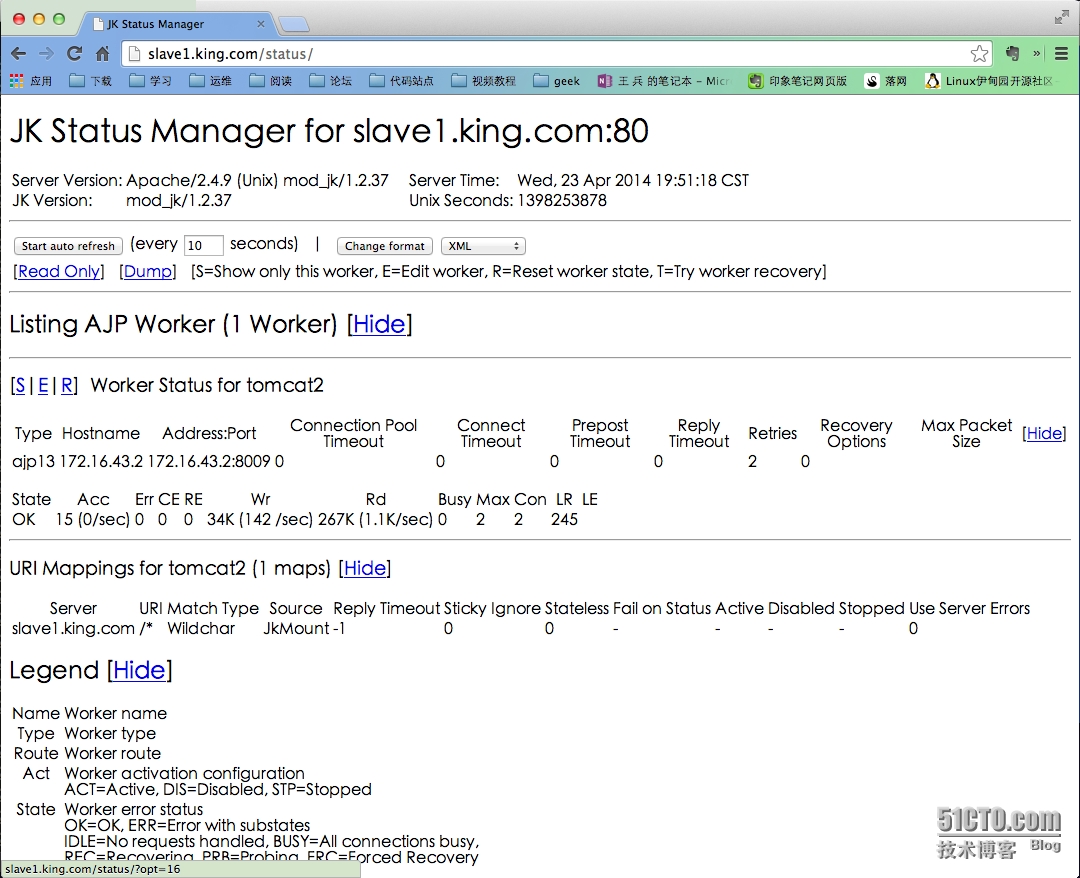
# 测试, 此时基本的反代及status页面已经可以访问
|
1
2
3
4
5
6
7
8
9
10
11
12
13
14
15
16
17
18
19
20
21
22
23
24
25
26
27
28
29
30
31
32
33
34
35
36
37
38
39
40
41
42
43
44
45
46
47
48
49
50
51
52
53
54
55
56
57
58
59
60
61
62
63
64
65
66
67
68
69
70
71
72
73
74
75
76
77
78
79
80
81
82
|
iv) mod_proxy(http协议 , ajp协议)反代tomcat示例 (salve1.king.com)
# 在httpd.conf的全局配置段(Directory)或虚拟主机(VirtualHost)中添加如下内容:
ProxyVia Off
ProxyRequests Off
ProxyPreserveHost Off
<Proxy *>
Require all granted
<
/Proxy
>
ProxyPass / ajp:
//172
.16.43.2:8009/
ProxyPassReverse / ajp:
//172
.16.43.2:8009/
<Location / >
Require all granted
<
/Location
>
#
# apache跟Tomcat的http连接器进行整合:
ProxyVia Off
ProxyRequests Off
ProxyPass / http:
//172
.16.100.2:8080/
ProxyPassReverse / http:
//172
.16.100.2:8080/
<Proxy *>
Require all granted
<
/Proxy
>
<Location / >
Require all granted
<
/Location
>
#
# 基于session绑定均衡反代
ProxyRequests Off
<proxy balancer:
//lbcluster
>
BalancerMember ajp:
//172
.16.100.1:8009 loadfactor=10 route=tomcat1
BalancerMember ajp:
//172
.16.100.2:8009 loadfactor=10 route=tomcat2
<
/proxy
>
#
<VirtualHost *:80>
ServerName www.king.com
ProxyPass / balancer:
//lbcluster/
stickysession=JSESSIONID
ProxyPassReverse / balancer:
//lbcluster/
<
/VirtualHost
>
#
# 为tomcat建立新的webapp用于测试 (slave2.king.com , slave3.king.com)
vim
/usr/local/tomcat/conf/server
.xml
<Context path=
"/testsession"
docBase=
"/usr/local/tomcat/webapps/testsession"
/>
# 140行
#
# 测试页面 (slave2.king.com)
<%@ page language=
"java"
%>
<html>
<
head
><title>tomcat1<
/title
><
/head
>
<body>
<h1><font color=
"red"
>tomcat1.king.com<
/font
><
/h1
>
<table align=
"centre"
border=
"1"
>
<
tr
>
<td>Session ID<
/td
>
<% session.setAttribute(
"king.com"
,
"king.com"
); %>
<td><%= session.getId() %><
/td
>
<
/tr
>
<
tr
>
<td>Created on<
/td
>
<td><%= session.getCreationTime() %><
/td
>
<
/tr
>
<
/table
>
<
/body
>
<
/html
>
#
# 测试页面 (salve3,king.com)
<%@ page language=
"java"
%>
<html>
<
head
><title>tomcat2<
/title
><
/head
>
<body>
<h1><font color=
"red"
>tomcat2.king.com<
/font
><
/h1
>
<table align=
"centre"
border=
"1"
>
<
tr
>
<td>Session ID<
/td
>
<% session.setAttribute(
"king.com"
,
"king.com"
); %>
<td><%= session.getId() %><
/td
>
<
/tr
>
<
tr
>
<td>Created on<
/td
>
<td><%= session.getCreationTime() %><
/td
>
<
/tr
>
<
/table
>
<
/body
>
<
/html
>
|
# 测试, 使用不同浏览器将访问落在不同节点上,反复刷新不变则证明sticksession成功




 5897
5897


 被折叠的 条评论
为什么被折叠?


