


1,没有引入缓存中间件的话,springboot会使用SimpleCacheConfiguration
springboot版本:2.0.2.RELEASE,1.5.x 同理
①,pom依赖
<dependency>
<groupId>org.springframework.boot</groupId>
<artifactId>spring-boot-starter-web</artifactId>
</dependency>
<dependency>
<groupId>org.mybatis.spring.boot</groupId>
<artifactId>mybatis-spring-boot-starter</artifactId>
<version>1.3.2</version>
</dependency>
<dependency>
<groupId>mysql</groupId>
<artifactId>mysql-connector-java</artifactId>
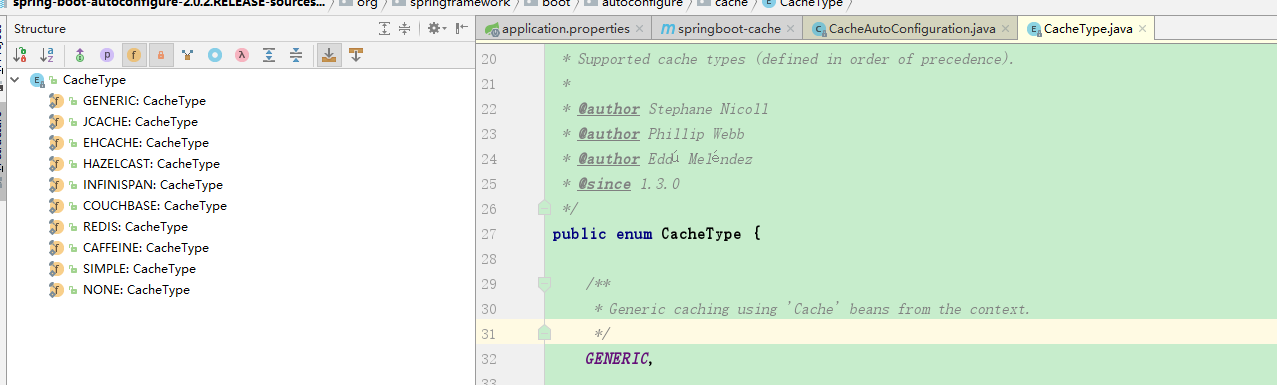
</dependency>②,我们可以观察CacheAutoConfiguration#CacheConfigurationImportSelector
这个静态内部类看出springboot可以让我们配置哪些缓存,
源码如下:
	static class CacheConfigurationImportSelector implements ImportSelector {

		@Override
		public String[] selectImports(AnnotationMetadata importingClassMetadata) {
            //通过CacheType 获取支持的缓存类型,注意,是有序的从上到下
			CacheType[] types = CacheType.values();
			String[] imports = new String[types.length];
			for (int i = 0; i < types.length; i++) {
				imports[i] = CacheConfigurations.getConfigurationClass(types[i]);
			}
			return imports;
		}

	}
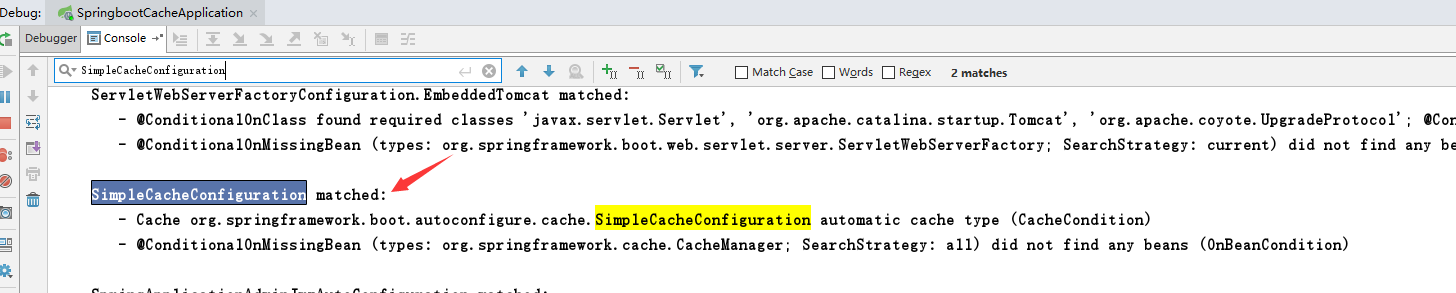
可以通过debug=true 查看springboot为我们加载了哪些类
2,启用springboot的缓存注解
//在主配置类上加上,@EnableCaching,使得缓存注解生效
@EnableCaching
@SpringBootApplication
public class SpringbootCacheApplication {
3,在service层的对应方法加上缓存注解
@Service
public class EmployeeService {

    @Autowired
    private EmployeeDao employeeDao;

    //缓存的key,默认就是传入的id,更多用法请自行百度
    @Cacheable(cacheNames = "emp")
    public Employee findById(Integer id) {
        System.out.println("查找key为:"+id);
        return employeeDao.findById(id);
    }
}
4,controller 编写对应的测试代码
@RestController
public class EmployeeController {

    @Autowired
    private EmployeeService employeeService;

    @RequestMapping("find/{id}")
    public Employee findById(@PathVariable("id")Integer id){

        return employeeService.findById(id);
    }
}
5,启动springboot应用
①,在application.properties 开启debug模式
debug=true②,通过观察控制台看到只有SimpleCacheConfiguration 是起效了,其余xxCacheConfiguration没有起效
6,给对应cache打上对应断点,在验证是否启用了该缓存
//ConcurrentMapCacheManager配置了	ConcurrentMapCacheManager 作为缓存管理器
@Bean
	public ConcurrentMapCacheManager cacheManager() {
		ConcurrentMapCacheManager cacheManager = new ConcurrentMapCacheManager();
		List<String> cacheNames = this.cacheProperties.getCacheNames();
		if (!cacheNames.isEmpty()) {
			cacheManager.setCacheNames(cacheNames);
		}
		return this.customizerInvoker.customize(cacheManager);
	}

//进入ConcurrentMapCacheManager  类,
//这个就是ConcurrentMapCacheManager  获取缓存的方法

@Override
	@Nullable
	public Cache getCache(String name) {
		Cache cache = this.cacheMap.get(name);
		if (cache == null && this.dynamic) {
			synchronized (this.cacheMap) {
				cache = this.cacheMap.get(name);
				if (cache == null) {
                   //这里创建缓存
					cache = createConcurrentMapCache(name);
					this.cacheMap.put(name, cache);
				}
			}
		}
		return cache;
	}
//点击createConcurrentMapCache ,可以看到ConcurrentMapCacheManager  创建的cache为ConcurrentMapCache

protected Cache createConcurrentMapCache(String name) {
		SerializationDelegate actualSerialization = (isStoreByValue() ? this.serialization : null);
		return new ConcurrentMapCache(name, new ConcurrentHashMap<>(256),
				isAllowNullValues(), actualSerialization);

}
7,给ConcurrentMapCache 的相关方法打上断点
①,重点是如下代码
//通过这行代码,我们知道SimpleCacheConfiguration是用ConcurrentMap来存储缓存的,
//(mybatis的二级缓存也是用map存储的)
//所以,我们可以得出SimpleCacheConfiguration 是内存缓存,相当于memorycache,不会持久化缓存
private final ConcurrentMap<Object, Object> store;

//获取缓存
protected Object lookup(Object key) {
		return this.store.get(key);
	}


//设置缓存
	@Override
	public void put(Object key, @Nullable Object value) {
		this.store.put(key, toStoreValue(value));
	}
8,测试结果
第一次访问http://127.0.0.1:8979/find/1 不会走缓存,第二次就走走缓存了
#第一次访问,打印的日志
2018-05-19 20:09:51.979  INFO 1736 --- [nio-8979-exec-1] o.a.c.c.C.[Tomcat].[localhost].[/]       : Initializing Spring FrameworkServlet 'dispatcherServlet'
2018-05-19 20:09:51.979  INFO 1736 --- [nio-8979-exec-1] o.s.web.servlet.DispatcherServlet        : FrameworkServlet 'dispatcherServlet': initialization started
2018-05-19 20:09:52.004  INFO 1736 --- [nio-8979-exec-1] o.s.web.servlet.DispatcherServlet        : FrameworkServlet 'dispatcherServlet': initialization completed in 25 ms
2018-05-19 20:09:52.012 DEBUG 1736 --- [nio-8979-exec-1] o.s.b.w.s.f.OrderedRequestContextFilter  : Bound request context to thread: org.apache.catalina.connector.RequestFacade@20e4d465
查找key为:1
2018-05-19 20:09:56.382  INFO 1736 --- [nio-8979-exec-1] com.zaxxer.hikari.HikariDataSource       : HikariPool-1 - Starting...
2018-05-19 20:09:56.513  INFO 1736 --- [nio-8979-exec-1] com.zaxxer.hikari.HikariDataSource       : HikariPool-1 - Start completed.
2018-05-19 20:09:56.517 DEBUG 1736 --- [nio-8979-exec-1] c.c.s.emp.dao.EmployeeDao.findById       : ==>  Preparing: select * from emp where id=?;
2018-05-19 20:09:56.529 DEBUG 1736 --- [nio-8979-exec-1] c.c.s.emp.dao.EmployeeDao.findById       : ==> Parameters: 1(Integer)
2018-05-19 20:09:56.538 DEBUG 1736 --- [nio-8979-exec-1] c.c.s.emp.dao.EmployeeDao.findById       : <==      Total: 1

#第二次访问,打印的日志
2018-05-19 20:10:49.643 DEBUG 1736 --- [nio-8979-exec-5] o.s.b.w.s.f.OrderedRequestContextFilter  : Bound request context to thread: org.apache.catalina.connector.RequestFacade@20e4d465
2018-05-19 20:10:49.645 DEBUG 1736 --- [nio-8979-exec-5] o.s.b.w.s.f.OrderedRequestContextFilter  : Cleared thread-bound request context: org.apache.catalina.connector.RequestFacade@20e4d465
2018-05-19 20:10:49.650 DEBUG 1736 --- [nio-8979-exec-8] o.s.b.w.s.f.OrderedRequestContextFilter  : Bound request context to thread: org.apache.catalina.connector.RequestFacade@20e4d465
2018-05-19 20:10:49.653 DEBUG 1736 --- [nio-8979-exec-8] o.s.b.w.s.f.OrderedRequestContextFilter  : Cleared thread-bound request context: org.apache.catalina.connector.RequestFacade@20e4d465


 76
76

 被折叠的 条评论
为什么被折叠?
被折叠的 条评论
为什么被折叠?
 到【灌水乐园】发言


