


主要参考了 http://blog.didispace.com/springcloud1/
下面来实践一下
---
1)创建一个普通的maven工程
然后maven里面添加以下内容
<parent>
    <groupId>org.springframework.boot</groupId>
    <artifactId>spring-boot-starter-parent</artifactId>
    <version>1.3.5.RELEASE</version>
    <relativePath/> <!-- lookup parent from repository -->
</parent>
<dependencies>
    <dependency>
        <groupId>org.springframework.boot</groupId>
	<artifactId>spring-boot-starter-test</artifactId>
	<scope>test</scope>
    </dependency>
    <dependency>
        <groupId>org.springframework.cloud</groupId>
	<artifactId>spring-cloud-starter-eureka-server</artifactId>
    </dependency>
</dependencies>
<dependencyManagement>
    <dependencies>
        <dependency>
	    <groupId>org.springframework.cloud</groupId>
	    <artifactId>spring-cloud-dependencies</artifactId>
	    <version>Brixton.RELEASE</version>
	    <type>pom</type>
	    <scope>import</scope>
	</dependency>
    </dependencies>
</dependencyManagement>
这样就可以了。
---然后创建主类,源码如下
package a.b.c;

import org.springframework.boot.autoconfigure.SpringBootApplication;
import org.springframework.boot.builder.SpringApplicationBuilder;
import org.springframework.cloud.netflix.eureka.server.EnableEurekaServer;

@EnableEurekaServer
@SpringBootApplication
public class Application {
	public static void main(String[] args) {
		new SpringApplicationBuilder(Application.class).web(true).run(args);
	}
}
好,到目前一切正常。
下面就该修改配置文件了,修改application.properties文件
比如,我的配置文件就是
server.port=1111
eureka.client.register-with-eureka=false
eureka.client.fetch-registry=false
eureka.client.serviceUrl.defaultZone=http://localhost:${server.port}/eureka/
启动后,访问localhost:1111端口,可以看到界面如下:
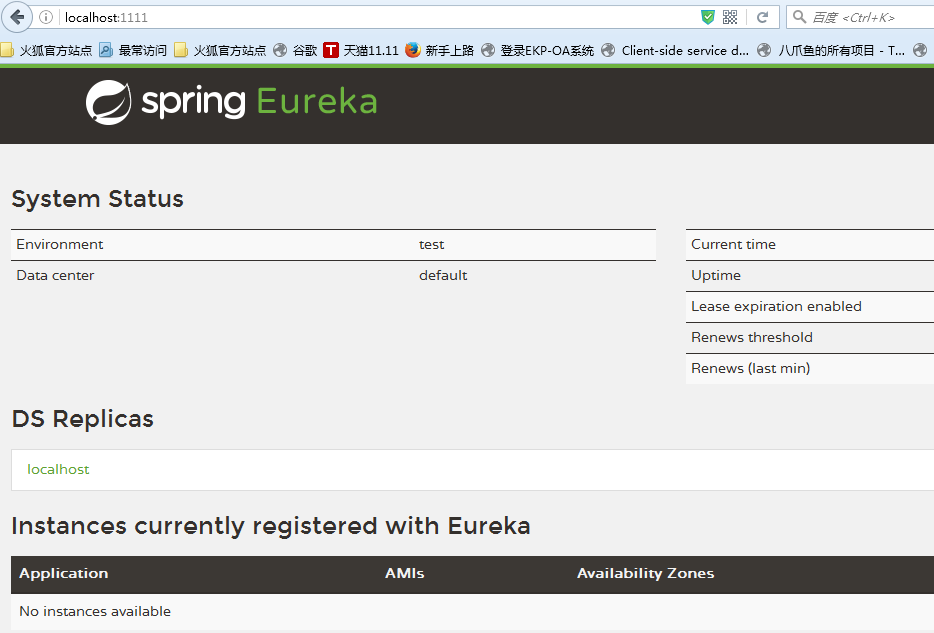
说明注册中心启动成功!
---不过,目前还没有服务提供方,所以需要创建一个服务,并注册上来!
创建“服务提供方”
创建一个新的maven工程,pom.xml中加入
<parent>
    <groupId>org.springframework.boot</groupId>
    <artifactId>spring-boot-starter-parent</artifactId>
    <version>1.3.5.RELEASE</version>
    <relativePath/> <!-- lookup parent from repository -->
</parent>
<dependencies>
    <dependency>
        <groupId>org.springframework.boot</groupId>
	<artifactId>spring-boot-starter-test</artifactId>
	<scope>test</scope>
    </dependency>
    <dependency>
        <groupId>org.springframework.cloud</groupId>
	<artifactId>spring-cloud-starter-eureka</artifactId>
    </dependency>
</dependencies>
<dependencyManagement>
    <dependencies>
        <dependency>
	    <groupId>org.springframework.cloud</groupId>
	    <artifactId>spring-cloud-dependencies</artifactId>
	    <version>Brixton.RELEASE</version>
	    <type>pom</type>
	    <scope>import</scope>
	</dependency>
    </dependencies>
</dependencyManagement>
然后,写上一个业务类
package a.q.t;

import org.apache.log4j.Logger;
import org.springframework.beans.factory.annotation.Autowired;
import org.springframework.cloud.client.ServiceInstance;
import org.springframework.cloud.client.discovery.DiscoveryClient;
import org.springframework.web.bind.annotation.RequestMapping;
import org.springframework.web.bind.annotation.RequestMethod;
import org.springframework.web.bind.annotation.RequestParam;
import org.springframework.web.bind.annotation.RestController;

@RestController
public class ComputeController {
	private final Logger logger = Logger.getLogger(getClass());
	@Autowired
	private DiscoveryClient client;

	@RequestMapping(value = "/add", method = RequestMethod.GET)
	public Integer add(@RequestParam Integer a, @RequestParam Integer b) {
		ServiceInstance instance = client.getLocalServiceInstance();
		Integer r = a + b;
		logger.info("/add, host:" + instance.getHost() + ", service_id:" + instance.getServiceId() + ", result:" + r);
		return r;
	}
}
然后写主类
import org.springframework.boot.autoconfigure.SpringBootApplication;
import org.springframework.boot.builder.SpringApplicationBuilder;
import org.springframework.cloud.client.discovery.EnableDiscoveryClient;

@EnableDiscoveryClient
@SpringBootApplication
public class ComputeServiceApplication {
	public static void main(String[] args) {
		new SpringApplicationBuilder(ComputeServiceApplication.class).web(true).run(args);
	}
}
剩下就是写配置文件了
spring.application.name=compute-service
server.port=2222
eureka.client.serviceUrl.defaultZone=http://localhost:1111/eureka/
好,启动前,注册中心界面

启动后,界面如下:

可以看到,服务成功注册了!


 1310
1310

 被折叠的 条评论
为什么被折叠?
被折叠的 条评论
为什么被折叠?
 到【灌水乐园】发言


