


上篇“【物联网(IoT)开发】Arduino 入门 Hello World(LED闪烁)”只是通过将一段程序烧录到Arduino开发板上控制LEC闪烁,没有任何连网动作,也就是说断开网络提供电源依然还可以工作。本文将介绍如何开发一个应用程序,以便使用适用于物联网 (Internet of Things, IoT) 的技术。我们的应用程序通过串口收集数据,将其存储在一个 Web 服务器上,然后在网页上实时显式结果,并可以在网页上控制LED的开关。
构建一个类似的应用程序的前提条件
对于第 1 部分,您需要:
一个 Bluemix 帐户,您还没有? 点击这里注册,已经有,点击这里登录;
对 HTML(超文本标记语言)的基本了解;
对CSS (层叠样式表)的基本了解;
对JavaScript(一种直译式脚本语言)的基本了解;
对Python 编程的基本了解;
对MySQL数据库及管理工具的基本了解;
对SQL语言的基本了解;
对于第 2 部分,您需要:一个 Arduino NANO 或其他兼容 Arduino 的主板
可选:Arduino Ethernet Shield
一个LED灯(发光二极管)
一些母母跳线(female-female jumper wire)
我提供了所有必要代码,但对这些技术的基本了解有助于您理解有关的细节,但不是必须如此。
也无需拥有使用 Arduino 或任何其他类型的微型控制器主板的经验。
步骤 1. 创建您的Python应用程序
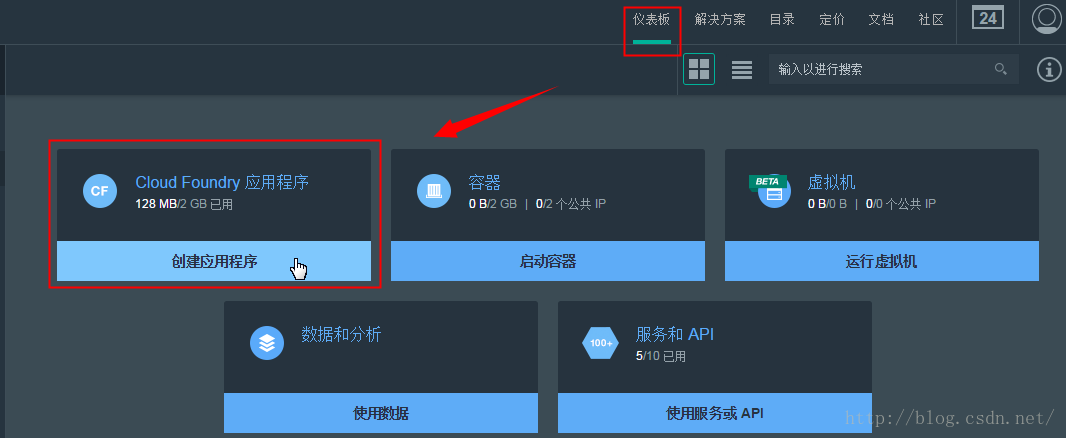
- 1、在 Bluemix 用户界面中,转至“仪表板”。
-
- 2、单击创建应用程序。
-
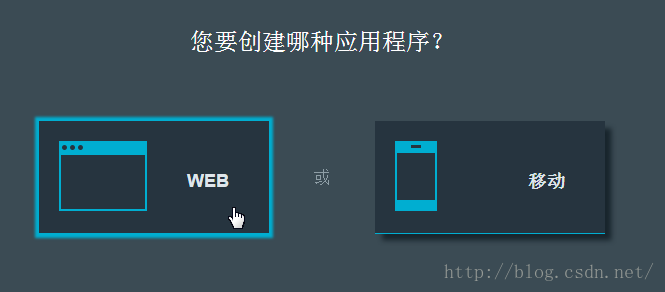
- 3、单击 Web,然后按照指导经验来选择入门模板,指定名称以及选择编码方式。
-
- 输入应用程序名称
-
- 应用程序名称是唯一的,接下来要通过它做为二级域名来访问你的应用!
- 点击完成之后,需要等待一会儿,然后可以看到下图的界面
-
- 这时就可以访问你刚刚创建的应用了。如下图:


步骤 2. 添加数据库服务
- 可以通过单击 Bluemix 用户界面中应用程序“概述”上的添加服务或 API,将服务添加到应用程序中。也可以使用 cf 命令行界面。请参阅处理应用程序的可用选项。
-
- 在服务列表中选择数据库(ClearDB MySQL Database)
-
- 您可以指定服务的名称,也可以使用默认的;
-


如果你事先已经创建了数据库服务,也可以直接绑定:

获取服务信息
进入自己的应用程序》概述页面,找到已经添加的服务,点击“显示凭证”,可以查看服务的具体信息:

拿到凭证,我们就可以通过MySQL的客户端管理工具来连接管理数据库了:
1、连接数据库
如果你还没有安装Navicat for MySQL管理工具,请参考:MySQL学习(二)图形界面管理工具Navicat for MySQL安装和使用

2、创建数据表
注意:我们是没有权限创建数据库的,只能用默认创建好的;

只需要创建一张非常简单的表,来保存状态和控制命令
SET FOREIGN_KEY_CHECKS=0;

-- ----------------------------
-- Table structure for `led_status`
-- ----------------------------
DROP TABLE IF EXISTS `led_status`;
CREATE TABLE `led_status` (
  `id` bigint(20) NOT NULL,
  `status` varchar(10) DEFAULT NULL,
  `control` varchar(10) DEFAULT NULL,
  PRIMARY KEY (`id`)
) ENGINE=InnoDB DEFAULT CHARSET=utf8;

-- ----------------------------
-- Records of led_status
-- ----------------------------
INSERT INTO `led_status` VALUES ('1', '0', '0');
步骤 3. 准备开发环境及硬件环境
有关开发环境搭建的细节,请参考下面的文章:
《Python入门》Windows 7下Python Web开发环境搭建笔记
《Python入门》第一个Python Web程序——简单的Web服务器
《Python入门》Linux 下 Python Web开发环境搭建笔记【物联网(IoT)开发】Arduino IDE(集成开发环境)下载及安装
【物联网(IoT)开发】Arduino NANO,UNO 驱动安装
本文使用的硬件环境非常简单,请参考:
【物联网(IoT)开发】Arduino 入门 Hello World(LED闪烁)
步骤 4.编写代码
1、下载初始Hello World示例代码
你可以下载入门示例参考,也可以完全自己写!
进入您的应用程序,点击左侧的开始编码,在右侧点击“下载入门模板代码”。

也可以通过添加Git来下载代码。
2、使其在本地运行
1、将下载的入门模板代码解压到一个目录,打开命令行窗口,切换到这个目录下

可以看出代码结构是很简单的;
2、执行命令:python server.py
3、在浏览器中访问:http://localhost:8000/
3、编写代码
本文涉及到三部分代码
1)、烧录到Arduino开发板上的代码,用于接收串口的命令控制LED状态,并实时输出LED的状态
String blink_flag = "1";

// the setup function runs once when you press reset or power the board
void setup() {
  // initialize digital pin 13 as an output.
  pinMode(2, OUTPUT);
  Serial.begin(9600);
}

// the loop function runs over and over again forever
void loop() {
  String rx_buffer;
  rx_buffer=Serial.readString();
  if (rx_buffer.length() == 1){
    blink_flag = rx_buffer;
  }

  if (blink_flag.compareTo("1")){
    digitalWrite(2, LOW);   // turn the LED on (HIGH is the voltage level)
    //delay(1000);              // wait for a second
  }else{
    digitalWrite(2, HIGH);    // turn the LED off by making the voltage LOW
    //delay(1000);              // wait for a second
  }

  Serial.print(",");
  Serial.print(blink_flag);
  delay(100);
}
2)、运行在本地计算机用于收集LED状态上传到Bluemix云平台上和从Bluemix云平台上接收命令并将控制命令通过串口发送给Anduino
文件:sendSamples.py
import serial, httplib
import os	#Python的标准库中的os模块包含普遍的操作系统功能
import re	#引入正则表达式对象
import urllib	#用于对URL进行编解码
import sys		#提供了许多函数和变量来处理 Python 运行时环境的不同部分.

# 调试函数,用于输出对象的属性及属性值
def getAllAttrs(obj):
    strAttrs = ''
    for o in dir(obj):
        strAttrs = strAttrs + o + ' := ' + str(getattr(obj, o)) + '\r\n'

    return strAttrs;

# Sends the reading to the webserver using a POST request
def sendRequest(reading):
    headers = {"Content-type": "application/x-www-form-urlencoded"}
    conn = httplib.HTTPConnection("localhost:8000")
    conn.request("POST", "/ledsave", "id="+reading, headers)
    response = conn.getresponse()
    print response.status, response.reason
    data = response.read()
    conn.close()


# Creates an array of numbers based on the string
# If there's any problem on the string, returns (_,False)
def parseNumbers(s):
    numbers = []
    success = True

    s = s.split(" ")
    for number in s:
        try:
            numbers.append(int(number))
        except ValueError:
            success = False

    return (numbers, success)

## Establish connection to the serial port that your arduino
## is connected to.
serialPorts=['COM5','COM7']
for port in serialPorts:
    try:
        print "Trying to connect to Arduino on",port
        device = serial.Serial(port, 9600, timeout=2)
        break
    except:
        print "Failed to connect on",port
        exit(1)


print "Arduino is ready!"

numberOfSamples = 0
currentAcceleration = [0,0,0]
auxString = ""

# Keep reading everything sent by the Arduino
while 1:
    c = ''
    auxString = ''
    # Verifies if there's something to read in the buffer
    while device.inWaiting():
        # Reads a character
        c=device.read()

        # If its not the end of the line yet, keep appending chars to the string
        if(c != '\r' and c != '\n' and c != ','):
            auxString = str(c)
        # If we reached the end of the line, parse the numbers read
        elif (c == ','):
            auxString = ""

    if auxString != '':
        print auxString
        sendRequest(auxString)

        surl = 'http://localhost:8000/ledcontrol'
        resContent = ''
        try:
            response = urllib.urlopen(surl)
            resContent = response.read()
            if (auxString != resContent):
                device.write(resContent)
        except:
            info = sys.exc_info()
            resContent = getAllAttrs(info[0]) + getAllAttrs(info[1])  # 获取异常的详细信息
            print resContent

device.close()
3)、运行在Bluemix上,实时显示LED状态提供控制界面
Web服务:server.py
# coding=utf-8
import os  # Python的标准库中的os模块包含普遍的操作系统功能
import re  # 引入正则表达式对象
import MySQLdb
import sys  # 提供了许多函数和变量来处理 Python 运行时环境的不同部分.
import cgi

reload(sys)
sys.setdefaultencoding('utf8')


# 调试函数,用于输出对象的属性及属性值
def getAllAttrs(obj):
    strAttrs = ''
    for o in dir(obj):
        strAttrs = strAttrs + o + ' := ' + str(getattr(obj, o)) + '<br />'

    return strAttrs;


try:
    from SimpleHTTPServer import SimpleHTTPRequestHandler as Handler
    from SocketServer import TCPServer as Server
except ImportError:
    from http.server import SimpleHTTPRequestHandler as Handler
    from http.server import HTTPServer as Server


# 自定义处理程序,用于处理HTTP请求
class TransHTTPHandler(Handler):
    # 处理GET请求
    def do_GET(self):
        # 页面输出模板字符串
        templateStr = '<html><head><title>pytrans</title></head><body>%s</body></html>'
        # 将正则表达式编译成Pattern对象
        pattern = re.compile(r'/ledinfo')
        # 使用Pattern匹配文本,获得匹配结果,无法匹配时将返回None
        match = pattern.match(self.path)

        if match:
            resContent = ''
            try:
                # conn=MySQLdb.connect(host='us-cdbr-iron-east-04.cleardb.net',user='b7de64a29b1f49',passwd='64701d27',db='ad_fd4a422d117d69b',port=3306)
                conn = MySQLdb.connect(host='localhost', user='root', passwd='root', db='pyiotled', port=3306)
                cur = conn.cursor()
                cur.execute('SET NAMES UTF8')
                cur.execute('SELECT * FROM led_status')
                rows = cur.fetchall()
                rowIdx = 0
                for row in rows:
                    rowIdx += 1;
                    resContent += row[1]
                cur.close()
                conn.close()
            except MySQLdb.Error, e:
                print "Mysql Error %d: %s" % (e.args[0], e.args[1])

            self.protocal_version = 'HTTP/1.1'  # 设置协议版本
            self.send_response(200)  # 设置响应状态码
            self.send_header("Content-type", "text/html")  # 设置响应头
            self.end_headers()
            self.wfile.write(resContent)  # 输出响应内容
        else:
            pattern = re.compile(r'/ledcontrol')
            # 使用Pattern匹配文本,获得匹配结果,无法匹配时将返回None
            match = pattern.match(self.path)

            if match:
                resContent = ''
                try:
                    # conn=MySQLdb.connect(host='us-cdbr-iron-east-04.cleardb.net',user='b7de64a29b1f49',passwd='64701d27',db='ad_fd4a422d117d69b',port=3306)
                    conn = MySQLdb.connect(host='localhost', user='root', passwd='root', db='pyiotled', port=3306)
                    cur = conn.cursor()
                    cur.execute('SET NAMES UTF8')
                    cur.execute('SELECT * FROM led_status')
                    rows = cur.fetchall()
                    rowIdx = 0
                    for row in rows:
                        rowIdx += 1;
                        resContent += row[2]
                    cur.close()
                    conn.close()
                except MySQLdb.Error, e:
                    print "Mysql Error %d: %s" % (e.args[0], e.args[1])

                self.protocal_version = 'HTTP/1.1'  # 设置协议版本
                self.send_response(200)  # 设置响应状态码
                self.send_header("Content-type", "text/html")  # 设置响应头
                self.end_headers()
                self.wfile.write(resContent)  # 输出响应内容
            else:
                # /voteinfo 之外的请求,交给底层去处理
                if self.path == "":
                    self.path = '/index.html'

                fStatic = self.send_head()
                if fStatic:
                    try:
                        self.copyfile(fStatic, self.wfile)
                    finally:
                        fStatic.close()

    # 处理POST请求
    def do_POST(self):
        form = cgi.FieldStorage()
        # 将正则表达式编译成Pattern对象
        pattern = re.compile(r'/ledsave')
        # 使用Pattern匹配文本,获得匹配结果,无法匹配时将返回None
        match = pattern.match(self.path)
        datas = self.rfile.read(int(self.headers['content-length']))
        print datas
        ids = datas.split("=")
        id = 0
        if len(ids) == 2:
            id = int(ids[1])
        print id

        if match:
            resContent = ''
            try:
                # conn=MySQLdb.connect(host='us-cdbr-iron-east-04.cleardb.net',user='b7de64a29b1f49',passwd='64701d27',db='ad_fd4a422d117d69b',port=3306)
                conn = MySQLdb.connect(host='localhost', user='root', passwd='root', db='pyiotled', port=3306)
                cur = conn.cursor()
                print str(id)
                cur.execute("UPDATE led_status SET `status`='" + str(id) + "' WHERE id=1")
                conn.commit()
                cur.close()
                conn.close()
            except MySQLdb.Error, e:
                print "Mysql Error %d: %s" % (e.args[0], e.args[1])

            self.protocal_version = 'HTTP/1.1'  # 设置协议版本
            self.send_response(200)  # 设置响应状态码
            self.send_header("Content-type", "text/html")  # 设置响应头
            self.end_headers()
            self.wfile.write(resContent)  # 输出响应内容
        else:
            # 将正则表达式编译成Pattern对象
            pattern = re.compile(r'/ledcontrol')
            # 使用Pattern匹配文本,获得匹配结果,无法匹配时将返回None
            match = pattern.match(self.path)
            #datas = self.rfile.read(int(self.headers['content-length']))
            print datas
            ids = datas.split("=")
            id = 0
            if len(ids) == 2:
                id = int(ids[1])
            print id

            if match:
                resContent = ''
                try:
                    print 'a'
                    # conn=MySQLdb.connect(host='us-cdbr-iron-east-04.cleardb.net',user='b7de64a29b1f49',passwd='64701d27',db='ad_fd4a422d117d69b',port=3306)
                    conn = MySQLdb.connect(host='localhost', user='root', passwd='root', db='pyiotled', port=3306)
                    cur = conn.cursor()
                    cur.execute("UPDATE led_status SET `control`='" + str(id) + "' WHERE id=1")
                    conn.commit()
                    cur.close()
                    conn.close()
                except MySQLdb.Error, e:
                    print "Mysql Error %d: %s" % (e.args[0], e.args[1])

                self.protocal_version = 'HTTP/1.1'  # 设置协议版本
                self.send_response(200)  # 设置响应状态码
                self.send_header("Content-type", "text/html")  # 设置响应头
                self.end_headers()
                self.wfile.write(resContent)  # 输出响应内容
            else:
                # /ledsave 之外的请求,返回错误信息
                self.protocal_version = 'HTTP/1.1'  # 设置协议版本
                self.send_response(500)  # 设置响应状态码
                self.send_header("Content-type", "text/html")  # 设置响应头
                self.end_headers()
                self.wfile.write("非法请求")  # 输出响应内容


# Read port selected by the cloud for our application
PORT = int(os.getenv('PORT', 8000))
# #改变当前目录到 static 目录
os.chdir('static')

httpd = Server(("", PORT), TransHTTPHandler)
try:
    print("Start serving at port %i" % PORT)
    httpd.serve_forever()  ##设置一直监听并接收请求
except KeyboardInterrupt:
    pass  # 按Ctrl+C退出服务
httpd.server_close()
前端页面:index.html
<html>
<head>
<meta http-equiv="Content-Type" content="text/html; charset=utf-8" />
<title>【物联网(IoT)开发】使用 Arduino 和 Python在 Bluemix 上开发一个 IoT 应用程序之控制LED灯开关 - 无知人生,记录点滴</title>
<style>
body {
	margin:0; padding:0;
}
a{
text-decoration:none;
color:black;
}

div.div_id {
	float:left;
	clear:left;
	width:60px;
	height:27px;
	border-bottom:solid 1px #808080;
	text-align:center;
	line-height:27px;
}

div.div_item {
	float:left;
	clear:none;
	width:260px;
	height:27px;
	border-bottom:solid 1px #808080;
	text-align:left;
	line-height:27px;
}

div.div_radio {
	float:left;
	clear:none;
	width:60px;
	height:27px;
	border-bottom:solid 1px #808080;
	text-align:left;
	line-height:27px;
	display:none;
}

div.div_num {
	float:left;
	clear:right;
	width:260px;
	height:27px;
	border-bottom:solid 1px #808080;
	text-align:left;
	line-height:27px;
	display:none;
}

</style>
<script src="jquery.js" type="text/javascript"></script>
<SCRIPT language=javascript>

$(document).ready(function(){
	setInterval(loadLedStatus,1000);
});

//通过AJAX加载LED状态信息
function loadLedStatus(){
	$.ajax({
	   type: "GET",
	   url: "ledinfo",
	   dataType:"html",
	   async: false,
	   success: function(data){
		 if (data == "1"){
			$("#divctnr").html("<img src=\"led1.png\" />");
			$("#button1").hide();
			$("#button2").show();
		 }else{
			$("#divctnr").html("<img src=\"led0.png\" />");
			$("#button2").hide();
			$("#button1").show();
		 }
		 console.log(data);
	   },
	   error: function(data){
		 console.log(data);
		 console.log( "加载LED信息失败: " + data.responseText );
	   }
	});
}

//通过AJAX调用后台保存LED信息
function execControl(status){
	$("#button1").hide();
	$.ajax({
	   type: "POST",
	   url: "ledcontrol",
	   dataType:"html",
	   data: {"id":status},
	   success: function(data){
		 console.log(data);
	   },
	   error: function(data){
		 console.log(data);
		 console.log( "命令发送失败: " + data.responseText );
	   }
	});
}
</SCRIPT>
</head>

<body>
<div>
<a href="http://blog.csdn.net/testcs_dn" target="_blank" title="无知人生,记录点滴 不积硅步,无以至千里;不积小流,无以成江海……">
<img src="banner.png" border=0 />
</a>
</div>
<div style="width:640px; height:40px; border-bottom:solid 1px #808080;text-align:center;">
<a href="http://blog.csdn.net/testcs_dn/article/details/49965993"><h3>您可以在这里监控和控制LED灯的点亮或关闭</h3></a>
</div>
<table id="Wrapper" style="padding: 0px; margin: 0px; min-height:300px; text-align: center; background-color: rgb(255, 255, 255);">
<tr>
	<td>
		<form>
			<div id="divctnr"></div>
		</form>
	</td>
	<td>
		<div style="width:640px; height:40px; text-align:center; float:left; clear:both; margin-top:15px;">
			<input type="button" id="button1" name="button1" value="点亮" οnclick="execControl(1)" style="display:none; width:200px; height:45px; font-size:36px; font-weight:bold;" />
			<input type="button" id="button2" name="button2" value="关闭" οnclick="execControl(0)" style="display:none; width:200px; height:45px; font-size:36px; font-weight:bold;" />
		</div>
	</td>
</tr>
</table>

<hr />
<div style="margin:auto; text-align:center; line-height:28px;">
云服务器:<a href="https://console.ng.bluemix.net/home/" target="_blank" title="IBM Bluemix 数字创新平台" style="">
	IBM Bluemix 数字创新平台
</a><br />
服务提供:<a href="https://www.ibm.com/smarterplanet/us/en/ibmwatson/developercloud/language-translation/api/v2/#introduction" target="_blank" title="IBM Watson Developer Cloud" style="">
	IBM Watson Developer Cloud
</a>
</div>

<div style="margin:auto; text-align:center; line-height:28px;">
<a href="http://blog.csdn.net/testcs_dn" target="_blank" title="无知人生,记录点滴 不积硅步,无以至千里;不积小流,无以成江海……" style="">
	Powered by:testcs_dn(微wx笑)<br />
	无知人生,记录点滴 不积硅步,无以至千里;不积小流,无以成江海……
</a>
</div>
<br /><br /><br />
<div id="divout"></div>
</body>
</html>
步骤 5. 本地运行访问测试
运行
运行Web服务,执行命令:python server.py
运行发送状态接收命令的服务,执行命令:phthon sendSamples.py
当然,你也可以直接在PyCharm等工具中调试运行。
访问
启动调试后会自动打开浏览器窗口:
点亮状态:显示关闭按钮


步骤 6. 上传应用程序
登录到 Bluemix™ 后,可以使用 cf push 命令来上传应用程序。
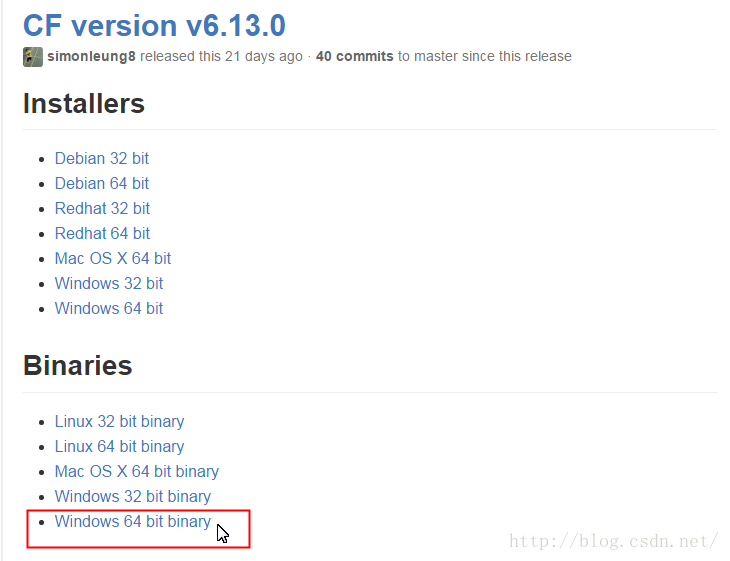
开始之前,您必须:- 1、安装 Cloud Foundry 命令行界面。

-
- 请根据自己使用的操作系统下载对应的版本;我使用的是Windows 7 64位操作系统,
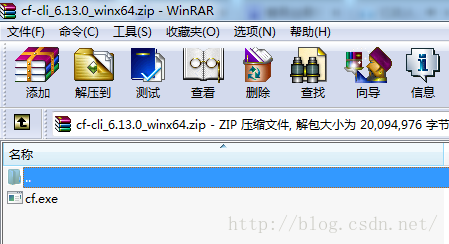
- 下载Binaries版本的不需要安装,直接解压到Windows目录就可以了。
-
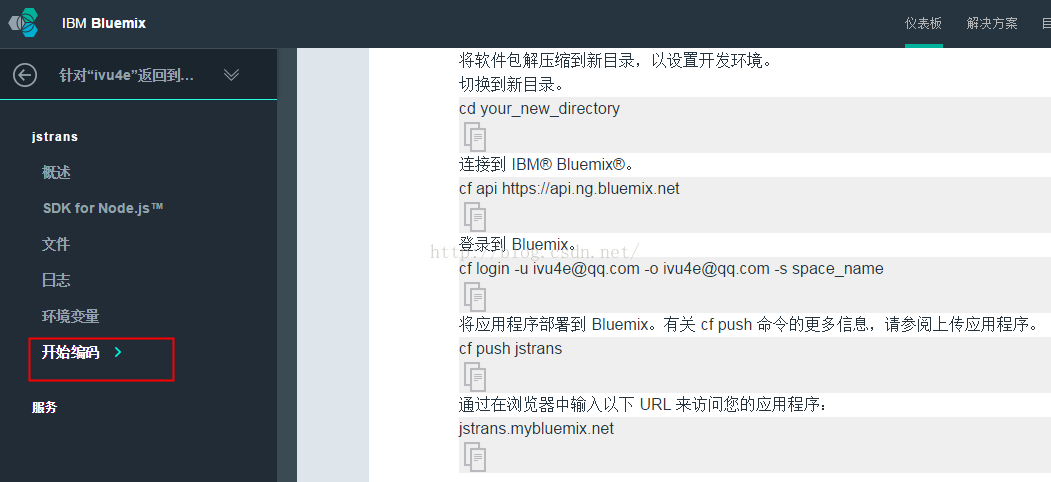
- 依次点击仪表板》jstrans(您创建的应用程序名称)》开始编码,可以查看属于自己的命令;如下图:
- 2、连接到 Bluemix。
- 打开命令提示符窗口:开始》运行,输入“cmd”,回车
- 执行:cf api https://api.ng.bluemix.net,如下图:
-
- 3、登录到 Bluemix。
- 注意,这里要换成对应你自己账户的命令!
-
cf login -u ivu4e@qq.com -o ivu4e@qq.com -s ivu4e

4、发出 cf push 命令时,cf 命令行界面将提供使用 buildpack 来构建并运行应用程序的 Bluemix 环境的工作目录。

步骤 7. 做个小小的测试
通过仪表板进入您刚刚创建的应用页面,点击左侧的概述,右侧顶部会显示:您的应用程序正在运行。
这时应用程序路径是带链接可以访问的,点击链接就可以访问刚刚发布的应用程序了。

注意:本地测试时收集数据、获取状态和控制命令等都是使用的本地的URL地址,上传到Bluemix之前要将其改为你创建的应用的URL地址。
结束语
本文提供了一个可用来开发许多 IoT 应用程序的框架。在这里,我们使用了一个连接到 Arduino 的LED,将LED的状态发送到 Web 服务器,并实时显示LED的状态,而且可以通过Web页面来控制LED的状态。尽管这是一个使用 Bluemix 和 Arduino 的特定示例,但您也可以使用本文介绍的原理来创建其他许多应用程序。
===========文档信息============
版权声明:非商用自由转载-保持署名-注明出处
署名(BY) :testcs_dn(微wx笑)
文章出处:[无知人生,记录点滴](http://blog.csdn.net/testcs_dn)


 618
618


 被折叠的 条评论
为什么被折叠?
被折叠的 条评论
为什么被折叠?
 到【灌水乐园】发言


