环境配置阶段:
Memory Requirements
Minimum: 1 GB of RAM
Recommended: 2 GB of RAM or more
[root@centos-fuwenchao ~]# grep MemTotal /proc/meminfo
MemTotal:        1914688 kB
[root@centos-fuwenchao ~]#
| RAM | Swap Space |
|---|---|
| Between 1 GB and 2 GB | 1.5 times the size of the RAM |
| Between 2 GB and 16 GB | Equal to the size of the RAM |
| More than 16 GB | 16 GB |
[root@centos-fuwenchao ~]# grep SwapTotal /proc/meminfo
SwapTotal:       2095096 kB
[root@centos-fuwenchao ~]#
System Architecture
[root@centos-fuwenchao mntsda3]# uname -m
x86_64
[root@centos-fuwenchao mntsda3]#
The following tables describe the disk space requirements for software files and data files for each installation type on Linux x86-64:
| Installation Type | Requirement for Software Files (GB) |
|---|---|
| Enterprise Edition | 4.7 |
| Standard Edition | 4.6 |
| Installation Type | Disk Space for Data Files (GB) |
|---|---|
| Enterprise Edition | 1.7 |
| Standard Edition | 1.5 |
To determine the distribution and version of Linux installed, enter the following command:
[root@centos-fuwenchao tmp]# cat /proc/version
Linux version 2.6.32-358.el6.x86_64 (mockbuild@c6b8.bsys.dev.centos.org) (gcc version 4.4.7 20120313 (Red Hat 4.4.7-3) (GCC) ) #1 SMP Fri Feb 22 00:31:26 UTC 2013
[root@centos-fuwenchao tmp]# lsb_release -id
Distributor ID: CentOS
Description:    CentOS release 6.4 (Final)
[root@centos-fuwenchao tmp]# lsb_release -r
Release:        6.4
[root@centos-fuwenchao tmp]# lsb_release -a
LSB Version:    :base-4.0-amd64:base-4.0-noarch:core-4.0-amd64:core-4.0-noarch:graphics-4.0-amd64:graphics-4.0-noarch:printing-4.0-amd64:printing-4.0-noarch
Distributor ID: CentOS
Description:    CentOS release 6.4 (Final)
Release:        6.4
Codename:       Final
2.7 Verifying UDP and TCP Kernel Parameters
Set TCP/IP ephemeral port range parameters to provide enough ephemeral ports for the anticipated server workload. Ensure that the lower range is set to at least 9000 or higher, to avoid Well Known ports, and to avoid ports in the Registered Ports range commonly used by Oracle and other server ports. Set the port range high enough to avoid reserved ports for any applications you may intend to use. If the lower value of the range you have is greater than 9000, and the range is large enough for your anticipated workload, then you can ignore OUI warnings regarding the ephemeral port range.
For example, with IPv4, use the following command to check your current range for ephemeral ports:
$ cat /proc/sys/net/ipv4/ip_local_port_range
32768 61000
In the preceding example, the lowest port (32768) and the highest port (61000) are set to the default range.
If necessary, update the UDP and TCP ephemeral port range to a range high enough for anticipated system workloads, and to ensure that the ephemeral port range starts at 9000 and above. For example:
# echo 9000 65500 > /proc/sys/net/ipv4/ip_local_port_range
Oracle recommends that you make these settings permanent. For example, as root, use a text editor to open /etc/sysctl.conf, and add or change to the following: net.ipv4.ip_local_port_range = 9000 65500, and then restart the network (# /etc/rc.d/init.d/network restart). Refer to your Linux distribution system administration documentation for detailed information about how to automate this ephemeral port range alteration on system restarts.
Oracle Base Directory
The Oracle base directory is a top-level directory for Oracle software installations. The Optimal Flexible Architecture (OFA) guidelines recommend that you use a path similar to the following for the Oracle base directory:
/mount_point/app/software_owner
/u01/app/oracle
/u01/app/orauser
Oracle Inventory Directory
The Oracle Inventory directory (oraInventory) stores an inventory of all software installed on the system. It is required and shared by all Oracle software installations on a single system. If you have an existing Oracle Inventory path, then Oracle Universal Installer continues to use that Oracle Inventory.
Oracle Home Directory
The Oracle home directory is the directory where you install the software for a particular Oracle product. You must install different Oracle products or different releases of the same Oracle product in separate Oracle home directories. When you run Oracle Universal Installer, it prompts you to specify the path to this directory and a name that identifies it. In accordance with the OFA guidelines, Oracle strongly recommends that the Oracle home directory you specify is a subdirectory of the Oracle base directory for the user account performing the installation. Oracle recommends that you specify a path similar to the following for the Oracle home directory:
oracle_base/product/11.1.0/dbhome_1
oracle_base/product/11.2.0/dbhome_1
oracle_base/product/11.2.0/grid
增加用户和组:
[root@centos-fuwenchao CentOS_6.4_Final]# groupadd oinstall
[root@centos-fuwenchao CentOS_6.4_Final]# groupadd dba
[root@centos-fuwenchao CentOS_6.4_Final]# useradd -g oinstall -G dba oracle
[root@centos-fuwenchao CentOS_6.4_Final]#
调整内核参数:xiang见官方文档
[root@centos-fuwenchao u01]# vi /etc/sysctl.conf
     40 kernel.shmall = 4294967296
     41 fs.aio-max-nr = 1048576
     42 fs.file-max = 6815744
     43 kernel.shmall = 2097152
     44 kernel.shmmax = 4294967295
     45 kernel.shmmni = 4096
     46 kernel.sem = 250 32000 100 128
     47 net.ipv4.ip_local_port_range = 9000 65500
     48 net.core.rmem_default = 262144
     49 net.core.rmem_max = 4194304
     50 net.core.wmem_default = 262144
     51 net.core.wmem_max = 1048576
[root@centos-fuwenchao u01]# sysctl -p
修改系统资源限制(在root帐号下操作):
编辑系统资源限制配置文件 vi /etc/security/limits.conf,在该文件下添加如下行:
|
1
2
3
4
5
|
oracle soft nproc 2047
oracle hard nproc 16384
oracle soft nofile 1024
oracle hard nofile 65536
oracle soft stack 10240
|
编辑文件 vi /etc/pam.d/login,添加如下行(11gR1有要求,R2没有要求):
|
1
|
session required pam_limits.so
|
编辑 vi /etc/profile 文件,添加如下行(11gR1有要求,R2没有要求):
|
1
2
3
4
5
6
7
8
|
if
[ $USER =
"oracle"
];
then
if
[ $SHELL =
"/bin/ksh"
];
then
ulimit
-p 16384
ulimit
-n 65536
else
ulimit
-u 16384 -n 65536
fi
fi
|
该配置在用户oracle登录时会立即生效,如果当前 oracle 用户已经登录可退出后重新登录使之生效。
关闭SELinux(在root帐号下操作):
编辑SELinux配置文件 vi /etc/selinux/config,将SELINUX的值设为 disabled,如下:
|
1
|
SELINUX=disabled;
|
修改该文件可使重启系统后不启动SELinux。关闭当前已开启的SELinux使用如下命令:
|
1
|
setenforce 0
|
修改/etc/hosts文件(在root帐号下操作):
编辑文件 vi /etc/hosts,添加一行:
[root@centos-fuwenchao u01]# more /etc/hosts
127.0.0.1   localhost localhost.localdomain localhost4 localhost4.localdomain4
::1         localhost localhost.localdomain localhost6 localhost6.localdomain6
10.13.2.115 centos-fuwenchao  node1
10.13.2.116 centos2-fuwenchao  node2
[root@centos-fuwenchao u01]#
若不进行此操作会在安装时弹出警告,并且可能影响监听程序的正常运行,所以建议做这个修改。
安装必要的包:具体见官方文档!
Creating an Oracle Base Directory
Before you create an Oracle base directory, you must identify an appropriate file system with sufficient free disk space.
To identify an appropriate file system:
To determine the free disk space on each mounted file system, use the following command:
# df -h
From the display, identify a file system that has the appropriate amount of free space.
The file system that you identify can be a local file system, a cluster file system, or an NFS file system on a certified NAS device.
Note the name of the mount point directory for the file system that you identified.
To create the Oracle base directory and specify the correct owner, group, and permissions for it:
Enter commands similar to the following to create the recommended subdirectories in the mount point directory that you identified and set the appropriate owner, group, and permissions on them:
# mkdir -p /mount_point/app/oracle_sw_owner
# chown -R oracle:oinstall /mount_point/app/oracle_sw_owner
# chmod -R 775 /mount_point/app/oracle_sw_owner
For example:
# mkdir -p /u01/app/oracle
# chown -R oracle:oinstall /u01/app/oracle
# chmod -R 775 /u01/app/oracle
When you configure the
oracleuser's environment later in this chapter, set theORACLE_BASEenvironment variable to specify the Oracle base directory that you created.
设置Oracle环境变量
[root@centos-fuwenchao security]# su - oracle
[oracle@centos-fuwenchao ~]$ vi .bash_profile
# .bash_profile
# Get the aliases and functions
if [ -f ~/.bashrc ]; then
        . ~/.bashrc
fi
# User specific environment and startup programs
PATH=$PATH:$HOME/bin
export PATH
export ORACLE_BASE=/u01/app/oracle
export ORACLE_HOME=/u01/app/oracle/product/11.2.0/db_1
export ORACLE_SID=orawen
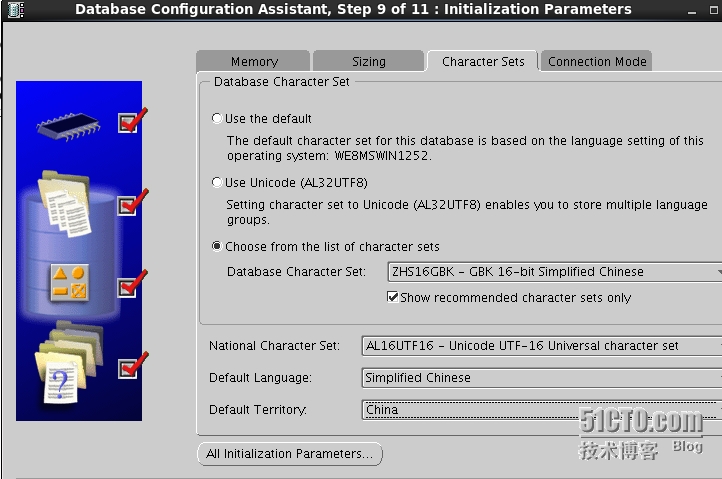
export NLS_LANG=american_america.zhs16gbk
-------开始安装
[root@centos-fuwenchao oraapp]# ll
total 2227316
drwxr-xr-x. 8 root root       4096 Aug 19  2009 database
-rw-r--r--. 1 root root 1285396902 Aug 26 23:16 linux_11gR2_database_1of2.zip
-rw-r--r--. 1 root root  995359177 Aug 26 23:33 linux_11gR2_database_2of2.zip
[root@centos-fuwenchao oraapp]# pwd
/u01/oraapp
[root@centos-fuwenchao oraapp]#
--
[root@centos-fuwenchao oraapp]# unzip linux_11gR2_database_1of2.zip
[root@centos-fuwenchao oraapp]# unzip linux_11gR2_database_2of2.zip
生成database目录
进入database。运行runInstall脚本
./runInstall
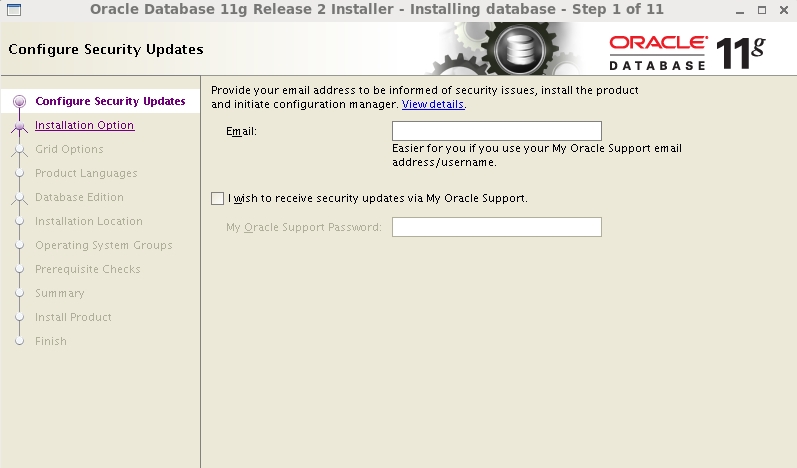
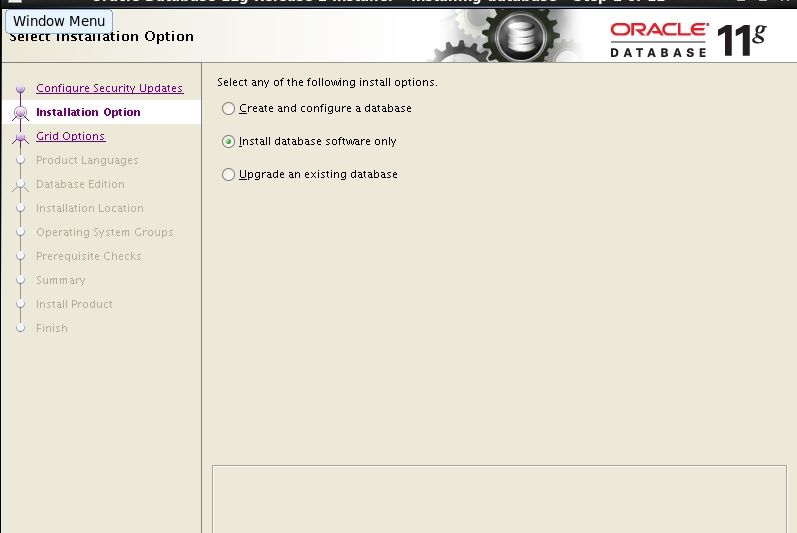
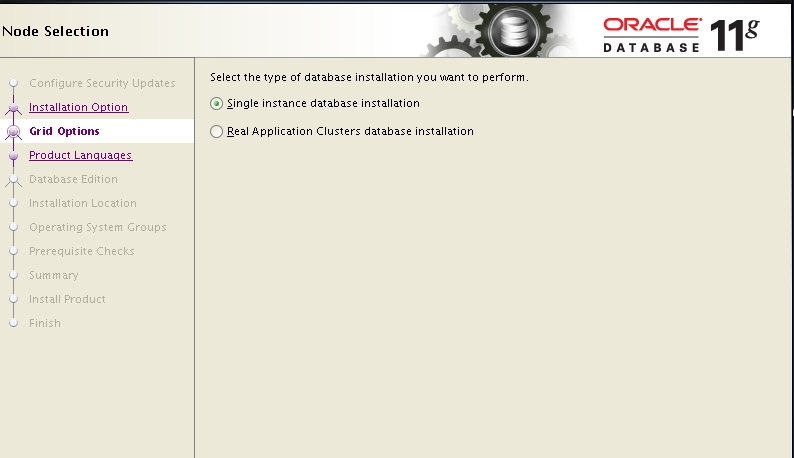
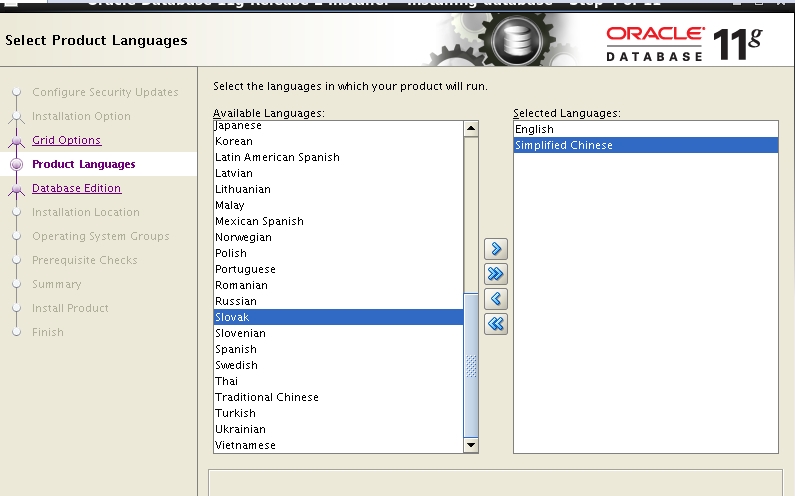
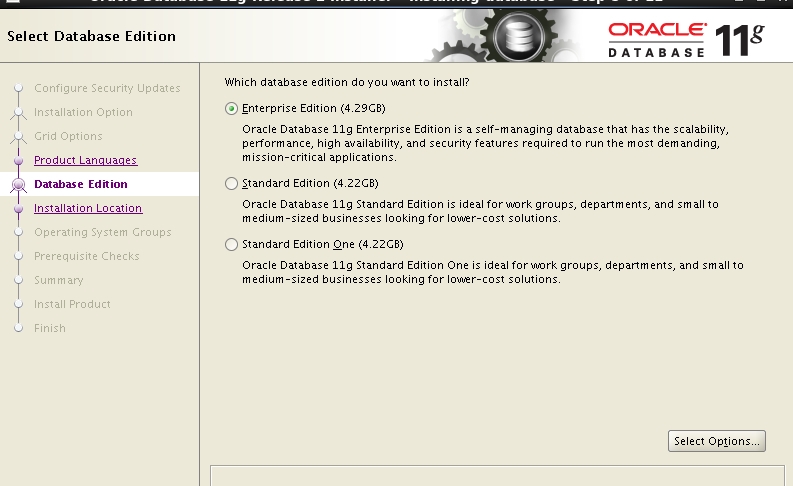
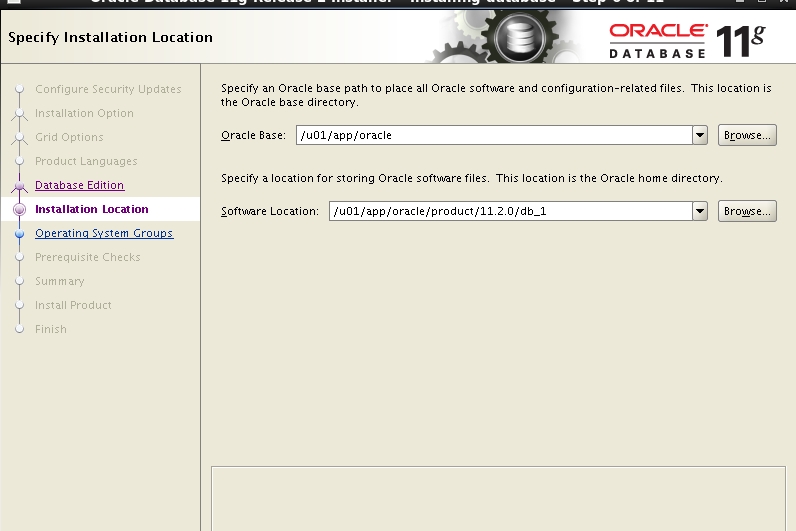
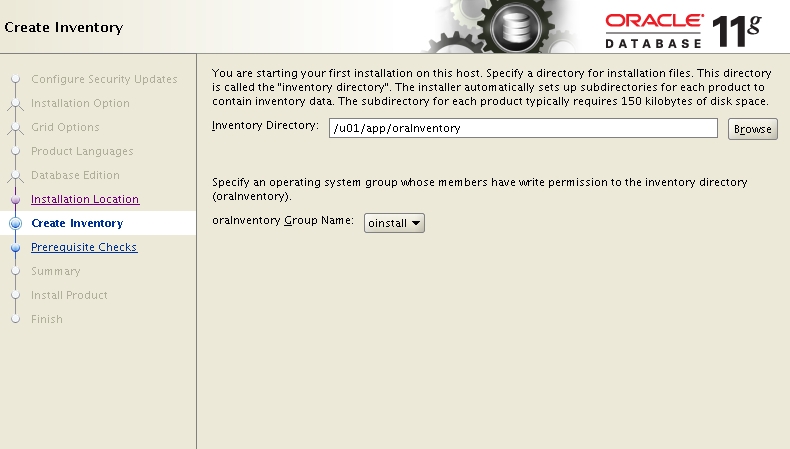
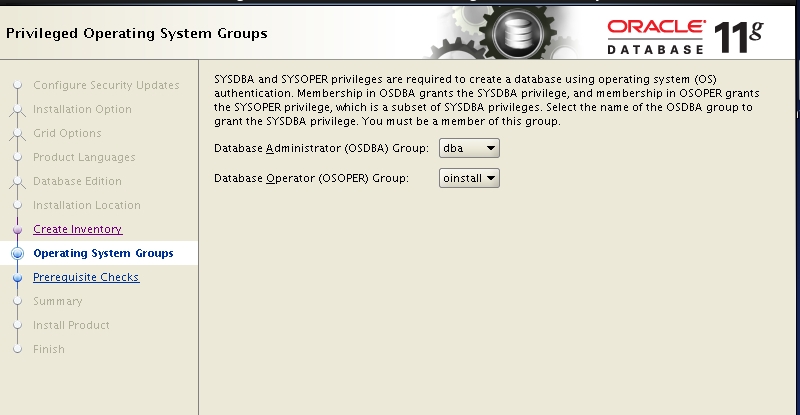
接着出现图形界面如下步骤进行
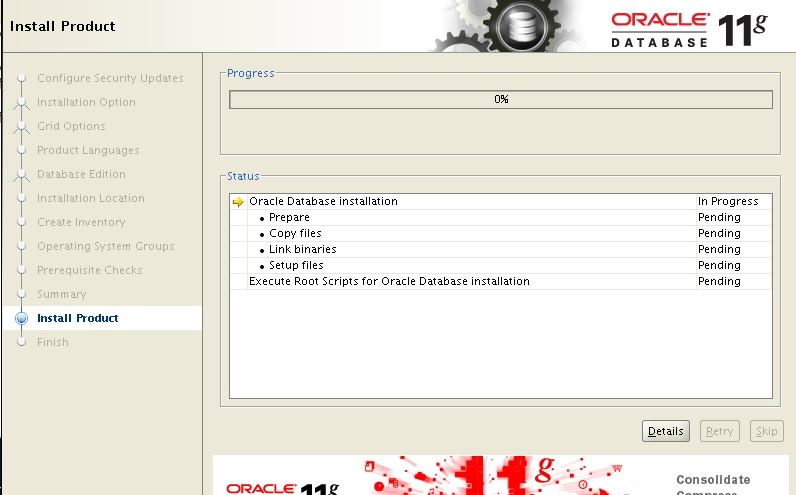
暂时先只安装数据库软件,db下面再来安装
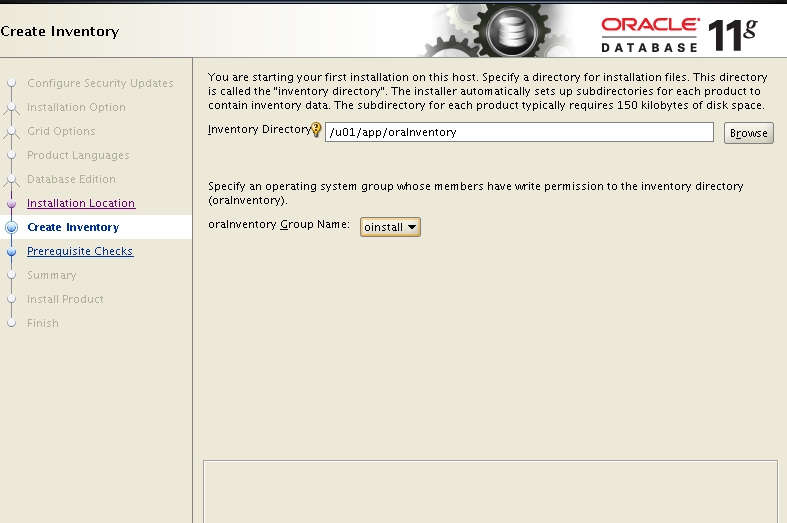
如果该目录不行,改为/u01/app/oracle/oraInventory
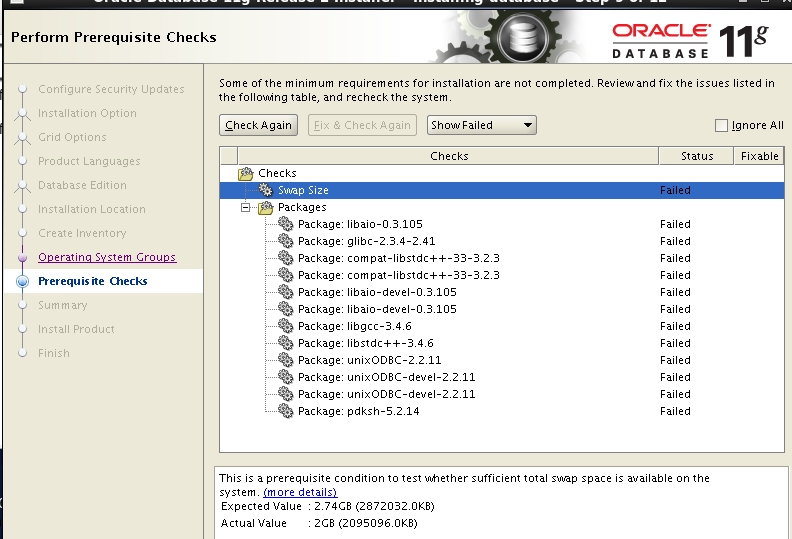
swap空间不够,如何增加swap空间,看我的另外的博文!
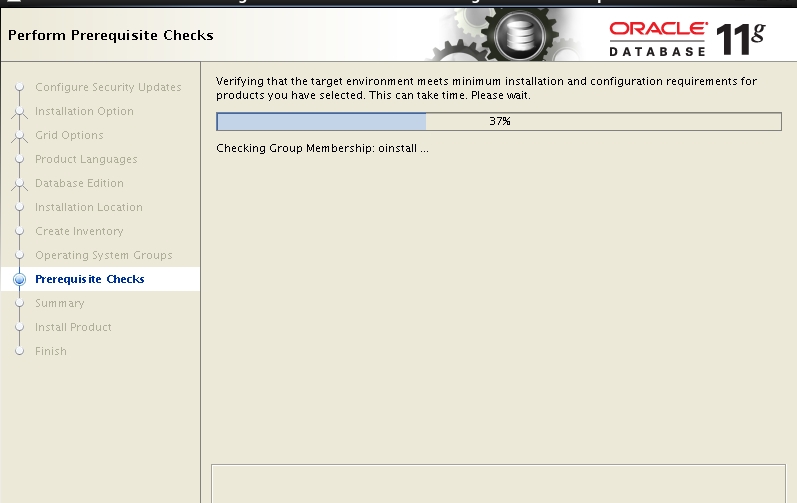
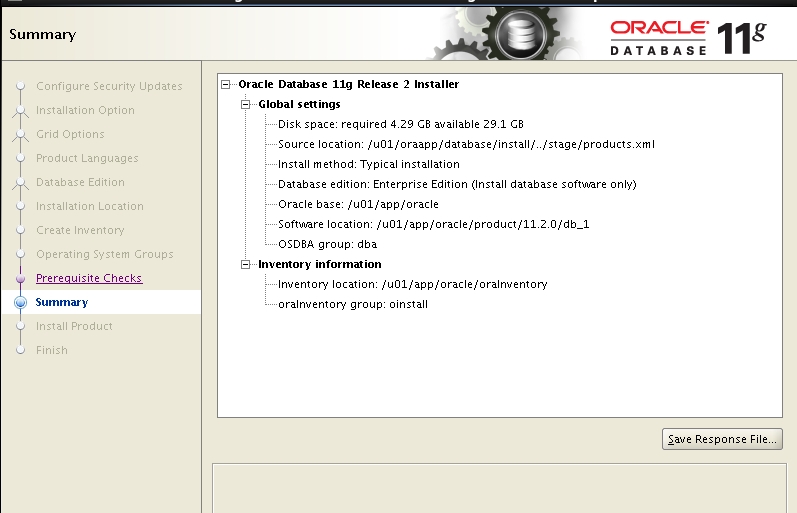
这个安装时间应该会有点久,在我的安装过程中报错,看下下Linux的安装包,发现少了几个,补齐即可!具体需要哪些安装包,看官方文档!
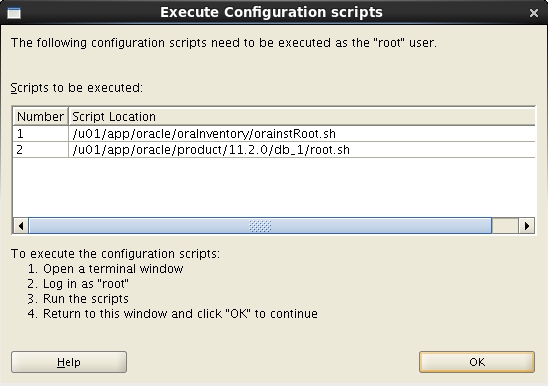
在终端以root权限运行上面两个脚本,一路确定即可
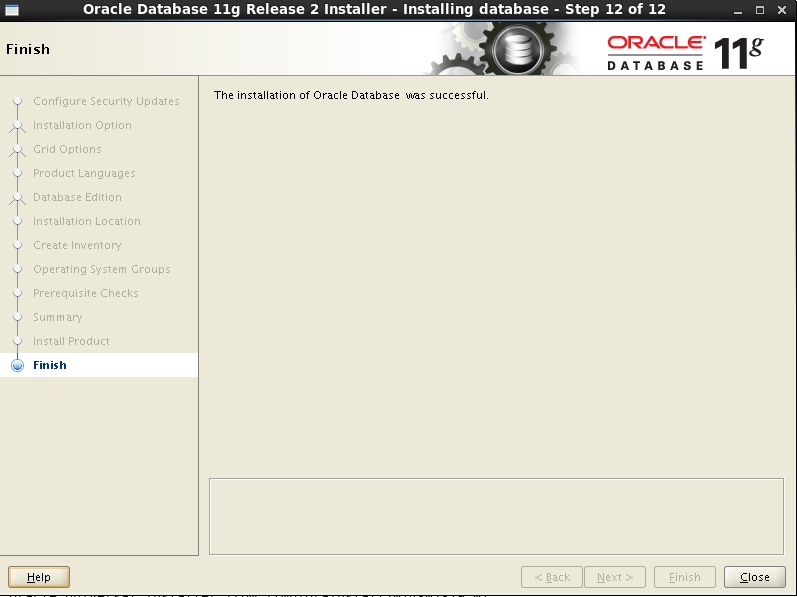
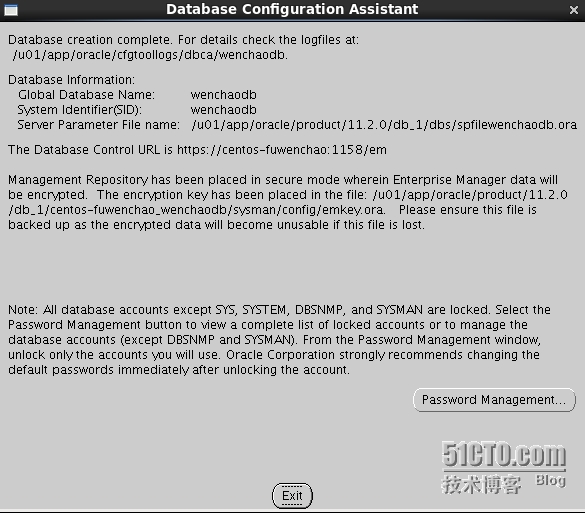
至此,安装成功,但是还没有配置数据库,看下面!
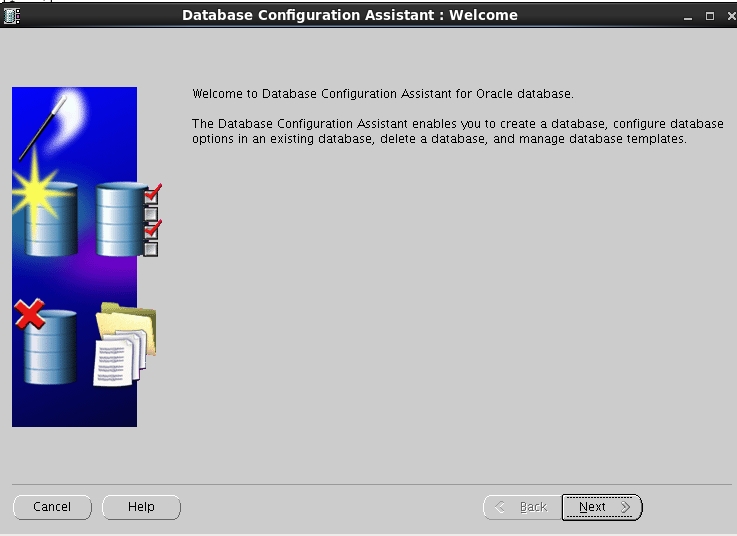
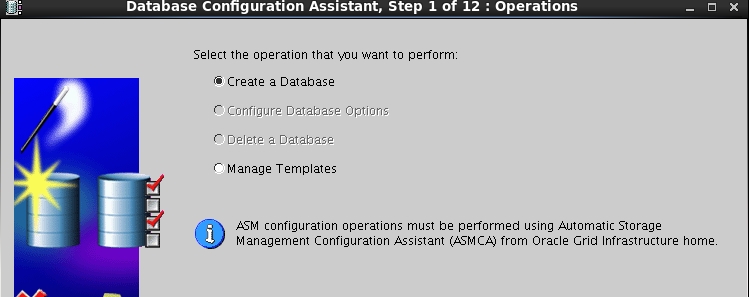
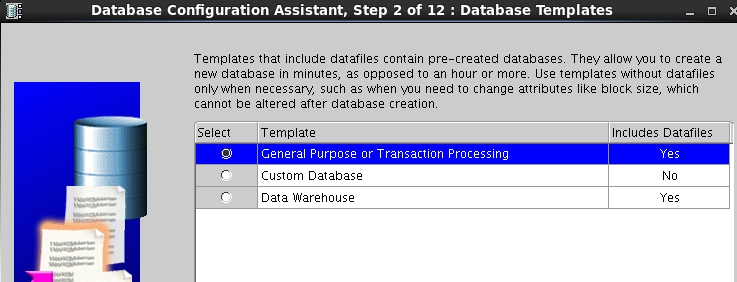
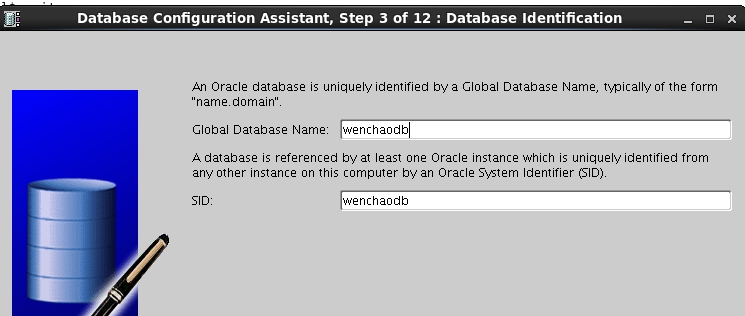
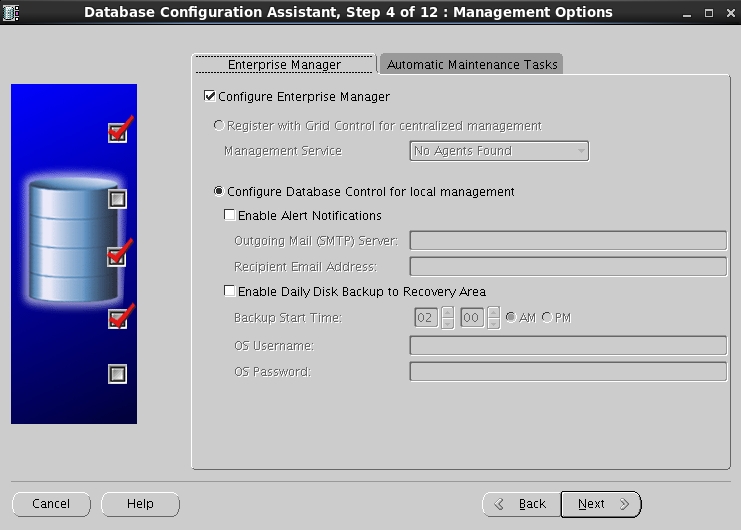
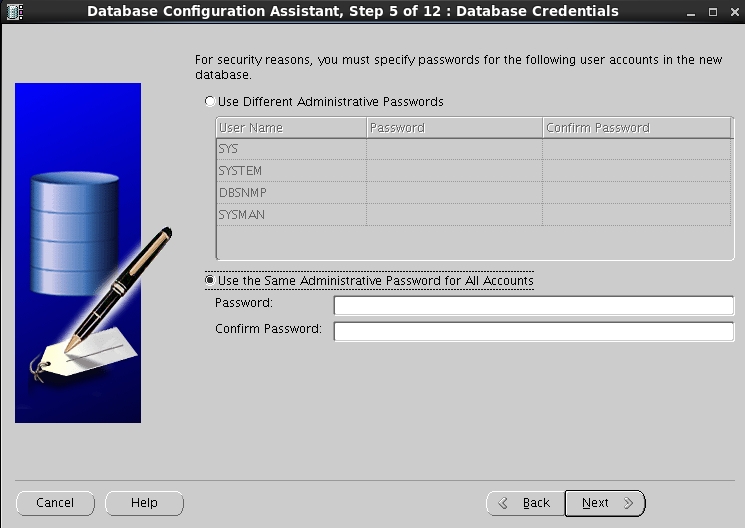
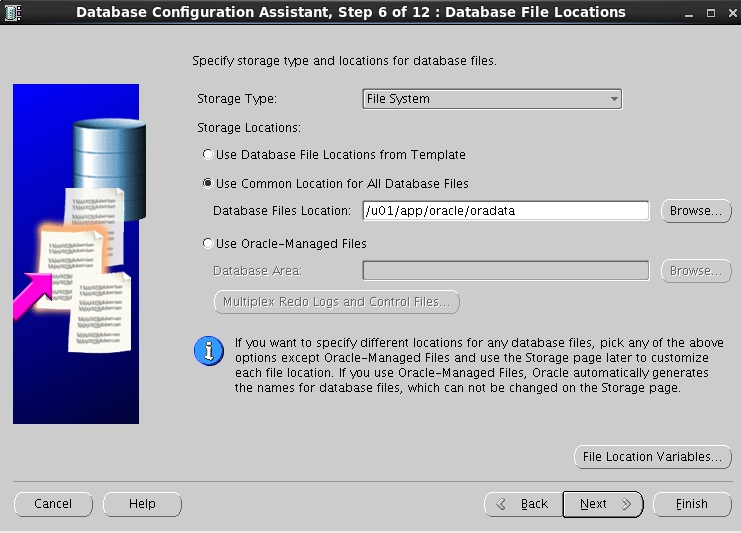
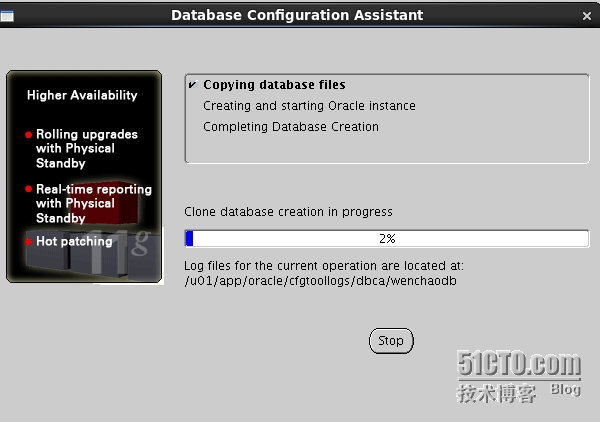
Oracle用户登录系统,输入命令dbca,如果提示没有该命令,vi .bash_profile增加path环境变量,
export PATH=$PATH:$ORACLE_HOME/bin:.
然后 . .bash_profile
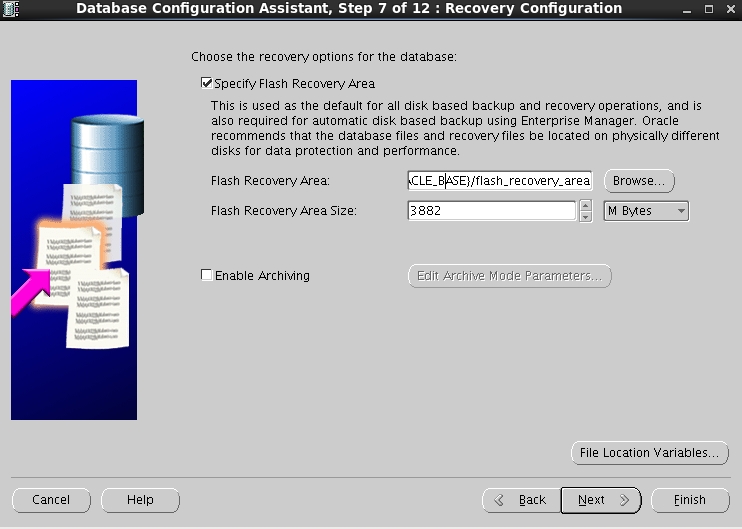
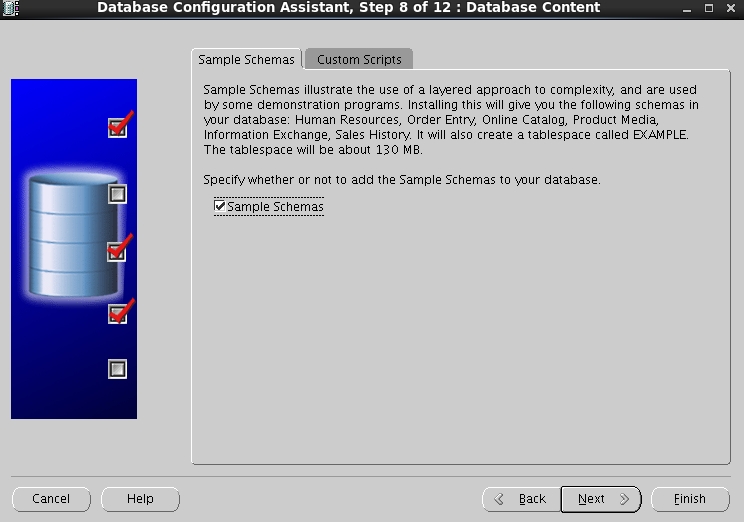
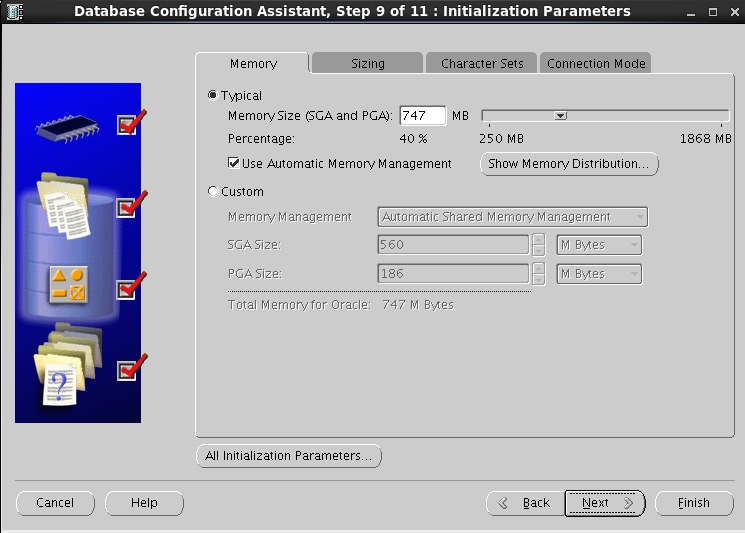
dbca
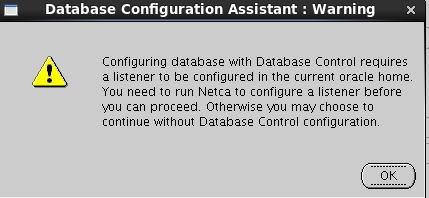
到这步之后发现走不通了,看来是需要先配置监听才能行呀
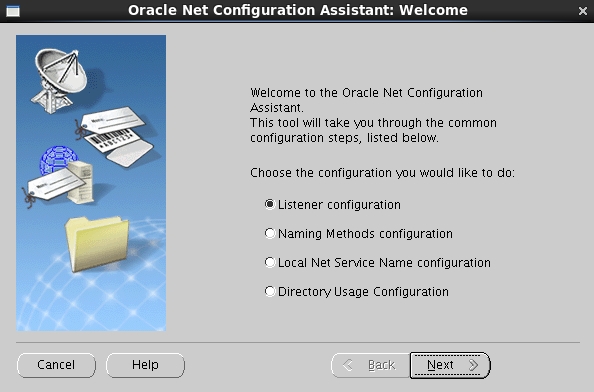
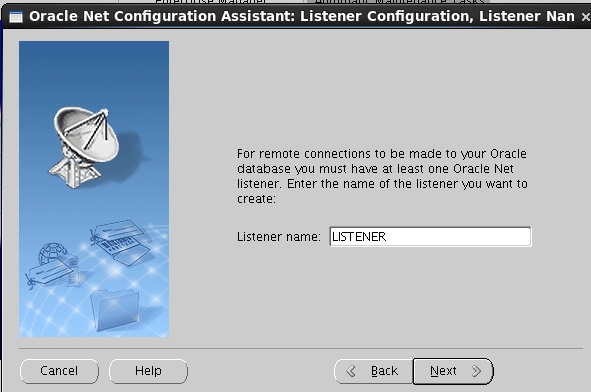
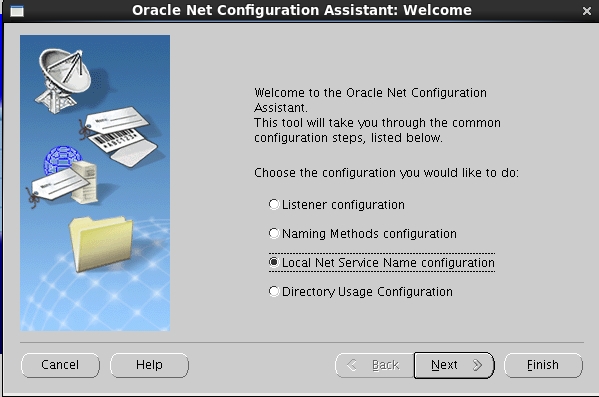
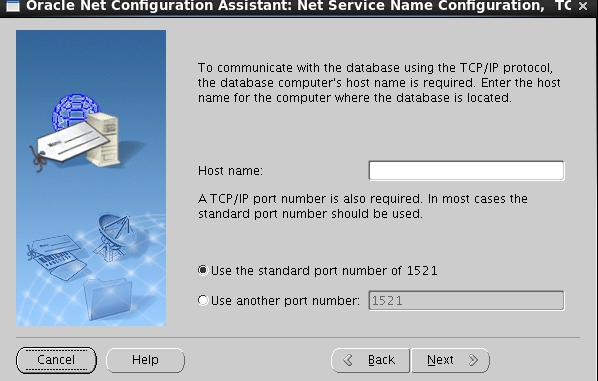
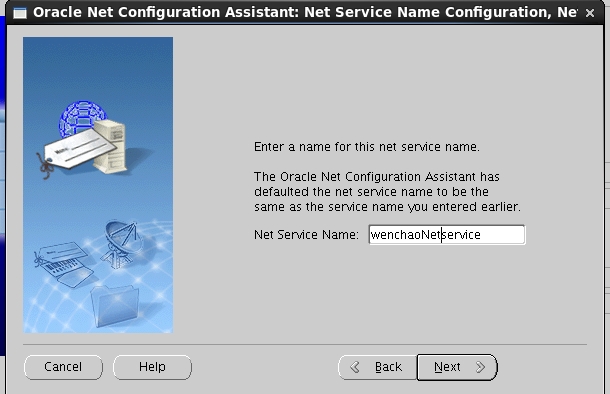
Oracle用户登录运行netca命令
在这里的host name 我输的是我的Linux的ip地址
我的密码是90************5
上面的不周时间有点久,大约花了一个小时!
参考:
http://www.liusuping.com/ubuntu-linux/redhat-linux-oracle-11g-r2.html
http://zhoujingxian.iteye.com/blog/1199166
http://blog.itrunc.com/2013/12/30/install-oracle-11g-release2-in-centos-x64/
Oracle官方文档
http://blog.csdn.net/chenpeng58/article/details/12575161
http://xiaochengzi.blog.51cto.com/1665206/1213616
http://www.cnoracle.com/archives/633
转载于:https://blog.51cto.com/fuwenchao/1360149






 937
937


 被折叠的 条评论
为什么被折叠?


