


Configuring Push Notifications
Apple Push Notification service (APNs) allows an app that isn’t running in the foreground to notify the user that it has information for the user. Use Xcode to enable push notifications. If necessary, Xcode creates an explicit App ID with the APNs entitlement enabled and a team provisioning profile using the explicit App ID. You then generate and download a corresponding client SSL certificate—this step fully enables push notifications—and later, install the client SSL certificate and key on your server.
Enabling Push Notifications
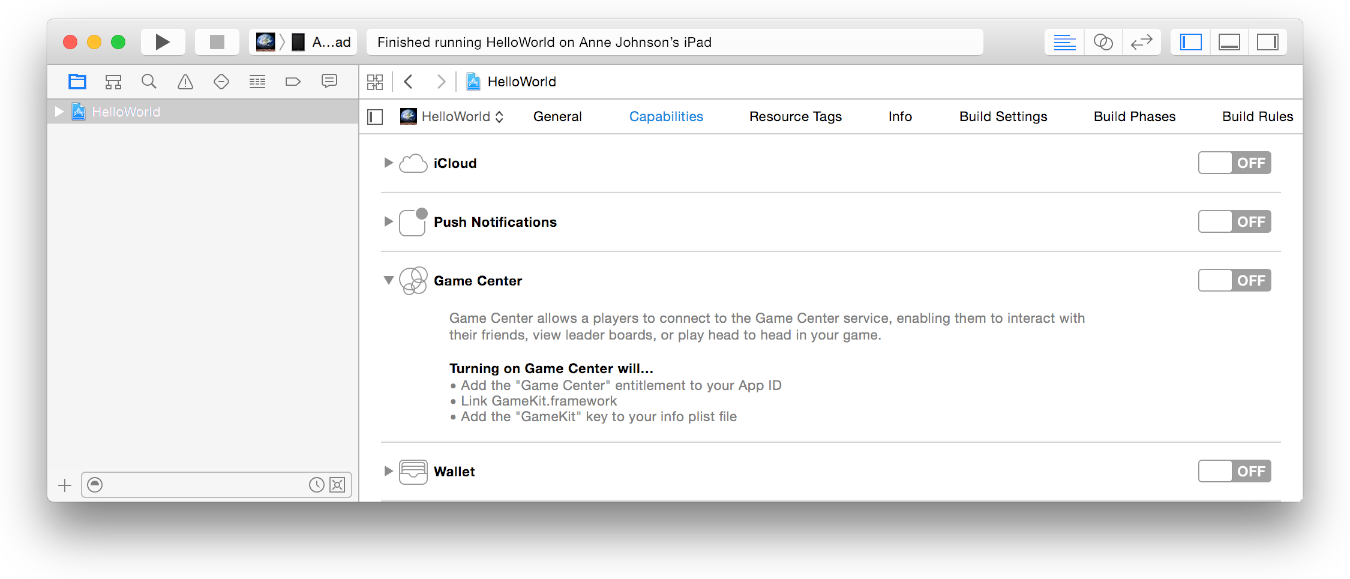
First enable push notifications in your Xcode project.
To enable push notifications
In the Capabilities pane, if Push Notifications isn’t enabled, click the switch in the Push Notifications section.

In Member Center, the Push Notifications service will appear as Configurable (not Enabled) until you create a client SSL certificate.
Creating a Universal Push Notification Client SSL Certificate
You use Member Center to generate a push notification client SSL certificate that allows your notification server to connect to the APNs. Each App ID is required to have its own client SSL certificate. The client SSL certificate Member Center generates is a universal certificate that allows your app to connect to both the development and production environments.
Important: Only a team agent or admin can generate Apple Push Notification service SSL certificates.
To generate a universal client SSL certificate
In Certificates, Identifiers & Profiles, select Certificates.
Click the Add button (+) in the upper-right corner.
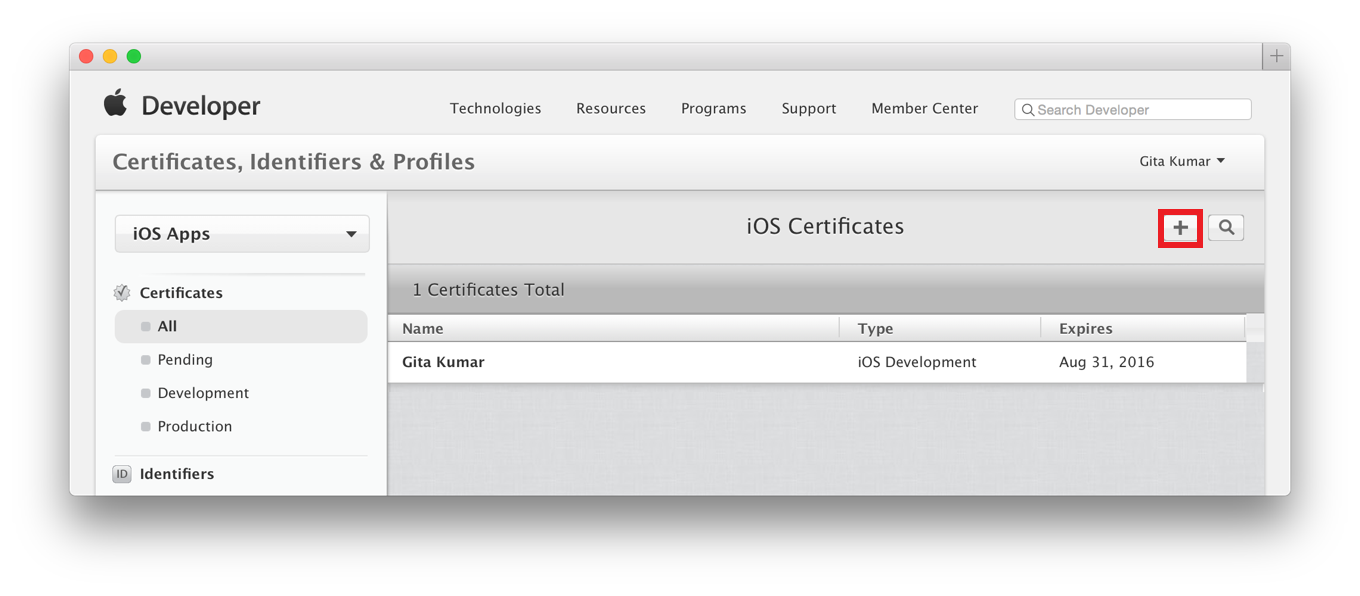
Under Production, select the “Apple Push Notification service SSL (Sandbox & Production)” checkbox, and click Continue.

Choose an App ID from the App ID pop-up menu, and click Continue.
Choose the explicit App ID that matches your bundle ID.
Follow the instructions on the next webpage to create a certificate request on your Mac, and click Continue.
Click Choose File.
In the dialog that appears, select the certificate request file (with a
.certSigningRequestextension), and click Choose.Click Generate.

Optionally, click Download.
Click Done.
Verifying Your Steps
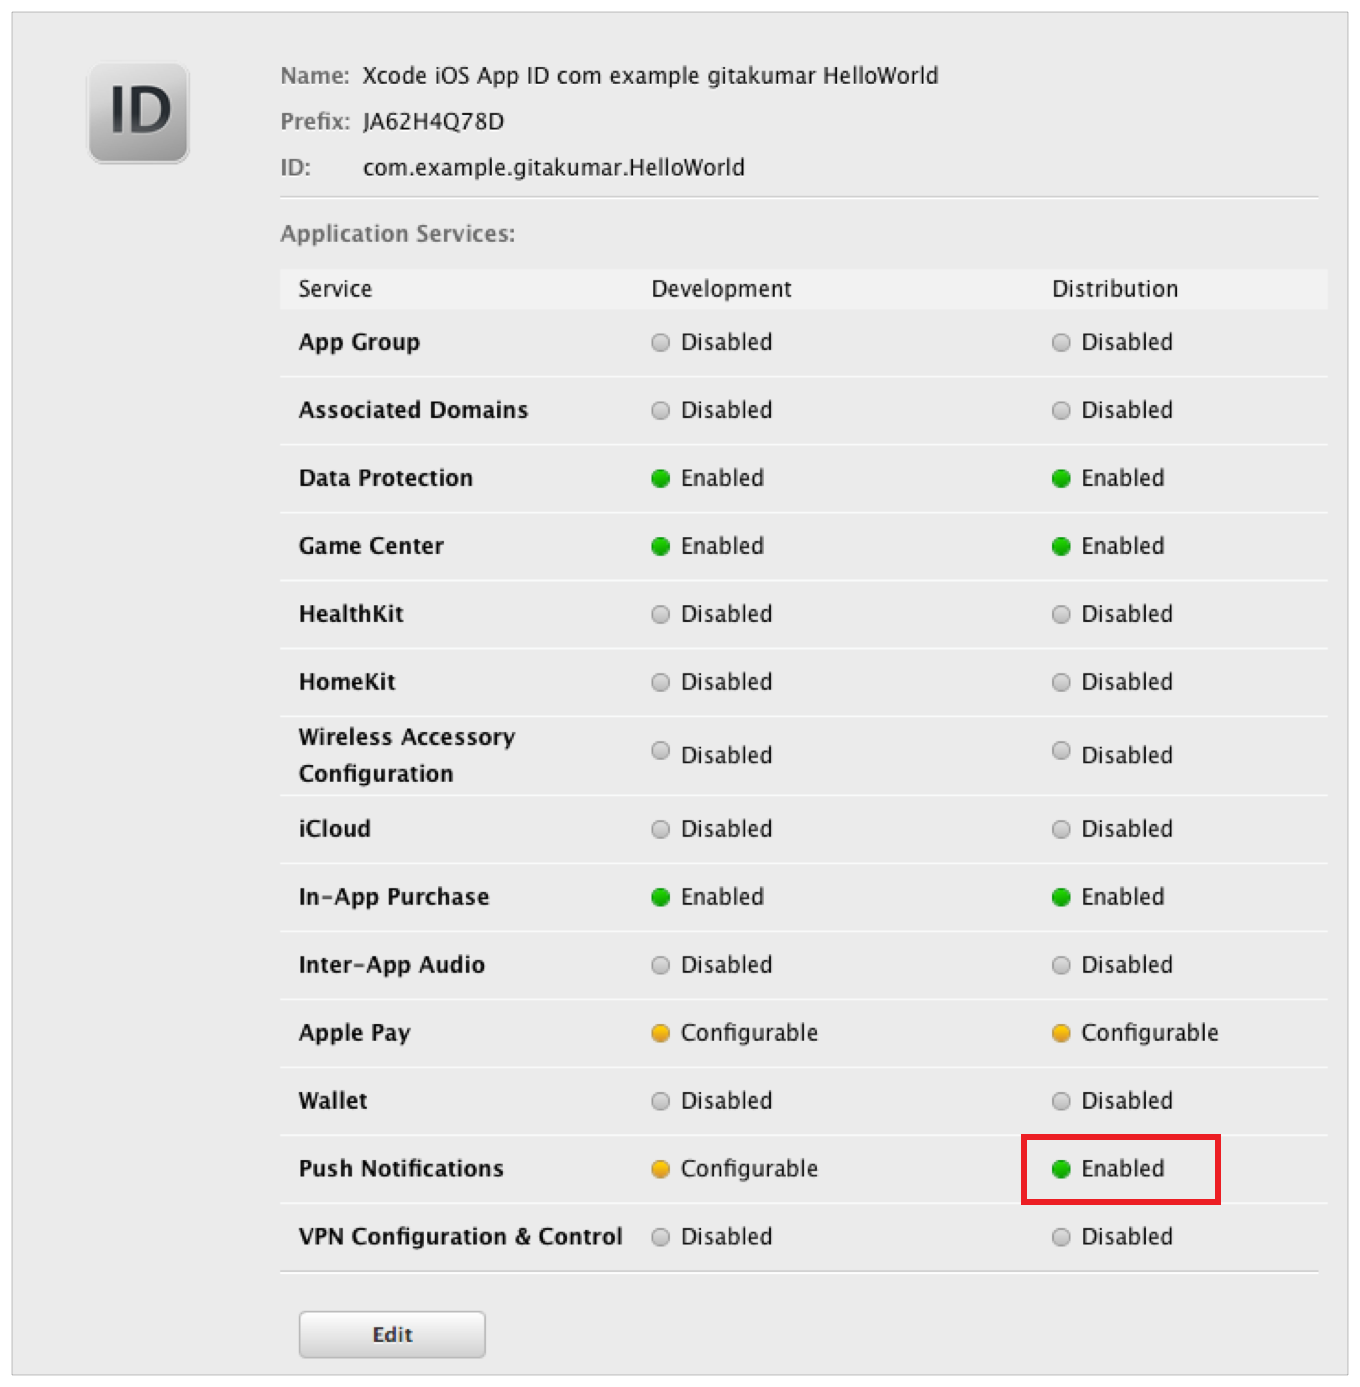
In Member Center, the status of the Push Notifications service for the specified environment (Development or Distribution) changes from Configurable to Enabled.
To verify the App ID settings
In Certificates, Identifiers & Profiles, select Identifiers and under Identifiers, select App IDs.
Select the explicit App ID that matches the bundle ID.
A green circle followed by “Enabled” appears in the Push Notifications row and the Distribution column.
Installing a Client SSL Signing Identity on the Server
Install the SSL distribution signing identity you obtained earlier on the server that runs the provider code and connects with the development or production version of APNs. Export the signing identity from the keychain on the Mac where you created it, and copy it to the appropriate place on the server.
To export a client SSL signing identity
Launch Keychain Access.
In the Category section, select My Certificates.
Find the certificate you want to export and disclose its contents.
You’ll see both a certificate and a private key.
Select both the certificate and the key, and choose File > Export Items.
From the File Format pop-up menu, choose a file format that your server accepts.
Enter a filename in the Save As field, and click Save.
Files in the Personal Information Exchange format have a
.p12extension, and files in the Privacy Enhanced Mail format have a.pemextension.
For techniques to resolve push notification server issues, read Troubleshooting Push Notifications.
Enabling Game Center (iOS, tvOS, Mac)
Game Center is Apple’s social gaming network. It allows players to connect their devices to the Game Center service and to exchange information.
To use Game Center, first enable Game Center in Xcode.
To enable Game Center
In the Capabilities pane, if Game Center isn’t enabled, click the switch in the Game Center section.
Xcode automatically provisions your app to use Game Center and adds the GameKit framework to your project.
For Mac apps, Xcode also sets your Outgoing network entitlements in the App Sandbox section, located in the Capabilities pane in Xcode. If your app also listens for network connections, it needs to allow incoming connections. To set additional network entitlements, read Configuring App Sandbox (Mac).
For how to write your GameKit code, read Game Center Programming Guide. To configure your app in iTunes Connect, read Adding New Apps in iTunes Connect Developer Guide to create the app record (enter your explicit App ID), and read Game Center Configuration Guide for iTunes Connect to configure game features.
https://developer.apple.com/library/ios/documentation/IDEs/Conceptual/AppDistributionGuide/AddingCapabilities/AddingCapabilities.html#//apple_ref/doc/uid/TP40012582-CH26-SW11


 4510
4510

 被折叠的 条评论
为什么被折叠?
被折叠的 条评论
为什么被折叠?
 到【灌水乐园】发言


