


模还是必须定义两个基本方法。还有部分label标签映射为汉字,假设进行表单验证,还要定义一些验证规则:
<?php /* * 用户模型 * */ class user extends CActiveRecord{ //获得数据模型 public static function model($classname = __CLASS__){ return parent::model($classname); } //定义数据表名字 public function tableName(){ return "{{user}}"; } //设置标签名字和数据库字段相应 public function attributeLabels() { //parent::attributeLabels(); return array( 'username' => '用户名', 'password' => '密码', 'user_qq' => 'qq', 'user_tel' => '手机', 'user_hobby' => '爱好', 'user_introduce' => '简单介绍', 'user_sex' => '性别', 'user_email' => 'email', ); } /* * 模型里面定义表单验证规则 */ public function rules(){ return array( array('username','required','message'=>'请填写用户名'), //第二參数必须设置 ,不然无法保存数据到数据库 第二个字段如何来的,见下图分晓 array('password','required','message'=>'请填写密码'), ); } } ?
>

render方法主要包括两个字段。一个是要渲染的模板。一个是数组,表示要传递过去变量
<?php /* 用户控制器 */ class UserController extends Controller{ function actionLogin(){ //$this->renderPartial('login'); $this->render('login'); //$this ->renderPartial('login'); } function actionRegister(){ //实例化数据模型对象user $user_model = new User(); /** * renderPartial不渲染布局 * render会渲染布局 */ //$this ->renderPartial('register'); //性别信息 $sex[1] = "男"; $sex[2] = "女"; $sex[3] = "保密"; //定义学历 $xueli[1] = "-请选择-"; $xueli[2] = "小学"; $xueli[3] = "初中"; $xueli[4] = "高中"; $xueli[5] = "大学"; //定义爱好信息 $hobby[1] = "篮球"; $hobby[2] = "足球"; $hobby[3] = "排球"; $hobby[4] = "棒球"; //假设用户有注冊表单 if(isset($_POST['User'])){ //给模型收集表单信息 //foreach($_POST['User'] as $_k => $_v){ // $user_model -> $_k = $_v; //} //上边的foreach,在yii框架里边有优化,使用模型属性attributes来进行优化 //attributes 属性已经把foreach集成好了,我们能够直接使用 $user_model -> attributes = $_POST['User']; //实现信息存储 if($user_model -> save()) //model 对象会调用rules 方法。详细追踪,能够一直到 $this ->redirect ('./index.php'); //重定向到首页 } $this -> render('register',array('user_model'=>$user_model,'sex'=>$sex,'xueli'=>$xueli,'hobby'=>$hobby)); } } ?
>
关于追踪模型save方法调用表单验证的rules方法例如以下


模型表单:
主要是创建form对象,调用小物件来实现 ,调用小物件时把CActiveForm传递进去,不是CActiveRecord偶
         <!--放入view详细内容-->

            <div class="block box">

                <div class="usBox">
                    <div class="usBox_2 clearfix">
                        <div class="logtitle3"></div>
                        <?php $form = $this -> beginWidget('CActiveForm'); ?
> <table cellpadding="5" cellspacing="3" style="text-align:left; width:100%; border:0;"> <tbody> <tr> <td style="width:13%; text-align: right;"> <?php echo $form->label($user_model, 'username'); ?
> </td> <td style="width:87%;"> <?php echo $form->textField($user_model,'username',array('class'=>'inputBg','id'=>'User_username')); ?> <!--表单验证失败显示错误信息--> <?php echo $form ->error($user_model,'username'); ?
> </td> </tr> <tr> <td align="right"> <?php echo $form->label($user_model, 'password'); ?> </td> <td> <?php echo $form->passwordField($user_model,'password',array('class'=>'inputBg','id'=>'User_password')); ?> <?php echo $form ->error($user_model,'password'); ?
> </td> </tr> <!-- <tr> <td align="right"><label for="User_password2">密码确认</label></td> <td> <input class="inputBg" size="25" name="User[password2]" id="User_password2" type="password" /> </td> </tr>--> <tr> <td align="right"><?
php echo $form->label($user_model, 'user_email'); ?></td> <td> <?php echo $form->textField($user_model,'user_email',array('class'=>'inputBg','id'=>'User_user_email')); ?> </td> </tr> <tr> <td align="right"><?php echo $form->label($user_model, 'user_qq'); ?></td> <td> <?php echo $form->textField($user_model,'user_qq',array('class'=>'inputBg','id'=>'User_user_qq')); ?> </td> </tr> <tr> <td align="right"><?
php echo $form->label($user_model, 'user_tel'); ?></td> <td> <?
php echo $form->textField($user_model,'user_tel',array('class'=>'inputBg','id'=>'User_user_tel')); ?> </td> </tr> <tr> <!--radioButtonList($model,$attribute,$data,$htmlOptions=array())--> <td align="right"><?
php echo $form->label($user_model, 'user_sex'); ?
></td> <td> <?
php echo $form->radioButtonList($user_model,'user_sex',$sex,array('separator'=>' ')); ?> </td> </tr> <tr> <!--dropDownList($model,$attribute,$data,$htmlOptions=array())--> <td align="right"><?php echo $form->label($user_model, 'user_xueli'); ?
></td> <td> <?
php echo $form -> dropDownList($user_model,'user_xueli',$xueli); ?> </td> </tr> <tr> <!--checkBoxList($model,$attribute,$data,$htmlOptions=array())--> <td align="right"><?
php echo $form->label($user_model, 'user_hobby'); ?></td> <td> <?php echo $form -> checkBoxList($user_model,'user_hobby',$hobby,array('separator'=>' ')); ?> </td> </tr> <tr> <!--textArea($model,$attribute,$htmlOptions=array())--> <td align="right"><?php echo $form->label($user_model, 'user_introduce'); ?
></td> <td> <?php echo $form -> textArea($user_model,'user_introduce',array('cols'=>50,'rows'=>5)); ?> </td> </tr> <tr> <td> </td> <td align="left"> <input name="Submit" value="" class="us_Submit_reg" type="submit" /> </td> </tr> <tr> <td colspan="2"> </td> </tr> </tbody> </table> <?
php $this->endWidget(); ?> </div> </div> </div> <!--放入view详细内容--> </div>
模板主要是这几个html控件主要是这几个样式
label ------》 label()
text ---------》textField()
area -------》 textArea()
checkbox ------》 checkBoxList()
radio ------------> radioButtonList()
password -------->passwordField()
error ---------------》 这个进行表单验证 输出错误信息
这几个第一个參数都是控制器要传递过来的模型。第二个參数是数据库表字段。第三个是样式设置,为数组形式,第四个是一些特殊分隔符 如单选按和复选框。
关于第四个參数追踪:
就到了以下这个函数定义

再次查找:
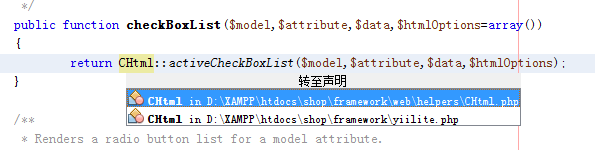
找到CHtml类文件里上面引用函数

最后一次查找啦:

就此搞定。这仅仅是简单应用啦!
高级还在明天啦!


 677
677


 被折叠的 条评论
为什么被折叠?
被折叠的 条评论
为什么被折叠?
 到【灌水乐园】发言


