


一、方法介绍
android 平台获取控件的方式,一般使用View.findViewById(int)但还有一个方findViewWithTag(Object key),indViewById(int resId)适合正向匹配查询,而findViewWithTag(Object key)适合反向查询。但2者中,后者功能比较弱,不能查询到所有的具有该tag的View。
在这里,着重讲解findViewWithTag
实际操作,往往是对固定的tabcard,或者TabWidget来说非常合适,另外有些时候,对于没必要设置ViewHolder的控件来说也非常合适。
在自定义tabWidget时,饿哦们可以将每个widget的tab设置成tag,然后读取的方式非常好,当然,这功能可有可无。
二、代码实现
1.布局文件R.layout.main.xml
<?xml version="1.0" encoding="utf-8"?>
<LinearLayout xmlns:android="http://schemas.android.com/apk/res/android"
    android:layout_width="match_parent"
    android:layout_height="match_parent"
    android:orientation="vertical">

    <!-- 这个布局决定了标签在上面还是在下面显示 -->
    <FrameLayout
        android:id="@+id/realtabcontent"
        android:layout_width="match_parent"
        android:layout_height="0dip"
        android:layout_weight="1" />

    <android.support.v4.app.FragmentTabHost
        android:id="@android:id/tabhost"
        android:layout_width="match_parent"
        android:layout_height="wrap_content">

        <TabWidget
            android:id="@android:id/tabs"
            android:layout_width="match_parent"
            android:layout_height="wrap_content"
            android:orientation="horizontal"/>
    </android.support.v4.app.FragmentTabHost>

</LinearLayout>
2.java代码
public class MainActivity extends FragmentActivity {
private FragmentTabHost mTabHost = null;;
private View indicator = null;
@Override
protected void onCreate(Bundle savedInstanceState) {
super.onCreate(savedInstanceState);
setContentView(R.layout.main);
mTabHost = (FragmentTabHost) findViewById(android.R.id.tabhost);
mTabHost.setup(this, getSupportFragmentManager(), R.id.realtabcontent);
// 添加tab名称和图标
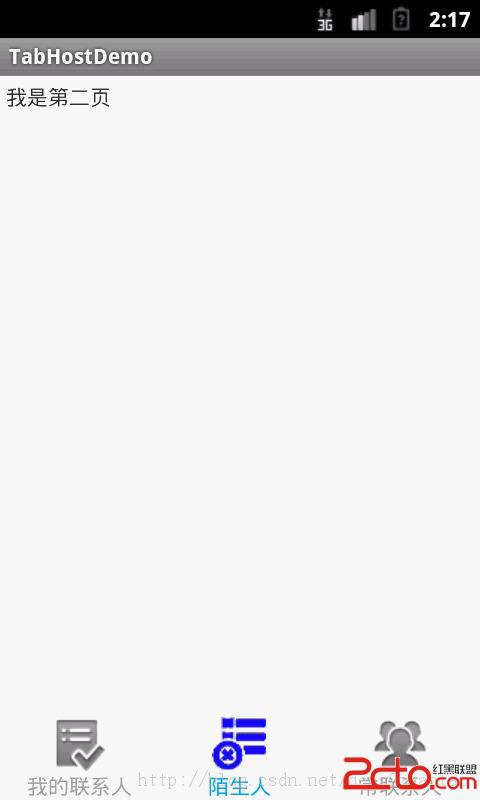
indicator = getIndicatorView("我的联系人", R.layout.mycontact_indicator);
mTabHost.addTab(mTabHost.newTabSpec("myContact")
.setIndicator(indicator), FirstFragment.class, null);
indicator = getIndicatorView("陌生人", R.layout.strangercontact_indicator);
mTabHost.addTab(
mTabHost.newTabSpec("stranger").setIndicator(indicator),
secondFragment.class, null);
indicator = getIndicatorView("常联系人", R.layout.alwayscontact_indicator);
mTabHost.addTab(
mTabHost.newTabSpec("alwaysContact").setIndicator(indicator),
ThirdFragment.class, null);
}
private View getIndicatorView(String name, int layoutId)
{
View v = getLayoutInflater().inflate(layoutId, null);
TextView tv = (TextView) v.findViewById(R.id.tabText);
tv.setText(name);
v.setTag(name); //设置tag
return v;
}
@Override
protected void onDestroy() {
// TODO Auto-generated method stub
super.onDestroy();
mTabHost = null;
}
}alwayscontact_indicator.xml文件
<?xml version="1.0" encoding="utf-8"?>
<LinearLayout xmlns:android="http://schemas.android.com/apk/res/android"
android:layout_width="match_parent"
android:layout_height="match_parent"
android:layout_gravity="center"
android:gravity="center">
<TextView
android:id="@+id/tabText"
android:layout_width="wrap_content"
android:layout_height="wrap_content"
android:focusable="true"
android:drawableTop="@drawable/mycontact_selector"
android:textColor="@drawable/tabitem_txt_sel"/>
</LinearLayout>
3.当我们需要命令模式(是一种设计模式,类似于BroadcastReciever的Action进行Tab切换)先来建立一个内部类
private BroadcastReceiver commandBroadcast = new BroadcastReceiver()
{

    private final String commondKey = "COMMOND_KEY";
    @override
    public void OnReceiver(Context  cxt,Intent data)
    {
       if("我的联系人".equals(intent.getStringExtra(commondKey)))
       {
           mTabHost.setCurrentTag("myContact");
           View layouView = mTabHost.getTabWidget().findViewWithTag("我的联系人");
       }
       else if("陌生人".equals(intent.getStringExtra(commondKey)))
       {
            mTabHost.setCurrentTag("stranger");
            View layouView = mTabHost.getTabWidget().findViewWithTag("陌生人");
       }
    }

}
4.在Activity中注册commandBroadcast,Action使用(具体步骤略过)
cn.test.my.tab.action5.当我们需要切换时tabcard时,直接可以发送广播
Intent intent = new Intent("cn.test.my.tab.action");
intent.putString("COMMOND_KEY","我的联系人");
sendBroadcast(intent);
就到这里,如有疑问,请留言
try doing it!


 937
937

 被折叠的 条评论
为什么被折叠?
被折叠的 条评论
为什么被折叠?
 到【灌水乐园】发言


