


在laravel中执行数据的迁移文件时,发现报了以下错误:

这是mysql版本太低的问题,需要升级到 5.7以上版本。下面详细说明升级步骤:
1、去官网下载mysql压缩包文件
地址:http://dev.mysql.com/downloads/mysql/
Mysql安装包分zip版和msi两种安装包,Msi版本,直接安装,Zip版本:压缩版本,需要自己去配置,这里需要下载zip版
2、备份原有的MySQL 文件
先将PHPstudy目录下的MySQL文件夹备份一份,以便在升级失败后恢复。
3、解压并复制my.ini文件
解压下载的压缩文件到PHPStudy目录下,并命名为MySQL,然后复制备份的那份文件里的my.ini文件到新的MySQL文件夹里的bin目录下(注:新版本,该文件在bin目录下)my.ini文件内容如下
[client]
port=3306
[mysql]
default-character-set=utf8

[mysqld]
port=3306
basedir="D:/software/php/PhpStudy2018/PHPTutorial/MySQL/"
datadir="D:/software/php/PhpStudy2018/PHPTutorial/MySQL/data/"
character-set-server=utf8
default-storage-engine=MyISAM
#支持 INNODB 引擎模式。修改为 default-storage-engine=INNODB 即可。
#如果 INNODB 模式如果不能启动,删除data目录下ib开头的日志文件重新启动。

sql-mode="NO_AUTO_CREATE_USER,NO_ENGINE_SUBSTITUTION"
max_connections=512

query_cache_size=0
table_cache=256
tmp_table_size=18M

thread_cache_size=8
myisam_max_sort_file_size=64G
myisam_sort_buffer_size=35M
key_buffer_size=25M
read_buffer_size=64K
read_rnd_buffer_size=256K
sort_buffer_size=256K

innodb_additional_mem_pool_size=2M

innodb_flush_log_at_trx_commit=1
innodb_log_buffer_size=1M

innodb_buffer_pool_size=47M
innodb_log_file_size=24M
innodb_thread_concurrency=8
innodb_thread_concurrency=8
innodb_thread_concurrency=8
innodb_thread_concurrency=8
innodb_thread_concurrency=8
innodb_thread_concurrency=8
innodb_thread_concurrency=8
innodb_thread_concurrency=8
innodb_thread_concurrency=8
innodb_thread_concurrency=8
innodb_thread_concurrency=8
innodb_thread_concurrency=8
innodb_thread_concurrency=8
innodb_thread_concurrency=8
innodb_thread_concurrency=8
innodb_thread_concurrency=8
innodb_thread_concurrency=8
innodb_thread_concurrency=8
innodb_thread_concurrency=8
innodb_thread_concurrency=8
innodb_thread_concurrency=8
innodb_thread_concurrency=8
innodb_thread_concurrency=8
innodb_thread_concurrency=8
innodb_thread_concurrency=8
innodb_thread_concurrency=8
innodb_thread_concurrency=8
innodb_thread_concurrency=8
innodb_thread_concurrency=8
innodb_thread_concurrency=8
innodb_thread_concurrency=8
#新增
innodb_file_per_table = 1
skip-grant-tables=1 #跳过权限验证
log-error =D:/software/php/phpstudy/PHPTutorial/MySQL/data/error.log
最后三行新增部分。
4、初始化mysql
然后已管理员身份运行cmd: 进入这个目录:D:/soft/phpstudy/PHPTutorial/MySQL/ bin 初始化mysql:
mysqld --initialize-insecure --user=mysql初始化完成后我们在MySQL文件夹下发现自动创建了一个data文件夹。
5、安装mysql5.7服务
mysqld –install运行结果:

发现安装失败,解决办法:打开cmd.exe程序的时候选择“用管理员身份打开”,

6、安装成功后启动mysql服务
net start mysql运行结果如果是这样:
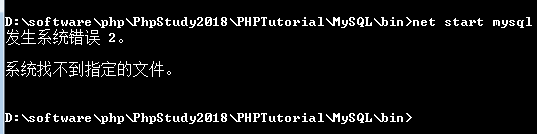
原因;mysqld 安装的路径不是在mysql安装的路径下
假如:D:\Program Files\MySQL\MySQL Server 5.7\bin 这是你MySQL安装路径,那么mysqld也需要安装在此目录下面。

7、登入mysql并修改密码
mysql -u root -p
直接回车,因为配置文件里配置了不进行登录验证
进入mysql后执行:ALTER USER USER() IDENTIFIED BY 'root';修改root密码

至此,win系统下的phpstudy的mysql就升级完了
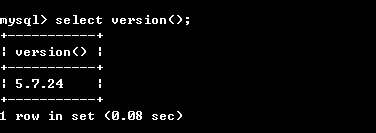
8、把配置文件里的skip-grant-tables = 1去掉再重启mysql,查看版本
此时启动phpStudy,如果mysql服务不能启动,就先去本地服务中开启mysql服务。然后就可以开启PHPStudy的mysql服务了。


 618
618


 被折叠的 条评论
为什么被折叠?
被折叠的 条评论
为什么被折叠?
 到【灌水乐园】发言


