


-
练习准备
Win10系统(已经安装配置好scrapy);Python2.7;http://hr.tencent.com/position.php?&start=0#a(社会招聘网页) - 框架分析
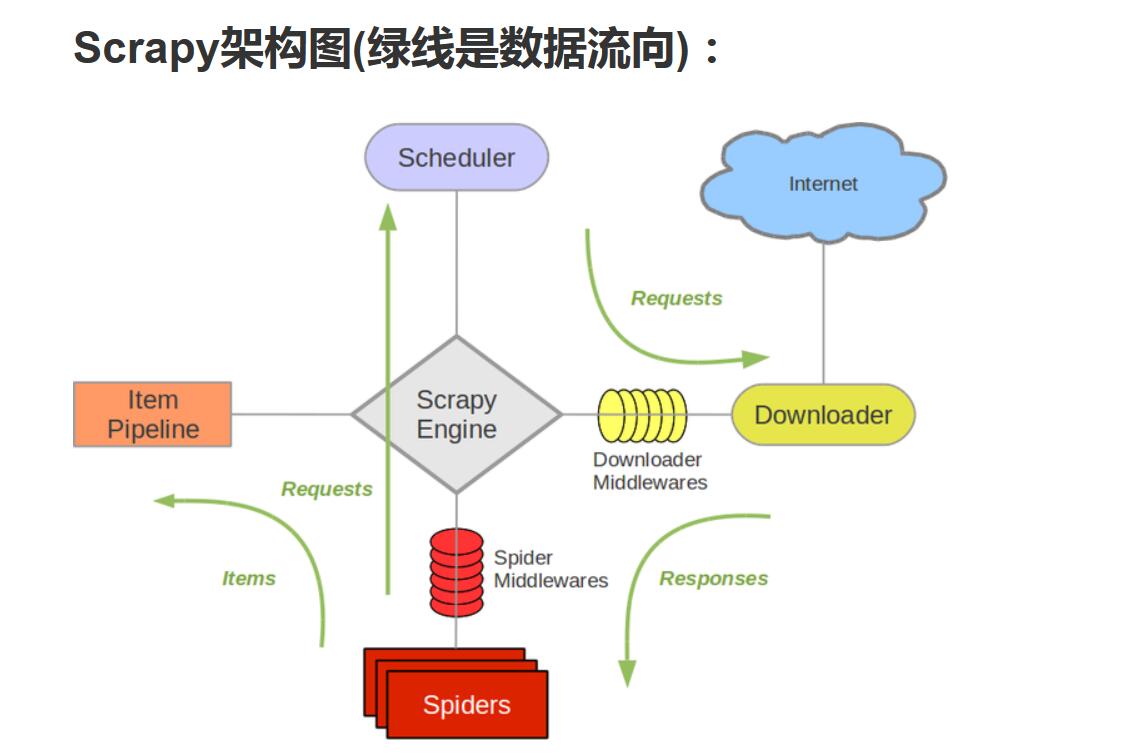
上图为scrapy框架结构图:
Scrapy Engine(引擎)部分负责中央调度、数据相互传递(第一部分是由我们所写的Spiders开始的);
Scheduler(调度器)负责引擎发过来的的Request请求,排入队列,引擎需要时返给引擎;
Downloader(下载器)接受引擎发出的请求,负责下载数据,返回给引擎,引擎将返回的response交给Spiders(我们自己写的部分)进行处理;
Spiders将response处理分类,获取item数据交给ItemPipeline处理,另外若有请求继续交给引擎取处理;ItemPipeline将数据进行分析处理、存储。
Downloader Middlewares(下载中间件):你可以当作是一个可以自定义扩展下载功能的组件。
Spider Middlewares(Spider中间件):你可以理解为是一个可以自定扩展和操作引擎和Spider中间通信的功能组件(比如进入Spider的Responses;和从Spider出去的Requests)
- 本次爬虫练习准备
Scrapy框架提供了需求的请求与下载,我们只需要提供需要下载的数据连接(Spiders)及进行相应的保存(ItemPipeline)即可。
本次练习:通过Scrapy爬取招聘网页的整个html,找到相应需要的数据保存即可。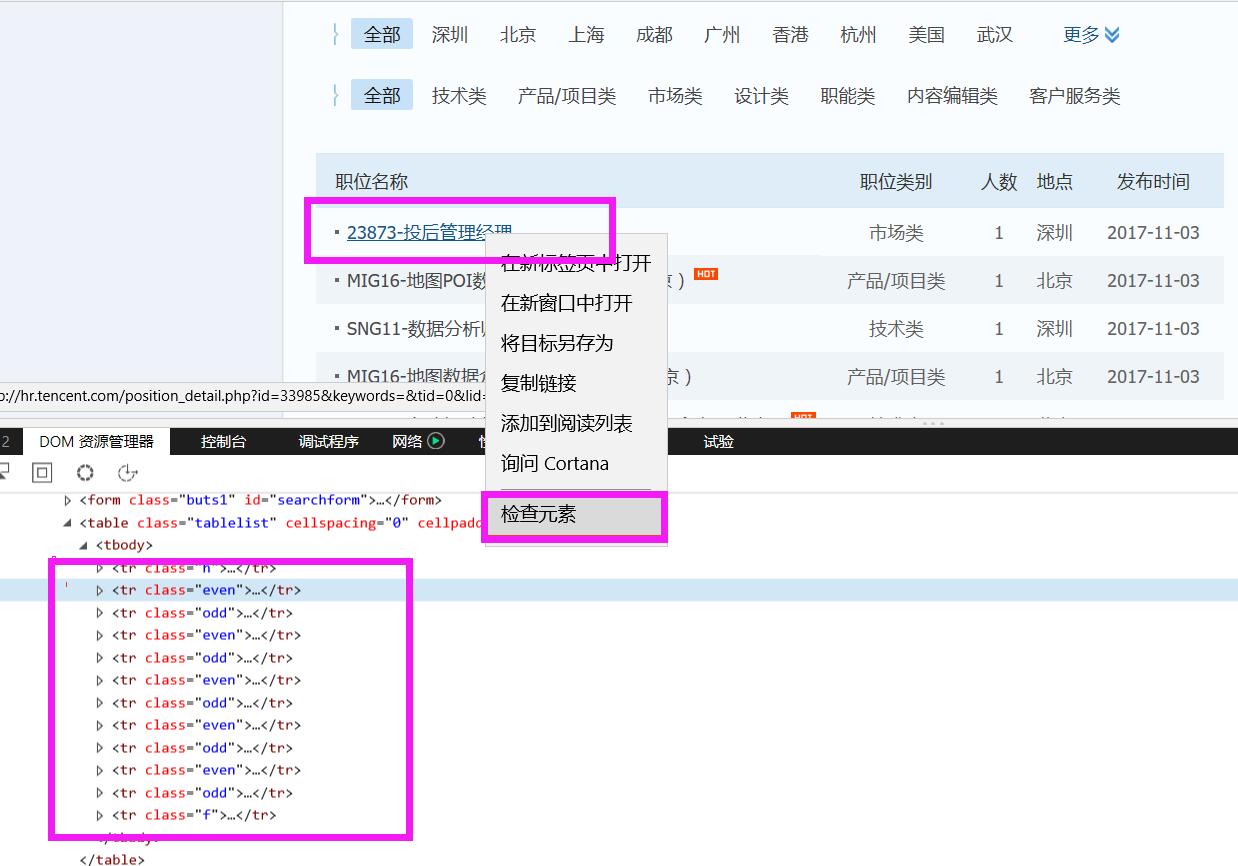
找到相应的网站,查看后台html页面设置。本次Scrapy练习所要爬取的内容包括:职位名称、相应的职位链接、职位类别、招聘人数、招聘地点、发布时间共六项。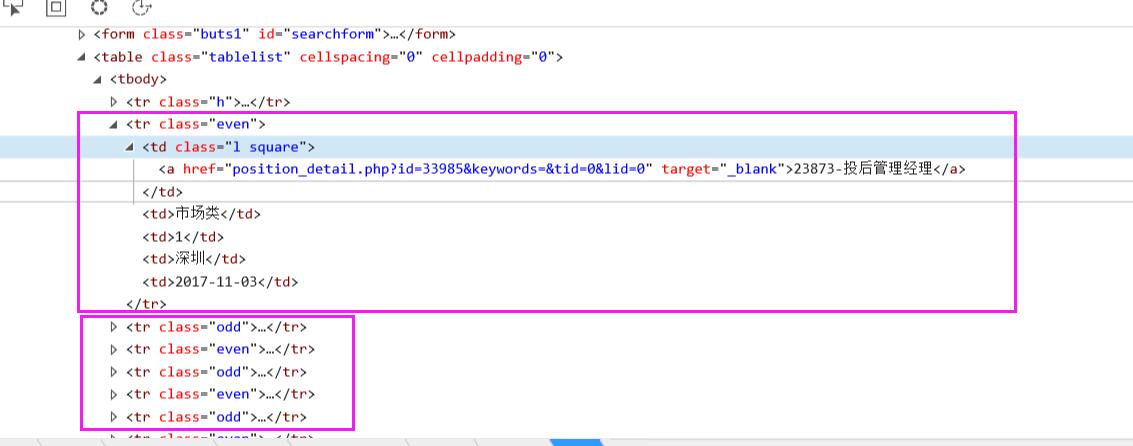
Scrapy内置支持xpath的使用,当我们爬取到整个页面时,通过xpath找到数据即可。
通过上图分析,对应职位的信息都在<tr class="even"></tr>和<tr class="odd"></tr>标签中,因此我们可以将这两个标签作为根标签,然后再遍历根标签里相应职位的具体信息。
根标签: .xpath("//tr[@class='even']|//tr[@class='odd']")
职位: .xpath("./td[1]/a/text()")
职位链接: .xpath("./td[1]/a/@href")
职位类别: .xpath("./td[2]/text()")
招聘人数: .xpath("./td[3]/text()")
招聘地点: .xpath("./td[4]/text()")
发布时间: .xpath("./td[5]/text()")
- 新建爬虫项目
win+R 键;输入cmd,打开命令窗口,新建项目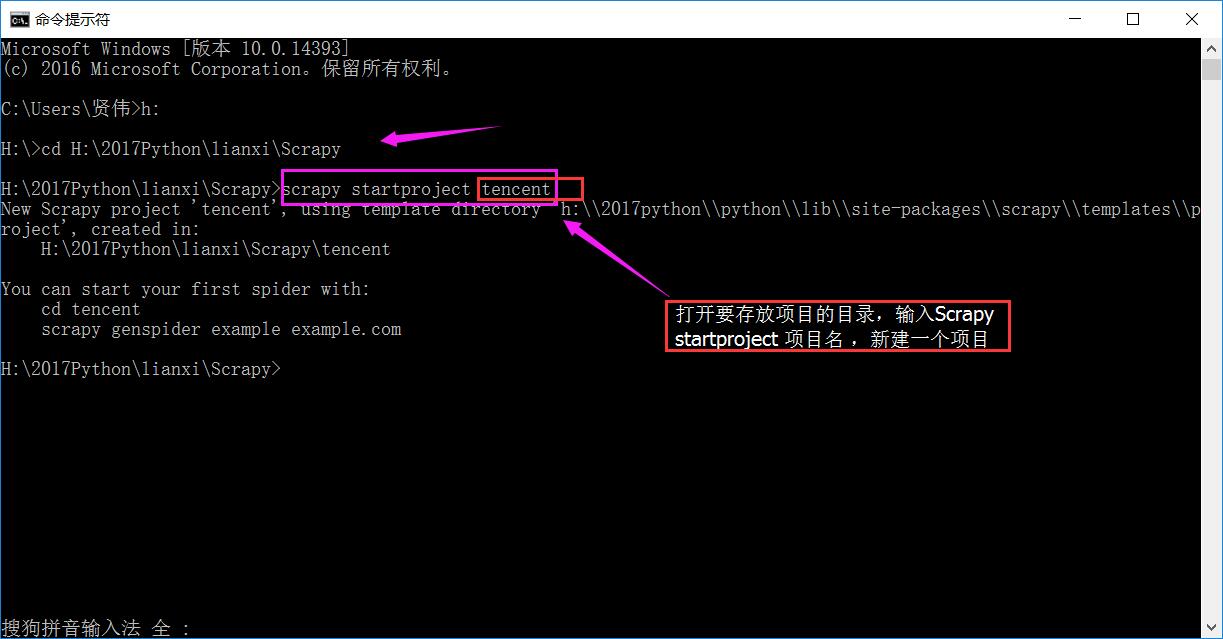
在相应的目录下就存在了一个爬虫项目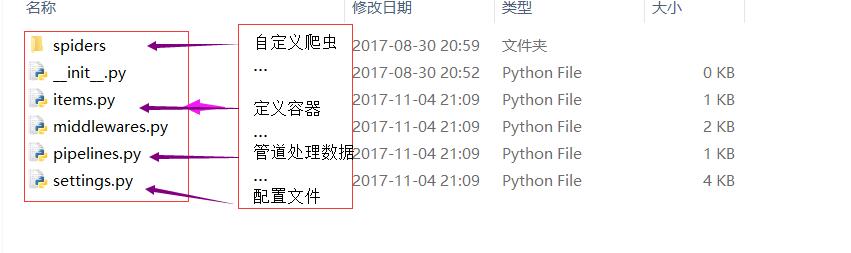
- 写爬虫
a,先写容器items.py(相当于定义一个容器,爬取的数据相应的存储在相应的位置里)b
b,自定义Spiders(在spiders文件夹新建一个.py文件,用于自定义的爬虫)import scrapy class TencentItem(scrapy.Item): # define the fields for your item here like: #职位名称 posName = scrapy.Field() #职位链接 posLink = scrapy.Field() #职位分类 posClass = scrapy.Field() #招聘人数 posPerson = scrapy.Field() #招聘城市 posCity = scrapy.Field() #招聘时间 posTime = scrapy.Field()
①,第一种方法:用scrapy.Spiders类进行处理
②,第二种方法:新建一个CrawlSpider爬虫类进行处理,如下:(这两种方法的使用仅限于此处设置不一样,其他几个方面的处理是一样的。CrawlSpider内部设置了爬取内容的规则,我们只需设置我们想要的链接规则,就可以深度爬取了)# -*- coding: utf-8 -*- import scrapy from tencent.items import TencentItem #将上面写的容器引入,方便存数据 class tencentSpiders(scrapy.Spider): #设置爬虫的名字————框架固定写法name name="tencent" #设置允许爬出的网站范围————框架固定写法allowed_domains allowed_domains = ["hr.tencent.com"] #设置开始爬取的网站 #由于本次爬取的网站存在多页,各页之间通过末尾的数字进行控制的 #因此,本次使用循环发送请求,改变某位数字进行页码控制 #url地址:http://hr.tencent.com/position.php?&start=0 url = "http://hr.tencent.com/position.php?&start=" #设置一个变量拼接在url后面 offset = 0 #则开始爬取的页面为————框架固定写法start_urls start_urls=[url+str(offset)] #设置parse函数处理请求返回的数据————固定写法(函数名固定,内容自己写) def parse(self,response): #根标签: node_list=response.xpath("//tr[@class='even']|//tr[@class='odd']") #遍历根节点 for each in node_list: #c创建容器 item=TencentItem() #职位,相应加入容器里 item["posName"]=each.xpath("./td[1]/a/text()").extract()[0] #职位链接,extract()转化为Unicode字符串 item["posLink"]=each.xpath("./td[1]/a/@href").extract()[0] #职位类别,由于xpath返回的是列表,[0]是为了取第一个 item["posClass"]=each.xpath("./td[2]/text()").extract()[0] #招聘人数: item["posPerson"]=each.xpath("./td[3]/text()").extract()[0] #招聘地点: item["posCity"]=each.xpath("./td[4]/text()").extract()[0] #发布时间: item["posTime"]=each.xpath("./td[5]/text()").extract()[0] #将数据返回给pipeline yield item #继续请求下一页的数据,每一页数据末位值是加10,目前总共到2510 if self.offset < 2510: self.offset += 10 #页码调整之后重新,向引擎发送请求,回调parse函数 yield scrapy.Request(self.url+str(self.offset),callback=self.parse)
此方法为后续增加的一种方法,里面的类的设置或许有些区别,但是爬取的网页都是一致的!# -*- coding: utf-8 -*- import scrapy #导入链接规则匹配类,用来提取符合要求的链接 from scrapy.linkextractors import LinkExtractor #导入crawlSpider爬虫类和Rule规则类 from scrapy.spiders import CrawlSpider, Rule from hrtencent.items import TencentItem class TencentSpider(CrawlSpider): name = 'tencent' allowed_domains = ['hr.tencent.com'] #设置开始爬取的网页 start_urls = ['http://hr.tencent.com/position.php?&start=0#a'] #设置提取返回数据Respouse里的所需链接的要求规格,allow=(这里面是正则匹配) link_list=LinkExtractor(allow=("start=\d")) #设置获得的链接,依法发送请求,并且跟进,调用自定义函数处理 rules = ( Rule(link_list , callback="parse_item", follow=True), ) #此函数为自定义函数,但名字不能是parse,会与系统冲突 def parse_item(self, response): #根标签: node_list=response.xpath("//tr[@class='even']|//tr[@class='odd']") #遍历根节点 for each in node_list: #c创建容器 item=TencentItem() #职位,相应加入容器里 item["posName"]=each.xpath("./td[1]/a/text()").extract()[0] #职位链接,extract()转化为Unicode字符串 item["posLink"]=each.xpath("./td[1]/a/@href").extract()[0] #职位类别,由于xpath返回的是列表,[0]是为了取第一个 item["posClass"]=each.xpath("./td[2]/text()").extract()[0] #招聘人数: item["posPerson"]=each.xpath("./td[3]/text()").extract()[0] #招聘地点: item["posCity"]=each.xpath("./td[4]/text()").extract()[0] #发布时间: item["posTime"]=each.xpath("./td[5]/text()").extract()[0] #将数据返回给pipeline yield item #与上一种方法比较,这里就不需要自定义不同链接的规则调整,再重新发送请求的。 #因为在上面的Rule里已经设置的新的规则
c,数据返回给pipeline,则重写pipelines.py,用作数据处理import json class TencentPipeline(object): #这三个函数名都是固定的写法,名字不能改变,但是只有第二个process_item函数是必需要的 def __init__(self): #初始化时,新建一个文件,用来保存数据 self.file = open("tenctent.json","w") def process_item(self, item, spider): #对于传过来的item文件,转化为json格式存储 text=json.dumps(dict(item),ensure_ascii=False)+"\n" self.file.write(text.encode("utf-8")) return item def close_spider(self,spider): #关闭文件通道 self.file.close()d,设置setting,配置文件
# -*- coding: utf-8 -*-

# Scrapy settings for tencent project
#
# For simplicity, this file contains only settings considered important or
# commonly used. You can find more settings consulting the documentation:
#
#     http://doc.scrapy.org/en/latest/topics/settings.html
#     http://scrapy.readthedocs.org/en/latest/topics/downloader-middleware.html
#     http://scrapy.readthedocs.org/en/latest/topics/spider-middleware.html

BOT_NAME = 'tencent'

SPIDER_MODULES = ['tencent.spiders']
NEWSPIDER_MODULE = 'tencent.spiders'


# Crawl responsibly by identifying yourself (and your website) on the user-agent
#USER_AGENT = 'tencent (+http://www.yourdomain.com)'

# Obey robots.txt rules
ROBOTSTXT_OBEY = True

# Configure maximum concurrent requests performed by Scrapy (default: 16)
#CONCURRENT_REQUESTS = 32

# Configure a delay for requests for the same website (default: 0)
# See http://scrapy.readthedocs.org/en/latest/topics/settings.html#download-delay
# See also autothrottle settings and docs
#每发送完请求设置延迟
DOWNLOAD_DELAY = 2
# The download delay setting will honor only one of:
#CONCURRENT_REQUESTS_PER_DOMAIN = 16
#CONCURRENT_REQUESTS_PER_IP = 16

# Disable cookies (enabled by default)
#COOKIES_ENABLED = False

# Disable Telnet Console (enabled by default)
#TELNETCONSOLE_ENABLED = False

# Override the default request headers:
#设置请求报头,主要是“User-Agent”,伪装浏览器访问
DEFAULT_REQUEST_HEADERS = {
    "User-Agent" : "Mozilla/5.0 (compatible; MSIE 9.0; Windows NT 6.1; Trident/5.0;",
    'Accept': 'text/html,application/xhtml+xml,application/xml;q=0.9,*/*;q=0.8'
}

# Enable or disable spider middlewares
# See http://scrapy.readthedocs.org/en/latest/topics/spider-middleware.html
#SPIDER_MIDDLEWARES = {
#    'tencent.middlewares.MyCustomSpiderMiddleware': 543,
#}

# Enable or disable downloader middlewares
# See http://scrapy.readthedocs.org/en/latest/topics/downloader-middleware.html
#DOWNLOADER_MIDDLEWARES = {
#    'tencent.middlewares.MyCustomDownloaderMiddleware': 543,
#}

# Enable or disable extensions
# See http://scrapy.readthedocs.org/en/latest/topics/extensions.html
#EXTENSIONS = {
#    'scrapy.extensions.telnet.TelnetConsole': None,
#}

# Configure item pipelines
# See http://scrapy.readthedocs.org/en/latest/topics/item-pipeline.html
#设置通道文件,用于数据处理
ITEM_PIPELINES = {
    'tencent.pipelines.posPipeline': 300,
}

# Enable and configure the AutoThrottle extension (disabled by default)
# See http://doc.scrapy.org/en/latest/topics/autothrottle.html
#AUTOTHROTTLE_ENABLED = True
# The initial download delay
#AUTOTHROTTLE_START_DELAY = 5
# The maximum download delay to be set in case of high latencies
#AUTOTHROTTLE_MAX_DELAY = 60
# The average number of requests Scrapy should be sending in parallel to
# each remote server
#AUTOTHROTTLE_TARGET_CONCURRENCY = 1.0
# Enable showing throttling stats for every response received:
#AUTOTHROTTLE_DEBUG = False

# Enable and configure HTTP caching (disabled by default)
# See http://scrapy.readthedocs.org/en/latest/topics/downloader-middleware.html#httpcache-middleware-settings
#HTTPCACHE_ENABLED = True
#HTTPCACHE_EXPIRATION_SECS = 0
#HTTPCACHE_DIR = 'httpcache'
#HTTPCACHE_IGNORE_HTTP_CODES = []
#HTTPCACHE_STORAGE = 'scrapy.extensions.httpcache.FilesystemCacheStorage'
e,运行爬虫程序
cmd——命令窗口运行,相应项目下运行 scrapy crawl tencent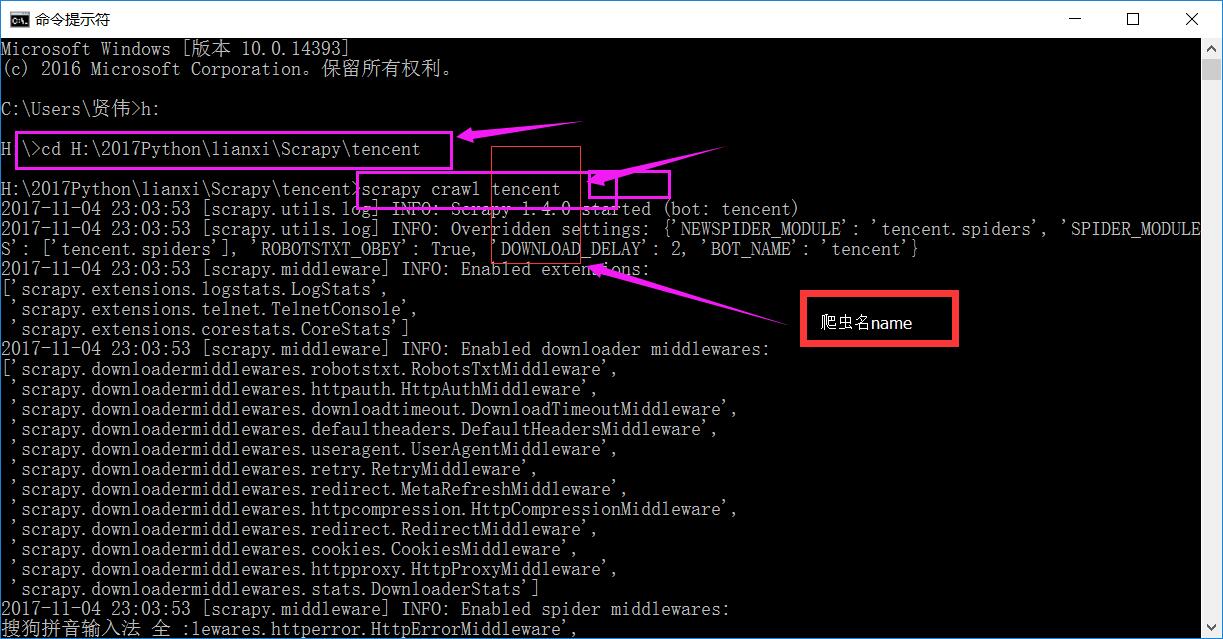
-
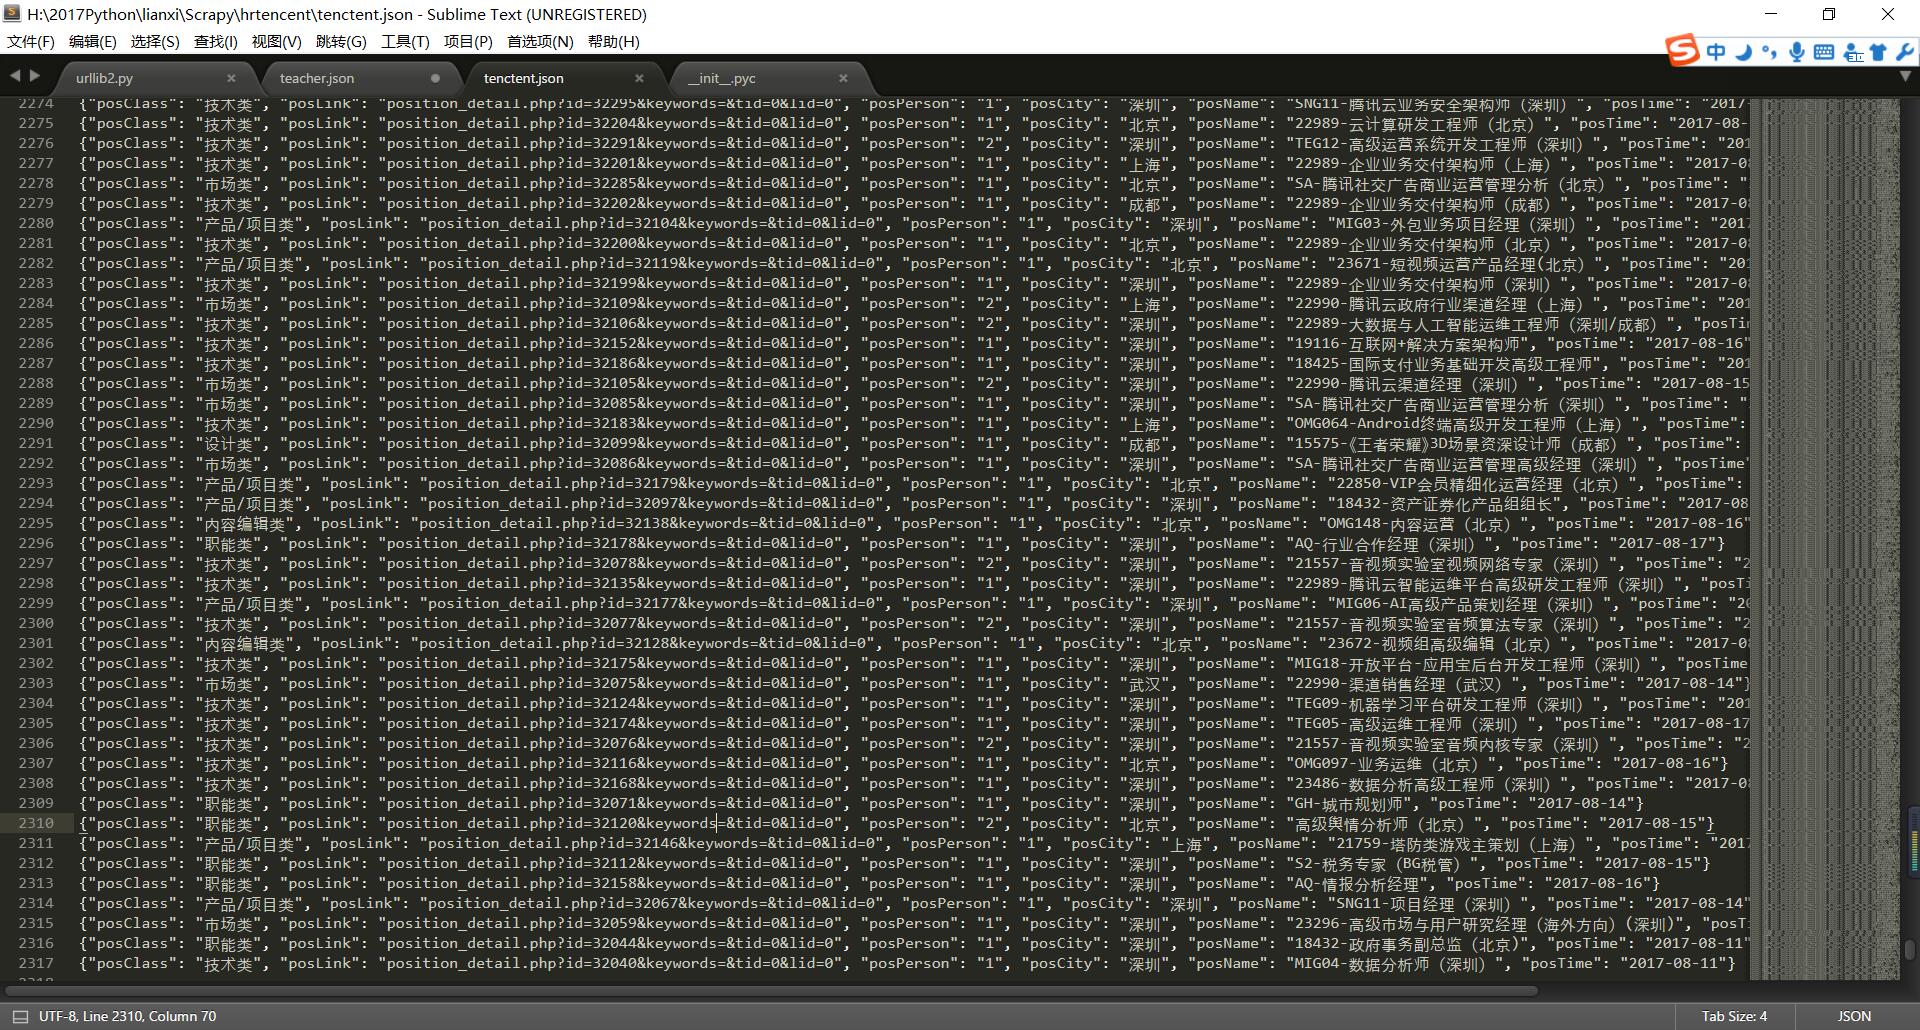
查看相应的爬取数据
a,对应项目目录中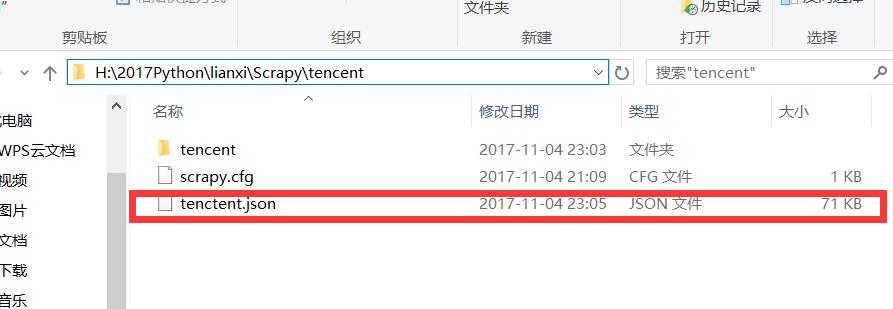
b,用记事本打开,或者复制里面的数据在网页搜索json解析器查看里面的json数据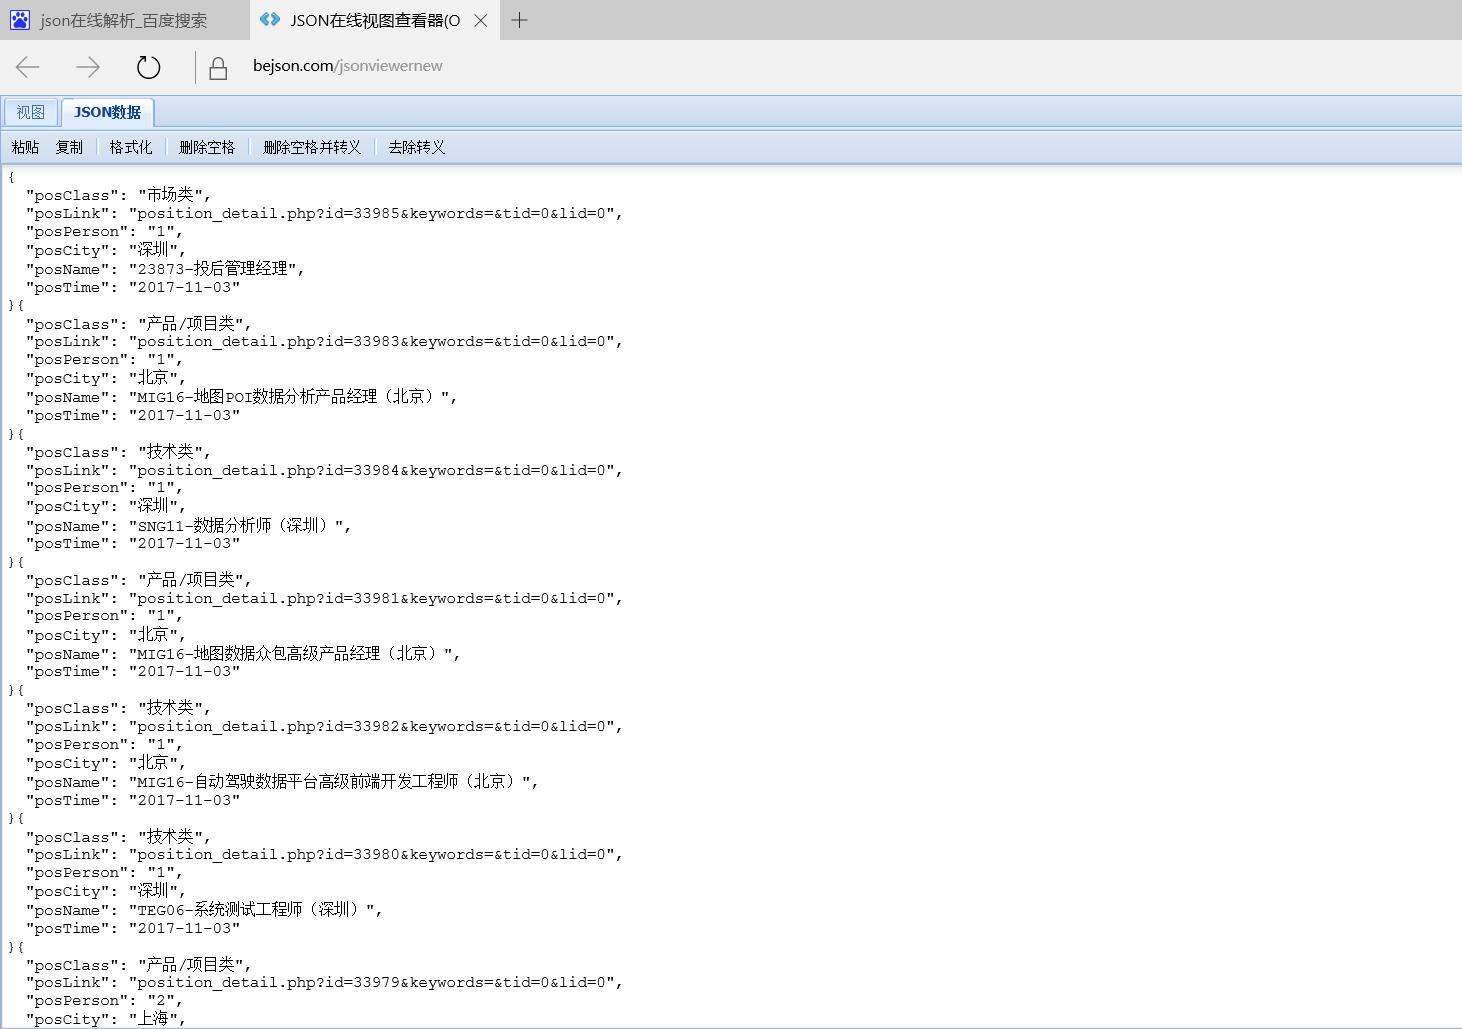
-
以上为本人学习Scrapy中的一些记录,


 227
227


 被折叠的 条评论
为什么被折叠?
被折叠的 条评论
为什么被折叠?
 到【灌水乐园】发言


