


Converting a VMware Workstation virtual machine to KVM
In this tutorial, I’ll show you the step by step procedure to convert the vmware machine into kvm, during this conversation, I have faced some issues, which I’ll also share with you along with solution.
Before converting the vmware machine,I strongly recommend removing the vmware tools and any existing snapshots of the virtual machine.Then, on the windows machine, convert this multi-file image into a single image:
cd "C:\Program Files (x86)\VMware\VMware Workstation"
vmware-vdiskmanager.exe -r "D:\VMWare\winxplite\XP-Lite.vmdk" -t 0 "D:\VMWare\winxplite\winxp.vmdk"

Note: Please change the path of vmdk file according to your requirement.
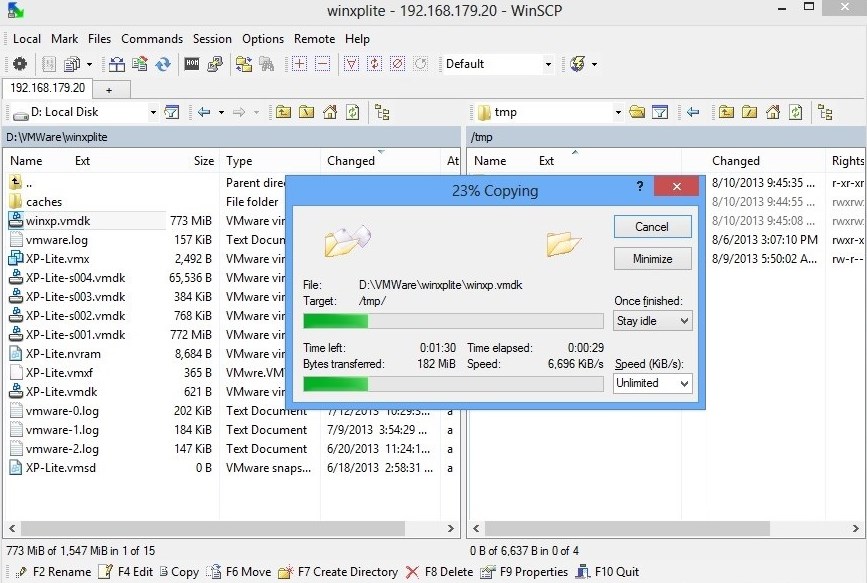
Copy this new vmdk file to the Linux box using WinSCP:
Next, convert the transfered image file (vmdk) into qcow2 format:
qemu-img convert winxp.vmdk -O qcow2 winxpvm.img

Move the qcow2 image to the /var/lib/libvirt/images/ directory and check the permission:
mv winxpvm.img /var/lib/libvirt/images/
cd /var/lib/libvirt/images/
ls -l

Start virt-manager by running the virt-manager command,click New to create a new guest.In the Virtual Machine Name window, enter a name for your guest. In this example, the virtual machine is named winxpvm and also select the “import existing disk image“. Click Forward.
Click on “Browse” button:

Locate the qcow2 image that we have converted above and select it:

Next,choose the amount of RAM and number of virtual CPUs allocated to the guest:

In the Summary window, verify the settings for creating the guest. When you are satisfied, click Finish.

Right click on the newly created virtual machine and select Run:

After boot, I got the (0x0000007B) BLUE SCREEN OF DEATH (BSOD):

Shutdown the Machine:

The main reason for BSOD problem is that most VMware Windows images are installed on SCSI virtual disk but KVM requires IDE device driver for converted images. To solve this problem, copy the MergeIDE.reg text from the below mentioned URL:
https://github.com/TJC/kvm-ievms/blob/master/MergeIDE.reg

Create a new file:
nano mergeide.reg

Paste the text inside it that we have copied from the above link:

Install all libguestfs related packages:
yum install qemu-img '*libguestfs*'

Now, we need to merge the mergeide.reg with the VM using virt-win-reg command:
virt-win-reg --merge winxpvm mergeide.reg

Note: You must not use virt-win-reg with the –merge option on running virtual machines. If you do this, you will get irreversible disk corruption in the VM.
Start the VM from the virt-manager again:

This time, virtual machine will boot successfully :-)

Enjoy ![]()
Hope this will help you!
Please Remember me in your prayers!


 2539
2539


 被折叠的 条评论
为什么被折叠?
被折叠的 条评论
为什么被折叠?
 到【灌水乐园】发言


