


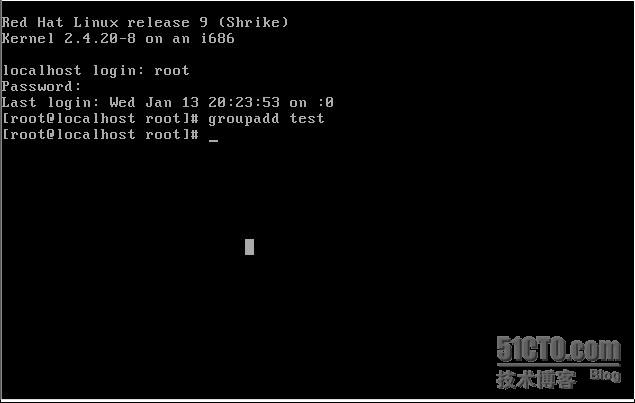
[root@localhost root]#groupadd test
//创建test组
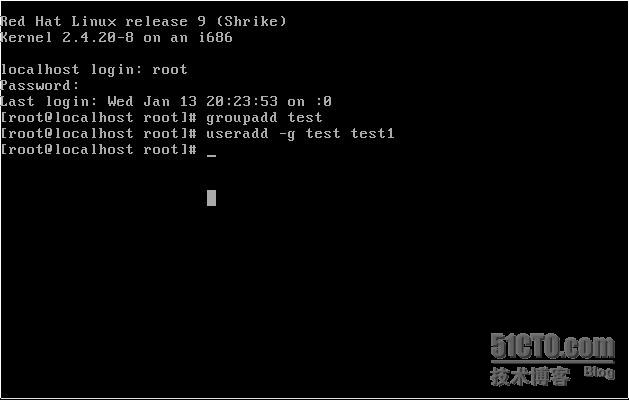
[root@localhost root ]#useradd –g test test1
//
在
test
组中创建
test1
用户
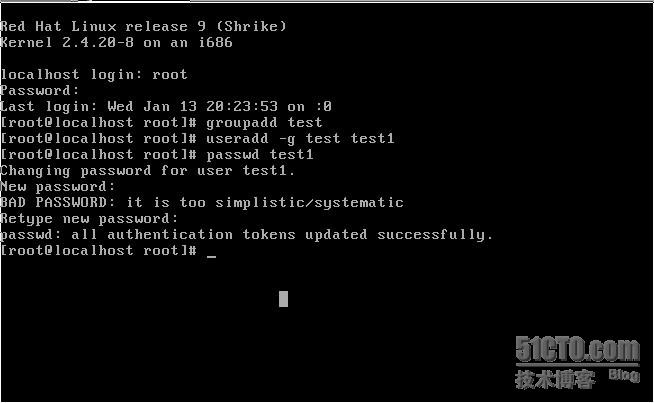
[root@localhost root]#passwd test1
//
设置
test1
的密码
,
密码为:
123456
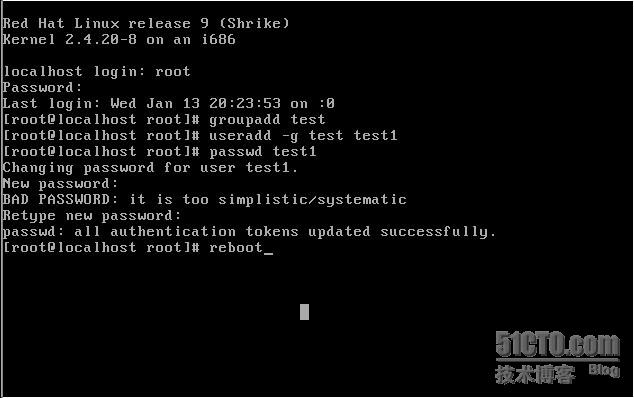
[root@localhost root]#reboot
//
重新启动
,
输入用户
test1
,密码
:123456
Localhost login:test1
Password:123456
[test1@localhost test1]$

[test1@localhost test1]$exit
//
退出
test1
用户
Localhost login:root
Password:123456
//
输入超级用户
root
,密码
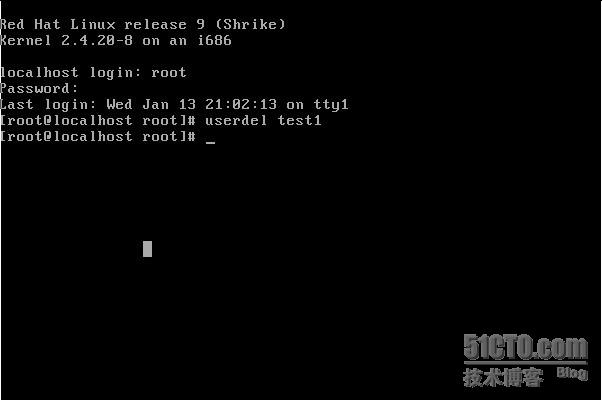
[root@localhost root]#userdel test1
//
删除刚才创建的用户
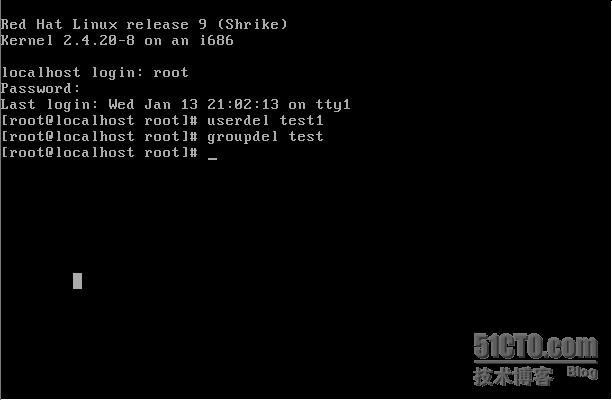
[root@localhost root]#groupdel test
//
删除创建的
test
组
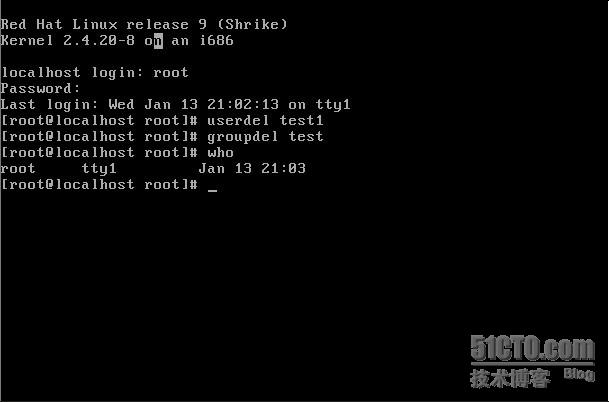
[root@localhost root]#who
//
列出所有正在使用系统的用户
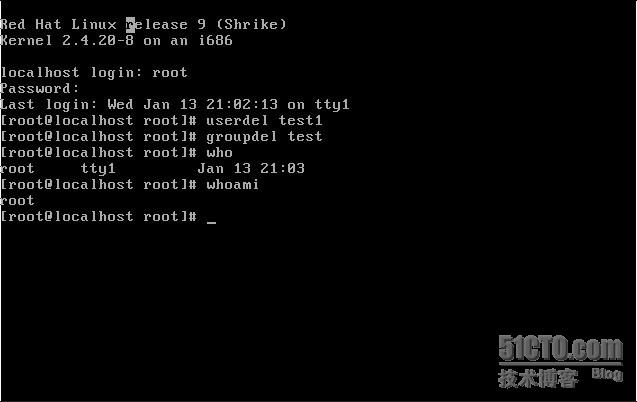
[root@localhost root]#whoami
//
列出当前用户
[root@localhost root]#w
//
显示谁登陆系统并且在做什么

更深入学习请点击:顶嵌技术交流网
转载于:https://blog.51cto.com/chenboqiang/266439


 237
237


 被折叠的 条评论
为什么被折叠?
被折叠的 条评论
为什么被折叠?
 到【灌水乐园】发言


