


一,介绍RazorGenerator的安装方式
1在vs-tool-拓展和更新,找到razor generator并安装

2 以图2-1为例,在建立的Module_X工程中,将对应的cshtml应用zazorgenerator工具(图2-2),结果应如图2-3所示
图2-1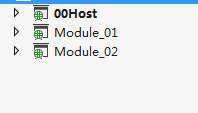
图2-2
图2-3
二,RazorGenerator实现模块分离
在项目建立时,由于项目模块较多,因此就需要将模块分离,各自建立相应工程,然后引用这些dll。然而简单的分离建立工程会出现加载不到视图资源的情况,因此有个想法,将资源也编译到dll中去即可,RazorGenerator可以帮助实现这一点,以cshtml模板生成相应的代码,然后将此代码编译进dll中,从而实现了模块分离的需求,而且还由于资源已经编译进dll,还能提高程序的性能。
做法:
1,将所有Module_X的工程生成路径设置到host工程下一文件夹。

2,在host工程中的App_Start添加WebActivator类,在此类中实现Module_X的dll加载。
注意:在引用中nuget安装RazorGenerator.Mvc 。
using PrecompiledMvcViewEngineContrib;
using System;
using System.Collections.Generic;
using System.Linq;
using System.Reflection;
using System.Web;
using System.Web.Compilation;
using System.Web.Mvc;
using System.Web.WebPages;
using RazorGenerator.Mvc;
using System.IO;

[assembly: System.Web.PreApplicationStartMethod(
                typeof(_00Host.App_Start.WebActivator), "start")]

namespace _00Host.App_Start
{
    public static class WebActivator
    {
        private static string hostpath = "E:\\项目\\vs2012\\ITP\\ITP05.WebUI\\00Host";
        public static void start()
        {
            RegisterPrecompiledMVCEngines();
        }

        private static void RegisterPrecompiledMVCEngines()  //加载所有模块dll
        {
            string dllpath = hostpath + "\\App_Data\\WEBUI";
            //PrecompiledMvcEngine a = new PrecompiledMvcEngine();
            IList<PrecompiledViewAssembly> views = new List<PrecompiledViewAssembly>();
            foreach (string file in Directory.EnumerateFiles(dllpath, "Module_*.dll"))
            {
                var assembly = Assembly.Load(AssemblyName.GetAssemblyName(file));
                BuildManager.AddReferencedAssembly(assembly);
                views.Add(new PrecompiledViewAssembly(assembly));
            }
            var engine = new CompositePrecompiledMvcEngine(views.ToArray());
            ViewEngines.Engines.Add(engine);
            VirtualPathFactoryManager.RegisterVirtualPathFactory(engine);

        }
    }
}
由此,只要以host为启动工程启动,即可使用到其它模块,各个模块也能使用各自的资源,实现模块分离。
结果如下所示


 571
571


 被折叠的 条评论
为什么被折叠?
被折叠的 条评论
为什么被折叠?
 到【灌水乐园】发言


