


Do you want to start with developing on your Mac or you already used tools like vagrant or docker and this is too slow for you? I show you how to run odoo locally without using virtualisation and how you configure PyCharm to be able to start the integrated debugger.
In this blogpost we use the Python and PostgreSQL packages from Homebrew. We create a virtual environment for Python and install the necessary packages with pip. At the end we configure PyCharm to use the created virtual environment.
As I told you we use Homebrew. It is titled as “The missing package manager for OS X”. With Homebrew we can install packages in the console as we can in the most Linux distributions. To install you have to run this command in your console (Terminal) and follow the instructions (without #):
# ruby -e "$(curl -fsSL https://raw.githubusercontent.com/Homebrew/install/master/install)"
After this we can install Python. If you already did this with a downloaded installer you can skip installing Python with Homebrew but I cannot guarantee for that. If you have problems then uninstall Python and try the package from Homebrew. To install run and follow the instructions:
# brew update
# brew install python
Now we have installed Python. Next we need the PostgreSQL server. Here we can also use Homebrew:
# brew install postgresql
To start the PostgreSQL right now and automatically at system startup we run:
# ln -sfv /usr/local/opt/postgresql/*.plist ~/Library/LaunchAgents
# launchctl load ~/Library/LaunchAgents/homebrew.mxcl.postgresql.plist
Before we install the Python modules we need to install some dependencies for the Pillow module:
brew install freetype jpeg libpng libtiff webp xz
Next we can decide how to install the Python dependencies for odoo. One way is to install these globally. If you developing on other Python applications you sometimes need the same Python packages but in different versions. Or you want to let the system clear and remove these easy when you do not need them anymore. To get these advantages we can create a virtual environment for Python. This virtual environment copies Python and some other files (like pip) to a specified directory (e.g. in your home path) and provides a script which rewrites the path to use the Python from this directory.
To install the Python dependencies we use pip which is package manager for Python (like Homebrew but for Python modules) and is already installed with Python. For creating the virtual environment we have to install virtualenv. Homebrew does not contain virtualenv so we install it with pip (globally):
# pip install virtualenv
Now we can create the virtual environment. We use for this the directory odoo-env in our home directory:
# virtualenv ~/odoo-env
With this command all necessary files were copied to this directory. Next we enter the created virtual environment:
# . ~/odoo-env/bin/activate
Okay, all looking the same as before? :) We can look if we are in this virtual environment:
# which python
/Users/youruser/odoo-env/bin/python
As you can see the Python binary from this directory is used. If you want to leave this environment you can type deactivate or close the terminal. Be aware that if you open a new tab or reopen the terminal you are not in the environment. Here you have to run the activate script as before.
Now we can start installing all dependencies for odoo. Download odoo if you did not have (e.g. clone the git repository) . In the newer odoo versions there is a requirements.txt file which contains all dependencies. To install these you have to change to the odoo directory (with cd) and run (you have to be in your virtual environment):
# pip install -r requirements.txt
This takes some time. If you get these as last lines you can be happy:
Successfully installed [...]
Cleaning up...
You have installed all dependencies. Now you can start odoo if you want:
# python ./odoo.py
2014-12-16 09:52:28,172 2974 INFO ? openerp: OpenERP version 8.0
2014-12-16 09:52:28,172 2974 INFO ? openerp: addons paths: ['/Users/youruser/Library/Application Support/Odoo/addons/8.0', u'/Users/youruser/odoo/openerp-v8/openerp/addons', u'/Users/youruser/odoo/openerp-v8/addons']
2014-12-16 09:52:28,172 2974 INFO ? openerp: database hostname: localhost
2014-12-16 09:52:28,172 2974 INFO ? openerp: database port: 5432
2014-12-16 09:52:28,172 2974 INFO ? openerp: database user: youruser
2014-12-16 09:52:28,328 2974 INFO ? openerp.service.server: HTTP service (werkzeug) running on 0.0.0.0:8069
2014-12-16 09:53:32,095 2974 INFO ? openerp.addons.bus.bus: Bus.loop listen imbus on db postgres
…
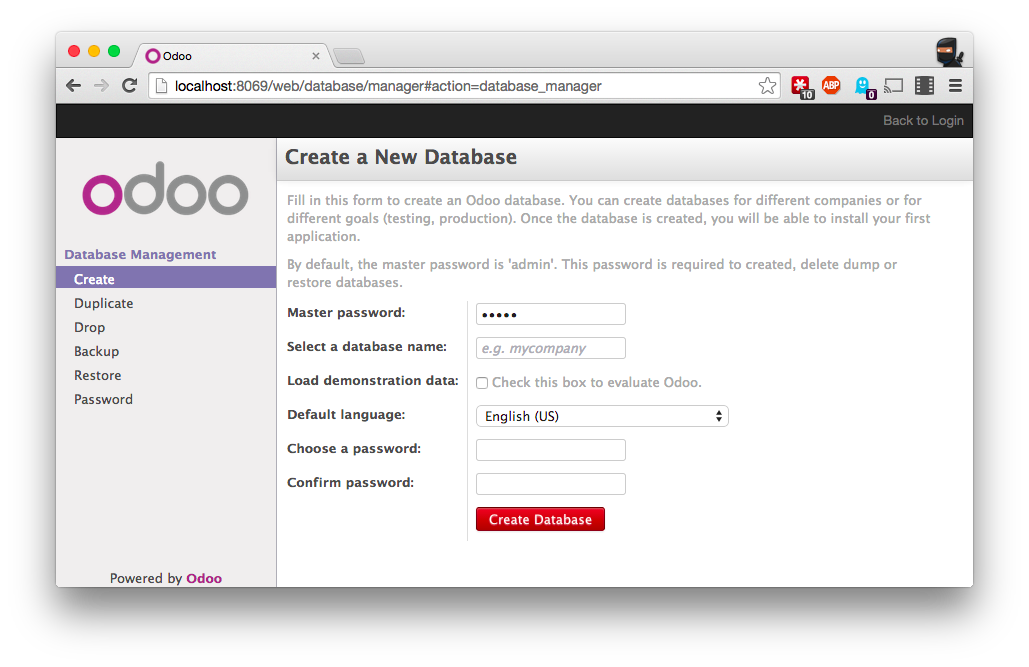
Then you can open your browser and open http://localhost:8069.
Here you can create a new database with or without demo data and playing/developing with odoo. If you done you can stop with CTRL+C in your console.
CONFIGURING PYCHARM
For Python developing I am using the Python IDE PyCharm from JetBrains. You can download the community version which should be sufficient for our needs. After installing and starting open the odoo directory as project.
As first we have to set the Python interpreter for our project. In the menu open PyCharm and then Preferences. Left in the sidebar open your project and select Project Interpreter. Next to the drop down field click on the gear and select Add Local. In the dialog search the folder odoo-env in your home directory which we created before. In the subdirectory bin select the python2.7 binary and click Choose (or use double click).

If you have more than one odoo projects you can select the added virtualenv in the drop down field. You can close this dialog with OK. Now we have set the interpreter. PyCharm will browse the virtual environment and looking for the Python modules in the background. With this you have no errors in the Python files about missing Python modules.
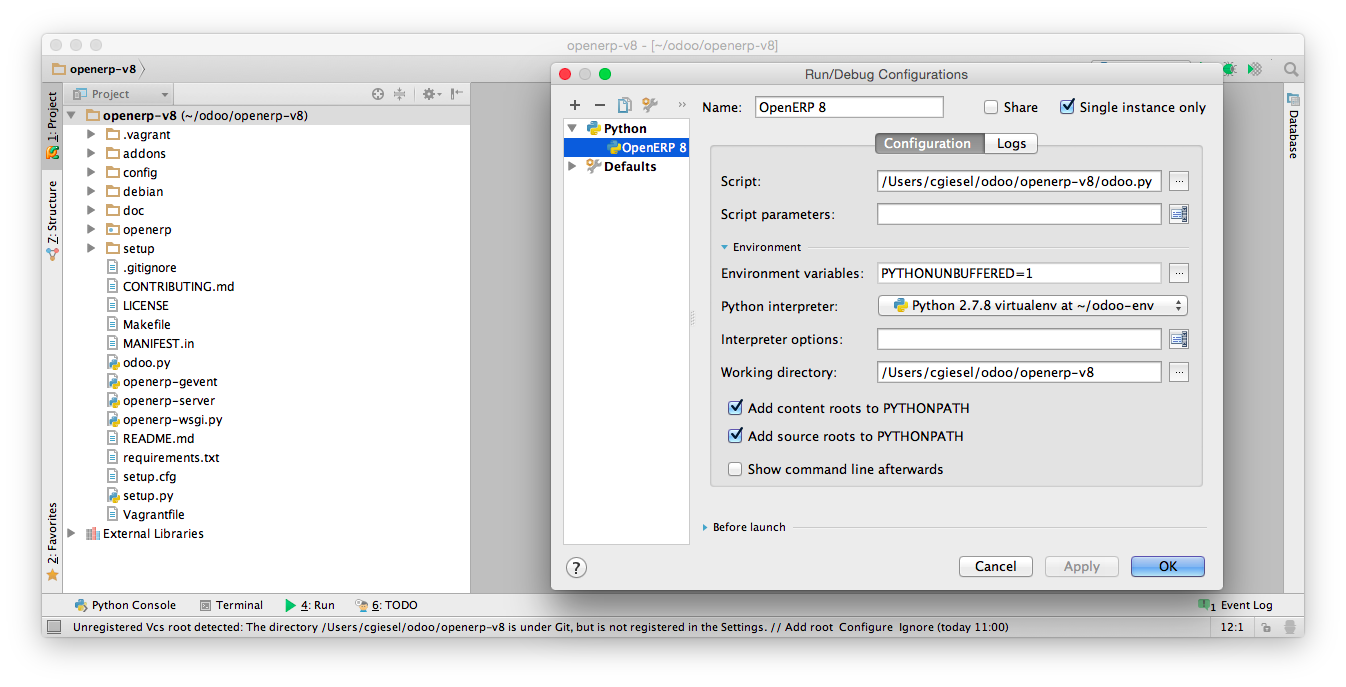
To run or debug odoo from PyCharm we create a new run configuration (for each project). In the menu select Run and then Edit Configurations. Click on the +-Icon and select Python. This adds a new entry. Name your configuration as you like and select Single instance only. Running more than one times is not possible because only one application can use the same port at the same time. In Script use the ...-Button and look for your project directory. Here select the odoo.py. In Python interpreter you have to select the interpreter from the virtual environment we created before. The other fields are untouched. You can change these if you want.
If you have more than one project you have to add a new configuration for each. After creating all configuration you can click OK.
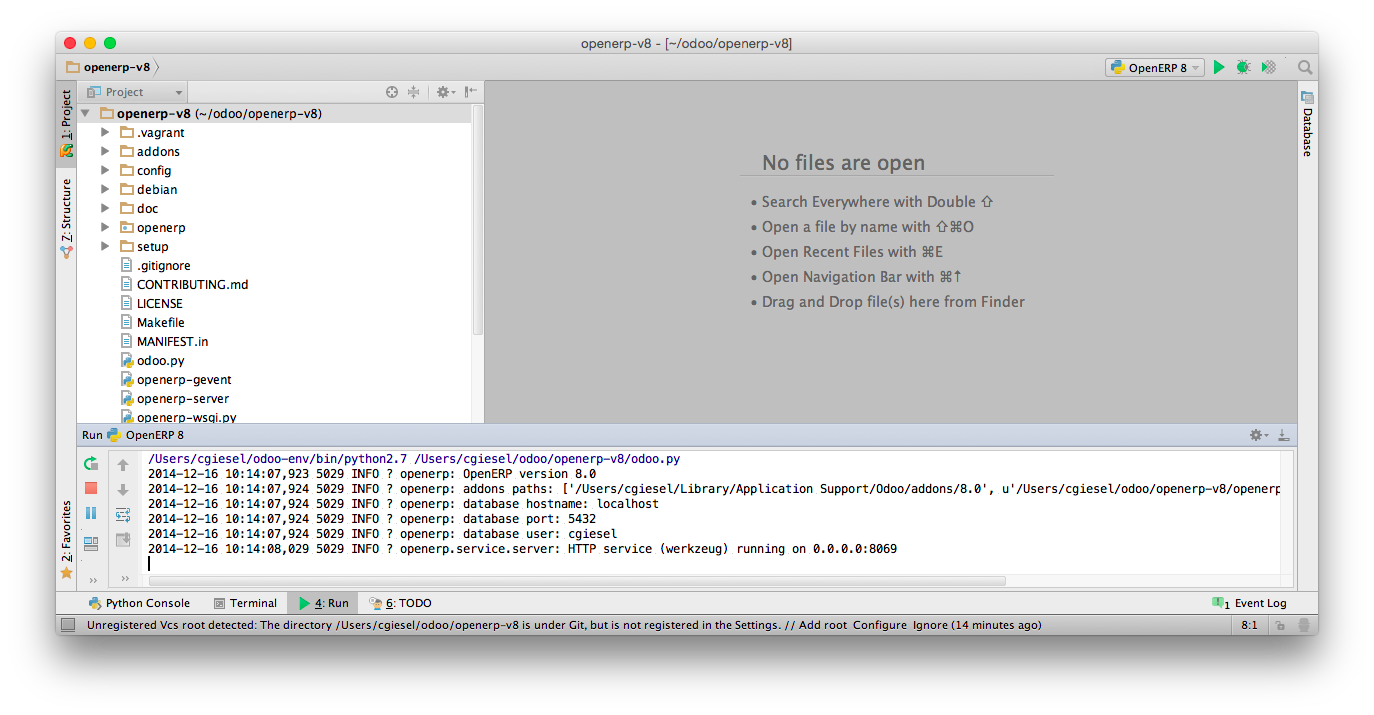
Now we can run odoo with the green play button in the top right (select the right configuration for your project). You can also run the debugger with the second button. Please be aware that you have to stop the running odoo from your console (with CTRL+C) if you did not stopped yet.
This is all. Now you can develop with odoo in PyCharm without any virtualisation or something else. If you have any questions please use the comment section below.


 345
345

 被折叠的 条评论
为什么被折叠?
被折叠的 条评论
为什么被折叠?
 到【灌水乐园】发言


