


参考资料:
https://mirrors.tuna.tsinghua.edu.cn/gitlab-ce/ubuntu/pool/trusty/main/g/gitlab-ce/
https://segmentfault.com/a/1190000006120164
https://segmentfault.com/a/1190000007180257
http://www.jianshu.com/p/2211f16cc099
https://my.oschina.net/secyaher/blog/280394
1)下载安装文件
wget https://mirrors.tuna.tsinghua.edu.cn/gitlab-ce/ubuntu/pool/trusty/main/g/gitlab-ce/gitlab-ce_8.17.5-ce.0_amd64.deb2)安装
sudo dpkg -i gitlab-ce_8.17.5-ce.0_amd64.debRunning handlers:
Running handlers complete
Chef Client finished, 117/330 resources updated in 01 minutes 20 seconds
gitlab Reconfigured!
Restarting previously running GitLab services
ok: run: logrotate: (pid 11357) 0s
ok: run: postgresql: (pid 11189) 72s
ok: run: redis: (pid 11131) 74s
Upgrade complete! If your GitLab server is misbehaving try running
sudo gitlab-ctl restart
before anything else. If you need to roll back to the previous version you can
use the database backup made during the upgrade (scroll up for the filename).3)启动
首页倒是可以访问,但是一直报错502
gitlab-ctl reconfigure然后终于看到了我的页面

4)尝试上传文件
毫无压力
======================接下来,解决CI/CD的问题
5).gitlab-ci.yml
参考:https://segmentfault.com/a/1190000007180257
首先,在根目录下创建一个.gitlab-ci.yml,此时会报错,因为还没有指定gitlab-ci runner
也就是没有指定runner,所以接下来,要解决这个问题。
6)Gitlab-runner安装
先来安装,添加Gitlab的官方源:
# For Debian/Ubuntu
curl -L https://packages.gitlab.com/install/repositories/runner/gitlab-ci-multi-runner/script.deb.sh | sudo bash

# For CentOS
curl -L https://packages.gitlab.com/install/repositories/runner/gitlab-ci-multi-runner/script.rpm.sh | sudo bash
成功了就会显示下面的信息
  % Total    % Received % Xferd  Average Speed   Time    Time     Time  Current
                                 Dload  Upload   Total   Spent    Left  Speed
100  5271    0  5271    0     0    414      0 --:--:--  0:00:12 --:--:--  1316
Detected operating system as Ubuntu/trusty.
Checking for curl...
Detected curl...
Running apt-get update... done.
Installing apt-transport-https... done.
Installing /etc/apt/sources.list.d/runner_gitlab-ci-multi-runner.list...done.
Importing packagecloud gpg key... done.
Running apt-get update...


done.

The repository is setup! You can now install packages.
接着开始安装
# For Debian/Ubuntu
sudo apt-get install gitlab-ci-multi-runner

# For CentOS
sudo yum install gitlab-ci-multi-runner
成功之后,就显示
Reading package lists... Done
Building dependency tree
Reading state information... Done
The following package was automatically installed and is no longer required:
  rlwrap
Use 'apt-get autoremove' to remove it.
Suggested packages:
  docker-engine
The following NEW packages will be installed:
  gitlab-ci-multi-runner
0 upgraded, 1 newly installed, 0 to remove and 82 not upgraded.
Need to get 26.9 MB of archives.
After this operation, 68.9 MB of additional disk space will be used.
0% [Working]
0% [Working]
Fetched 26.9 MB in 41s (648 kB/s)
Selecting previously unselected package gitlab-ci-multi-runner.
(Reading database ... 241213 files and directories currently installed.)
Preparing to unpack .../gitlab-ci-multi-runner_9.0.2_amd64.deb ...
Unpacking gitlab-ci-multi-runner (9.0.2) ...
Setting up gitlab-ci-multi-runner (9.0.2) ...
GitLab Runner: creating gitlab-runner...
7)Gitlab-runner注册
sudo gitlab-ci-multi-runner register我这边失败,原来注册时候的token必须是gitlab自身的,这个从哪找呢?
有1行"
- General
Members
Integrations
Repository
CI/CD Pipelines
Pages
"
选择CI/CD Pipelines就可以看到了,提示有URL和token,按照这个操作即可。
详情页[http://我的IP:我的端口/root/MyProject0/settings/ci_cd]
---------------------------------------------------------------------------------------------
Runner registered successfully. Feel free to start it, but if it's running already the config should be automatically reloaded!注册成功。
8)运行1个CI
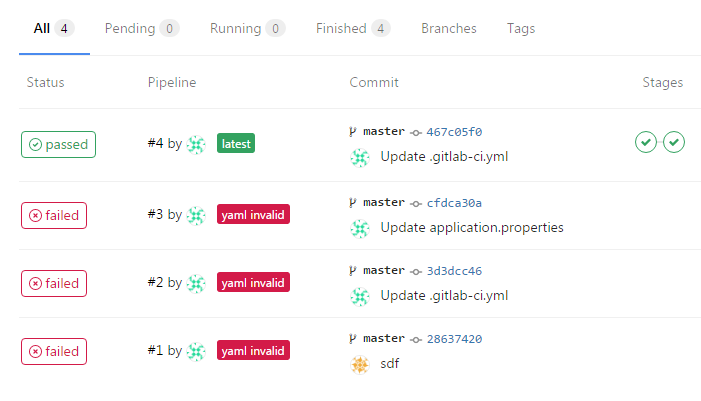
总算搭建成功了
以.gitlab-ci.yml为内容,我们填入以下内容
# 定义 stages
stages:
  - build
  - test
# 定义 job
job1:
  stage: test
  script:
    - echo "I am job1"
    - echo "I am in test stage"
# 定义 job
job2:
  stage: build
  script:
    - echo "I am job2"
    - echo "I am in build stage"
看一下内容,我们就知道,先执行build,再执行test,
其中,build的内容是打印
- echo "I am job2"
- echo "I am in build stage"
而test的内容是打印
- echo "I am job1"
- echo "I am in test stage"
查看实际情况,也确实如此,下面我们开始考虑,如何添加自己的步骤。
---------------------------------------------------------------------------------------------
强烈建议看一下这篇文章 https://segmentfault.com/a/1190000006120164
---------------------------------------------------------------------------------------------
正则表达式可以参考http://www.cnblogs.com/lzq198754/p/5780340.html
其它思路:curl 一个远程网址,然后拿到文件,执行java -classpath *.jar 主类


 1万+
1万+


 被折叠的 条评论
为什么被折叠?
被折叠的 条评论
为什么被折叠?
 到【灌水乐园】发言


