


1、自定义rm
linux系统的rm命令太危险,一不小心就会删除掉系统文件。 写一个shell脚本来替换系统的rm命令,要求当删除一个文件或者目录时,都要做一个备份,然后再删除。下面分两种情况,做练习:
1. 简单
假设有一个大的分区/data/,每次删除文件或者目录之前,都要先在/data/下面创建一个隐藏目录,以日期/时间命名,比如/data/.201703271012/,然后把所有删除的文件同步到该目录下面,可以使用rsync -R 把文件路径一同同步
2. 复杂
不知道哪个分区有剩余空间,在删除之前先计算要删除的文件或者目录大小,然后对比系统的磁盘空间,如果够则按照上面的规则创建隐藏目录,并备份,如果没有足够空间,要提醒用户没有足够的空间备份并提示是否放弃备份,如果用户选择y,则直接删除文件或者目录,如果选择n,则提示未删除,然后退出脚本。
参考答案:
1. 简单
#!/bin/bash
filename=$1
d=`date +%Y%m%d%H%M`
read -p “Are U sure delete the file or directory $1? y|n: ” c
if [ $c == “y” ] || [ $c == “Y” ]
then
mkdir /data/.$d
rsync -aR $1/ /data/.$d/$1/
/bin/rm -rf $1
elif [ $c == “n” ] || [ $c == “N” ]
then
exit 0
else
echo “Please input ‘y’ or ‘n’.”
fi
2. 复杂
#!/bin/bash
filename=$1
d=`date +%Y%m%d%H%M`
f_size=`du -sk $1|awk ‘{print $1}’`
disk_size=`LANG=en; df -k |grep -vi filesystem|awk ‘{print $4}’ |sort -n |tail -n1`
big_filesystem=`LANG=en; df -k |grep -vi filesystem |sort -n -k4 |tail -n1 |awk ‘{print $NF}’`
if [ $f_size -lt $disk_size ]
then
read -p “Are U sure delete the file or directory: $1? y|n: ” c
if [ $c == “y” ] || [ $c == “Y” ]
then
mkdir -p $big_filesystem/.$d && rsync -aR $1 $big_filesystem/.$d/ && /bin/rm -rf $1
elif [ $c == “n” ] || [ $c == “N” ]
then
exit 0
else
echo “Please input ‘y’ or ‘n’.”
fi
else
echo “The disk size is not enough to backup the files $1.”
read -p “Do you want to delete “$1″? y|n: ” c
if [ $c == “y” ] || [ $c == “Y” ]
then
echo “It will delete “$1″ after 5 seconds whitout backup.”
for i in `seq 1 5`; do echo -ne “.”; sleep 1;done
echo
/bin/rm -rf $1
elif [ $c == “n” ] || [ $c == “N” ]
then
echo “It will not delete $1.”
exit 0
else
echo “Please input ‘y’ or ‘n’.”
fi
fi
2、
请把下面的字符串:
zhangsan
y97JbzPru
lisi
5JhvCls6q
xiaowang
Nnr8qt2Ma
laoma
iqMtvC02y
zhaosi
9fxrb4sJD
改为如下:
zhangsan:y97JbzPru
lisi:5JhvCls6q
xiaowang:Nnr8qt2Ma
laoma:iqMtvC02y
zhaosi:9fxrb4sJD
参考答案:
sed 'N;s/\n/:/g' filename
截取字符串
3、利用你学过的知识点,想办法根据要求截取出字符。
字符串var=http://www.aaa.com/root/123.htm
1.取出www.aaa.com/root/123.htm
2.取出123.htm
3.取出http://www.aaa.com/root
4.取出http:
5.取出http://
6.取出www.aaa.com/root/123.htm
7.取出123
8.取出123.htm
参考答案:
#!/bin/bash
var="http://www.aaa.com/root/123.htm"
echo "##1 取出www.aaa.com/root/123.htm"
echo $var | awk -F"//" '{print $2}' #截取//后面的内容
echo $var | grep -o "www.*"
echo "##2 取出123.htm"
echo $var | awk -F"/" '{print $5}'
echo $var | grep -o "[0-9]*\.htm"
echo "##3 取出http://www.aaa.com/root"
echo $var | sed 's|\(.*//.*/.*\)\(/.*\)|\1|'
echo $var | grep -o http.*root
echo "##4 取出http:"
echo $var | awk -F '//' '{print $1}'
echo $var | sed 's/\/\/www.*//'
echo "##5 取出http://"
echo $var | awk -F "w" '{print $1}'
echo $var | sed 's/www.*//'
echo "##6 取出www.aaa.com/root/123.htm"
echo $var | awk -F '//' '{print $2}'
echo $var | sed 's|http://||'
echo "##7 取出123"
echo $var | tr -c -d '0-9\n'
echo $var | grep -o '[0-9]\{3\}'
echo "##8 取出123.htm"
echo $var | awk -F '/' '{print $5}'
4、打印三角形
打印一个三角形(正三角形,元素用*表示)。
参考答案:
#!/bin/bash
read -p "please input the lenth:" n
for i in `seq 1 $n`
do
for ((j=$n;j>i;j--))
do
echo -n " "
done
for m in `seq 1 $i`
do
echo -n "* "
done
echo
done
5、shell多线程
需求背景:
领导要求小明备份数据库服务器里面的100个库(数据量在几十到几百G),需要以最快的时间完成(5小时内),并且不能影响服务器性能。
需求分析:
由于数据量比较大,单个库备份时间少则10几分钟,多则几个小时,我们算平均每个库30分钟,若一个库一个库的去备份,则需要3000分钟,相当于50个小时。很明显不可取。但全部丢到后台去备份,100个并发,数据库服务器也无法承受。所以,需要写一个脚本,能够控制并发数就可以实现了。
参考答案:
#!/bin/sh
##假设100个库的名字存到了一个文件里,文件名字为/tmp/databases.list
##其中备份数据库用了mysqldump,这里你可以换成xtrabackup,更快
function bak_data {
dbname=$1
d=`date +%y%d`
mysqldump -uroot -pxxxxx $dbname > /backup/$1.$d
}
mkfifo $tmp_fifofile
exec 1000<>$tmp_fifofile
rm -f $tmp_fifofile
thread=10
for ((i=0;i<$thread;i++));
do
echo >&1000
done
for d in `cat /tmp/databases.list`
do
read -u1000
{
bak_data $d
echo >&1000
} &
done
wait
exec 1000>&-
6、自动挂载磁盘
我们使用的云主机,购买一块云盘后,默认并不是挂载状态的,用shell写一个脚本,只要把盘符和挂载点以参数的形式提供给脚本,该脚本就可以自动格式化、挂载。
要求:
1 不用分区,直接格式化
2 格式化为ext4文件系统类型
参考答案:
#!/bin/bash
echo "Useage $0 盘符 挂载点, 如: $0 /dev/xvdb /data"
if [ $# -ne 2 ]
then
exit
fi
if [ ! -b $1 ]
then
echo "你提供的盘符不正确,请检查后再操作"
exit 1
fi
mkfs -t ext4 $1
if [ ! -d $2 ] ;then
mkdir -p $2
fi
n=`egrep " $2 " /etc/fstab|wc -l`
if [ $n -eq 0 ]
then
echo "$1 $2 ext4 defaults 0 0" >> /etc/fstab
mount -a
else
mount $1 $2
echo "配置文件/etc/fstab中已经存在挂载点$2,请检查一下."
fi
7、自动封/解封ip
需求背景:
discuz论坛,每天有很多注册机注册的用户,然后发垃圾广告帖子。虽然使用了一些插件但没有效果。分析访问日志,发现有几个ip访问量特别大,所以想到可以写个shell脚本,通过分析访问日志,把访问量大的ip直接封掉。
但是这个脚本很有可能误伤,所以还需要考虑到自动解封这些ip。
思路:
1 可以每分钟分析1次访问日志,设定一个阈值,把访问量大的ip用iptables封掉80端口
2 每20分钟检测一次已经被封ip的请求数据包数量,设定阈值,把没有请求的或者请求量很小的解封
参考答案:
#! /bin/bash
## To block the ip of bad requesting.
## Writen by aming 2017-11-18.
log="/data/logs/www.xxx.com.log"
tmpdir="/tmp/badip"
#白名单ip,不应该被封
goodip="27.133.28.101"
[ -d $tmpdir ] || mkdir -p $tmpdir
t=`date -d "-1 min" +%Y:%H:%M`
#截取一分钟以前的日志
grep "$t:" $log > $tmpdir/last_min.log
#把一分钟内日志条数大于120的标记为不正常的请求
awk '{print $1}' $tmpdir/last_min.log |sort -n |uniq -c |sort -n |tail |awk '$1>120 {print $2}'|grep -v "$good_ip"> $tmpdir/bad.ip
d3=`date +%M`
#每隔20分钟解封一次ip
if [ $d3 -eq "20" ] || [ $d3 -eq "40" ] || [ $d3 -eq "00" ]
then
/sbin/iptables -nvL INPUT|grep 'DROP' |awk '$1<10 {print $8}'>$tmpdir/good.ip
if [ -s $tmpdir/good.ip ]
then
for ip in `cat $tmpdir/good.ip`
do
/sbin/iptables -D INPUT -p tcp --dport 80 -s $ip -j DROP
d4=`date +%Y%m%d-%H:%M`
echo "$d4 $ip unblock" >>$tmpdir/unblock.ip
done
fi
#解封后,再把iptables的计数器清零
/sbin/iptables -Z INPUT
fi
if [ -s $tmpdir/bad.ip ]
then
for ip in `cat $tmpdir/bad.ip`
do
/sbin/iptables -A INPUT -p tcp --dport 80 -s $ip -j DROP
d4=`date +%Y%m%d-%H:%M`
echo "$d4 $ip block" >>$tmpdir/block.ip
done
fi
8、安装samba
写个shell脚本,能够实现一键安装并配置samba服务,执行该脚本时需要带一个参数,为共享的目录,目录可以不存在,若不存在,需要脚本自动创建。
参考答案:
#!/bin/bash
is_samba_installed=`rpm -qa|grep samba|wc -l`
if [ $is_samba_installed != 0 ]
then
echo "You had already installed Samba."
exit 0
fi
echo "It will install Samba."
sleep 1
cnfdir="/etc/samba/smb.conf"
chkok(){
if [ $? != 0 ]
then
echo "Error, Please try again."
exit 1
fi
}
yum install -y samba
chkok
sed -i 's/MYGROUP/WORKGROUP/' $cnfdir
sed -i 's/user/share/' $cnfdir
sed -i '$a\[fish]' $cnfdir
if [ -d $1 ]
then
cd $1
echo "test" > test.txt
sed -i '$a\[fish]\n\tcomment = Share All\n\tpath = "'$1'"\n\tbrowseable = yes\n\tpublic = yes\n\twritable = no' $cnfdir
else
mkdir $1
cd $1
echo "test" > test.txt
sed -i '$a\[fish]\n\tcomment = Share All\n\tpath = "'$1'"\n\tbrowseable = yes\n\tpublic = yes\n\twritable = no' $cnfdir
fi
/etc/init.d/smb start
chkok
echo "Please input [\\sambaIP\sharename] to access the share dir."
9、管理容器
用shell写一个脚本,实现一键管理docker容器,比如启动/关闭/删除容器等操作。
要求:
1 脚本支持启动全部容器、关闭全部容器、删除全部容器
2 需要提示用户如何使用该脚本,需给出范例
参考答案:
说明,本脚本为端亚同学提供。
#! /bin/bash
##start,restart,delete the docker containers
##written by zhdya_20171114
list=`docker ps -a |awk '{print $2}'| grep -v 'ID'`
echo "======================================="
echo -e "pls check the follow list of container: \n$list"
read -p "pls choose an action which you want!<1.start 2.stop 3.rm > " act
echo "======================================"
echo -e "stop\nstart\nrm\nrmi" > /tmp/docker.txt
##judge if input the words or not!
if [ -z $act ]
then
echo "you type was wrong,pls just input "start"."stop"."rm"."rmi"."
exit
fi
##judge if input a wrong words!!
if grep -wq $act /tmp/docker.txt
then
case $act in
start)
docker start $(docker ps -a | awk '{ print $1}' | tail -n +2)
echo "already start all of container,pls checking it.."
;;
stop)
docker stop $(docker ps -a | awk '{ print $1}' | tail -n +2)
echo "already restart all of container,pls checking it.."
;;
rm)
docker rm $(docker ps -a | awk '{ print $1}' | tail -n +2)
echo "already rm all of container,pls checking it.."
;;
*)
docker rmi $(docker images | awk '{print $3}' |tail -n +2)
echo "already rm all of container,pls checking it.."
esac
else
echo "you type was wrong,pls just input "start"."stop"."rm"."rmi"."
fi
10、部署mysql主从
用shell脚本实现,部署mysql主从架构。
思路是这样的:
1)master.sh脚本用来安装master的mysql
2)然后通过expect脚本+rsync工具把slave.sh脚本、/etc/my.cnf、 /etc/init.d/mysqld 还有mysqldump下来的all.sql,以及在master下载下来的mysql二进制安装包传到slave上
3)通过expect脚本来运行slave.sh的脚本来安装,并且配置好主从,期间,用slave.tmp来记录master机子的binlog的状态,以便于传到slave后用命令添加进去。
参考答案:
cp_slave.expect
#!/usr/bin/expect
set user [lindex $argv 0]
set host [lindex $argv 1]
set passwd [lindex $argv 2]
set file [lindex $argv 3]
spawn rsync -avzP $file $user@$host:/tmp
set timeout 600
expect {
“yes/no” { send “yes\r”}
“password:” { send “$passwd\r” }
}
expect eof
ins_rsync.expect
#!/usr/bin/expect
set user [lindex $argv 0]
set host [lindex $argv 1]
set passwd [lindex $argv 2]
spawn ssh $user@$host
expect {
“yes/no” { send “yes\r”;exp_continue}
“password:” { send “$passwd\r” }
}
expect “]*”
send “yum install -y rsync\rexit\r”
interact
slave.expect
#!/usr/bin/expect
set host [lindex $argv 0]
set passwd [lindex $argv 1]
set cm [lindex $argv 2]
spawn ssh root@$host
expect {
“yes/no” { send “yes\r”}
“password:” { send “$passwd\r” }
}
expect “]*”
send “$cm\rexit\r”
interact
slave.sh
#!/bin/bash
####this is for building slave script
##by lv.
####master ip address
mas_ip=192.168.47.24
###mysql password conf
my_passwd=hd8832508
####replication user and password
rp_user=hd
rp_passwd=hd8832508
###check ok
check(){
if [ $? != 0 ]
then
echo “error,please check log.”
exit 1
fi
}
##close seliux
sed -i ‘s/SELINUX=enforcing/SELINUX=disabled/’ /etc/selinux/config
selinux_s=`getenforce`
if [ $selinux_s == “Enforcing” -o $selinux_s == “enforcing” ]
then
setenforce 0
fi
##close iptables
iptables-save > /etc/sysconfig/iptables_`date +%s`
iptables -F
service iptables save
##install the mirror.aliyun.com
cd /etc/yum.repos.d/
if rpm -qa |grep epel-release >/dev/null
then
rpm -e epel-release
fi
if [ -f epel.repo ]
then
/bin/mv epel.repo epel.repo.bak
fi
yum install -y wget
if [ -f CentOS-Base.repo ]
then
/bin/mv CentOS-Base.repo CentOS-Base.repo.bak
wget -O /etc/yum.repos.d/CentOS-Base.repo http://mirrors.aliyun.com/repo/Centos-6.repo
wget http://mirrors.aliyun.com/repo/epel-6.repo -O /etc/yum.repos.d/epel.repo
fi
yum clean all
yum makecache
#first to update datetime
[ `rpm -qa |grep ntpdate|wc -l` -eq 1 ] || yum install -y ntpdate
ntpdate 0.openwrt.pool.ntp.org 2>&1 >/dev/null;clock -w
###install lib software
syum(){
if ! rpm -qa|grep -q $1
then
yum install -y $1
check
else
echo “$1 is already installed”
fi
}
## install some packges for the first on setup.
for p in gcc perl perl-devel libaio libaio-devel pcre-devel zlib-devel cmake glibc pcre compat-libstdc++-33
do
syum $p
done
###check file is already in tmp
if [ ! -f /tmp/my.cnf ] && [ ! -f /tmp/mysqld ] && [ ! -f /tmp/mysql-* ] && [ ! -f /tmp/slave.tmp ]
then
echo “error,please try to sync again”
exit 1
fi
mysql=`ls /tmp |grep tar.gz`
version=`echo /tmp/$mysql|awk -F – ‘{print $2}’|cut -d. -f2`
######install mysql
cd /tmp
tar -zxf $mysql
mv `echo $mysql|sed ‘s/.tar.gz//g’` /usr/local/mysql
cd /usr/local/mysql
if ! grep “^mysql:” /etc/passwd
then
useradd -s /sbin/nologin -M mysql
check
fi
[ -d /data/mysql ] && /bin/mv /data/mysql /data/mysql_`date +%s`
mkdir -p /data/mysql
chown -R mysql:mysql /data/mysql
###initialize
case $version in
1)
/usr/local/mysql/scripts/mysql_install_db –user=mysql –datadir=/data/mysql
check
sed -i ‘/^server-id/’d /tmp/my.cnf
check
sed -i ‘/\[mysqld\]/a\server-id=2’ /tmp/my.cnf
check
;;
6)
/usr/local/mysql/scripts/mysql_install_db –user=mysql –datadir=/data/mysql
check
sed -i ‘/^server_id/’d /tmp/my.cnf
check
sed -i ‘/\[mysqld\]/a\server_id = 2’ /tmp/my.cnf
check
;;
7)
pswd5_7=`/usr/local/mysql/bin/mysqld –user=mysql –datadir=/data/mysql –initialize 2>&1 |sed -r -n ‘/localhost: /p’|sed ‘s/.* //g’`
/usr/local/mysql/bin/mysql_ssl_rsa_setup –datadir=/data/mysql
check
sed -i ‘/^server_id/’d /tmp/my.cnf
check
sed -i ‘/\[mysqld\]/a\server_id = 2’ /tmp/my.cnf
check
;;
esac
###cp conf file
/bin/cp -rf /tmp/my.cnf /etc/my.cnf
check
/bin/cp -rf /tmp/mysqld /etc/init.d/
check
chmod 755 /etc/init.d/mysqld
chkconfig –add mysqld
chkconfig mysqld on
service mysqld start
check
####change mysql password
if [ $version -eq 7 ]
then
/usr/local/mysql/bin/mysql -uroot -p$pswd5_7 –connect-expired-password -e “set password=password(‘$my_passwd’);”
check
else
/usr/local/mysql/bin/mysql -uroot -e “set password=password(‘$my_passwd’);”
check
fi
###input date
if [ -f /tmp/all.sql ]
then
/usr/local/mysql/bin/mysql -uroot -p$my_passwd < /tmp/all.sql
check
else
echo “date error.”
exit 1
fi
######binlog
slave_bin=`grep “mysql-bin” /tmp/slave.tmp`
slave_pos=`grep ‘^[0-9]’ /tmp/slave.tmp`
###stop slave
/usr/local/mysql/bin/mysql -uroot -p$my_passwd -e “stop slave;”
check
###configure slave
/usr/local/mysql/bin/mysql -uroot -p$my_passwd -e “change master to master_host=’$mas_ip’,master_port=3306,master_user=’$rp_user’,master_password=’$rp_passwd’,master_log_file=’$slave_bin’,master_log_pos=$slave_pos;”
check
###start slave
/usr/local/mysql/bin/mysql -uroot -p$my_passwd -e “start slave;”
check
###check repecation status
show=`/usr/local/mysql/bin/mysql -uroot -p$my_passwd -e “show slave status\G;”|grep ‘Slave_IO_Running:’`
slaveIO=`echo $show|awk -F’:’ ‘{print $2}’`
Slave_SQL=`echo $show|awk -F’:’ ‘{print $2}’`
if [ $slaveIO == Yes ] && [$Slave_SQL == Yes ]
then
echo “mysql repliation is start”
/bin/rm -rf /tmp/all.sql /tmp/$mysql /tmp/mysqld /tmp/my.cnf /tmp/slave.tmp
else
echo “error,please check the log.”
fi
master.sh
#!/bin/bash
#####this is building mysql replication###
##by lv.
ml=`pwd`
ar=`arch`
###mysql password conf
my_passwd=hd8832508
####replication user and password
rp_user=hd
rp_passwd=hd8832508
###slave conf
s_user=root
s_host=192.168.47.25
s_passwd=hd8832508
###check ok
check(){
if [ $? != 0 ]
then
echo “error,please check log.”
exit 1
fi
}
####check the file is exist
for wj in $ml/cp_slave.expect $ml/ins_rsync.expect $ml/slave.expect $ml/slave.sh
do
if [ ! -f $wj ]
then
echo “error,your miss $wj file.”
exit 1
else
/bin/chmod +x $wj
check
fi
done
##close seliux
sed -i ‘s/SELINUX=enforcing/SELINUX=disabled/’ /etc/selinux/config
selinux_s=`getenforce`
if [ $selinux_s == “Enforcing” -o $selinux_s == “enforcing” ]
then
setenforce 0
fi
##close iptables
iptables-save > /etc/sysconfig/iptables_`date +%s`
iptables -F
service iptables save
##install the mirror.aliyun.com
aliyun(){
cd /etc/yum.repos.d/
if rpm -qa |grep epel-release >/dev/null
then
rpm -e epel-release
fi
if [ -f epel.repo ]
then
/bin/mv epel.repo epel.repo.bak
fi
yum install -y wget
if [ -f CentOS-Base.repo ]
then
/bin/mv CentOS-Base.repo CentOS-Base.repo.bak
wget -O /etc/yum.repos.d/CentOS-Base.repo http://mirrors.aliyun.com/repo/Centos-6.repo
wget http://mirrors.aliyun.com/repo/epel-6.repo -O /etc/yum.repos.d/epel.repo
fi
yum clean all
yum makecache
}
if [ `grep “aliyun.com” /etc/yum.repos.d/CentOS-Base.repo|wc -l` -eq 0 ]
then
aliyun
else
echo “aliyun epel is already installed.”
fi
#first to update datetime
[ `rpm -qa |grep ntpdate|wc -l` -eq 1 ] || yum install -y ntpdate
ntpdate 0.openwrt.pool.ntp.org 2>&1 >/dev/null;clock -w
###install lib software
syum(){
if ! rpm -qa|grep -q $1
then
yum install -y $1
check
else
echo “$1 is already installed”
fi
}
## install some packges for the first on setup.
for p in gcc perl perl-devel libaio libaio-devel pcre-devel zlib-devel cmake glibc pcre compat-libstdc++-33
do
syum $p
done
###variables,fuctions
mysql_5_1=http://mirrors.sohu.com/mysql/MySQL-5.1/mysql-5.1.73-linux-$ar-glibc23.tar.gz
mysql_5_6=http://mirrors.sohu.com/mysql/MySQL-5.6/mysql-5.6.31-linux-glibc2.5-$ar.tar.gz
mysql_5_7=http://mirrors.sohu.com/mysql/MySQL-5.7/mysql-5.7.12-linux-glibc2.5-$ar.tar.gz
#######################################
conf_mysql(){
cd /usr/local/mysql
if ! grep “^mysql:” /etc/passwd
then
useradd -s /sbin/nologin -M mysql
check
fi
[ -d /data/mysql ] && /bin/mv /data/mysql /data/mysql_`date +%s`
mkdir -p /data/mysql
chown -R mysql:mysql /data/mysql
###initialize
case $version in
5.1)
./scripts/mysql_install_db –user=mysql –datadir=/data/mysql
check
;;
5.6)
./scripts/mysql_install_db –user=mysql –datadir=/data/mysql
check
;;
5.7)
pswd5_7=`./bin/mysqld –user=mysql –datadir=/data/mysql –initialize 2>&1 |sed -r -n ‘/localhost: /p’|sed ‘s/.* //g’`
./bin/mysql_ssl_rsa_setup –datadir=/data/mysql
check
;;
esac
}
cp_mysql(){
###my.cnf
if [ -f /usr/local/mysql/support-files/my-huge.cnf ]
then
/bin/cp -rf support-files/my-huge.cnf /etc/my.cnf
check
sed -i ‘/^\[mysqld\]$/a\datadir = /data/mysql’ /etc/my.cnf
check
else
/bin/cp -rf support-files/my-default.cnf /etc/my.cnf
check
sed -i ‘/^\[mysqld\]$/a\socket = /tmp/mysql.sock’ /etc/my.cnf
sed -i ‘/^\[mysqld\]$/a\port = 3306’ /etc/my.cnf
sed -i ‘/^\[mysqld\]$/a\datadir = /data/mysql’ /etc/my.cnf
check
sed -i ‘/^\[mysqld\]$/a\basedir = /usr/local/mysql’ /etc/my.cnf
fi
####/etc/init.d/mysqld
if [ $version == 5.7 ]
then
/bin/cp support-files/mysql.server /etc/init.d/mysqld
check
sed -i ‘s#^datadir=#datadir=/data/mysql#’ /etc/init.d/mysqld
sed -i ‘s#^basedir=#basedir=/usr/local/mysql#’ /etc/init.d/mysqld
check
chmod 755 /etc/init.d/mysqld
chkconfig –add mysqld
chkconfig mysqld on
service mysqld start
check
else
/bin/cp support-files/mysql.server /etc/init.d/mysqld
sed -i ‘s#^datadir=#datadir=/data/mysql#’ /etc/init.d/mysqld
chmod 755 /etc/init.d/mysqld
chkconfig –add mysqld
chkconfig mysqld on
service mysqld start
check
fi
}
###install mysql
insall_mysql(){
echo “Chose the version of mysql.”
select mysql_v in 5.1 5.6 5.7
do
case $mysql_v in
5.1)
cd /usr/local/src
[ -f ${mysql_5_1##*/} ] || wget $mysql_5_1
tar zxf ${mysql_5_1##*/}
check_ok
[ -d /usr/local/mysql ] && /bin/mv /usr/local/mysql /usr/local/mysql_`date +%s`
mv `echo ${mysql_5_1##*/}|sed ‘s/.tar.gz//g’` /usr/local/mysql
check_ok
version=5.1
conf_mysql
cp_mysql
break
;;
5.6)
cd /usr/local/src
[ -f ${mysql_5_6##*/} ] || wget $mysql_5_6
tar zxf ${mysql_5_6##*/}
check_ok
[ -d /usr/local/mysql ] && /bin/mv /usr/local/mysql /usr/local/mysql_bak
mv `echo ${mysql_5_6##*/}|sed ‘s/.tar.gz//g’` /usr/local/mysql
check_ok
version=5.6
conf_mysql
cp_mysql
break
;;
5.7)
cd /usr/local/src
[ -f ${mysql_5_7##*/} ] || wget $mysql_5_7
tar zxf ${mysql_5_7##*/}
check_ok
[ -d /usr/local/mysql ] && /bin/mv /usr/local/mysql /usr/local/mysql_bak
mv `echo ${mysql_5_7##*/}|sed ‘s/.tar.gz//g’` /usr/local/mysql
check_ok
version=5.7
conf_mysql
cp_mysql
break
;;
*)
echo “only 1(5.1) 2(5.6) or 3(5.7) ”
exit 1
;;
esac
done
}
####change mysql password
passwd_mysql(){
if [ $version == 5.7 ]
then
/usr/local/mysql/bin/mysql -uroot -p$pswd5_7 –connect-expired-password -e “set password=password(‘$my_passwd’);”
check
else
/usr/local/mysql/bin/mysql -uroot -e “set password=password(‘$my_passwd’);”
check
fi
}
######
if [ `ps aux|grep mysql|wc -l` -gt 1 ]
then
echo “mysql is already start”
else
insall_mysql
passwd_mysql
fi
####start install slave
echo “#############################”
echo “## ##”
echo “## slave install ##”
echo “## ##”
echo “#############################”
##first check master tool
if ! rpm -qa|grep -q rsync
then
yum install -y rsync
fi
if ! rpm -qa|grep -q expect
then
yum install -y expect
fi
###replication building for master first
if [ `ps aux|grep mysql|wc -l` -gt 1 ] && [ `grep “log_bin = mysql-bin” /etc/my.cnf|wc -l` -eq 0 ] && [ `grep “log-bin=mysql-bin” /etc/my.cnf|wc -l` -eq 0 ]
then
/etc/init.d/mysqld stop
check
sed -i ‘/^\[mysqld\]$/a\server_id = 1’ /etc/my.cnf
sed -i ‘/^\[mysqld\]$/a\log_bin = mysql-bin’ /etc/my.cnf
sed -i ‘/^\[mysqld\]$/a\binlog_format = “MIXED”‘ /etc/my.cnf
check
/etc/init.d/mysqld start
check
fi
master_bin=`/usr/local/mysql/bin/mysql -uroot -p$my_passwd -e “show master status \G;”|grep File|awk ‘{print $2}’`
master_pos=`/usr/local/mysql/bin/mysql -uroot -p$my_passwd -e “show master status \G;”|grep Position|awk ‘{print $2}’`
echo $master_bin >>/tmp/slave.tmp
echo $master_pos >>/tmp/slave.tmp
/usr/local/mysql/bin/mysql -uroot -p$my_passwd -e “grant replication slave on *.* to $rp_user@’$s_host’ identified by ‘$rp_passwd’;”
check
/usr/local/mysql/bin/mysql -uroot -p$my_passwd -e “flush privileges;”
check
###dump date
/usr/local/mysql/bin/mysqldump -uroot -p$my_passwd –single-transaction -A > /tmp/all.sql
check
####cp file to slave
if [ `pwd` != $ml ]
then
cd $ml
fi
./ins_rsync.expect $s_user $s_host $s_passwd
for file in /usr/local/src/mysql-* /etc/my.cnf /etc/init.d/mysqld ./slave.sh /tmp/slave.tmp /tmp/all.sql
do
./cp_slave.expect $s_user $s_host $s_passwd $file
done
./slave.expect $s_host $s_passwd /tmp/slave.sh
11、自动增加公钥
写一个shell脚本,当我们执行时,提示要输入对方的ip和root密码,然后可以自动把本机的公钥增加到对方机器上,从而实现密钥认证。
参考答案:
#!/bin/bash
read -p "Input IP: " ip
ping $ip -w 2 -c 2 >> /dev/null
## 查看ip是否可用
while [ $? -ne 0 ]
do
read -p "your ip may not useable, Please Input your IP: " ip
ping $ip -w 2 -c 2 >> /dev/null
done
read -p "Input root\'s password of this host: " password
## 检查命令子函数
check_ok() {
if [ $? != 0 ]
then
echo "Error!."
exit 1
fi
}
## yum需要用到的包
myyum() {
if ! rpm -qa |grep -q "$1"
then
yum install -y $1
check_ok
else
echo $1 already installed
fi
}
for p in openssh-clients openssh expect
do
myyum $p
done
## 在主机A上创建密钥对
if [ ! -f ~/.ssh/id_rsa ] || [ ! -f ~/.ssh/id_rsa.pub ]
then
if [ -d ~/.ssh ]
then
mv ~/.ssh/ ~/.ssh_old
fi
echo -e "\n" | ssh-keygen -t rsa -P ''
check_ok
fi
## 传私钥给主机B
if [ ! -d /usr/local/sbin/rsync_keys ]
then
mkdir /usr/local/sbin/rsync_keys
fi
cd /usr/local/sbin/rsync_keys
if [ -f rsync.expect ]
then
d=`date +%F-%T`
mv rsync.expect $d.expect
fi
#创建远程同步的expect文件
cat > rsync.expect <<EOF
#!/usr/bin/expect
set host [lindex \$argv 0]
#主机B的密码
set passwd [lindex \$argv 1]
spawn rsync -av /root/.ssh/id_rsa.pub root@\$host:/tmp/tmp.txt
expect {
"yes/no" { send "yes\r"; exp_continue}
"password:" { send "\$passwd\r" }
}
expect eof
spawn ssh root@\$host
expect {
"password:" { send "\$passwd\r" }
}
expect "]*"
send "\[ -f /root/.ssh/authorized_keys \] && cat /tmp/tmp.txt >>/root/.ssh/authorized_keys \r"
expect "]*"
send "\[ -f /root/.ssh/authorized_keys \] || mkdir -p /root/.ssh/ \r"
send "\[ -f /root/.ssh/authorized_keys \] || mv /tmp/tmp.txt /root/.ssh/authorized_keys\r"
expect "]*"
send "chmod 700 /root/.ssh; chmod 600 /root/.ssh/authorized_keys\r"
expect "]*"
send "exit\r"
EOF
check_ok
/usr/bin/expect /usr/local/sbin/rsync_keys/rsync.expect $ip $password
echo "OK,this script is successful. ssh $ip to test it"
12、域名到期提醒
写一个shell脚本,查询指定域名的过期时间,并在到期前一周,每天发一封提醒邮件。
思路: 大家可以在linux下使用命令“whois 域名”,如”whois apelearn.com”,来获取该域名的一些信息。
提示: whois命令,需要安装jwhois包
参考答案:
#!/bin/bash
t1=`date +%s`
is_install_whois()
{
which whois >/dev/null 2>/dev/null
if [ $? -ne 0 ]
then
yum install -y jwhois
fi
}
notify()
{
e_d=`whois $1|grep 'Expiry Date'|awk '{print $4}'|cut -d 'T' -f 1`
e_t=`date -d "$e_d" +%s`
n=`echo "86400*7"|bc`
e_t1=$[$e_t-$n]
if [ $t1 -ge $e_t1 ] && [ $t1 -lt $e_t ]
then
/usr/local/sbin/mail.py aming_test@163.com "Domain $1 will be expire." "Domain $1 expire date is $e_d."
fi
}
is_install_whois
notify aminglinux.com
13、取消后缀
至少用两种方法,批量把当前目录下面所有文件名后缀为.bak的后缀去掉,比如1.txt.bak去掉后为1.txt
参考答案:
假设取消的后缀为.bak
方法一:
for i in `ls *.bak`
do
mv $i `echo $i|sed 's/\.bak//g'`
done
方法二:
for i in `ls *.bak`
do
newname=`echo $i|awk -F '.bak' '{print $1}'`
mv $i $newname
done
14、重启tomcat
在生产环境中,经常遇到tomcat无法彻底关闭,也就是说用tomcat自带shutdown.sh脚本无法将java进程完全关掉。所以,需要借助shell脚本,将进程杀死,然后再启动。
写一个shell脚本,实现上述功能。彻底杀死一个进程的命令是 kill -9 pid.
参考答案:
说明:以下脚本为猿课同学实际线上跑的shell脚本,考虑的方面比较多,大家可以学一学他的思路
#!/bin/bash
###功能: 重启 tomcat 进程
###要求:对于tomcat中的某些应用,使用shutdown.sh是无法完全停掉所有服务的 实际操作中都需要kill掉tomcat再重启
##
### root can not run this script.
##
if [ $USER = root ]
then
echo "root cann't run this script!please run with other user!"
exit 1
fi
##
### check the Parameter
##
if [[ $# -ne 1 ]]
then
echo "Usage:$0 tomcatname"
exit 1
fi
##
### only one process can run one time
##
TMP_FILE_U=/tmp/.tmp.ps.keyword.$USER.956327.txt
#echo $TMP_FILE_U
KEYWORD1="$0"
KEYWORD2="$1"
# 使用赋值会多fork出一个进程,所以要先重定向到一个文本,再统计.
ps ux |grep "$KEYWORD1"|grep "\<$KEYWORD2\>"|grep -v "grep" > $TMP_FILE_U
Pro_count=`cat $TMP_FILE_U |wc -l`
if [ $Pro_count -gt 1 ]
then
echo "An other process already running ,exit now!"
exit 1
fi
###################################################
# #
# begin of the script #
# #
###################################################
##
### set the Parameter
##
TOM=`echo $1|sed 's#/##g'`
TOMCAT_DIRECTORY=~/usr/local/$TOM
STARTUP_SCRIPT=$TOMCAT_DIRECTORY/bin/startup.sh
TOMCAT_LOG=$TOMCAT_DIRECTORY/logs/catalina.out
CONF_FILE=$TOMCAT_DIRECTORY/conf/server.xml
TEMPFILE=/tmp/.tmpfile.x.89342.c4r3.tmp
##
### check if the tomcat directory exist
##
if [ ! -d "$TOMCAT_DIRECTORY" ]
then
echo "the tomcat \"$TOM\" not exist.check again!"
exit 1
fi
##
### log roteta and delete log one week ago
##
rotate_log(){
TIME_FORMART=$(date +%Y%m%d%H%M%S)
LOG_DIR=$(dirname $TOMCAT_LOG)
mv $TOMCAT_LOG ${TOMCAT_LOG}_${TIME_FORMART}
find $LOG_DIR -type f -ctime +7 -exec rm -rf {} \;
}
##
### function start the tomcat
##
start_tomcat()
{
#echo start-tomcat-func
if [ -x "$STARTUP_SCRIPT" ]
then
rotate_log
$STARTUP_SCRIPT
sleep 1
tail -f $TOMCAT_LOG
else
if [ -e $STARTUP_SCRIPT ]
then
chmod +x $STARTUP_SCRIPT
# echo "permition added!"
if [ -x "$STARTUP_SCRIPT" ]
then
rotate_log
$STARTUP_SCRIPT
sleep 1
tail -f $TOMCAT_LOG
else
echo "The script not have excute permision,Couldn't add permision to Script!"
exit 1
fi
else
echo "error,the script \"startup.sh\" not exist!"
exit 1
fi
fi
}
##
### function stop the tomcat
##
stop_tomcat()
{
rm -rf $TEMPFILE
ps ux |grep /$TOM/ |grep -v "grep /$TOM/"|grep java > $TEMPFILE
Pro_Count=`cat $TEMPFILE|wc -l`
PIDS=`cat $TEMPFILE|awk '{print $2}'`
rm -rf $TEMPFILE
#echo $Pro_Count
if [ $Pro_Count -eq 0 ]
then
echo "The tomcat not running now!"
else
if [ $Pro_Count -ne 1 ]
then
echo "The have $Pro_Count process running,killed!"
kill -9 `echo $PIDS`
WC=`ps aux | grep "/$TOM/" | grep -v "grep /$TOM/" | grep java |wc -l`
[ $WC -ne 0 ] && (echo "kill process failed!";exit 1)
else
echo "Process killed!"
kill -9 `echo $PIDS`
WC=`ps aux | grep "/$TOM/" | grep -v "grep /$TOM/" | grep java |wc -l`
[ $WC -ne 0 ] && (echo "kill process failed!";exit 1)
fi
fi
}
###########################
#### ####
#### The main script ####
#### ####
###########################
echo -e "are you sure restart $TOM?(y or n)"
read ANS
if [ "$ANS"a != ya ]
then
echo -e "bye! \n"
exit 1
fi
stop_tomcat
echo "start tomcat ..."
sleep 2
start_tomcat
# end
15、关闭服务
在centos6系统里,我们可以使用ntsysv关闭不需要开机启动的服务,当然也可以使用chkconfig工具来实现。
写一个shell脚本,用chkconfig工具把不常用的服务关闭。脚本需要写成交互式的,需要我们给它提供关闭的服务名字。
参考答案:
#!/bin/bash
LANG=en
c="1"
while [ ! $c == "q" ]
do
echo -e "\033[35mPlease chose a service to close from this list: \033[0m"
chkconfig --list |awk '/3:on/ {print $1}'
read -p "Which service to close: " s
chkconfig $s off
service $s stop
read -p "If you want's to quit this program, tab "q", or tab "Ctrl c": " c
done
16、测试数字大小
#!/bin/bash
NUM=100
if (($NUM > 4));then
echo "The NUM is $NUM greater 4."
else
echo "The NUM is $NUM little 4."
fi
17、测试目录是否存在。不存在则新建(注意 。中括号之间必须要空格);
#!/bin/bash
#dir exitst
if [ ! -d /data/20160512 ];then
mkdir -p /data/20160512
else
fi
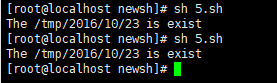
#!/bin/bash
DIR=/tmp/2016/10/23
if [ ! -d $DIR ];then
mkdir -p $DIR
else
echo "The $DIR is exist"
exit
fi
注意 :-d是判断目录是否存在
-p 是判断文件是否存在
FILES替换DIR
:%s/DIR/FILES
18、
19、
20、
21、
22、
23、
24、
25、
26、
27、
28、
29、
30、


 249
249

 被折叠的 条评论
为什么被折叠?
被折叠的 条评论
为什么被折叠?
 到【灌水乐园】发言


