


原创)FragmentTabHost的应用(fragment学习系列文章之二)
接着研究,在实际项目中我们我们事实上常常看到上面(或者以下)是一个类似于tab标签的东西,以下是真正的内容区域。点击不同标签内容区域会显示不同的内容。曾经用过一个TabHost的组件,如今貌似过时了,大概是由于有了fragment,被FragmentTabHost代替了。闲言少叙,先看一下官方文档的描写叙述,了解一个类的使用方法,看官方文档,是最快和最准确的
原来这个家伙来自于android.support.v4.app这个包下,继承自 TabHost ,而且实现了 TabHost.OnTabChangeListener 接口。文档上也直接放了两个样例。一个是在Activity下包括多个fragment。注意这个activity是v4包下的 FragmentActivity。
public class FragmentTabs extends FragmentActivity {
    private FragmentTabHost mTabHost;

    @Override
    protected void onCreate(Bundle savedInstanceState) {
  super.onCreate(savedInstanceState);

  setContentView(R.layout.fragment_tabs);
  mTabHost = (FragmentTabHost)findViewById(android.R.id.tabhost);
  mTabHost.setup(this, getSupportFragmentManager(), R.id.realtabcontent);

  mTabHost.addTab(mTabHost.newTabSpec("simple").setIndicator("Simple"),
    FragmentStackSupport.CountingFragment.class, null);
  mTabHost.addTab(mTabHost.newTabSpec("contacts").setIndicator("Contacts"),
    LoaderCursorSupport.CursorLoaderListFragment.class, null);
  mTabHost.addTab(mTabHost.newTabSpec("custom").setIndicator("Custom"),
    LoaderCustomSupport.AppListFragment.class, null);
  mTabHost.addTab(mTabHost.newTabSpec("throttle").setIndicator("Throttle"),
    LoaderThrottleSupport.ThrottledLoaderListFragment.class, null);
    }
}官方给出的栗子例如以下:
public class FragmentTabsFragmentSupport extends Fragment {
    private FragmentTabHost mTabHost;

    @Override
    public View onCreateView(LayoutInflater inflater, ViewGroup container,
      Bundle savedInstanceState) {
  mTabHost = new FragmentTabHost(getActivity());
  mTabHost.setup(getActivity(), getChildFragmentManager(), R.id.fragment1);

  mTabHost.addTab(mTabHost.newTabSpec("simple").setIndicator("Simple"),
    FragmentStackSupport.CountingFragment.class, null);
  mTabHost.addTab(mTabHost.newTabSpec("contacts").setIndicator("Contacts"),
    LoaderCursorSupport.CursorLoaderListFragment.class, null);
  mTabHost.addTab(mTabHost.newTabSpec("custom").setIndicator("Custom"),
    LoaderCustomSupport.AppListFragment.class, null);
  mTabHost.addTab(mTabHost.newTabSpec("throttle").setIndicator("Throttle"),
    LoaderThrottleSupport.ThrottledLoaderListFragment.class, null);

  return mTabHost;
    }

    @Override
    public void onDestroyView() {
  super.onDestroyView();
  mTabHost = null;
    }
tabhost的XML布局文件例如以下:
<android.support.v4.app.FragmentTabHost
    android:id="@android:id/tabhost"
    android:layout_width="match_parent"
    android:layout_height="wrap_content"
    android:layout_below="@id/line" >

    <TabWidget
      android:id="@android:id/tabs"
      android:layout_width="match_parent"
      android:layout_height="wrap_content"
      android:orientation="horizontal" >
    </TabWidget>
  </android.support.v4.app.FragmentTabHost>

  <RelativeLayout
    android:id="@+id/fragment_multi"
    android:layout_width="match_parent"
    android:layout_height="match_parent"
    android:layout_below="@android:id/tabhost"
    android:background="#FFFFFF" />
注意: FragmentTabHost是v4包下的类。一定要写全包名和类名。
写完了布局文件。接着研究java代码。
mTabHost = (FragmentTabHost)findViewById(android.R.id.tabhost); 先把tabhost找到,也能够把context传进去直接new出来。
mTabHost.setup(this, getSupportFragmentManager(), R.id.realtabcontent); 对tabhost做初始化的操作,可是在activity和在fragment里面这两句代码是不一样的,fragment的FragmentManager一定要写成 getChildFragmentManager()。说明是他子fragment的manager。
mTabHost.addTab(mTabHost.newTabSpec("simple").setIndicator("Simple"),
                FragmentStackSupport.CountingFragment.class, null);
然后加入4个Tab,当中 mTabHost.newTabSpec("simple")这个simple是该Tab的tag。 setIndicator("Simple")是标签显示的label,有三个重载方法,
setIndicator(CharSequence label);
setIndicator(CharSequence label, Drawable icon);
setIndicator(View view)
从參数名字就能够看出来。就不多做解释,当中一和二是系统提供的布局,第三种能够自己定义自己想要的view。
FragmentStackSupport.CountingFragment.class 是要加入的fragment字节码,最后一个參数是一个bundle类型的tag。
事实上到这个地方已经大功告成。我们不须要add。replace等等一切对fragment的操作,FragmentTabHost很强大,他会对所加入的fragment进行管理,保存栈信息和恢复栈信息等一切操作,比方我的fragment内部有三个子fragment,我退出该fragment的时候开启的是第二个子fragment,下次我再进入该fragment的时候依旧会开启第二个子fragment。且看 FragmentTabHost源代码中对保存,和恢复的操作:
@Override
  protected Parcelable onSaveInstanceState() {
    Parcelable superState = super.onSaveInstanceState();
    SavedState ss = new SavedState(superState);
    ss.curTab = getCurrentTabTag();
    return ss;
  }

  @Override
  protected void onRestoreInstanceState(Parcelable state) {
    SavedState ss = (SavedState)state;
    super.onRestoreInstanceState(ss.getSuperState());
    setCurrentTabByTag(ss.curTab);
}通过代码实际检验。即使退出的时候是打开的第二个fragment。可是再次进来的时候也会运行一遍第一个fragment的生命周期方法。主要是由于tabhost要有一个默认的打开界面。
且看他的addTab方法
public void addTab(TabHost.TabSpec tabSpec, Class<?> clss, Bundle args) {
    tabSpec.setContent(new DummyTabFactory(mContext));
    String tag = tabSpec.getTag();

    TabInfo info = new TabInfo(tag, clss, args);

    if (mAttached) {
      // If we are already attached to the window, then check to make
      // sure this tab's fragment is inactive if it exists.  This shouldn't
      // normally happen.
      info.fragment = mFragmentManager.findFragmentByTag(tag);
      if (info.fragment != null && !info.fragment.isDetached()) {
        FragmentTransaction ft = mFragmentManager.beginTransaction();
        ft.detach(info.fragment);
        ft.commit();
      }
    }

    mTabs.add(info);
    addTab(tabSpec);
  }
最后一句是addTab(tabSpec)。这是他的父类TabHost的方法,跟踪一下addTab方法,发现他有这样一句代码:
if (mCurrentTab == -1) {
            setCurrentTab(0);
        }
也就是当前没有Tab的时候,会指定第0个元素为当前的Tab。所以会运行他的生命周期方法。
另外FragmentTabHost另一个重要的方法就是 setOnTabChangedListener (TabHost.OnTabChangeListener l)
就是当页面发生变化的时候,设置回调监听接口,这个接口仅仅有一个方法 public void onTabChanged(String tabId),事实上參数就是Tab的Tag。
各位看官,事实上这是一个非常实用的方法。比方你在给你自己定义的Tab设置背景的时候。这个就能够派上用途了。
最后。我们在项目中事实上是有一个个性化的需求的,比方说我想直接跳到fragment的第三个子fragment而不是按之间栈里保存的状态,经过研究
有一个比較笨的方法。希望大家批评指正并提出更好的解决方式。
写一个自己的类并继承FragmentTabHost:
package com.example.myfragment;

import android.content.Context;
import android.os.Parcelable;
import android.support.v4.app.FragmentTabHost;
import android.util.AttributeSet;

public class MyTabHost extends FragmentTabHost {

  public MyTabHost(Context context) {
    super(context);
  }

  public MyTabHost(Context context, AttributeSet attrs) {
    super(context, attrs);
  }

  String tag = null;

  public void setTag(String tag) {
    this.tag = tag;
  }

  public String getTag() {
    return tag;
  }

  @Override
  protected void onRestoreInstanceState(Parcelable state) {
    super.onRestoreInstanceState(state);
    if (tag != null)
      setCurrentTabByTag(tag);
  }

  @Override
  protected void onAttachedToWindow() {
    super.onAttachedToWindow();
    if (tag != null) {
      onTabChanged("alwaysContact");
      setCurrentTabByTag("alwaysContact");
    }
  }
}public static Fragment3 getInstance(Bundle bundle) { Fragment3 instance = new Fragment3(); arg = bundle; if (bundle != null) instance.setArguments(bundle); return instance; }
View v = inflater.inflate(R.layout.fragment3, container, false);
    tabhost = (FragmentTabHost) v.findViewById(android.R.id.tabhost);
    if (arg != null) {
      tabhost.setTag(arg.getString("currentTag"));
    }
齐活。
在上一篇文章中,我们花了大量的篇幅来解说Fragment这个新引进类的使用,目的就是为了让大家可以牢牢的掌握它的用法,以便读者在今后的开发中可以熟练的使用它。
一、实现效果图


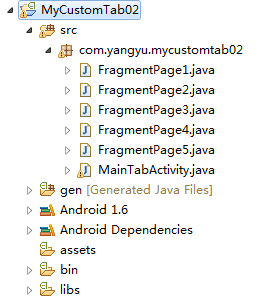
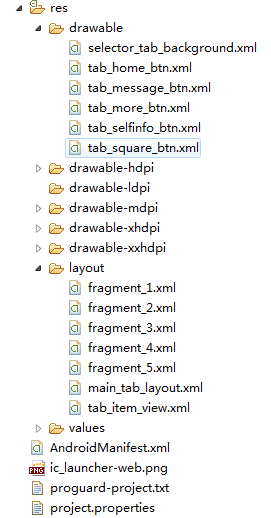
二、项目project结构
三、具体代码编写
1、主tab布局界面,main_tab_layout:
<?xml version="1.0" encoding="utf-8"?> <LinearLayout xmlns:android="http://schemas.android.com/apk/res/android" android:layout_width="fill_parent" android:layout_height="fill_parent" android:orientation="vertical" > <FrameLayout android:id="@+id/realtabcontent" android:layout_width="fill_parent" android:layout_height="0dip" android:layout_weight="1" /> <android.support.v4.app.FragmentTabHost android:id="@android:id/tabhost" android:layout_width="fill_parent" android:layout_height="wrap_content" android:background="@drawable/maintab_toolbar_bg"> <FrameLayout android:id="@android:id/tabcontent" android:layout_width="0dp" android:layout_height="0dp" android:layout_weight="0" /> </android.support.v4.app.FragmentTabHost> </LinearLayout>
2、Tabbutton选项布局,tab_item_view.xml:
<?xml version="1.0" encoding="utf-8"?>
<LinearLayout xmlns:android="http://schemas.android.com/apk/res/android"
    android:layout_width="wrap_content"
    android:layout_height="wrap_content"
    android:gravity="center"
    android:orientation="vertical" >

    <ImageView
        android:id="@+id/imageview"
        android:layout_width="wrap_content"
        android:layout_height="wrap_content"
        android:focusable="false"
        android:padding="3dp"
        android:src="@drawable/tab_home_btn">
    </ImageView>

    <TextView
        android:id="@+id/textview"
        android:layout_width="wrap_content"
        android:layout_height="wrap_content"
        android:text="首页"
        android:textSize="10sp"
        android:textColor="#ffffff">
    </TextView>

</LinearLayout>
3、fragment布局界面。这里仅仅列出一个,fragment_1.xml:
<?xml version="1.0" encoding="utf-8"?>
<LinearLayout xmlns:android="http://schemas.android.com/apk/res/android"
    android:layout_width="fill_parent"
    android:layout_height="fill_parent" >

    <ImageView
        android:id="@+id/imageview"
        android:layout_width="fill_parent"
        android:layout_height="fill_parent"
        android:scaleType="fitCenter"
        android:src="@drawable/xianjian01" >
    </ImageView>

</LinearLayout>
4、Tab选项的自己定义button资源文件。列出当中一个button,tab_home_btn:
<?xml version="1.0" encoding="utf-8"?>
<selector xmlns:android="http://schemas.android.com/apk/res/android">

    <item android:drawable="@drawable/icon_home_sel" android:state_selected="true"/>
    <item android:drawable="@drawable/icon_home_nor"/>

</selector>
5、Tab选项button背景资源文件。selector_tab_background.xml:
<?xml version="1.0" encoding="utf-8"?>
<selector xmlns:android="http://schemas.android.com/apk/res/android">

    <item android:drawable="@drawable/home_btn_bg" android:state_pressed="true"/>
    <item android:drawable="@drawable/home_btn_bg" android:state_selected="true"/>

</selector>6、主Activity类,MainTabActivity.Java:
package com.yangyu.mycustomtab02;

import android.os.Bundle;
import android.support.v4.app.FragmentActivity;
import android.support.v4.app.FragmentTabHost;
import android.view.LayoutInflater;
import android.view.View;
import android.widget.ImageView;
import android.widget.TabHost.TabSpec;
import android.widget.TextView;

/**
 * @author yangyu
 *	功能描写叙述:自己定义TabHost
 */
public class MainTabActivity extends FragmentActivity{
	//定义FragmentTabHost对象
	private FragmentTabHost mTabHost;

	//定义一个布局
	private LayoutInflater layoutInflater;

	//定义数组来存放Fragment界面
	private Class fragmentArray[] = {FragmentPage1.class,FragmentPage2.class,FragmentPage3.class,FragmentPage4.class,FragmentPage5.class};

	//定义数组来存放button图片
	private int mImageViewArray[] = {R.drawable.tab_home_btn,R.drawable.tab_message_btn,R.drawable.tab_selfinfo_btn,
									 R.drawable.tab_square_btn,R.drawable.tab_more_btn};

	//Tab选项卡的文字
	private String mTextviewArray[] = {"首页", "消息", "好友", "广场", "很多其它"};

	public void onCreate(Bundle savedInstanceState) {
        super.onCreate(savedInstanceState);
        setContentView(R.layout.main_tab_layout);

        initView();
    }

	/**
	 * 初始化组件
	 */
	private void initView(){
		//实例化布局对象
		layoutInflater = LayoutInflater.from(this);

		//实例化TabHost对象,得到TabHost
		mTabHost = (FragmentTabHost)findViewById(android.R.id.tabhost);
		mTabHost.setup(this, getSupportFragmentManager(), R.id.realtabcontent);

		//得到fragment的个数
		int count = fragmentArray.length;

		for(int i = 0; i < count; i++){
			//为每个Tabbutton设置图标、文字和内容
			TabSpec tabSpec = mTabHost.newTabSpec(mTextviewArray[i]).setIndicator(getTabItemView(i));
			//将Tabbutton加入进Tab选项卡中
			mTabHost.addTab(tabSpec, fragmentArray[i], null);
			//设置Tabbutton的背景
			mTabHost.getTabWidget().getChildAt(i).setBackgroundResource(R.drawable.selector_tab_background);
		}
	}

	/**
	 * 给Tabbutton设置图标和文字
	 */
	private View getTabItemView(int index){
		View view = layoutInflater.inflate(R.layout.tab_item_view, null);

		ImageView imageView = (ImageView) view.findViewById(R.id.imageview);
		imageView.setImageResource(mImageViewArray[index]);

		TextView textView = (TextView) view.findViewById(R.id.textview);
		textView.setText(mTextviewArray[index]);

		return view;
	}
}
7、Fragment页面,FragmentPage1.java:
package com.yangyu.mycustomtab02;

import android.os.Bundle;
import android.support.v4.app.Fragment;
import android.view.LayoutInflater;
import android.view.View;
import android.view.ViewGroup;

public class FragmentPage1 extends Fragment{

	@Override
	public View onCreateView(LayoutInflater inflater, ViewGroup container,Bundle savedInstanceState) {
		return inflater.inflate(R.layout.fragment_1, null);
	}
}


 2万+
2万+


 被折叠的 条评论
为什么被折叠?
被折叠的 条评论
为什么被折叠?
 到【灌水乐园】发言


