Laravel Application 的默认目录结构如下
app/
├─Console
│  └─Commands
├─Events
├─Exceptions
├─Http
│  ├─Controllers
│  │  └─Auth
│  ├─Middleware
│  └─Requests
├─Jobs
├─Listeners
├─Models
├─Policies
└─Providers
虽然我们可以利用 psr-4 标准的自动载入灵活的使用命名空间对 controller/model 分组来简单的模拟实现“模块”,但这种方式严格上讲并不是标准的模块,尤其是在版本迭代较快的 Api 开发中,我比较喜欢将一个版本的 Api 作为一个独立的模块去管理。
一个模块应该有自己独立的一套 MVC,laravel 自带的约定结构并不能实现,所以我们需要借助第三方包来完成这项功能。
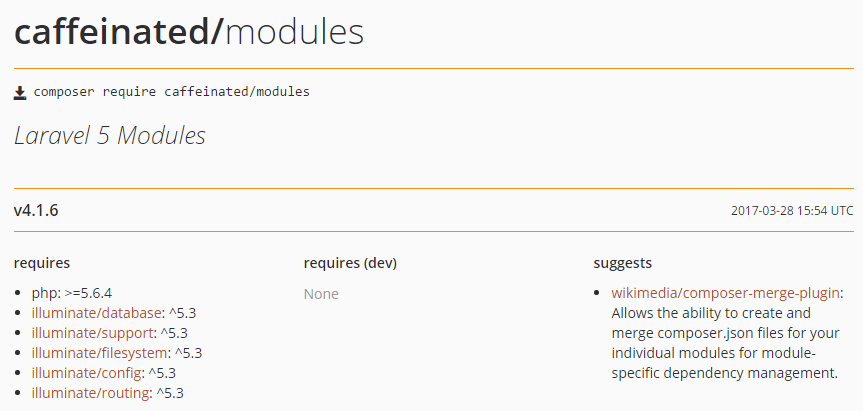
caffeinated/modules
caffeinated/modules 是 laravel5 实现多模块开发扩展包,安装完成后可以使用 artisan 命令创建一个独立的 mvc 模块,方便我们快速的构建 laravel 的多模块应用。
packagist 的地址:https://packagist.org/packages/caffeinated/modules

由于我用的 wamp 集成环境 php 还是 5.5 的版本,所以 composer 给我装的 laravel ^5.2,所以 composer 会默认给我安装 caffeinated/modules ^3.2.* 版本,后续的版本需要 larvael ^5.3 了,这里就不纠结这问题了。
安装依赖
#在项目目录执行依赖安装命令
composer require caffeinated/modules
执行成功后扩展包就安装到我们当前项目了
注册服务器提供者和门面
# file: config/app.config

# 在 providers 配置项中添加注册服务提供者
Caffeinated\Modules\ModulesServiceProvider::class

# 在 alias 配置项中添加注册门面
'Module' => Caffeinated\Modules\Facades\Module::class
到这里就安装完成了,下面我们可以构建自己的模块了。
生成模块
比如我们想创建一个 Api 模块:php artisan make:module Api
php artisan make:module Api
*-----------------------------------------------*
|                                               |
|              Copyright (c) 2016               |
|                  Shea Lewis                   |
|                                               |
|         Thanks for using Caffeinated!         |
*-----------------------------------------------*
______  ___     _________      ______
___   |/  /___________  /___  ____  /____________
__  /|_/ /_  __ \  __  /_  / / /_  /_  _ \_  ___/
_  /  / / / /_/ / /_/ / / /_/ /_  / /  __/(__  )
/_/  /_/  \____/\__,_/  \__,_/ /_/  \___//____/

*-----------------------------------------------*
|                                               |
|          Step #1: Configure Manifest          |
|                                               |
*-----------------------------------------------*


 Please enter the name of the module: [Api]:
 > Api

 Please enter the slug for the module: [api]:
 > api

 Please enter the module version: [1.0]:
 > 1.0

 Please enter the description of the module: [This is th
 > application api module

 Please enter the author of the module: [ ]:
 > big_cat

 Please enter the module license: [MIT]:
 >

You have provided the following manifest information:
Name:        Api
Slug:        api
Version:     1.0
Description: application api module
Author:      big_cat
License:     MIT

 Do you wish to continue? (yes/no) [no]:
 > yes

Thanks! That's all we need.
Now relax while your module is generated for you.
 0/4 [>---------------------------]   0%
 1/4 [=======>--------------------]  25%
 2/4 [==============>-------------]  50%
 3/4 [=====================>------]  75%
 4/4 [============================] 100%
Module generated successfully.
创建完成!
这时我们再看下 app 目录的结构
├─Console
│  └─Commands
├─Events
├─Exceptions
├─Http
│  ├─Controllers
│  │  └─Auth
│  ├─Middleware
│  └─Requests
├─Jobs
├─Listeners
├─Modules
│  └─api
│      ├─Console
│      ├─Database
│      │  ├─Migrations
│      │  └─Seeds
│      ├─Http
│      │  ├─Controllers
│      │  ├─Middleware
│      │  └─Requests
│      ├─Providers
│      └─Resources
│          ├─Lang
│          └─Views
├─Policies
└─Providers
可以看到 modules 模块目录下存放着我们新建的 api 模块,拥有自己独立的 mvc 结构'且拥有自己的独立的路由配置:我们可以方便的在此处配置模块的路由
<?php
//file:app/modules/api/Http/route.php
/*
|--------------------------------------------------------------------------
| Module Routes
|--------------------------------------------------------------------------
|
| Here is where you can register all of the routes for the module.
| It's a breeze. Simply tell Laravel the URIs it should respond to
| and give it the Closure to execute when that URI is requested.
|
*/

Route::group(['prefix' => 'api'], function() {

	Route::get('/', function() {
		dd('This is the Api module index page.');
	});

    //通过这则路由演示下模块的命名空间以及其视图的命名空间
	Route::get('/index', 'IndexController@index');

});
访问 http://domain/api 即可访问此模块
模块加载机制
模块服务注册
Caffeinated\Modules\ModulesServiceProvider
ModulesServiceProvider 主要作用是加载我们创建的模块服务,将各模块的环境参数,最主要的是路由规则注册到服务容器,让容器可以管理各模块。一次请求在我们自己的代码层什么最为重要?肯定是路由注册啦,路由注册作为服务容器分发请求到控制器的起点,必须要作为核心服务加载到服务容器中。
比如我们后面生成了一个 Api 模块,会有一个模块入口服务
app/Modules/api/Providers/ApiServiceProvider.php
模块的入口服务在初始一些模块环境参数,同时会加载本模块的路由服务
app/Modules/api/Providers/RouteServiceProvider.phpApiServiceProvider 的服务为模块入口服务:加载路由服务,同时设置了模块的视图命名空间
public function register()
{
   // 加载本模块的路由服务
   App::register('App\Modules\Api\Providers\RouteServiceProvider');

   // 为 语言包 添加 api命名空间 索引 检索路径
   Lang::addNamespace('api', realpath(__DIR__.'/../Resources/Lang'));
   // 为 视图 添加 api命名空间 索引 检索路径
   // 这里我不在把模块视图放在 resources/views 下 注册到模块自己的视图路径中
   // View::addNamespace('api', base_path('resources/views/vendor/api'));
   View::addNamespace('api', realpath(__DIR__.'/../Resources/Views'));
}
RouteServiceProvider 的服务:注册模块的路由规则
// 本模块路由注册时的基命名空间
protected $namespace = 'App\Modules\Api\Http\Controllers';

// 此处将模块独立的路由配置加载到服务容器中
public function map(Router $router)
{
    $router->group([
        'namespace'  => $this->namespace, // 本模块默认的命名空间
        'middleware' => ['web'] // 本模块默认加载的中间件
    ], function ($router) {
        require (config('modules.path').'/Api/Http/routes.php'); //将路由配置并入服务容器
    });
}
视图命名空间
视图通过添加命名空间可以为某命名空间指定相对应的视图路径,而且可以指定多个,laravel 会以最先匹配的为准。laravel 默认的视图路径是在 resoures/views 下面,而我们通过为视图添加新的命名空间可以自定义视图的加载路径:
View::addNamespace($namespace, $alternate_views_dir_path);如此一来当我们使用
return view("api::index.index");时会根据注册的视图命名空间检索对应的视图路径,源码中的逻辑会先检索
resources/views/vendor/api如果不存对应视图则继续则检索
app/Modules/api/Resources/Views路由命名空间
RouteServiceProvider 服务为服务容器提供路由注册/解析的功能组件
这里简单说一下路由的默认命名空间:
laravel 路由注册控制器的命名空间并不是开放的,这意味着你无法在注册控制器时访问根命名空间(handler 如果是闭包函数则不受影响)。以下讲解皆为 handler 为控制器的场景:
laravel 路由服务本身有自己的 控制器 handler 基命名空间,如下:
// file:app/Providers/RouteServiceProvider.php
protected $namespace = 'App\Http\Controllers';
// file:app/Modules/api/Providers/RouteServiceProvider.php
protected $namespace = 'App\Modules\Api\Http\Controllers';在路由服务中注册的任何命名空间都是以本路由服务中的基命名空间为前缀向后拼加的,所以我们在注册控制器的时候可以不用补全控制器的全路径。但这也造成你没办法利用 psr-4 规范灵活的在当前模块下注册绑定其他模块的控制器来处理请求,比如:
<?php
Route::group(['namespace' => '\App\Api\Controllers'], function () {
    Route::get('/api', "IndexController@index");
});
并不会从 app\Api\Controllers 路径加载控制器,此路由规则的完整命名空间会被拼接成
\App\Http\Controllers\App\Api\Controllers不过这样也就省去了我们自己要书写可能长的让你抓狂的命名空间的烦恼,而且这也是模块化的体现,相互隔离,不应该交织访问。
模块实例
路由注册
<?php
//file:app/modules/api/Http/route.php
/*
|--------------------------------------------------------------------------
| Module Routes
|--------------------------------------------------------------------------
|
| Here is where you can register all of the routes for the module.
| It's a breeze. Simply tell Laravel the URIs it should respond to
| and give it the Closure to execute when that URI is requested.
|
*/

Route::group(['prefix' => 'api'], function() {

	Route::get('/', function() {
		dd('This is the Api module index page.');
	});

    // 注意当前路由服务的基命名空间
    // 完整的类名为:App\Modules\Api\Http\Controllers\IndexController
	Route::get('/index/{name?}', 'IndexController@index');

});
IndexController 控制器
<?php
//file:app/Modules/api/Http/Controllers/IndexController.php
/**
 * Created by PhpStorm.
 * User: think
 * Date: 2017/4/27 0027
 * Time: 20:47
 */

namespace App\Modules\Api\Http\Controllers;

use App\Http\Controllers\Controller;
use Illuminate\Http\Request;

class IndexController extends Controller
{
    public function __construct()
    {
    }

    public function index(Request $request, $name = "")
    {
        $msg = "hello " . $name;
        // 在 ApiServiceProvider 中我指定了命名空间api 的视图路径为模块视图
        return view('api::index.index', ["msg" => $msg]);
    }
}
视图:注意我在模块的入口服务中注册的视图命名空间
<!--file:app/Modules/api/Resources/Views/index/index.blade.php-->
<!doctype html>
<html lang="en">
<head>
    <meta charset="UTF-8">
    <title>Document</title>
</head>
<body>
{{ $msg }}
</body>
</html>
访问 http://domain/api/index/big_cat 即可看到模块正常运行了!
多模块构建和开发完毕,再总结需要注意的几点:
1、视图命名空间:我们可以通过定义视图的命名空间来指定新的视图路径,从而更好的配合模块开发
2、路由命名空间:路由规则的 handler 为指定的控制器时,会启用当前路由服务的基命名空间,你是没办法访问根命名空间的,除非你把基命名空间设为 "\",我们可以在自带的 http 模块中载入其他模块,但这样又使得你 handler 必须补全完整的类名,折中考虑构建多模块开发才是方便。


 1888
1888

 被折叠的 条评论
为什么被折叠?


