


在空余时间学习下NetCore,记录日常,供参考。
1.确保已下载安装NetCore2.2SDK 环境,下载地址:https://dotnet.microsoft.com/download/dotnet-core/2.2

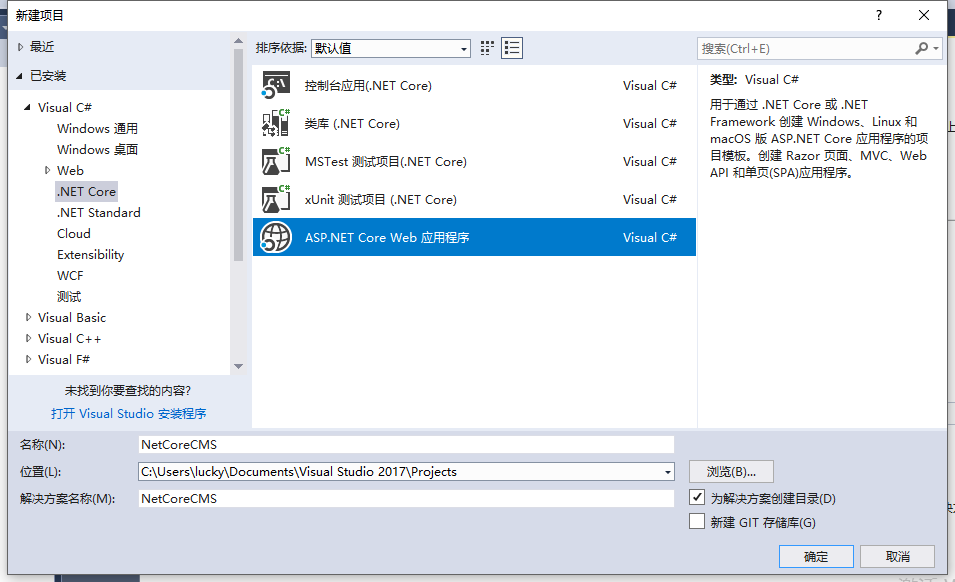
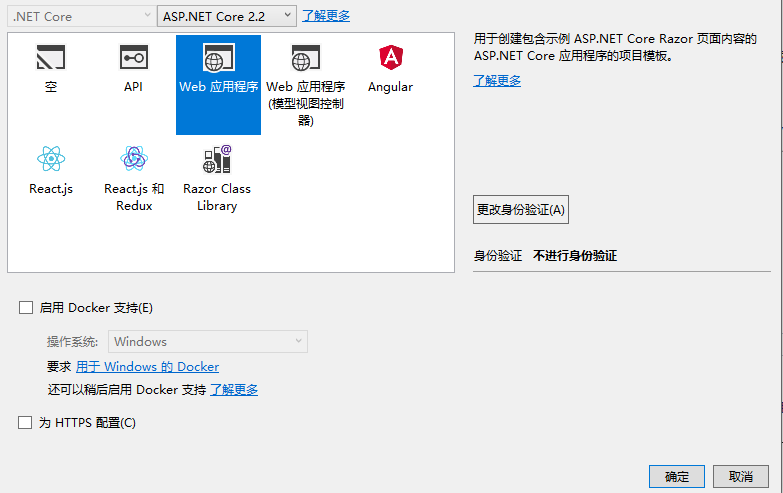
2.打开VS2017,首先新建一个解决方案,并在解决方案上新建项目操作,选择ASP.NET Core Web 应用程序,点击“确定”。继续,NetCore版本选择ASP.NET Core 2.2,类型选择“Web应用程序”点击确定。
3、在appsettings.json添加配置数据库链接字符串,添加后如下图
{
  "Logging": {
    "IncludeScopes": false,
    "LogLevel": {
      "Default": "Warning"
    }
  },
  "AllowedHosts": "*",
  "ConnectionStrings": { "DefaultConnectionString": "Data Source=.;Initial Catalog=bcmf_core;User ID=sa;Password=123456" }
}
4.NetCore2.2的SDK正常包含有Microsoft.EntityFrameworkCore和microsoft.EntityFrameworkCore.SqlServer,若没有,可以在NuGet包中查询安装,这里也是安装的2.2版本
NuGet官网:https://www.nuget.org/
搜索以上两个引用名称,获取安装命令行,在VS2017的程序包管理器控制台输入对应命令行,如下:

5.在Models文件夹新建文件夹“Entity”,在Entity下存放我们的数据实体类,新建实体类User.cs,这里视个人情况而定,我选择的是以前项目的一个测试数据库。
using System;
using System.Collections.Generic;
using System.Linq;
using System.Threading.Tasks;

namespace NetCoreCMS.Models.Entity
{
    public class User
    {
        public int UserId { get; set; }
        public int PermissionId { get; set; }
        public int RoleId { get; set; }
        public string Name { get; set; }
        public string NameCN { get; set; }
        public string Email { get; set; }
        public string Password { get; set; }
        public bool IsSystem { get; set; }
        public bool IsActive { get; set; }
    }

    /// <summary>
    /// 返回模型类
    /// </summary>
  public class UserViewModel
    {
        public int UserId { get; set; }
        public int PermissionId { get; set; }
        public int RoleId { get; set; }
        public string Name { get; set; }
        public string NameCN { get; set; }
        public string Email { get; set; }
        public string IsSystem { get; set; }
        public string IsActive { get; set; }
    }
}
5、在Models文件夹新建文件夹“Mapping”,在Mapping下存放我们的数据实体映射类,新建实体类UserMapping.cs,
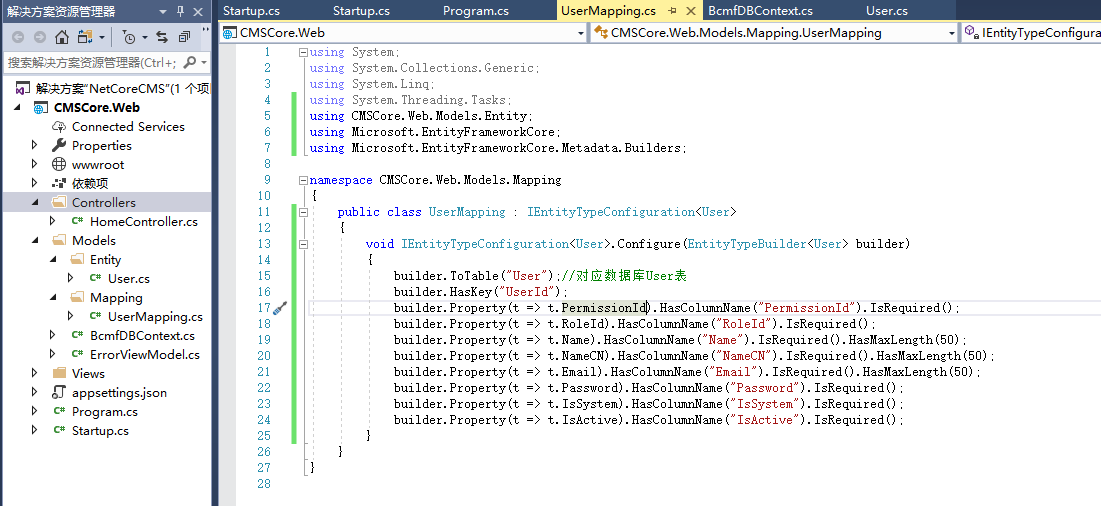
using System;
using System.Collections.Generic;
using System.Linq;
using System.Threading.Tasks;
using CMSCore.Web.Models.Entity;
using Microsoft.EntityFrameworkCore;
using Microsoft.EntityFrameworkCore.Metadata.Builders;

namespace CMSCore.Web.Models.Mapping
{
    public class UserMapping : IEntityTypeConfiguration<User>
    {
        void IEntityTypeConfiguration<User>.Configure(EntityTypeBuilder<User> builder)
        {
            builder.ToTable("User");//对应数据库User表
            builder.HasKey("UserId");
            builder.Property(t => t.PermissionId).HasColumnName("PermissionId").IsRequired();
            builder.Property(t => t.RoleId).HasColumnName("RoleId").IsRequired();
            builder.Property(t => t.Name).HasColumnName("Name").IsRequired().HasMaxLength(50);
            builder.Property(t => t.NameCN).HasColumnName("NameCN").IsRequired().HasMaxLength(50);
            builder.Property(t => t.Email).HasColumnName("Email").IsRequired().HasMaxLength(50);
            builder.Property(t => t.Password).HasColumnName("Password").IsRequired();
            builder.Property(t => t.IsSystem).HasColumnName("IsSystem").IsRequired();
            builder.Property(t => t.IsActive).HasColumnName("IsActive").IsRequired();
        }
    }
}
6、在Models文件夹新建上下文BcmfContext.cs类
using CMSCore.Web.Models.Entity;
using CMSCore.Web.Models.Mapping;
using Microsoft.EntityFrameworkCore;

namespace CMSCore.Web.Models
{
    public class BcmfDBContext : DbContext
    {
        public BcmfDBContext(DbContextOptions options) : base(options)
        {
        }

        public DbSet<User> User { get; set; }
protected override void OnModelCreating(ModelBuilder modelBuilder)
        {
            modelBuilder.ApplyConfiguration(new UserMapping());
            base.OnModelCreating(modelBuilder);
        }
    }
}
7、在入口文件注册上下文,在根目录Startup.cs的ConfigureServices方法中,注册上下文。
不要忘记了添加引用命名空间
using Microsoft.EntityFrameworkCore;
using Microsoft.EntityFrameworkCore.SqlServer;
 // This method gets called by the runtime. Use this method to add services to the container.
        public void ConfigureServices(IServiceCollection services)
        {
            services.Configure<CookiePolicyOptions>(options =>
            {
                // This lambda determines whether user consent for non-essential cookies is needed for a given request.
                options.CheckConsentNeeded = context => true;
                options.MinimumSameSitePolicy = SameSiteMode.None;
            });

            services.AddMvc().SetCompatibilityVersion(CompatibilityVersion.Version_2_2);
            //注册数据库操作上下文
            services.AddDbContext<BcmfDBContext>(option => option.UseSqlServer(Configuration.GetConnectionString("DefaultConnectionString")));
        }
8、在Controller文件夹下,创建控制器UserController.cs
using System;
using System.Collections.Generic;
using System.Linq;
using System.Threading.Tasks;
using CMSCore.Web.Models;
using CMSCore.Web.Models.Entity;
using Microsoft.AspNetCore.Mvc;

// For more information on enabling MVC for empty projects, visit https://go.microsoft.com/fwlink/?LinkID=397860

namespace CMSCore.Web.Controllers
{
    public class UserController : Controller
    {
        private readonly BcmfDBContext db;

        public UserController(BcmfDBContext _db)
        {
            db = _db;
        }

        // GET: /<controller>/
        public IActionResult Index()
        {
            var userList = db.User.Where(m => m.IsActive).Select(t => new UserViewModel
            {
                Email = t.Email,
                IsActive = t.IsActive ? "激活" : "禁用",
                IsSystem = t.IsSystem ? "是" : "否",
                Name = t.Name,
                NameCN = t.NameCN,
                PermissionId = t.PermissionId,
                RoleId = t.RoleId,
                UserId = t.UserId
            });
            return Json(userList);
        }
    }
}
运行、访问/user/index,成功获取用户信息


 1569
1569


 被折叠的 条评论
为什么被折叠?
被折叠的 条评论
为什么被折叠?
 到【灌水乐园】发言


