


gitLab是个好东西,优势比SVN还真不是一星半点,具体有关git的相关知识可以去廖雪峰的网站去学习:(http://www.liaoxuefeng.com/wiki/0013739516305929606dd18361248578c67b8067c8c017b000/)
下边为git服务器的搭建过程,centos下有很多坑,下边我给出我的搭建过程,仅供参考
1.安装gitlab需要的工具
yum -y update
yum -y groupinstall 'Development Tools'
yum -y install readline readline-devel ncurses-devel gdbm-devel glibc-devel tcl-devel openssl-devel curl-devel expat-devel db4-devel byacc sqlite-devel libyaml libyaml-devel libffi libffi-devel libxml2 libxml2-devel libxslt libxslt-devel libicu libicu-devel system-config-firewall-tui redis sudo wget crontabs logwatch logrotate perl-Time-HiRes git cmake libcom_err-devel.i686 libcom_err-devel.x86_64 nodejs

# For reStructuredText markup language support, install required package:
yum -y install python-docutils
2.install mail server
yum -y install postfix3.配置默认编辑器
# Install vim and set as default editor
yum -y install vim-enhanced
ln -s /usr/bin/vim /usr/bin/editor
rm -i /usr/bin/editor
4.安装git
git --version //git版本查看,安装git2.7或者以上版本如果git版本比较低,先删除git,如下命令
yum -y remove git安装git所需要依赖
yum install zlib-devel perl-CPAN gettext curl-devel expat-devel gettext-devel openssl-devel下载并且提取git
mkdir /tmp/git && cd /tmp/git
curl --progress https://www.kernel.org/pub/software/scm/git/git-2.9.0.tar.gz | tar xz  //下载可能会比较慢
cd git-2.9.0
./configure
make
make prefix=/usr/local install
然后新建终端:查看git版本
5.安装ruby
清理掉自带的低版本的ruby
yum remove ruby

cd <your-ruby-source-path>
make uninstall
安装并且提取ruby
mkdir /tmp/ruby && cd /tmp/ruby
curl --progress https://cache.ruby-lang.org/pub/ruby/2.1/ruby-2.1.9.tar.gz | tar xz   //下载可能比较慢,慢的时候可以试试重新下载
cd ruby-2.1.9
./configure --disable-install-rdoc
make
make prefix=/usr/local install
install the Bundler Gem
gem install bundler --no-doc新建终端查看ruby的版本信息
which ruby
# /usr/local/bin/ruby
ruby -v
# ruby 2.1.10p492 (2016-04-01 revision 54464) [x86_64-linux]
6.安装go语言
yum install golang golang-bin golang-src7.安装mysql
yum install -y mysql-server mysql-devel
chkconfig mysqld on
service mysqld start
如果yum install -y msql-server mysql-devel的时候报没有mysqlserver的安装包的时候:
wget http://repo.mysql.com/mysql-community-release-el7-5.noarch.rpm
rpm -ivh mysql-community-release-el7-5.noarch.rpm
然后再执行第一条安装mysql server的语句
确定mysql的版本
mysql --version确保安装
mysql_secure_installation登录mysql
mysql -u root -p为gitlab创建用户
CREATE USER 'git'@'localhost' IDENTIFIED BY 'gitpwd';确保你可以使用InnoDB引擎必须支持长指标
SET storage_engine=INNODB;为gitlab创建数据库
CREATE DATABASE IF NOT EXISTS `gitlabhq_production` DEFAULT CHARACTER SET `utf8` COLLATE `utf8_unicode_ci`;为gitlab用户创建数据库权限
GRANT SELECT, INSERT, UPDATE, DELETE, CREATE, CREATE TEMPORARY TABLES, DROP, INDEX, ALTER, LOCK TABLES, REFERENCES ON `gitlabhq_production`.* TO 'git'@'localhost';退出
\q测试gitlab账户
sudo -u git -H mysql -u git -p -D gitlabhq_production8、安装redis
卸载旧版本
yum remove redis安装新版本
yum --enablerepo=remi,remi-test install redis如果安装不了,参考下边的命令
解决办法一:yum添加epel源
yum添加epel源:yum install epel-release回车
再次:yum install redis回车,然后根据提示
授权等
Make sure redis is started on boot:
chkconfig redis on
Configure redis to use sockets:
cp /etc/redis.conf /etc/redis.conf.orig
Disable Redis listening on TCP by setting 'port' to 0:
sed 's/^port .*/port 0/' /etc/redis.conf.orig | sudo tee /etc/redis.conf
Enable Redis socket for default CentOS path:
echo 'unixsocket /var/run/redis/redis.sock' | sudo tee -a /etc/redis.conf
echo -e 'unixsocketperm 0770' | sudo tee -a /etc/redis.conf
Create the directory which contains the socket
mkdir /var/run/redis
chown redis:redis /var/run/redis
chmod 755 /var/run/redis
Persist the directory which contains the socket, if applicable
if [ -d /etc/tmpfiles.d ]; then
    echo 'd  /var/run/redis  0755  redis  redis  10d  -' | sudo tee -a /etc/tmpfiles.d/redis.conf
fi
Activate the changes to redis.conf:
service redis restart
Add git to the redis group:
usermod -aG redis git9.安装gitlab
推荐bitnami下载打包安装版本 https://bitnami.com/stack/gitlab/installer ,省去很多时间。他们也提供相关WIKI
以centos为演示环境,来安装这个包,切换到root账户, 在终端运行:
./bitnami-gitlab-7.1.1-0-linux-x64-installer.run默认同时安装了GitLab CI, 后然配置Apache的端口,MySQL的端口,注意如果默认端口80, 3306有占用,需要修改。就不截图 了。
这个包默认会安装独立的MySQL,如果需要配置已有Mysql数据库,那么请手工逐个安装各个组件。安装完成后,服务就启动了。
配置OS自动启动:
sudo update-rc.d gitlab defaults 21启动gitlab
cd进gitlab安装目录下
[root@stark gitlab-7.4.3-0]# ./ctlscript.sh start
/opt/gitlab-7.4.3-0/mysql/scripts/ctl.sh : mysql  (pid 14322) already running
/opt/gitlab-7.4.3-0/redis/scripts/ctl.sh : redis (pid 14546) already running
/opt/gitlab-7.4.3-0/apps/gitlab/scripts/sidekiq.sh : gitlab_sidekiq  (pid 14930) already running
/opt/gitlab-7.4.3-0/apps/gitlabci/scripts/sidekiq.sh : gitlabci_sidekiq  (pid 15179) already running
/opt/gitlab-7.4.3-0/apps/gitlabci/scripts/runner.sh : gitlabci_runner (pid 15481
15482) already running
Syntax OK
/opt/gitlab-7.4.3-0/apache2/scripts/ctl.sh : httpd (pid 15338) already running
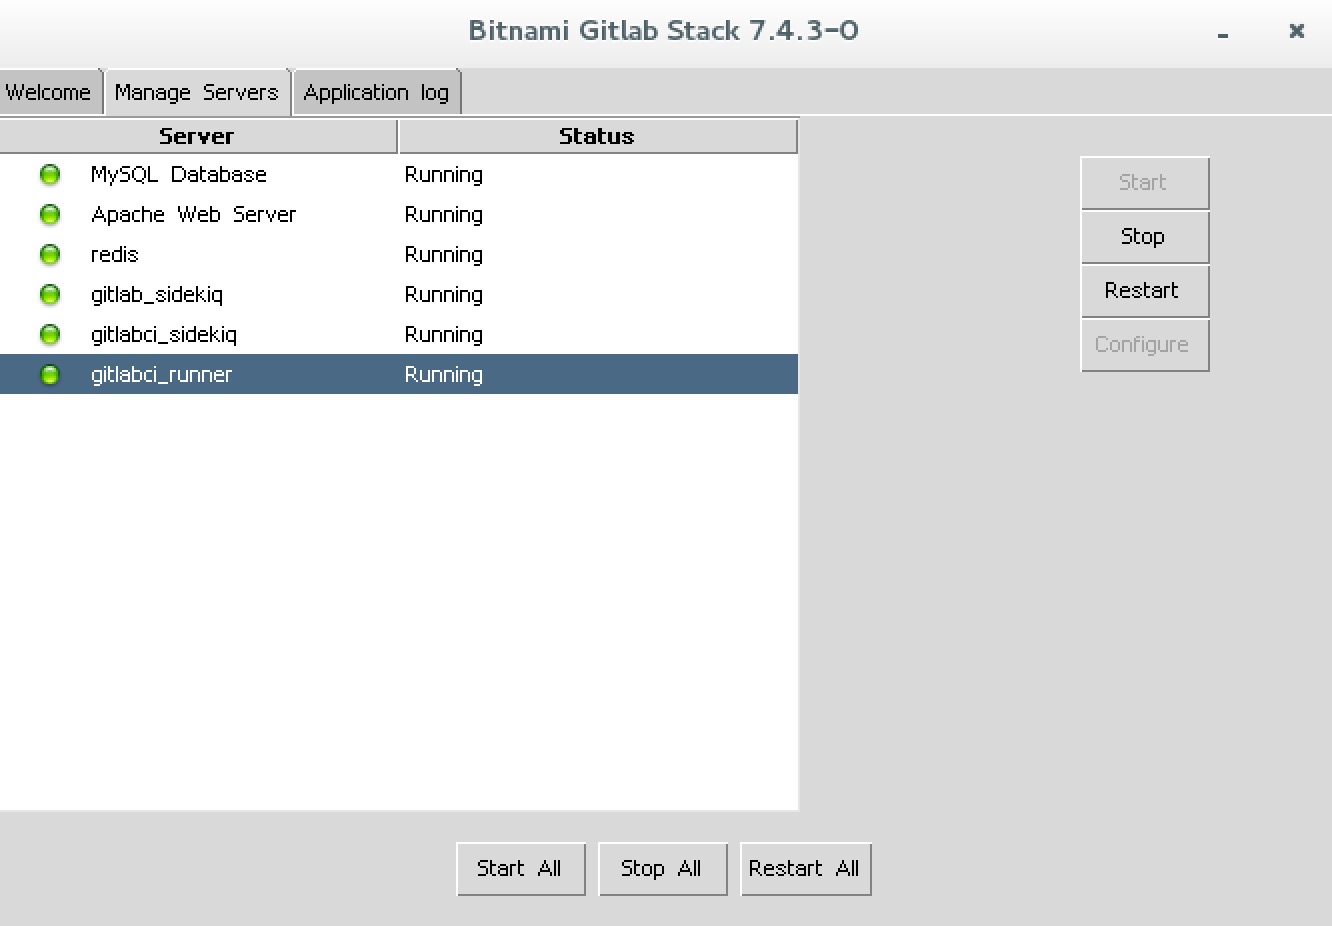
也可以查看GUI管理控制台 ./manager-linux-x64.run
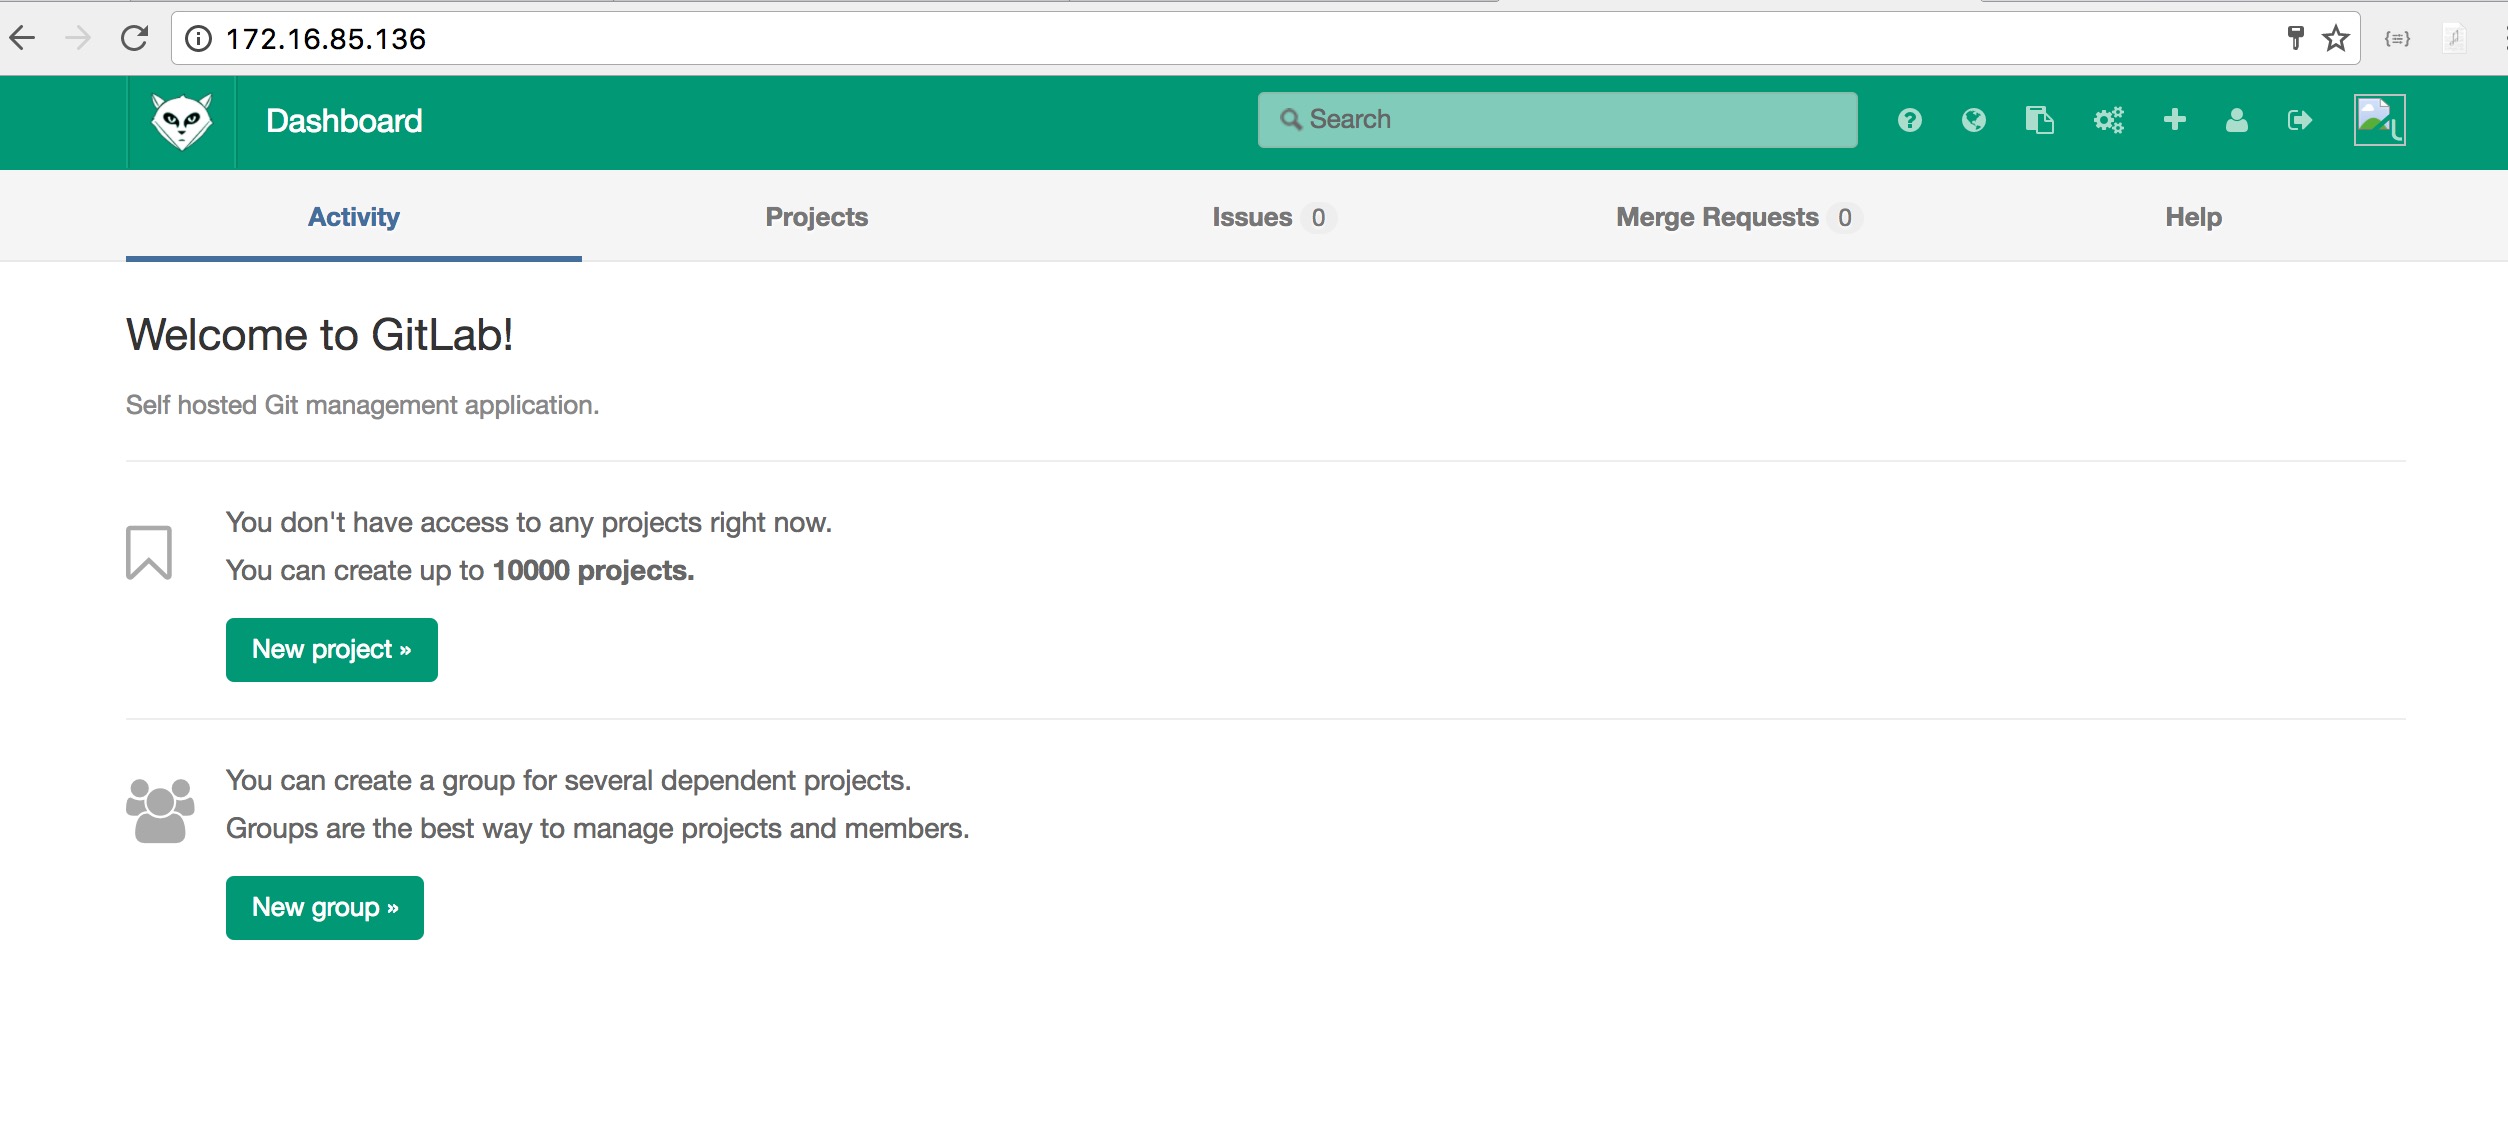
登录gitlab


 137
137

 被折叠的 条评论
为什么被折叠?
被折叠的 条评论
为什么被折叠?
 到【灌水乐园】发言


