


废话不多说,直接上干货,不会的话可以来找我。
一、权限管理
悬浮窗权限:
权限检验和请求:
//检查是否已经授予权限,大于6.0的系统适用,小于6.0系统默认打开,无需理会 if (Build.VERSION.SDK_INT >= Build.VERSION_CODES.M&&!Settings.canDrawOverlays(this)) { //没有权限,需要申请权限,因为是打开一个授权页面,所以拿不到返回状态的,所以建议是在onResume方法中从新执行一次校验 Intent intent = new Intent(Settings.ACTION_MANAGE_OVERLAY_PERMISSION); intent.setData(Uri.parse("package:" + getPackageName())); startActivityForResult(intent, 100); }else{ //已经有权限,可以直接显示悬浮窗 } 其他注意问题:
//因为部分type在部分系统中已经废弃,懒得看文档,下面是我亲测是兼容7.0和8.0系统的方法 if (Build.VERSION.SDK_INT < Build.VERSION_CODES.O) { wmParams.type = WindowManager.LayoutParams.TYPE_SYSTEM_ALERT; } else { wmParams.type = WindowManager.LayoutParams.TYPE_APPLICATION_OVERLAY; }二、Base类BaseSuspend
import android.content.Context;import android.graphics.PixelFormat;import android.os.Build;import android.view.Gravity;import android.view.LayoutInflater;import android.view.View;import android.view.WindowManager; import com.imxiaoyu.common.utils.entity.SizeEntity; public abstract class BaseSuspend { private Context context; private View view; private boolean isShowing = false; /** * UI */ private WindowManager.LayoutParams wmParams;//悬浮窗的布局 /** * 变量 */ private WindowManager mWindowManager;//创建浮动窗口设置布局参数的对象 /** * 接口 */ private OnSuspendDismissListener onSuspendDismissListener; public BaseSuspend(Context context) { this.context = context; view = LayoutInflater.from(context).inflate(getLayoutId(), null); init(); initView(); onCreateSuspension(); } public void init() { if (mWindowManager == null) { mWindowManager = (WindowManager) context.getApplicationContext().getSystemService(Context.WINDOW_SERVICE); } wmParams = getParams();//设置好悬浮窗的参数 // 悬浮窗默认显示以左上角为起始坐标 wmParams.gravity = Gravity.LEFT | Gravity.TOP; } /** * 布局文件id,这里是用不到的,但还是建议填写,方便跳转到布局管理 * * @return */ protected abstract int getLayoutId(); /** * 注册需要使用的控件 */ protected abstract void initView(); protected abstract void onCreateSuspension(); /** * 根据id快速找到控件 * * @param id * @param * @return */ public final E findView(int id) { try { return (E) view.findViewById(id); } catch (ClassCastException ex) { throw ex; } } /** * 根据id快速找到控件 * * @param id * @param onClickListener * @param * @return */ public final E findView(int id, View.OnClickListener onClickListener) { E e = findView(id); e.setOnClickListener(onClickListener); return e; } /** * 对windowManager进行设置 * * @return */ public WindowManager.LayoutParams getParams() { wmParams = new WindowManager.LayoutParams(); //设置window type 下面变量2002是在屏幕区域显示,2003则可以显示在状态栏之上 //wmParams.type = LayoutParams.TYPE_PHONE; if (Build.VERSION.SDK_INT < Build.VERSION_CODES.O) { wmParams.type = WindowManager.LayoutParams.TYPE_SYSTEM_ALERT; } else { wmParams.type = WindowManager.LayoutParams.TYPE_APPLICATION_OVERLAY; }// wmParams.type = WindowManager.LayoutParams.TYPE_SYSTEM_ERROR; //设置图片格式,效果为背景透明 wmParams.format = PixelFormat.RGBA_8888; //设置浮动窗口不可聚焦(实现操作除浮动窗口外的其他可见窗口的操作) //wmParams.flags = LayoutParams.FLAG_NOT_FOCUSABLE; //设置可以显示在状态栏上 wmParams.flags = WindowManager.LayoutParams.FLAG_NOT_FOCUSABLE | WindowManager.LayoutParams.FLAG_NOT_TOUCH_MODAL | WindowManager.LayoutParams.FLAG_LAYOUT_IN_SCREEN | WindowManager.LayoutParams.FLAG_LAYOUT_INSET_DECOR | WindowManager.LayoutParams.FLAG_WATCH_OUTSIDE_TOUCH; return wmParams; } /** * 全屏显示悬浮视图 */ public void showSuspend() { showSuspend(0, 0, true); } /** * 显示悬浮视图 * * @param sizeEntity * @param isMatchParent 是否全屏显示 */ public void showSuspend(SizeEntity sizeEntity, boolean isMatchParent) { if (sizeEntity != null) { showSuspend(sizeEntity.getWidth(), sizeEntity.getHeight(), isMatchParent); } } /** * 显示悬浮视图 * * @param width * @param height */ public void showSuspend(int width, int height, boolean isMatchParent) { //设置悬浮窗口长宽数据 if (isMatchParent) { wmParams.width = WindowManager.LayoutParams.MATCH_PARENT; wmParams.height = WindowManager.LayoutParams.MATCH_PARENT; } else { wmParams.width = WindowManager.LayoutParams.WRAP_CONTENT; wmParams.height = WindowManager.LayoutParams.WRAP_CONTENT; } //悬浮窗的开始位置,读取缓存 wmParams.x = width; wmParams.y = height; if (isShowing) { removeView(); } mWindowManager.addView(view, wmParams); isShowing = true; } /** * 更新当前视图的位置 * * @param x 更新后的X轴的增量 * @param y 更新后的Y轴的增量 */ public void updateSuspend(int x, int y) { if (view != null) { //必须是当前显示的视图才给更新 WindowManager.LayoutParams layoutParams = (WindowManager.LayoutParams) view.getLayoutParams(); layoutParams.x += x; layoutParams.y += y; mWindowManager.updateViewLayout(view, layoutParams); } } /** * 移除当前悬浮窗 */ public void dismissSuspend() { if (view != null) { mWindowManager.removeView(view); isShowing = false; if (onSuspendDismissListener != null) { onSuspendDismissListener.onDismiss(); } } } public Context getContext() { return context; } public View getView() { return view; } /** * 是否正在显示 * * @return */ public boolean isShowing() { return isShowing; } /** * 移除弹窗的时候回调 * * @param onSuspendDismissListener */ public void setOnSuspendDismissListener(OnSuspendDismissListener onSuspendDismissListener) { this.onSuspendDismissListener = onSuspendDismissListener; } public interface OnSuspendDismissListener { public void onDismiss(); }}还有里面用到的一个size类:
/** * 宽高实体 * Created by 她叫我小渝 on 2016/11/4. */ public class SizeEntity { private int width; private int height; public SizeEntity(){} public SizeEntity(int width,int height){ setWidth(width); setHeight(height); } public int getWidth() { return width; } public void setWidth(int width) { this.width = width; } public int getHeight() { return height; } public void setHeight(int height) { this.height = height; }}3、定制视图和使用
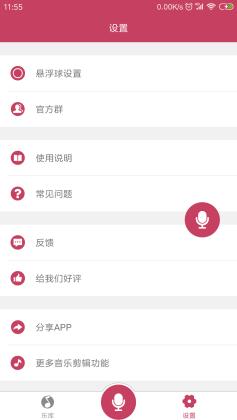
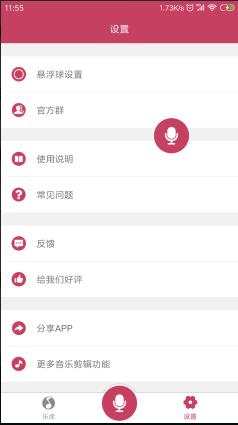
要实现的逻辑是,显示一个悬浮球,然后可以拖动移动悬浮球的位置,效果图:
然后新建一个类,LogoSuspend继承BaseSuspend,里面引用到了一些工具类就不贴出来了,用到的地方我会加上注释
/** * 悬浮球 * Created by 她叫我小渝 on 2017/1/1. */ public class LogoSuspend extends BaseSuspend { /** * ui */ private ImageView ivLogo; /** * 变量 */ private int width, height; private float mStartX, mStartY, mStopX, mStopY, touchStartX, touchStartY; private long touchStartTime; /** * 接口 */ private View.OnClickListener onClickListener; public LogoSuspend(Context context) { super(context); } @Override protected int getLayoutId() { return R.layout.suspend_logo; } @Override protected void initView() { ivLogo = findView(R.id.iv_logo); ivLogo.setOnTouchListener(new View.OnTouchListener() { @Override public boolean onTouch(View view, MotionEvent event) { final int action = event.getAction(); mStopX = event.getRawX(); mStopY = event.getRawY(); switch (action) { case MotionEvent.ACTION_DOWN: // 以当前父视图左上角为原点 mStartX = event.getRawX(); mStartY = event.getRawY(); touchStartX = event.getRawX(); touchStartY = event.getRawY(); touchStartTime = DateUtil.getTimeForLong();//获取当前时间戳 break; case MotionEvent.ACTION_MOVE: width = (int) (mStopX - mStartX); height = (int) (mStopY - mStartY); mStartX = mStopX; mStartY = mStopY; updateSuspend(width, height); break; case MotionEvent.ACTION_UP: width = (int) (mStopX - mStartX); height = (int) (mStopY - mStartY); updateSuspend(width, height); WindowManager.LayoutParams layoutParams = (WindowManager.LayoutParams) getView().getLayoutParams(); SuspensionCache.setSuspendSize(getContext(), new SizeEntity(layoutParams.x + width, layoutParams.y + height));//缓存一下当前位置 if ((mStopX - touchStartX) < 30 && (mStartY - touchStartY) < 30 && (DateUtil.getTimeForLong() - touchStartTime) < 300) { //左右上下移动距离不超过30的,并且按下和抬起时间少于300毫秒,算是单击事件,进行回调 if (onClickListener != null) { onClickListener.onClick(view); } } break; } return true; } }); } @Override protected void onCreateSuspension() { } /** * 设置点击监听 * * @param onClickListener */ public void setOnClickListener(View.OnClickListener onClickListener) { this.onClickListener = onClickListener; }}布局文件syspend_logo.xml
因为Activity是有生命周期的,所以打开悬浮窗的Context上下文,不要用Activity的,而是用Service的
创建并注册一个Service,然后在onCreate方法中执行调用代码就好
@Override public void onCreate() { super.onCreate(); ALog.e("服务已创建"); if (logoSuspend == null) { logoSuspend = new LogoSuspend(this); } logoSuspend.showSuspend(SuspensionCache.getSuspendSize(this), false);//从缓存中提取上一次显示的位置 logoSuspend.setOnClickListener(new View.OnClickListener() { @Override public void onClick(View view) { //处理单击事件 } }); }四、废话
上面的例子,其实还是比较简单的,但一般开发对于悬浮球的需求并不算很大,Base类的话,目前只是最基础的东西,在开发的过程中,需要用到什么了再往里面加就好,问题不大。
目前代码支持同时显示多个悬浮窗、悬浮球,主要用于在于悬浮窗交互的时候,直接弹出其他的交互界面(也是以悬浮窗的状态出现),但建议每一个页面都有关闭按钮或者做返回键关闭的相关操作,毕竟是显示在最前端的,要是关不掉就点哪里都没用,只能是强制关机了…………
()&@()……()@#*¥)()@*#…………@#)()*¥)()…………
五、最后
正在学习Android,或者正在准备Android面试的朋友可以关注我,评论区留言“111”,免费分享Android架构师进阶学习资料,还有大厂面试真题和解析。
种一棵树最好的时间有两个,一个是十年前,另一个就是现在。
学习也是如此。
亡羊补牢,为时不晚。要想进步,不被淘汰,那就要不断学习。


 843
843

 被折叠的 条评论
为什么被折叠?
被折叠的 条评论
为什么被折叠?
 到【灌水乐园】发言


