


背景
在平常的开发中,接收参数是一个很常见的需求,例如用户登录,肯定要把用户名和密码传输过去的。这个时候,我们用什么方法接收呢,这个文档有三个部分。就是用Action、DomainModel、ModelDriven三种方式接收参数。
用Action接收参数
第一种用Action方式接收参数是最简单的一种。看一看代码就都明白了
1. 分析
struts.xml
<?xml version="1.0" encoding="UTF-8" ?>
<!DOCTYPE struts PUBLIC
    "-//Apache Software Foundation//DTD Struts Configuration 2.0//EN"
    "http://struts.apache.org/dtds/struts-2.0.dtd">

<struts>
    <constant name="struts.devMode" value="true" />
    <!-- 名称空间是/user -->
    <package name="user" extends="struts-default" namespace="/user">

    <!-- action_name=user 具体的Action内容看UserAction -->
        <action name="user" class="com.bjsxt.struts2.user.action.UserAction">
            <result>/user_add_success.jsp</result>
        </action>
    </package>
</struts>
UserAction
package com.bjsxt.struts2.user.action;

import com.opensymphony.xwork2.ActionSupport;

public class UserAction extends ActionSupport {
    //定义这个成员变量就是为了来接收参数
    private String name;
    private int age;

    public String add() {
        System.out.println("name=" + name);
        System.out.println("age=" + age);
        return SUCCESS;
    }

    //只要getXXX setXXX和参数的名称相同,就会调用相应方法,把参数值赋给成员变量
    public String getName() {
        return name;
    }

    public void setName(String name) {
        this.name = name;
    }

    public int getAge() {
        return age;
    }

    public void setAge(int age) {
        this.age = age;
    }
}
index.jsp
<?xml version="1.0" encoding="GB18030" ?>
<%@ page language="java" contentType="text/html; charset=GB18030"
pageEncoding="GB18030"%>
<%
String path = request.getContextPath();
String basePath = request.getScheme()+"://"+request.getServerName()+":"+request.getServerPort()+path+"/";
%>
<html xmlns="http://www.w3.org/1999/xhtml">
<head>
<meta http-equiv="Content-Type" content="text/html; charset=GB18030" />
<base href="<%=basePath %>"/>
<title>Insert title here</title>
</head>
<body>
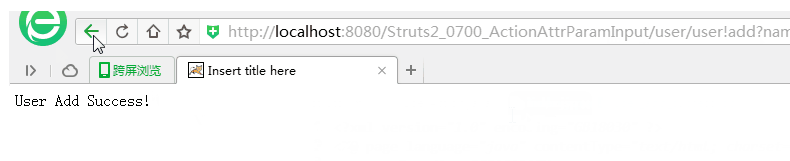
<!-- 可以看得到,传给服务器的参数是name和age,值分别为a和8 -->
使用action属性接收参数<a href="user/user!add?name=a&age=8">添加用户</a>
</body>
</html>
user_add_sucess.jsp
<?xml version="1.0" encoding="GB18030" ?>
<%@ page language="java" contentType="text/html; charset=GB18030"
    pageEncoding="GB18030"%>
    <%@taglib uri="/struts-tags" prefix="s" %>
<html xmlns="http://www.w3.org/1999/xhtml">
    <head>
        <meta http-equiv="Content-Type" content="text/html; charset=GB18030" />
        <title>Insert title here</title>
    </head>
    <body>
        User Add Success!
    </body>
</html>
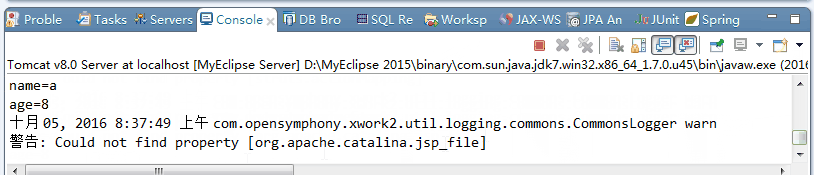
2. 结果
可以看到在控制台,打印出了结果,页面也跳转到了相应页面
DomainModel接收参数
用Action直接接收的话,其实,并不是特别常用,因为我们接收到的参数,肯定不是像上一个demo一样打印出来,肯定是封装到一个bean对象里面,然后传到service层或者dao层,操作数据库。
所以下面这种方式,才是开发中最为常用的一种。
1. 分析
struts.xml
<?xml version="1.0" encoding="UTF-8" ?>
<!DOCTYPE struts PUBLIC
    "-//Apache Software Foundation//DTD Struts Configuration 2.0//EN"
    "http://struts.apache.org/dtds/struts-2.0.dtd">

<struts>
    <constant name="struts.devMode" value="true" />
    <package name="user" extends="struts-default" namespace="/user">

        <action name="user" class="com.bjsxt.struts2.user.action.UserAction">
            <result>/user_add_success.jsp</result>
        </action>
    </package>
</struts>
可以看到struts.xml和上面一个demo是一样的,不一样的东西,在jsp和Action
UserAction
package com.bjsxt.struts2.user.action;

import com.bjsxt.struts2.user.model.User;
import com.opensymphony.xwork2.ActionSupport;

public class UserAction extends ActionSupport {
    // 这里是用的User,也就是bean,但是定义了不用new
    // Struts会帮你new的
    private User user;
    //private UserDTO userDTO;
    public String add() {
        System.out.println("name=" + user.getName());
        System.out.println("age=" + user.getAge());
        return SUCCESS;
    }

    public User getUser() {
        return user;
    }

    public void setUser(User user) {
        this.user = user;
    }
}
index.jsp
<?xml version="1.0" encoding="GB18030" ?>
<%@ page language="java" contentType="text/html; charset=GB18030"
    pageEncoding="GB18030"%>

<%
String path = request.getContextPath();
String basePath = request.getScheme()+"://"+request.getServerName()+":"+request.getServerPort()+path+"/";
%>

<html xmlns="http://www.w3.org/1999/xhtml">
    <head>
        <meta http-equiv="Content-Type" content="text/html; charset=GB18030" />
        <base href="<%=basePath %>"/>
        <title>Insert title here</title>
    </head>
    <body>
<!-- namespace=user action_name=user method=add-->
<!-- 这里的参数就不只是name和age了,实际上是getUser.setName() -->
<!-- getUser().setAge() -->
    使用Domain Model接收参数<a href="user/user!add?user.name=a&user.age=8">添加用户</a>

    </body>
</html>
User就很简单了
package com.bjsxt.struts2.user.model;

public class User {
    private String name;
    private int age;
    public String getName() {
        return name;
    }
    public void setName(String name) {
        this.name = name;
    }
    public int getAge() {
        return age;
    }
    public void setAge(int age) {
        this.age = age;
    }
}
2. 结果
可以发现,可以跳转到正确页面,并能打印到控制台


3. 补充知识点——DTO
DTO(Date Transfer Object)数据传输对象,一般用在传输的参数和bean(或称Domain Moel)不匹配的时候。举例就是用户注册系统。一般输入密码之后,要进行确认密码的校验,还要进行表单校验。这个时候,传输的参数,和bean对象,无法一一对应。一般这个时候,就先定义出一个DTO来接收参数,然后处理之后,再将DTO的相关数据传到bean对象上。
因为这个DTO的作用就是接收和处理数据,然后传到新的对象上,所以称为DTO,算是一个重要的中间对象。
ModelDriven接收参数
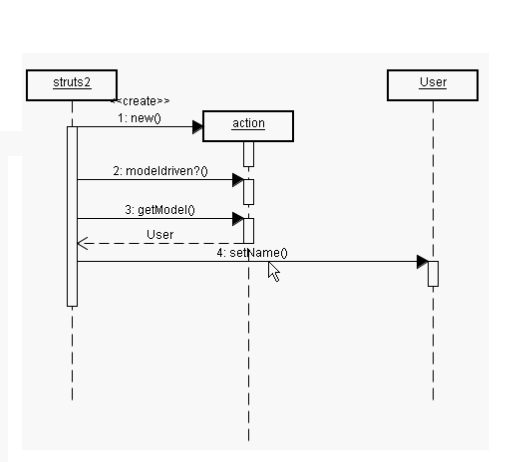
其实这种方法,在开发中并不常见,但是设计到一个重要的接口ModelDriven,所以拿出来讲一讲。
首先,Struts2 new 一个action出来,发现了这个action有实现ModelDriven接口,这个action就返回了一个Model,本题就是user给Struts2,Struts2拿到User之后,就直接调用Use的setName(),setAge()方法将参数设置到User中了。
1. 分析
struts.xml
<?xml version="1.0" encoding="UTF-8" ?>
<!DOCTYPE struts PUBLIC
    "-//Apache Software Foundation//DTD Struts Configuration 2.0//EN"
    "http://struts.apache.org/dtds/struts-2.0.dtd">

<struts>
    <constant name="struts.devMode" value="true" />
    <package name="user" extends="struts-default" namespace="/user">

        <action name="user" class="com.bjsxt.struts2.user.action.UserAction">
            <result>/user_add_success.jsp</result>
        </action>
    </package>
</struts>
这个文件依然没有变化
ActionUser有所不同
package com.bjsxt.struts2.user.action;

import com.bjsxt.struts2.user.model.User;
import com.opensymphony.xwork2.ActionSupport;
import com.opensymphony.xwork2.ModelDriven;

//首先要实现ModelDriven接口
public class UserAction extends ActionSupport implements ModelDriven<User>{

    //和第二种方法的不同就是要new出一个bean
    private User user = new User();

    public String add() {
        System.out.println("name=" + user.getName());
        System.out.println("age=" + user.getAge());
        return SUCCESS;
    }

    @Override
    public User getModel() {
        return user;
    }

}
index.jsp
<?xml version="1.0" encoding="GB18030" ?>
<%@ page language="java" contentType="text/html; charset=GB18030"
    pageEncoding="GB18030"%>

<%
String path = request.getContextPath();
String basePath = request.getScheme()+"://"+request.getServerName()+":"+request.getServerPort()+path+"/";
%>


<html xmlns="http://www.w3.org/1999/xhtml">
    <head>
        <meta http-equiv="Content-Type" content="text/html; charset=GB18030" />
        <base href="<%=basePath %>"/>
        <title>Insert title here</title>
    </head>
    <body>
        <!-- 直接name和age就可以了,因为拿到model了 -->
        使用ModelDriven接收参数<a href="user/user!add?name=a&age=8">添加用户</a>

    </body>
</html>
User 里面也没什么特别的
package com.bjsxt.struts2.user.model;

public class User {
    private String name;
    private int age;
    public String getName() {
        return name;
    }
    public void setName(String name) {
        this.name = name;
    }
    public int getAge() {
        return age;
    }
    public void setAge(int age) {
        this.age = age;
    }
}
user_and_success.jsp
<?xml version="1.0" encoding="GB18030" ?>
<%@ page language="java" contentType="text/html; charset=GB18030"
    pageEncoding="GB18030"%>
    <%@taglib uri="/struts-tags" prefix="s" %>

<html xmlns="http://www.w3.org/1999/xhtml">
<head>
<meta http-equiv="Content-Type" content="text/html; charset=GB18030" />
<title>Insert title here</title>
</head>
<body>
    User Add Success!
</body>
</html>
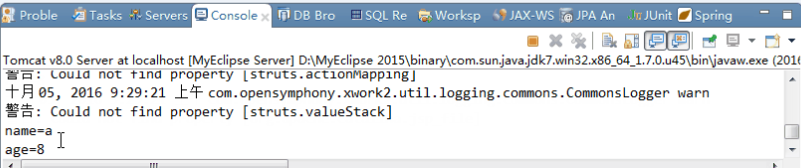
2. 结果

若有不足之处,请不吝赐


 207
207


 被折叠的 条评论
为什么被折叠?
被折叠的 条评论
为什么被折叠?
 到【灌水乐园】发言


