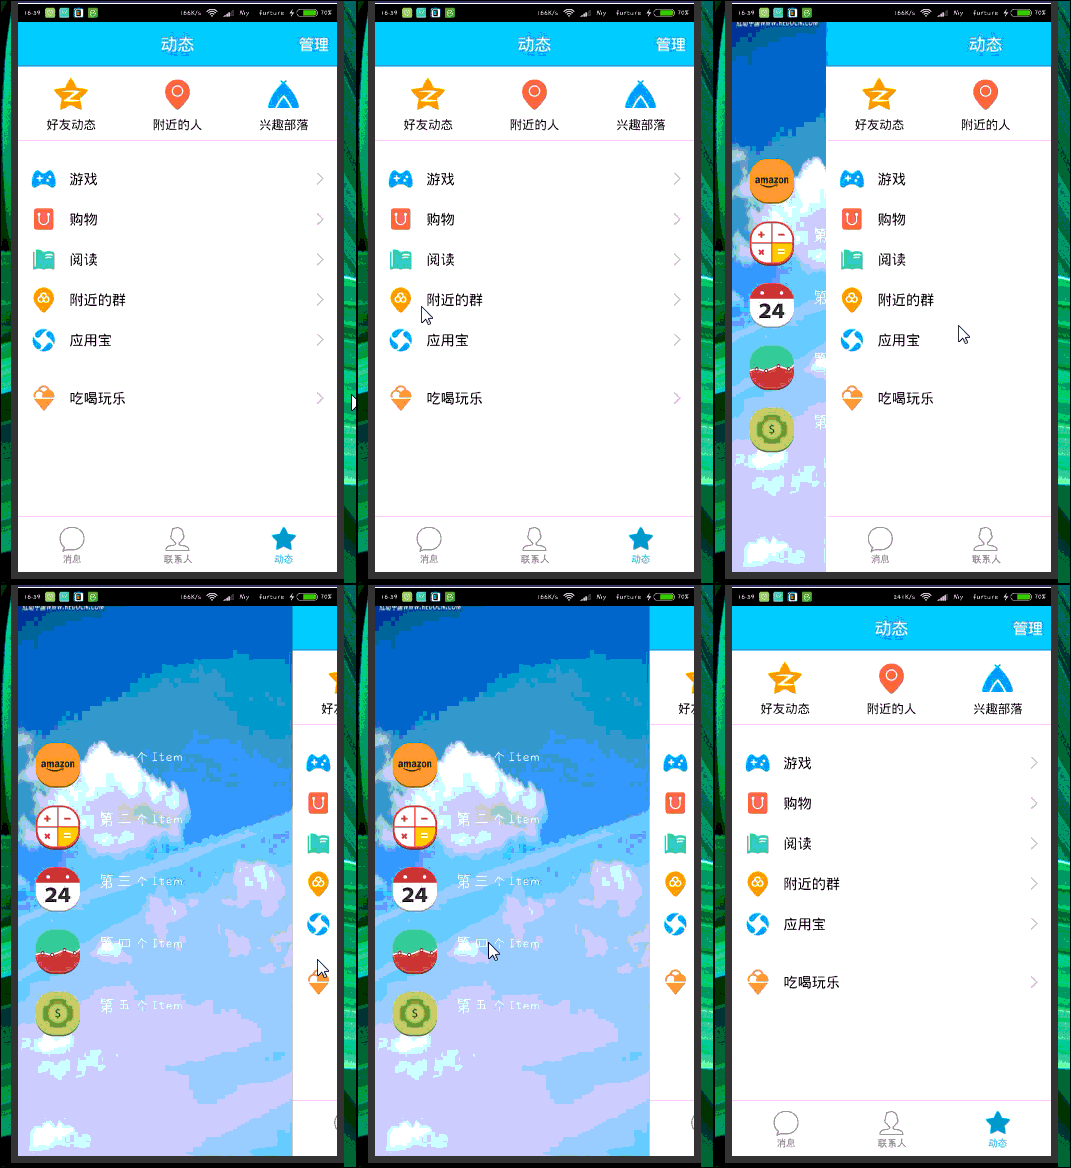
本文实例为大家分享了DrawerLayout和触摸事件分发实现抽屉侧滑效果的具体代码,供大家参考,具体内容如下
效果展示

还是看代码实在,直接上菜了。
1.MainActivity的代码:
public class MainActivity extends AppCompatActivity implements MyDraweLayout.GetPositionCallback {
private List imageList;
private ViewPager viewPager;
private MyAdapter adapter;
private MyDraweLayout myDraweLayout;
private int currentPosition;
@Override
protected void onCreate (Bundle savedInstanceState){
super.onCreate(savedInstanceState);
setContentView(R.layout.activity_main);
viewPager = (ViewPager) findViewById(R.id.viewpager);
myDraweLayout = (MyDraweLayout) findViewById(R.id.mydrawelayout);
initdata();
adapter = new MyAdapter(this, imageList);
myDraweLayout.setCallback(this);
viewPager.setAdapter(adapter);
viewPager.addOnPageChangeListener(new ViewPager.OnPageChangeListener() {
@Override
public void onPageScrolled(int position, float positionOffset, int positionOffsetPixels) {
}
@Override
public void onPageSelected(int position) {
currentPosition=position;
}
@Override
public void onPageScrollStateChanged(int state) {
}
});
}
private void initdata() {
imageList = new ArrayList();
ImageView imageView = new ImageView(this);
imageView.setImageResource(R.mipmap.ic_launcher);
imageView.setScaleType(ImageView.ScaleType.FIT_XY);
imageList.add(imageView);
imageView = new ImageView(this);
imageView.setImageResource(R.mipmap.ic_launcher);
imageView.setScaleType(ImageView.ScaleType.FIT_XY);
imageList.add(imageView);
imageView = new ImageView(this);
imageView.setImageResource(R.mipmap.ic_launcher);
imageView.setScaleType(ImageView.ScaleType.FIT_XY);
imageList.add(imageView);
imageView = new ImageView(this);
imageView.setImageResource(R.mipmap.ic_launcher);
imageView.setScaleType(ImageView.ScaleType.FIT_XY);
imageList.add(imageView);
}
@Override
public int position() {
return currentPosition;//TODO 通过接口回调把当前位置传到MyDraweLayout中
}
}
2.MyDraweLayout类中的代码:
public class MyDraweLayout extends DrawerLayout {
public MyDraweLayout(Context context) {
super(context);
}
public MyDraweLayout(Context context, AttributeSet attrs) {
super(context, attrs);
}
public MyDraweLayout(Context context, AttributeSet attrs, int defStyle) {
super(context, attrs, defStyle);
}
//TODO 事件拦截
@Override
public boolean onInterceptTouchEvent(MotionEvent ev) {
//Todo 获得当前位置,进行判断
if(callback.position()==0){
return super.onInterceptTouchEvent(ev);
}else {
return false;
}
}
public interface GetPositionCallback{
int position();
}
private GetPositionCallback callback;
public void setCallback(GetPositionCallback callback){
this.callback = callback;
}
}
3.适配器的代码;
public class MyAdapter extends PagerAdapter {
private final List imageList;
private final Context contex;
public MyAdapter(Context context, List imageList) {
this.contex=context;
this.imageList = imageList;
}
@Override
public int getCount() {
return imageList.size();
}
@Override
public boolean isViewFromObject(View view, Object object) {
return view==object;
}
@Override
public Object instantiateItem(ViewGroup container, int position) {
ImageView imageView = imageList.get(position);
container.addView(imageView);
return imageView;
}
@Override
public void destroyItem(ViewGroup container, int position, Object object) {
//super.destroyItem(container, position, object);这行代码记得删除,不然滑到Viewpager的时候会闪退哦
container.removeView(imageList.get(position));
}
}
4.xml布局:
android:id="@+id/mydrawelayout"
xmlns:android="http://schemas.android.com/apk/res/android"
android:layout_width="match_parent"
android:layout_height="match_parent"
>
android:layout_width="match_parent"
android:layout_height="match_parent">
android:layout_width="match_parent"
android:layout_height="250dp"
android:id="@+id/viewpager"/>
android:background="@mipmap/ic_launcher"
android:layout_width="300dp"
android:layout_gravity = "start"
android:layout_height="match_parent"
android:layout_below="@+id/viewpager"
/>


 1105
1105


 被折叠的 条评论
为什么被折叠?


