1. 新建项目
引入web和security包
完整的pom.xml文件如下
xsi:schemaLocation="http://maven.apache.org/POM/4.0.0 https://maven.apache.org/xsd/maven-4.0.0.xsd">
4.0.0
org.springframework.boot
spring-boot-starter-parent
2.2.6.RELEASE
com.example
spring-demo
0.0.1-SNAPSHOT
spring-demo
Demo project for Spring Boot
1.8
org.springframework.boot
spring-boot-starter-security
org.springframework.boot
spring-boot-starter-web
org.springframework.boot
spring-boot-starter-test
test
org.junit.vintage
junit-vintage-engine
org.springframework.security
spring-security-test
test
org.springframework.boot
spring-boot-maven-plugin
2. 编写启动类和控制器方法和自定义登录页面
package com.example.springdemo;
import org.springframework.boot.SpringApplication;
import org.springframework.boot.autoconfigure.SpringBootApplication;
import org.springframework.web.bind.annotation.GetMapping;
import org.springframework.web.bind.annotation.RestController;
@RestController
@SpringBootApplication
public class SpringDemoApplication {
public static void main(String[] args) {
SpringApplication.run(SpringDemoApplication.class, args);
}
@GetMapping("/")
public String hello() {
return "hello spring security";
}
}
Title3. 编写配置类
package com.example.springdemo.conf;
import org.springframework.security.config.annotation.web.builders.HttpSecurity;
import org.springframework.security.config.annotation.web.configuration.EnableWebSecurity;
import org.springframework.security.config.annotation.web.configuration.WebSecurityConfigurerAdapter;
import org.springframework.security.core.Authentication;
import org.springframework.security.core.AuthenticationException;
import org.springframework.security.web.authentication.AuthenticationFailureHandler;
import org.springframework.security.web.authentication.AuthenticationSuccessHandler;
import javax.servlet.ServletException;
import javax.servlet.http.HttpServletRequest;
import javax.servlet.http.HttpServletResponse;
import java.io.IOException;
import java.io.PrintWriter;
@EnableWebSecurity
public class WebSecurityConfig extends WebSecurityConfigurerAdapter {
@Override
protected void configure(HttpSecurity http) throws Exception {
http.authorizeRequests()
.anyRequest().authenticated()
.and()
.formLogin()
//指定处理登录页面
.loginPage("/myLogin.html")
//指定登录成功的处理逻辑
.successHandler(new AuthenticationSuccessHandler() {
@Override
public void onAuthenticationSuccess(HttpServletRequest request,
HttpServletResponse response,
Authentication authentication)
throws IOException, ServletException {
response.setContentType("application/json;charset=UTF-8");
PrintWriter writer = response.getWriter();
writer.write("{\"error_code\":\"0\",\"message\":\"欢迎登录\"}");
}
})
//指定登录失败时的处理逻辑
.failureHandler(new AuthenticationFailureHandler() {
@Override
public void onAuthenticationFailure(HttpServletRequest request,
HttpServletResponse response,
AuthenticationException e)
throws IOException, ServletException {
response.setStatus(401);
PrintWriter writer = response.getWriter();
writer.write("{\"error_code\":\"401\",\"name\":\"" + e.getClass() + "\",\"message\":\"" + e.getMessage() + "\"}");
}
})
.permitAll()
.and()
.csrf().disable();
}
}
4. 运行结果
当输入密码错误时

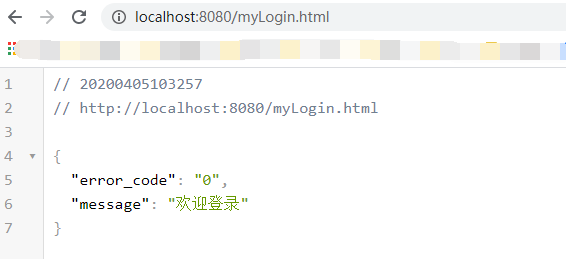
当输入密码正确时

以上就是本文的全部内容,希望对大家的学习有所帮助,也希望大家多多支持脚本之家。


 824
824


 被折叠的 条评论
为什么被折叠?


