antd上传文件到服务器,Antd 4 Upload 图片上传(前端篇)

Antd 4 Upload 图片上传(前端篇)

简介

记录一下第一次使用 Ant Design 的 Upload 组件上传图片到后端服务器的基本流程和思路。

前端使用了 React + Antd ,后端使用 Nodejs 的Express 。

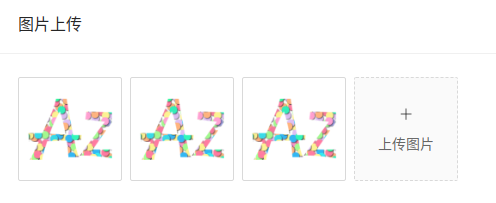
主要介绍 Antd 中 Upload 组件的照片墙,也就是上传多张图片。

57bced53091378b7ee412fa1427ef961.png

Ant Design 官方 Upload 教程地址:Antd Upload 组件

实现

1. 简单的render

import React, { Component } from 'react'

import { Card, Upload } from 'antd'

import { PlusOutlined } from '@ant-design/icons'

class Example extends Component{

render() {

return (

上传图片

)

}

}

export default Example

也就是先做一个基本的 Upload 组件样子:

c84f586707213c3ef9b5b1584501ab27.png

Card 组件是为了案例的样式效果好一点。现在的 Upload 组件还不具有上传的功能,只是简单的使用,listType 属性是 Upload 组件的显示效果,有 picture-card 、picture 、text 这三个属性值,对应的效果可在 Antd 官网查看。

2. 上传功能

给 Upload 组件添加 action 属性,就可以利用 FormData 表格数据的格式提交到后端服务器地址。

// 省略部分代码

// 后端API

const SERVER_URL = 'http://localhost:8000'

const UPLOAD_URL = `${SERVER_URL}/upload`

// render 中部分代码

listType='picture-card'

action={UPLOAD_URL}

>

上传图片

3. 查看图片

添加一个用于查看图片的 Modal 对话框组件,设置组件的 footer 属性为 null 来隐藏对话框对应的确认和取消按钮;然后在 Modal 组件中包含一个原生的 img 标签用来显示图片,设置对应的 src 和 alt 属性。

  • 0
    点赞
  • 6
    收藏
    觉得还不错? 一键收藏
  • 0
    评论
好的,您可以按照以下步骤来实现antd upload上传图片: 1. 首先安装antd和axios。 ```bash npm install antd axios --save ``` 2. 在您的组件中引入antd upload组件。 ```javascript import { Upload, message } from 'antd'; import { LoadingOutlined, PlusOutlined } from '@ant-design/icons'; class UploadImage extends React.Component { state = { loading: false, imageUrl: '', }; handleChange = info => { if (info.file.status === 'uploading') { this.setState({ loading: true }); return; } if (info.file.status === 'done') { // Get this url from response in real world. getBase64(info.file.originFileObj, imageUrl => this.setState({ imageUrl, loading: false, }), ); } }; render() { const { loading, imageUrl } = this.state; const uploadButton = ( <div> {loading ? <LoadingOutlined /> : <PlusOutlined />} <div style={{ marginTop: 8 }}>Upload</div> </div> ); return ( <Upload name="avatar" listType="picture-card" className="avatar-uploader" showUploadList={false} action="https://www.mocky.io/v2/5cc8019d300000980a055e76" beforeUpload={beforeUpload} onChange={this.handleChange} > {imageUrl ? <img src={imageUrl} alt="avatar" style={{ width: '100%' }} /> : uploadButton} </Upload> ); } } ``` 3. 在handleChange方法中,您需要将上传的图片转换为base64格式,以便于后续的保存和显示。 ```javascript import { Upload, message } from 'antd'; import { LoadingOutlined, PlusOutlined } from '@ant-design/icons'; function getBase64(file) { return new Promise((resolve, reject) => { const reader = new FileReader(); reader.readAsDataURL(file); reader.onload = () => resolve(reader.result); reader.onerror = error => reject(error); }); } class UploadImage extends React.Component { state = { loading: false, imageUrl: '', }; handleChange = info => { if (info.file.status === 'uploading') { this.setState({ loading: true }); return; } if (info.file.status === 'done') { // Get this url from response in real world. getBase64(info.file.originFileObj, imageUrl => this.setState({ imageUrl, loading: false, }), ); } }; render() { const { loading, imageUrl } = this.state; const uploadButton = ( <div> {loading ? <LoadingOutlined /> : <PlusOutlined />} <div style={{ marginTop: 8 }}>Upload</div> </div> ); return ( <Upload name="avatar" listType="picture-card" className="avatar-uploader" showUploadList={false} action="https://www.mocky.io/v2/5cc8019d300000980a055e76" beforeUpload={beforeUpload} onChange={this.handleChange} > {imageUrl ? <img src={imageUrl} alt="avatar" style={{ width: '100%' }} /> : uploadButton} </Upload> ); } } ``` 4. 最后,在handleSubmit方法中,您可以将base64格式的图片传给后端进行保存。 ```javascript import { Upload, message } from 'antd'; import { LoadingOutlined, PlusOutlined } from '@ant-design/icons'; import axios from 'axios'; function getBase64(file) { return new Promise((resolve, reject) => { const reader = new FileReader(); reader.readAsDataURL(file); reader.onload = () => resolve(reader.result); reader.onerror = error => reject(error); }); } class UploadImage extends React.Component { state = { loading: false, imageUrl: '', }; handleChange = info => { if (info.file.status === 'uploading') { this.setState({ loading: true }); return; } if (info.file.status === 'done') { // Get this url from response in real world. getBase64(info.file.originFileObj, imageUrl => this.setState({ imageUrl, loading: false, }), ); } }; handleSubmit = () => { axios.post('/api/upload', { image: this.state.imageUrl, }).then(response => { message.success('Image uploaded successfully!'); }).catch(error => { message.error('Failed to upload image!'); }); }; render() { const { loading, imageUrl } = this.state; const uploadButton = ( <div> {loading ? <LoadingOutlined /> : <PlusOutlined />} <div style={{ marginTop: 8 }}>Upload</div> </div> ); return ( <div> <Upload name="avatar" listType="picture-card" className="avatar-uploader" showUploadList={false} action="https://www.mocky.io/v2/5cc8019d300000980a055e76" beforeUpload={beforeUpload} onChange={this.handleChange} > {imageUrl ? <img src={imageUrl} alt="avatar" style={{ width: '100%' }} /> : uploadButton} </Upload> <Button type="primary" onClick={this.handleSubmit}>Submit</Button> </div> ); } } ``` 以上就是antd upload上传图片的实现步骤。

“相关推荐”对你有帮助么?

  • 非常没帮助
  • 没帮助
  • 一般
  • 有帮助
  • 非常有帮助
提交
评论
添加红包

请填写红包祝福语或标题

红包个数最小为10个

红包金额最低5元

当前余额3.43前往充值 >
需支付:10.00
成就一亿技术人!
领取后你会自动成为博主和红包主的粉丝 规则
hope_wisdom
发出的红包
实付
使用余额支付
点击重新获取
扫码支付
钱包余额 0

抵扣说明:

1.余额是钱包充值的虚拟货币,按照1:1的比例进行支付金额的抵扣。
2.余额无法直接购买下载,可以购买VIP、付费专栏及课程。

余额充值