


虚拟机以及linux安装
VMware安装,我安装的版本是14.1.1.28517
虚拟机以及linux安装过程传送门:点击打开链接,虚拟机简简单单的典型安装就行
虚拟机安装后需要激活,激活码传送门:点击打开链接
linux系统用的是centos7
linux系统安装时候需要注意的是最好不要选择最下化安装,要不然之后安装redis的时候会遇到很多麻烦,比如安装失败,需要先安装gcc、tcl等等

----------------------------------------一小时后----------------------------------------
现在你应该已经进入到了linux系统了,如果安装了图形界面的话,可以在桌面右键打开中端敲命令,界面十分友好,还有中文
不过实际生产中服务器都是不会安装图形界面的,建议用非图形界面。在桌面系统中进入命令系统按:alt+ctrl+F2(f1至f6可以切换6个不同的终端)。命令系统中输入:startx 把当前终端变为图形界面,不建议这么做,你可以按alt+ctrl+F1切换回之前的图形终端。startx命令后界面变成英文的了,可以在设置中改回来。我倒是有一个简单粗暴的办法恢复中文,重启!
redis安装
第一步:下载redis安装包
wget http://download.redis.io/releases/redis-4.0.6.tar.gz
tips:命令粘贴在这里。如果你是最小化安装那么这句你都会出错,解决办法在下面

第二步:解压压缩包
tar -zxvf redis-4.0.6.tar.gz
第三步:跳转到redis解压目录下
cd redis-4.0.6
第四步:安装
make
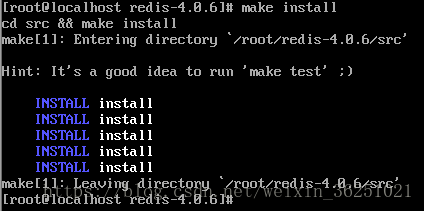
出现这个就是安装完了
第五步:测试
src/redis-server


出现这个盒子的时候证明redis已经安装完并可以启动了。窗口必须一直看着不能干别的,按ctrl+c退出并关闭服务。
当然也还可以设置为守护进程(后台执行),开机启动等等。redis其他设置
java远程访问
项目用的spring-boot以及maven构建
maven依赖
<dependencies>
        <dependency>
            <groupId>org.springframework.boot</groupId>
            <artifactId>spring-boot-starter-redis</artifactId>
        </dependency>
        <dependency>
            <groupId>com.google.code.gson</groupId>
            <artifactId>gson</artifactId>
            <version>2.2.4</version>
        </dependency>
        <dependency>
            <groupId>springboot.db</groupId>
            <artifactId>mysql</artifactId>
            <version>${project.version}</version>
        </dependency>
    </dependencies>
创建redis服务类
@Repository
public class UserRedis {
    @Autowired
    private RedisTemplate<String, String> redisTemplate;

    public void add(String key, Long time,User user) {
        Gson gson = new Gson();
        redisTemplate.opsForValue().set(key, gson.toJson(user), time, TimeUnit.MINUTES);
    }

    public void add(String key, Long time, List<User> users) {
        Gson gson = new Gson();
        redisTemplate.opsForValue().set(key, gson.toJson(users), time, TimeUnit.MINUTES);
    }

    public User get(String key) {
        Gson gson = new Gson();
        User user = null;
        String userJson = redisTemplate.opsForValue().get(key);
        if(!StringUtils.isEmpty(userJson))
            user = gson.fromJson(userJson, User.class);
        return user;
    }

    public List<User> getList(String key) {
        Gson gson = new Gson();
        List<User> ts = null;
        String listJson = redisTemplate.opsForValue().get(key);
        if(!StringUtils.isEmpty(listJson))
            ts = gson.fromJson(listJson, new TypeToken<List<User>>(){}.getType());
        return ts;
    }

    public void delete(String key){
        redisTemplate.opsForValue().getOperations().delete(key);
    }
}
这个服务类可以存取对象User等,这些方法都是用RedisTemplate实现的。
redis没有表结构这个概念,所以要实现像MySQL那样利用实体对象交换数据,需要借助json,即将对象转为json文本存储,取出时在转为对象。使用RedisTemplate需要一些初始化配置,代码就不粘贴了,直接上项目!
git:点击打开链接
目录结构

dbdemo.redis.test.RedisConfig中修改一下ip和端口。端口默认6379,ip去linux里查一下
默认不开启网络连接,需要设置一下
cd /etc/sysconfig/network-scripts/ #进入网络配置文件目录
vi ifcfg-eno16777736 #编辑配置文件,添加修改内容,文件名可能不是ifcfg-eno16777736,比如我的就是ifcfg-ens33
修改NOBOOT为yes


之后运行dbdemo.redis.test.RedisTest,如果出现奇迹的话你就能看到这样的输出

如果错误是Could not get a resource from the pool,那么是没有连接上,可能是ip不对,防火墙没开等等
# 查询端口是否开放
firewall-cmd --query-port=6379/tcp
# 开放80端口
firewall-cmd --permanent --add-port=6379/tcp
#重启防火墙(修改配置后要重启防火墙)
firewall-cmd --reload
如果错误是下面这样的,就是远程连接保护模式的问题
org.springframework.dao.InvalidDataAccessApiUsageException: DENIED Redis is running in protected mode because protected mode is enabled, no bind address was specified, no authentication password is requested to clients. In this mode connections are only accepted from the loopback interface. If you want to connect from external computers to Redis you may adopt one of the following solutions: 1) Just disable protected mode sending the command 'CONFIG SET protected-mode no' from the loopback interface by connecting to Redis from the same host the server is running, however MAKE SURE Redis is not publicly accessible from internet if you do so. Use CONFIG REWRITE to make this change permanent. 2) Alternatively you can just disable the protected mode by editing the Redis configuration file, and setting the protected mode option to 'no', and then restarting the server. 3) If you started the server manually just for testing, restart it with the '--protected-mode no' option. 4) Setup a bind address or an authentication password. NOTE: You only need to do one of the above things in order for the server to start accepting connections from the outside.; nested exception is redis.clients.jedis.exceptions.JedisDataException: DENIED Redis is running in protected mode because protected mode is enabled, no bind address was specified, no authentication password is requested to clients. In this mode connections are only accepted from the loopback interface. If you want to connect from external computers to Redis you may adopt one of the following solutions: 1) Just disable protected mode sending the command 'CONFIG SET protected-mode no' from the loopback interface by connecting to Redis from the same host the server is running, however MAKE SURE Redis is not publicly accessible from internet if you do so. Use CONFIG REWRITE to make this change permanent. 2) Alternatively you can just disable the protected mode by editing the Redis configuration file, and setting the protected mode option to 'no', and then restarting the server. 3) If you started the server manually just for testing, restart it with the '--protected-mode no' option. 4) Setup a bind address or an authentication password. NOTE: You only need to do one of the above things in order for the server to start accepting connections from the outside.修改redis.conf配置文件,其中有一行:

bind 127.0.0.1 把这行注释掉
关闭redis服务,改用下面的命令启动
src/redis-server --protected-mode no
这次就应该能得到正确的测试结果了。
参考文章:
可能用到的linux命令:
启动redis:src/redis-server --protected-mode no
按配置文件启动redis:src/redis-server /root/redis-4.0.6/redis.conf --protected-mode no
查询redis端口:ps -aux | grep redis
关闭redis端口:src/redis-cli -h 127.0.0.1 -p 6379 shutdown


 819
819

 被折叠的 条评论
为什么被折叠?
被折叠的 条评论
为什么被折叠?
 到【灌水乐园】发言


