


zabbix基于命令行方式监控MySQL
作者:尹正杰
版权声明:原创作品,谢绝转载!否则将追究法律责任。
一.zabbix agent自定义监控脚本
1>.自定义脚本
[root@node203.yinzhengjie.org.cn ~]# cat /etc/zabbix/zabbix_agentd.d/mysql_monitoring.sh#!/bin/bash
#
#********************************************************************#Author: yinzhengjie
#QQ:1053419035#Date:2019-11-23#FileName: shell/menu.sh#URL: http://www.cnblogs.com/yinzhengjie
#Description: The test script
#Copyright notice: original works, no reprint!Otherwise, legal liability will be investigated.
#********************************************************************
functionseconds_Behind_Master(){
NUM=`mysql -uroot -hlocalhost -e "show slave status\G;" | grep "Seconds_Behind_Master:" | awk -F: '{print $2}'`echo$NUM
}functionmaster_slave_check(){
NUM1=`mysql -uroot -hlocalhost -e "show slave status\G;" | grep "Slave_IO_Running" | awk -F: '{print $2}' | sed 's/^[ \t]*//g'`
#echo$NUM1
NUM2=`mysql -uroot -hlocalhost -e "show slave status\G;" | grep "Slave_SQL_Running:" | awk -F: '{print $2}' | sed 's/^[ \t]*//g'`
#echo$NUM2if test $NUM1 == "Yes" && test $NUM2 == "Yes";then
echo 50
else
echo 100
fi}functionmain(){case $1 inseconds_Behind_Master)
seconds_Behind_Master
;;
master_slave_check)
master_slave_check
;;esac}
main $1[root@node203.yinzhengjie.org.cn~]#
2>.测试脚本可用性

3>.为脚本授权
[root@node203.yinzhengjie.org.cn ~]# ll /etc/zabbix/zabbix_agentd.d/mysql_monitoring.sh
-rw-r--r-- 1 root root 1279 Feb 29 18:31 /etc/zabbix/zabbix_agentd.d/mysql_monitoring.sh[root@node203.yinzhengjie.org.cn~]#[root@node203.yinzhengjie.org.cn~]# chmod +x /etc/zabbix/zabbix_agentd.d/mysql_monitoring.sh[root@node203.yinzhengjie.org.cn~]#
[root@node203.yinzhengjie.org.cn~]# ll /etc/zabbix/zabbix_agentd.d/mysql_monitoring.sh
-rwxr-xr-x 1 root root 1279 Feb 29 18:31 /etc/zabbix/zabbix_agentd.d/mysql_monitoring.sh[root@node203.yinzhengjie.org.cn~]#
[root@node203.yinzhengjie.org.cn~]#
4>.定义agent端的子配置文件
[root@node203.yinzhengjie.org.cn ~]# grep ^Include /etc/zabbix/zabbix_agentd.confInclude=/etc/zabbix/zabbix_agentd.d/*.conf
[root@node203.yinzhengjie.org.cn ~]#
[root@node203.yinzhengjie.org.cn ~]# cat /etc/zabbix/zabbix_agentd.d/mysql_monitoring.conf
UserParameter=mysql_master_slave[*],/etc/zabbix/zabbix_agentd.d/mysql_monitoring.sh $1
[root@node203.yinzhengjie.org.cn ~]#
[root@node203.yinzhengjie.org.cn ~]#
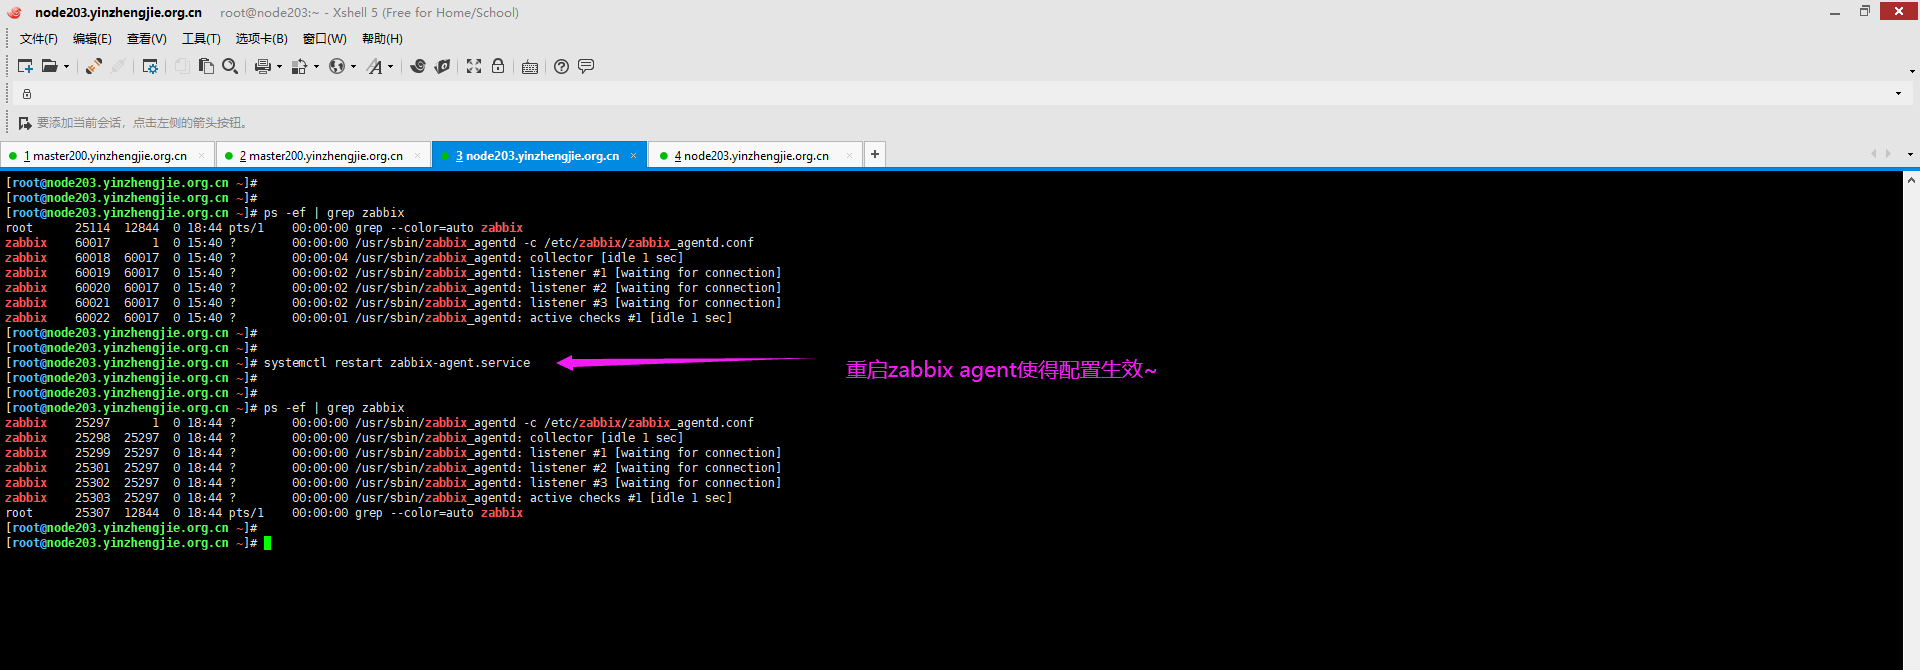
5>.重启zabbix agent服务使得配置生效
[root@node203.yinzhengjie.org.cn ~]# systemctl restart zabbix-agent.service
二.在zabbix WebUI测试
1>.先在zabbix server端进行测试是否可以获取数据
[root@zabbix203.yinzhengjie.org.cn ~]# /yinzhengjie/softwares/zabbix/bin/zabbix_get -s 172.200.1.203 -p 10050 -k "mysql_master_slave[master_slave_check]"
50[root@zabbix203.yinzhengjie.org.cn~]#
[root@zabbix203.yinzhengjie.org.cn~]# /yinzhengjie/softwares/zabbix/bin/zabbix_get -s 172.200.1.203 -p 10050 -k "mysql_master_slave[seconds_Behind_Master]"
0[root@zabbix203.yinzhengjie.org.cn~]#
[root@zabbix203.yinzhengjie.org.cn~]#
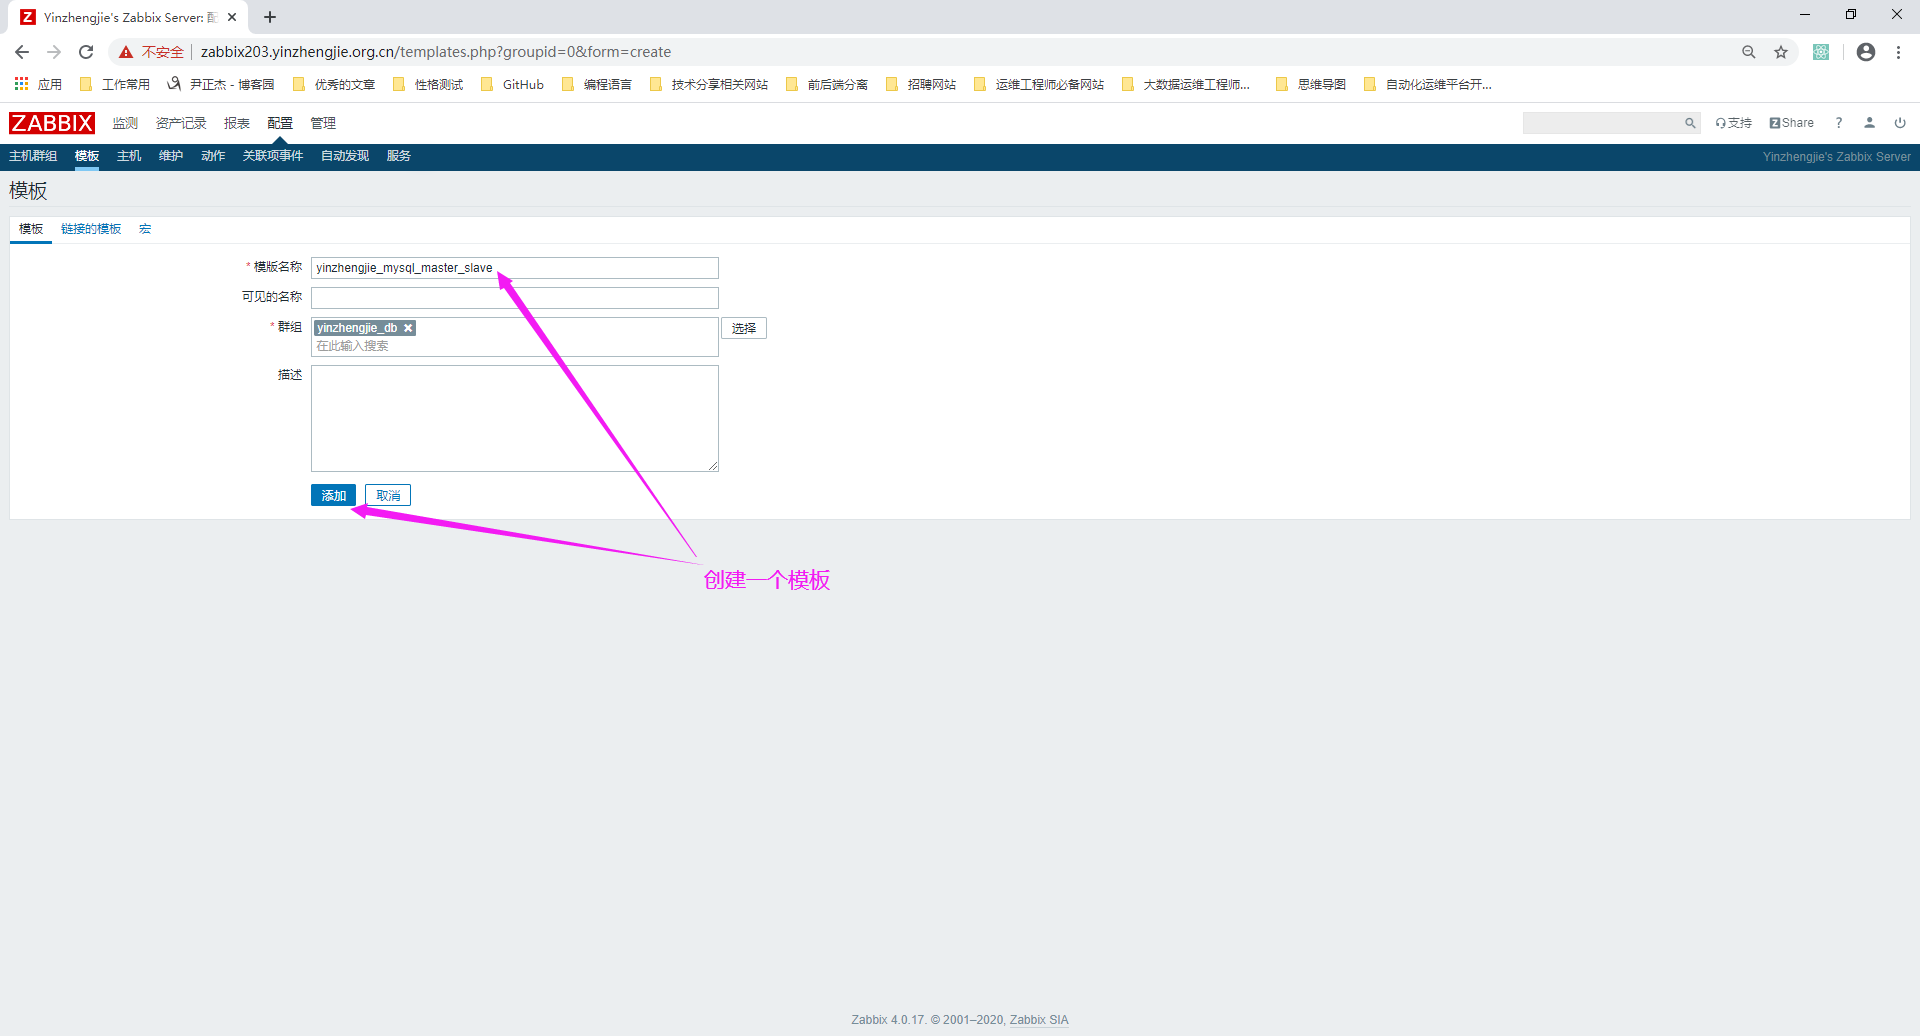
2>.创建一个模板
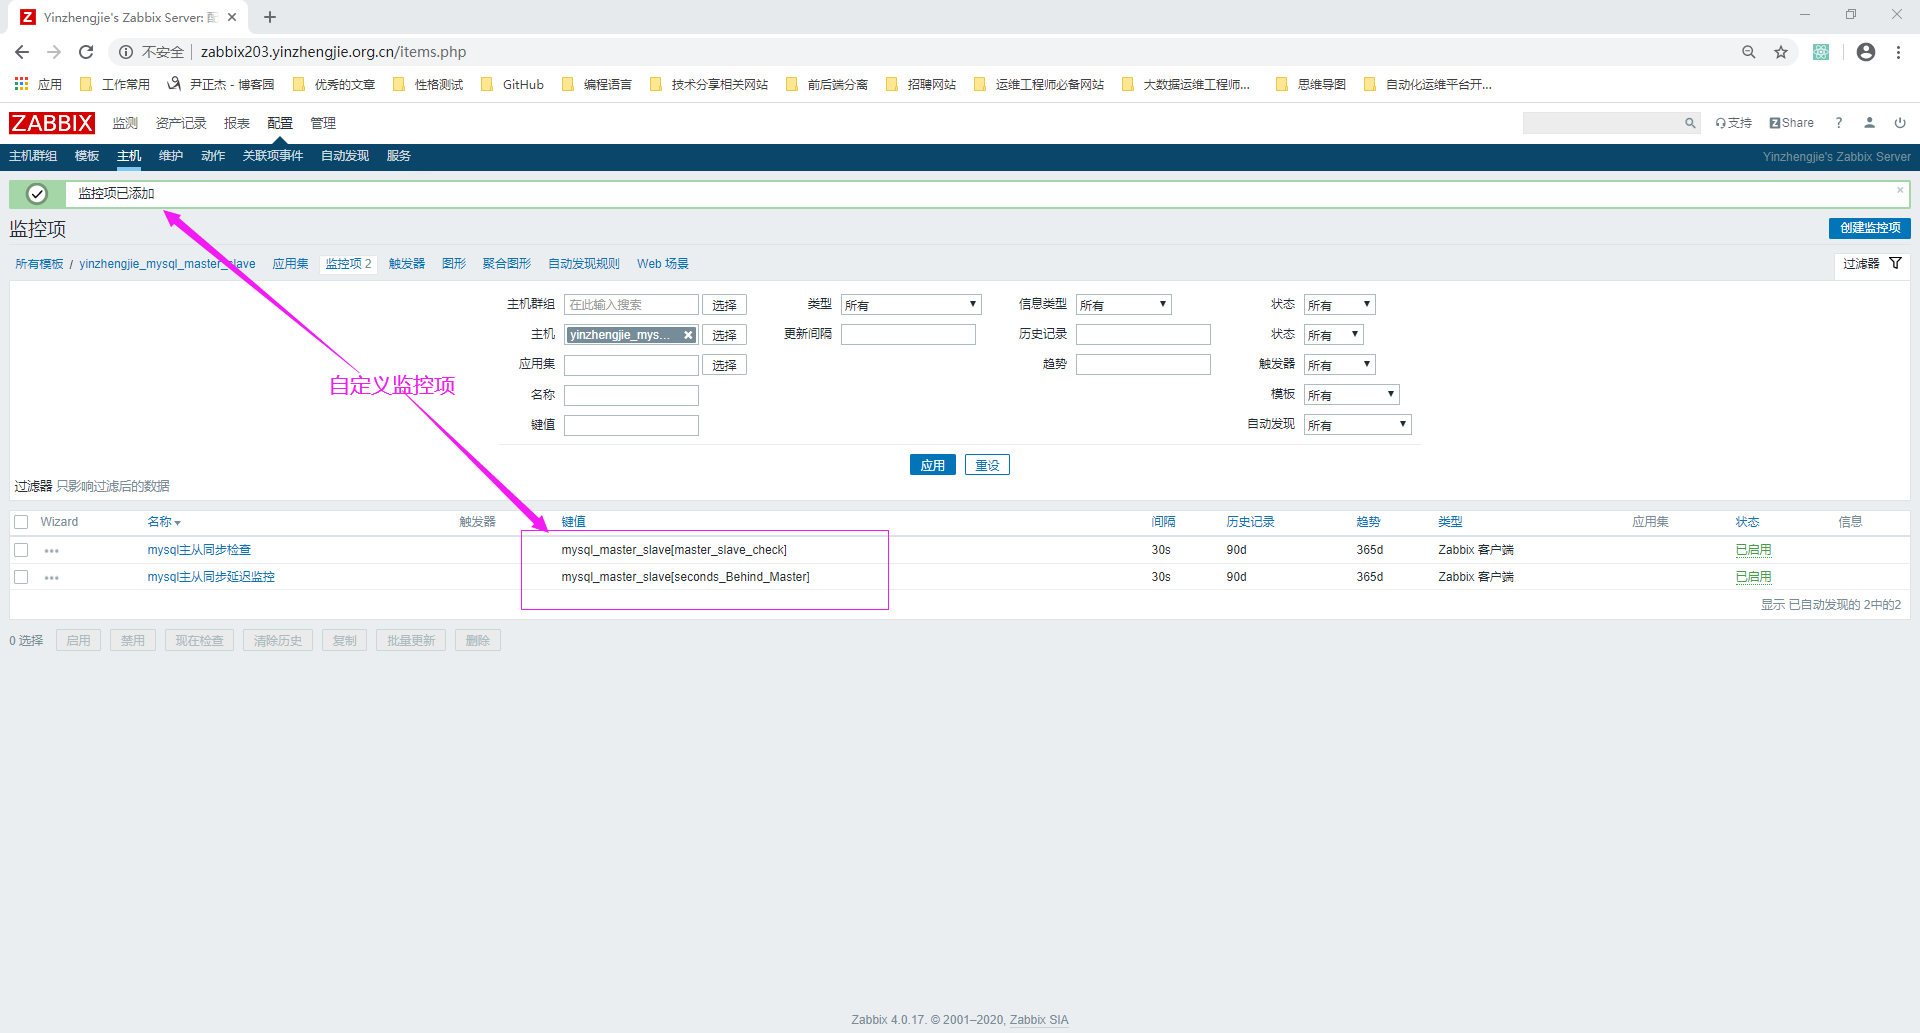
3>.自定义监控项
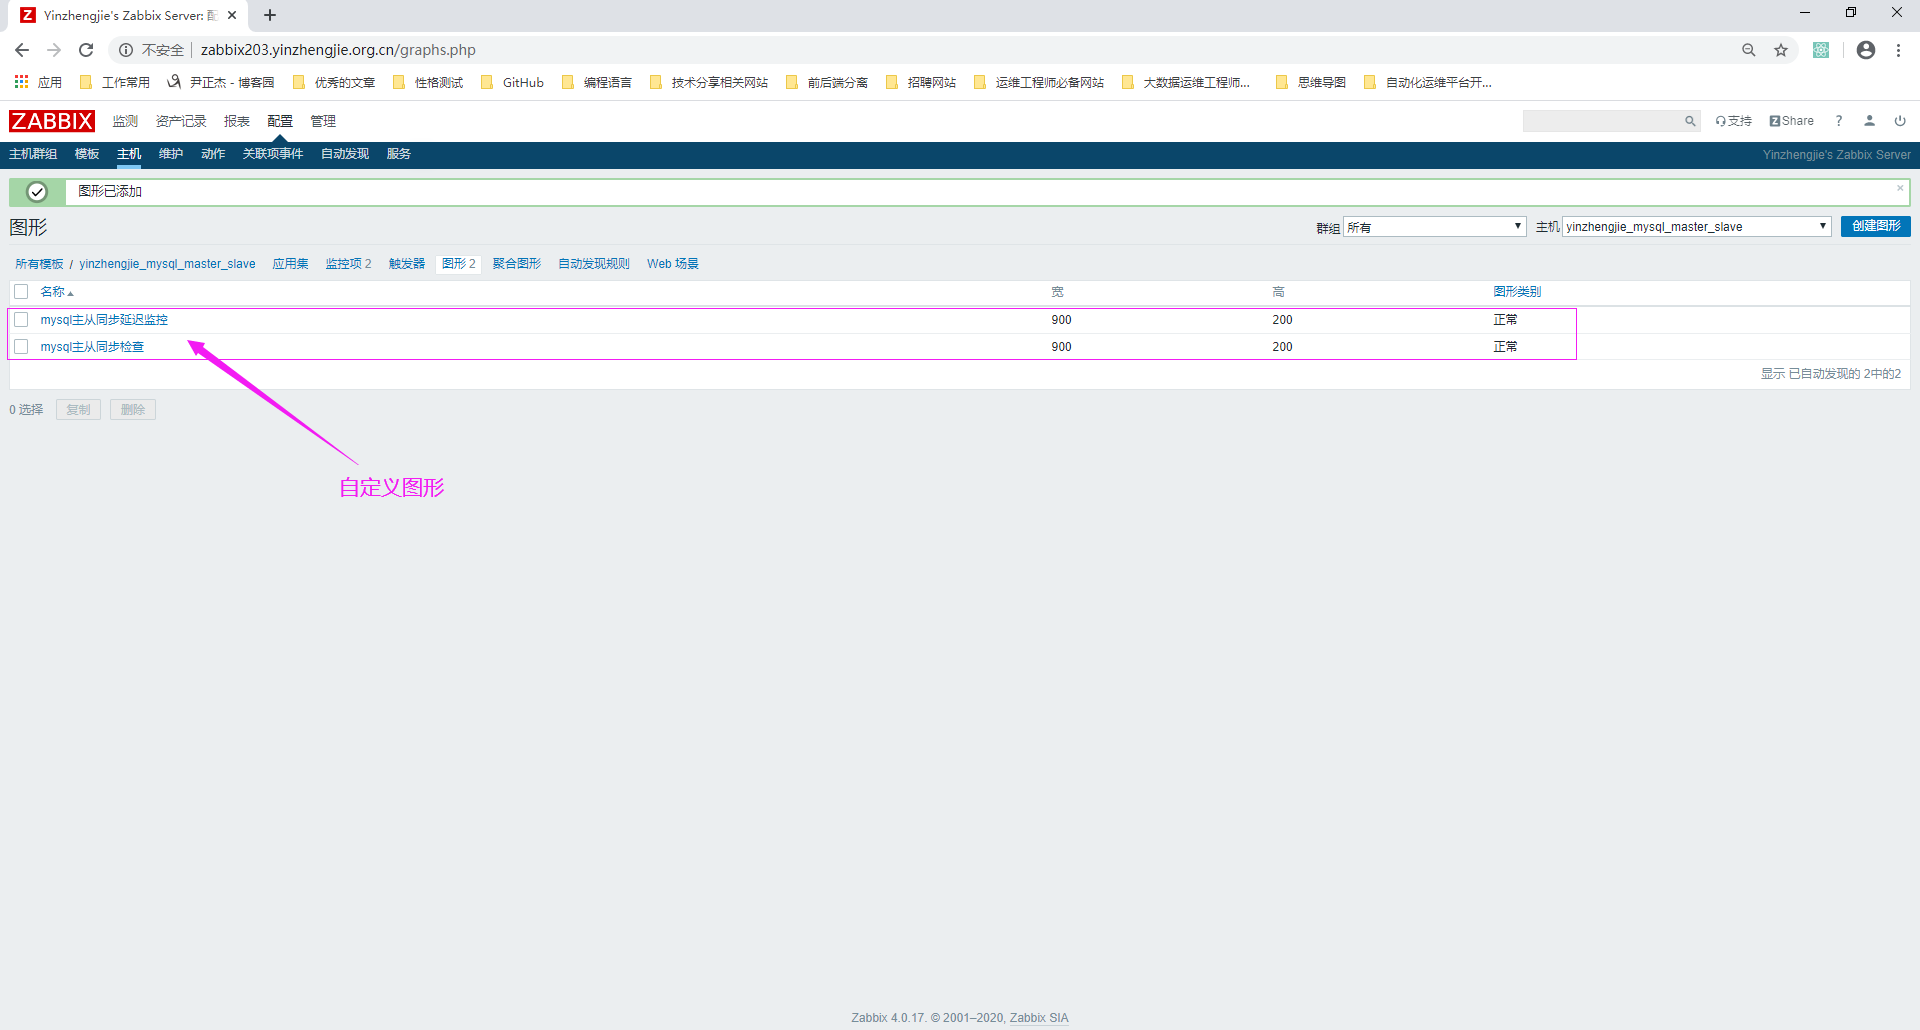
4>.自定义模板的图形
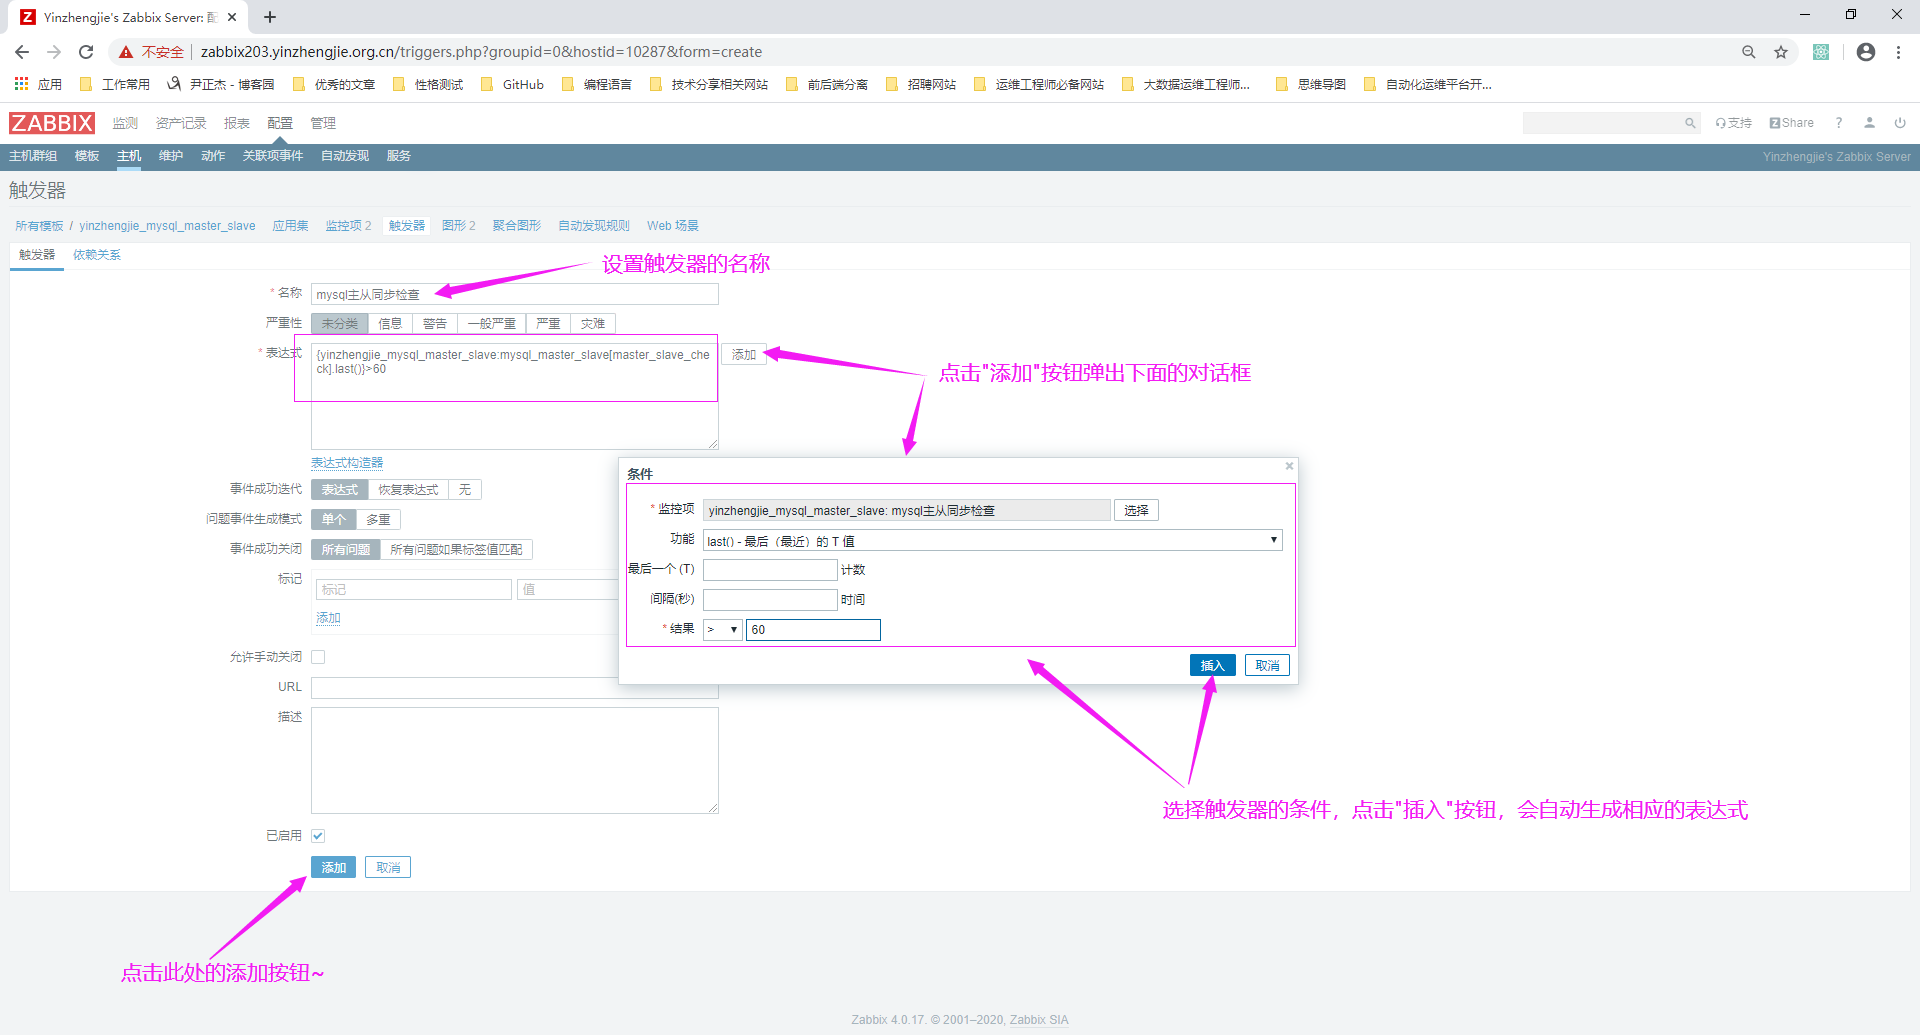
5>.自定义MySQL的触发器
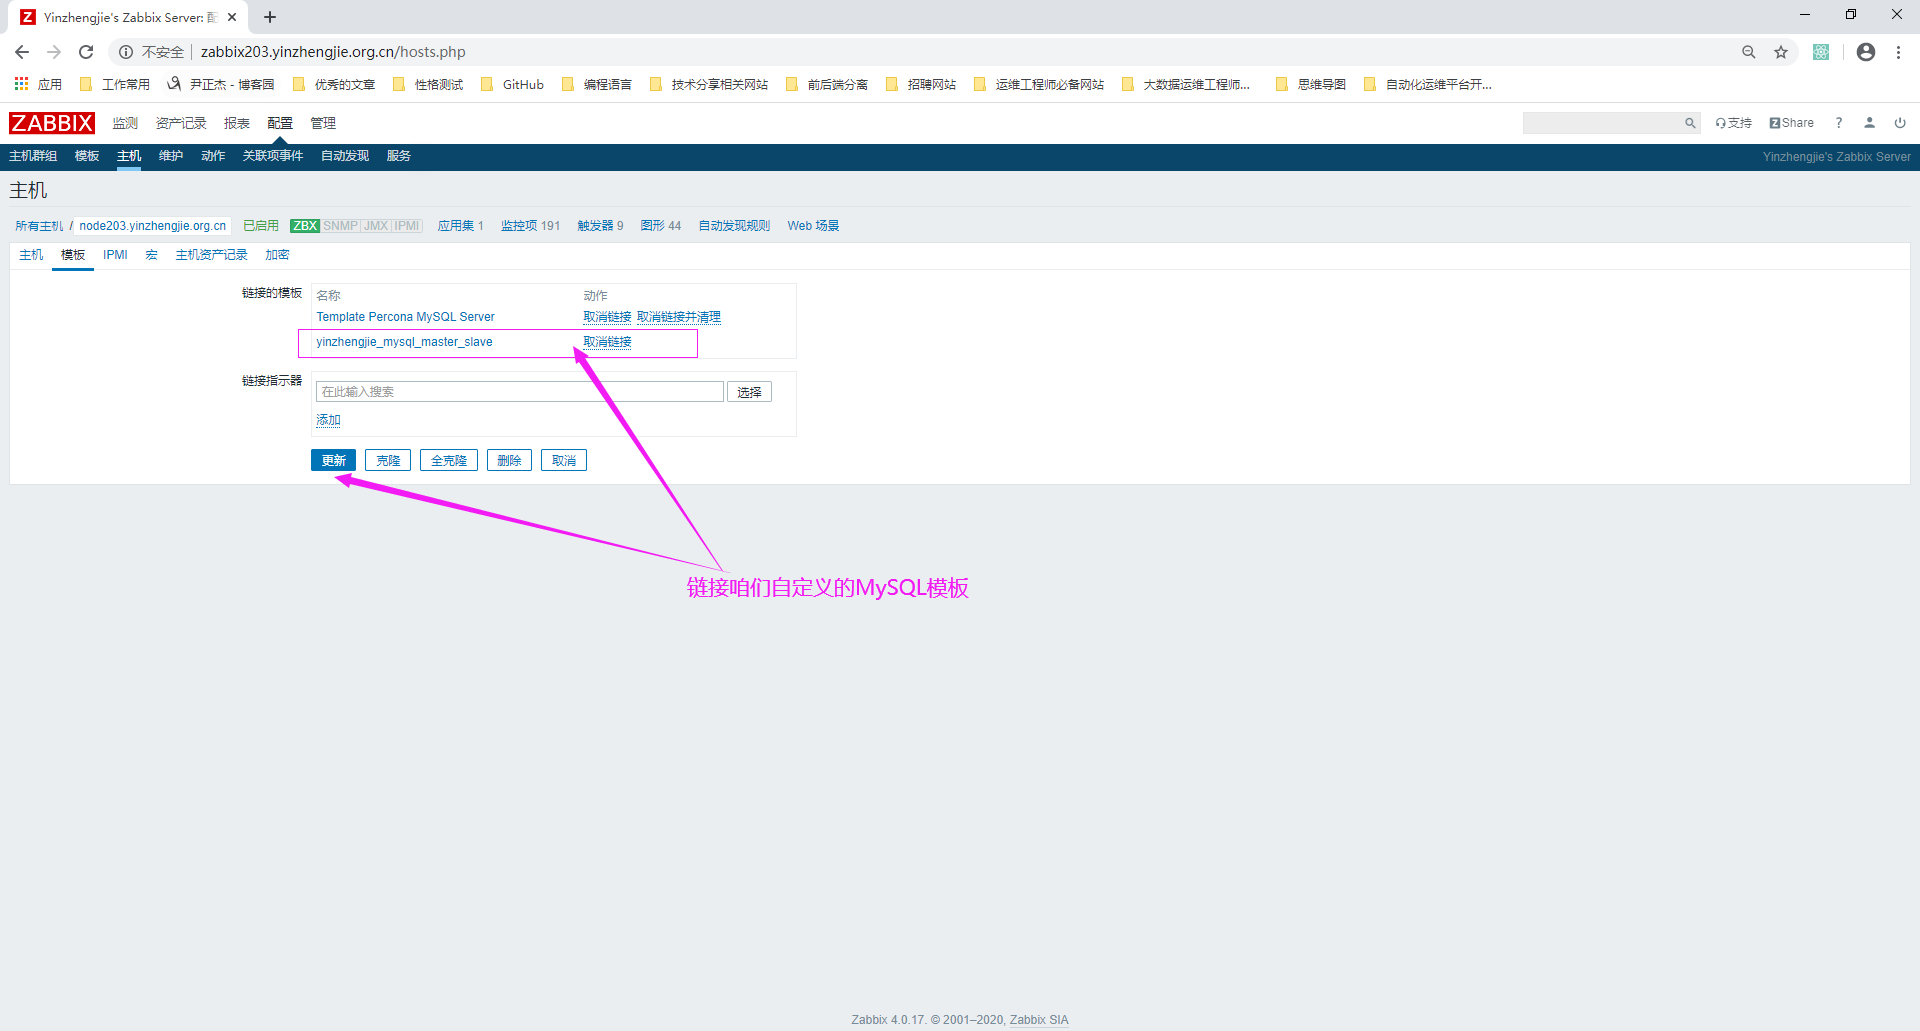
6>.为MySQL主机链接咱们自定义的模板
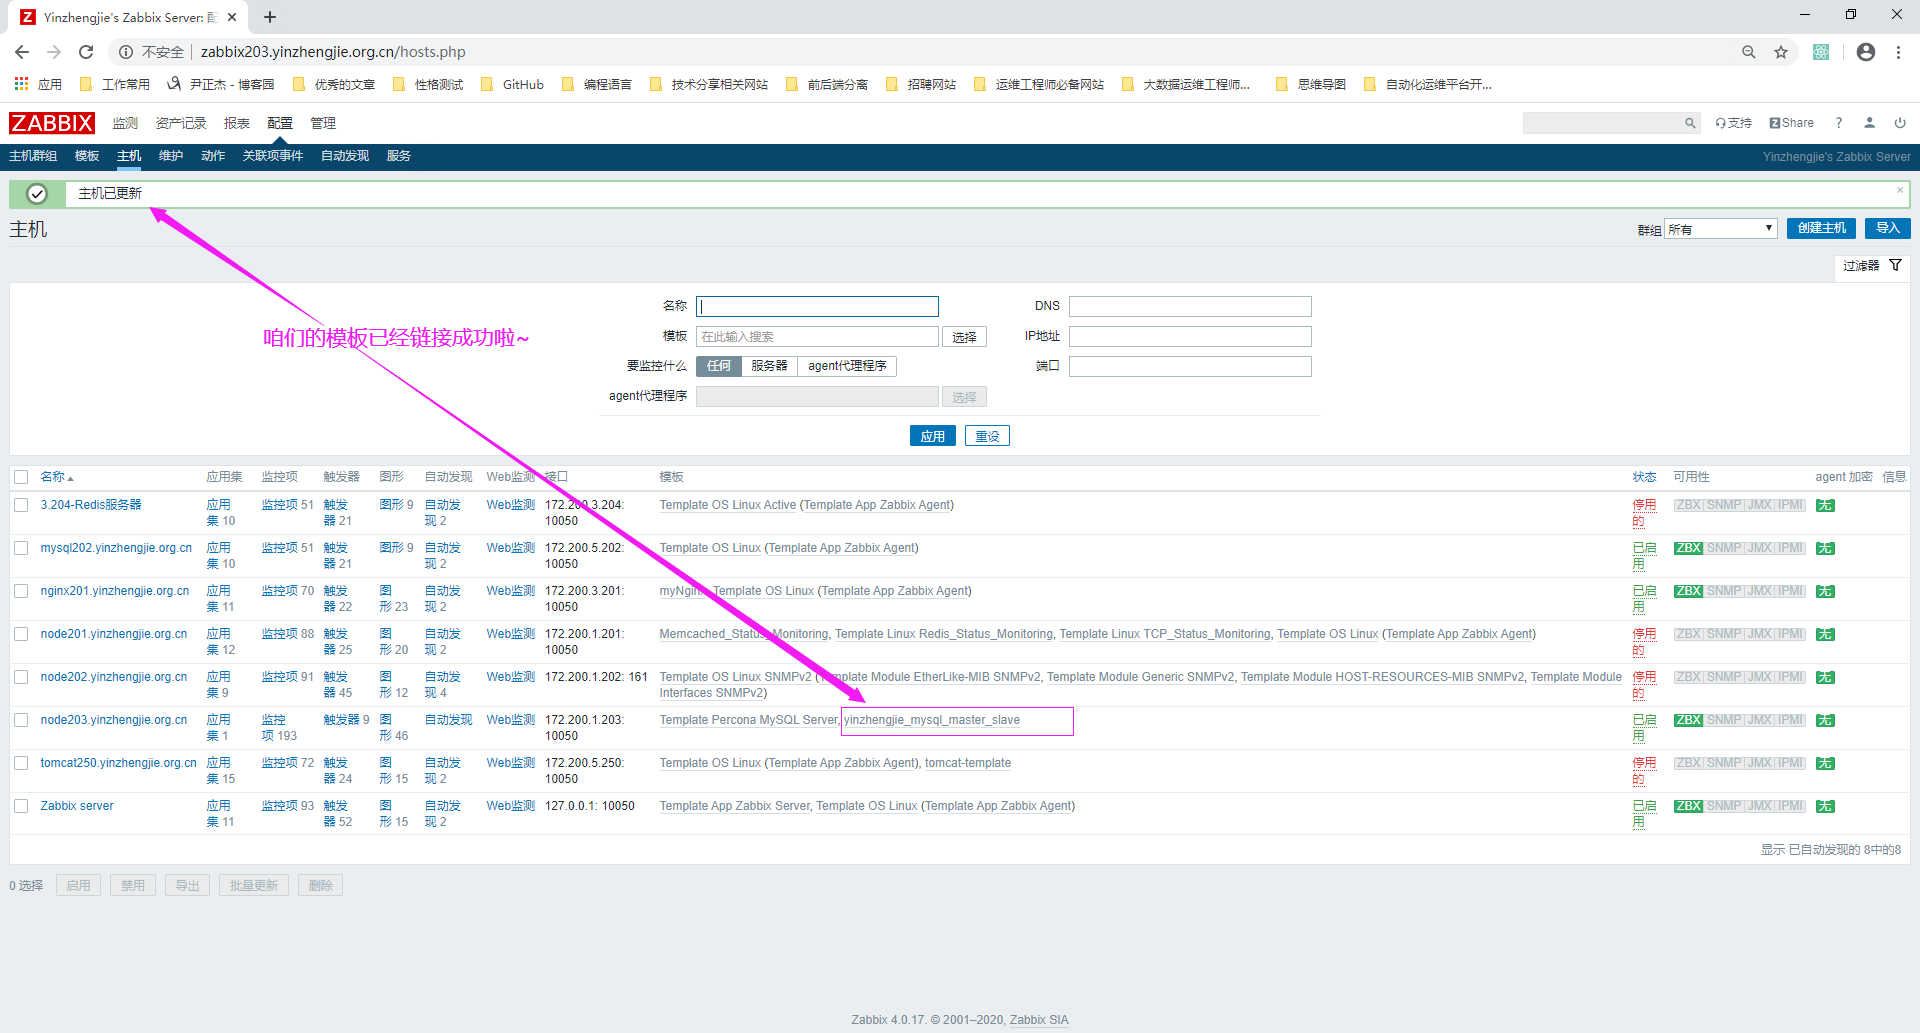
7>.模板链接成功
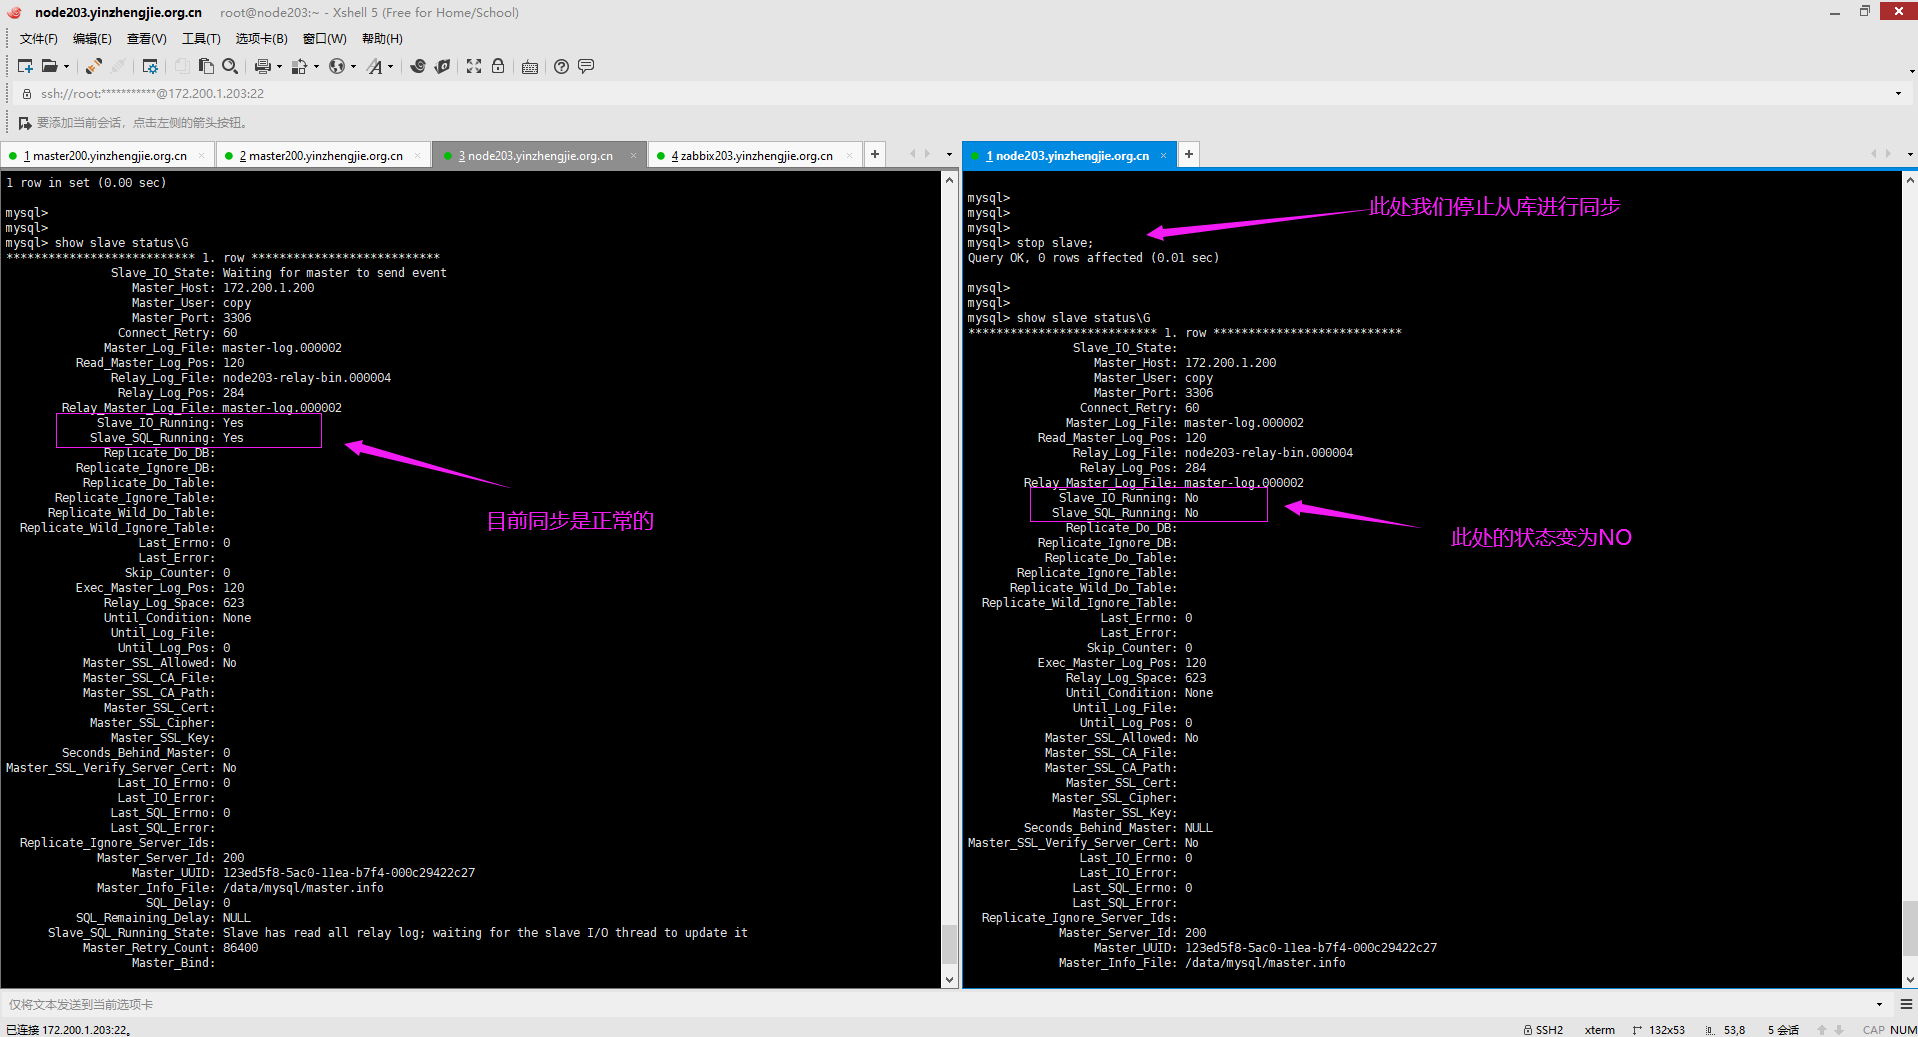
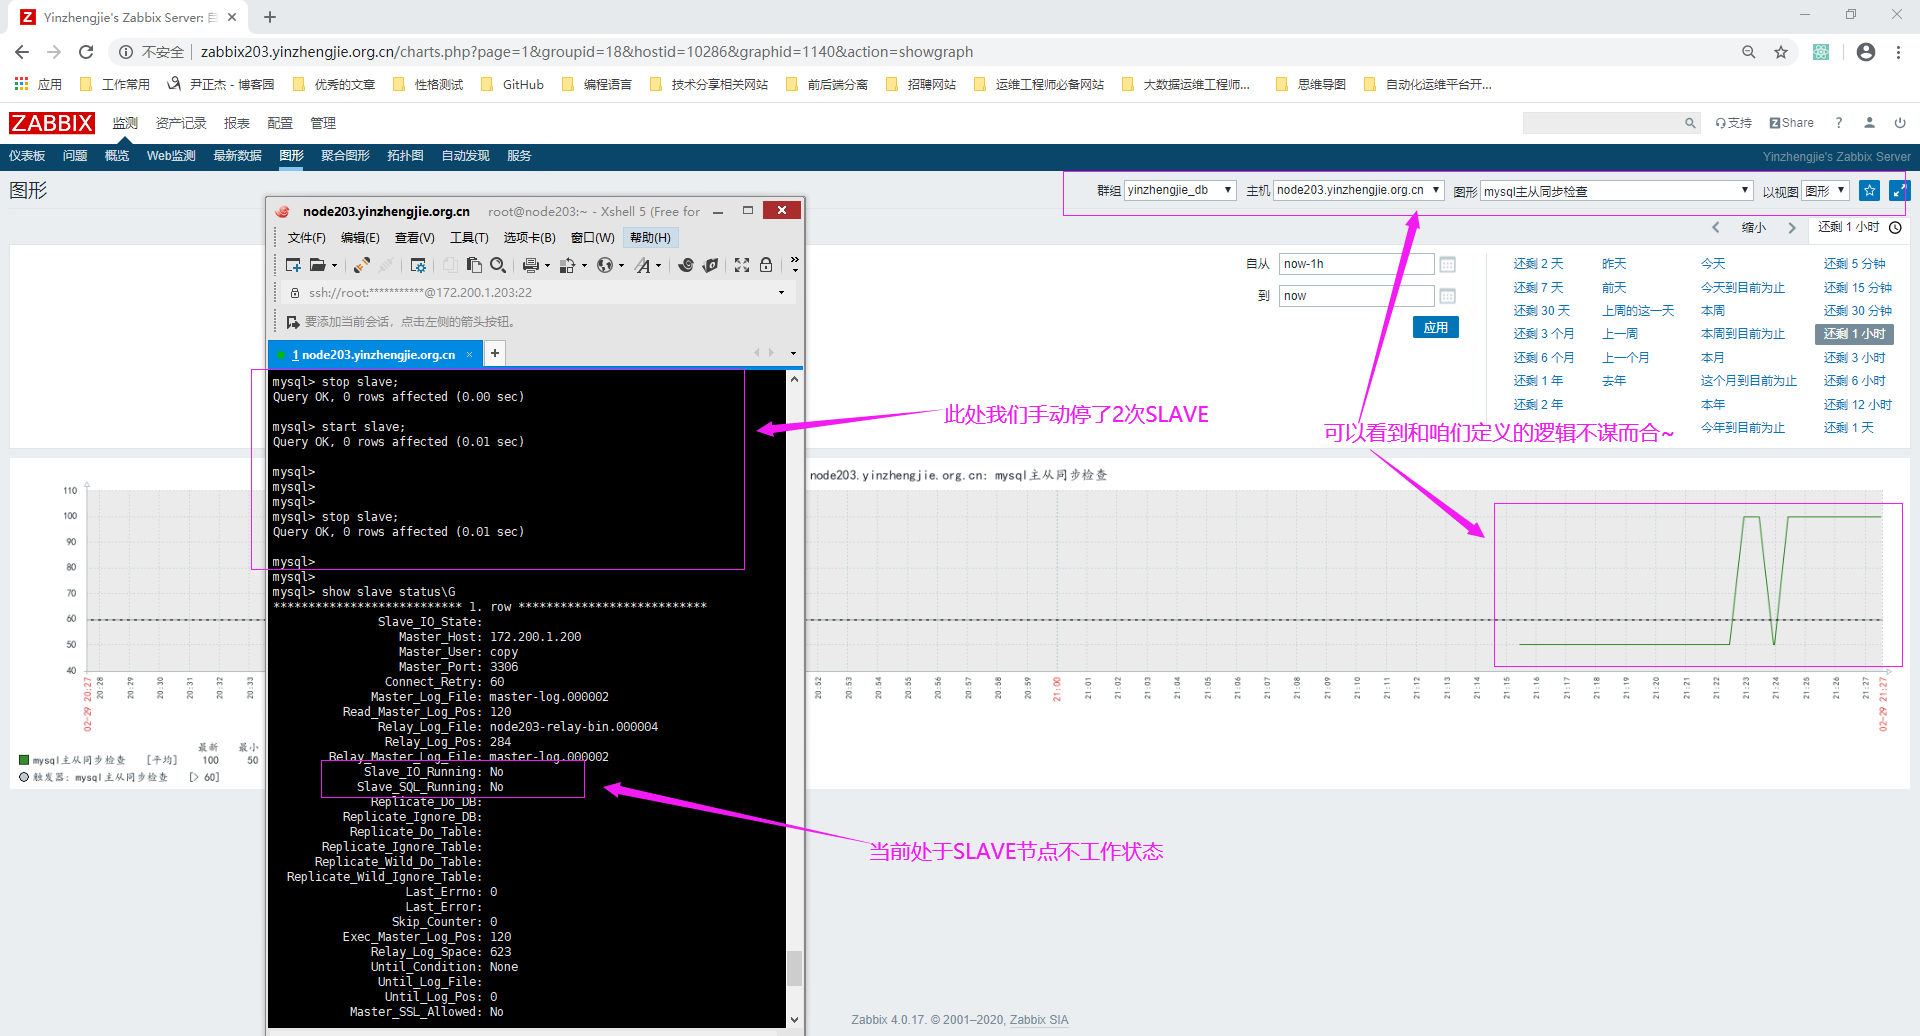
8>.手动停止MySQL数据库从库同步数据
mysql> stop slave;
9>.查看自定义的MySQL图形


 263
263


 被折叠的 条评论
为什么被折叠?
被折叠的 条评论
为什么被折叠?
 到【灌水乐园】发言


