


1 配置Spring
新建一个java工程,导入如下包:

2 开始Spring编程
1 新建一个HelloWorld.java
package test;
public class HelloWorld {
    private String info ;
    public String getInfo() {
        return info;
    }
    public void setInfo(String info) {
        this.info = info;
    }

}
2 编写配置文件applicationContext.xml
在当前工程下创建一个xml文件,添加如下代码
<?xml version="1.0" encoding="UTF-8"?>
<beans
    xmlns="http://www.springframework.org/schema/beans"
    xmlns:xsi="http://www.w3.org/2001/XMLSchema-instance"
    xmlns:p="http://www.springframework.org/schema/p"
    xsi:schemaLocation="http://www.springframework.org/schema/beans http://www.springframework.org/schema/beans/spring-beans-3.0.xsd">
    <!-- 配置需要被Spring管理的Bean(创建,创建后放在了Spring IOC容器里面)-->
    <bean id="hello" class="test.HelloWorld">
        <!-- 配置该Bean需要注入的属性(是通过属性set方法来注入的) -->
        <property name="info" value="Hello World!"/>
    </bean>
</beans>
3 反转控制开始
在Main.java中添加如下:
package test;
import org.springframework.beans.factory.BeanFactory;
import org.springframework.context.support.ClassPathXmlApplicationContext;
public class Main {
public static void main(String[] args) {
//获取Spring的ApplicationContext配置文件,注入IOC容器中
//(Map: key:String, bean标签的id属性值 ==>value:Object, bean标签class属性所指类的实例)
BeanFactory factory = new ClassPathXmlApplicationContext("applicationContext.xml");
/*
HelloWorld hw1 = new HelloWorld();
hw1.setInfo("Hello World!");
*/
//Spring相当于如上代码,通过getBean获取xml文件中对应id值的Bean,在xml文件中配置该Bean需要注入的属性
//不需要自己new对象以及赋值.
HelloWorld hw1 = (HelloWorld)factory.getBean("hello");//map.get("hello")
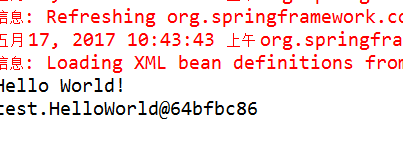
System.out.println(hw1.getInfo());
System.out.println(hw1);
}
}3 测试结果
3 总结
Spring可以通过配置的方法取得对象,而不再用new的方法来取得对象
* 先在xml配置文件中配置bean标签,如:
  <bean id="hello" class="test.HelloWorld">
        <!-- 配置该Bean需要注入的属性(是通过属性set方法来注入的) -->
        <property name="info" value="Hello World!"/>
    </bean>
其中
id 为bean的key,通过之后getBean()取得配置的Bean.
class 为创建的类所在包+类名
property标签为该Bean配置注入的属性.
- 反转控制
1 通过
BeanFactory factory = new ClassPathXmlApplicationContext("applicationContext.xml");来获取配置文件
2 通过getBean获取xml文件中对应id值的Bean,就可以取得我们想要得到的对象了.


 被折叠的 条评论
为什么被折叠?
被折叠的 条评论
为什么被折叠?
 到【灌水乐园】发言


