


以https://wy.guahao.com/为例,编写一个最简单的脚本
用例设计
在写自动化脚本之前,需要先设计用例。
不管在什么情况下,用例的设计直接决定了测试的效果。
不过我们这次是为了完成一个简单的例子,所以设计一个简单的用例。
用例

打开浏览器,切换为H5模式
查看挂号按钮下方文案是否为「全国7800+家医院」
查看问诊按钮下方文案是否为「28万医生在线服务」
查看购药按钮下方文案是否为「微医自营购药更安心」
元素定位
使用浏览器F12对元素进行定位
挂号按钮下方文案定位为:
<p class="home-main-entry--item-title">问诊</p>
<p class="home-main-entry--item-description">
  全国
  <span style="color: #61D000; font-weight: bold">
    7800+
  </span>
  家
  <br>
  医院
</p>这里不能使用它的class=home-main-entry--item-description去定位,因为问诊、购药下方的文案的class是一样的
这时候我们可以使用兄弟节点来进行定位
问诊下方的文案正好是问诊的兄弟节点:'//p[text()="挂号"]/following-sibling::p'
所以yaml文件如下:
pages:
  - page:
      pageName: home_h5
      desc: 首页
      locators:
        - { desc: "挂号",type: "xpath",value: '//p[text()="挂号"]', name: "registered" }
        - { desc: "问诊",type: "xpath",value: '//p[text()="问诊"]', name: "inquiry" }
        - { desc: "购药",type: "xpath",value: '//p[text()="购药"]', name: "buy_medicine" }
        - { desc: "挂号下方文字",type: "xpath",value: '//p[text()="挂号"]/following-sibling::p', name: "registered_text" }
        - { desc: "问诊下方文字",type: "xpath",value: '//p[text()="问诊"]/following-sibling::p', name: "inquiry_text" }
        - { desc: "购药下方文字",type: "xpath",value: '//p[text()="购药"]/following-sibling::p', name: "buy_medicine_text" }
编写页面操作类
编写一个HomePage类继承ElementOperator
from src.utils.constant import BASE_DATA_PATH
from src.utils.elementoperator import ElementOperator


class HomePage(ElementOperator):
    def __init__(self, path=f"{BASE_DATA_PATH}/home.yaml", file_name=f'home_h5', driver=None):
        super(HomePage, self).__init__(path, file_name, driver)
编写pytest.fixture夹具
对于一些重复的操作,将他们提取为夹具进行插拔式使用
打开浏览器切换为H5这个操作就是一个基础的前置操作,所以编写一个fixture
@pytest.fixture(scope='module')
def home():
    home = HomePage()
    url = "https://wy.guahao.com"
    with allure.step(f"打开浏览器进入「{url}」"):
        home.open(url, home.registered)
    yield home
home.close()scope='module':module级别的夹具,在执行一个py文件用例的最开始和最后执行使用继承
ElementOperator的open方法来打开浏览器使用yield返回打开浏览器后的对象
在完成测试后使用
close方法关闭浏览器
编写测试主体
新建一个test_home.py文件。
默认情况下
pytest执行的测试文件需要以test开头或以test结尾
使用compose完成测试报告文件夹层级的展示
使用
@pytest.mark.parametrize进行测试的参数化,每个case就测试一小块内容
import allure
import pytest

from src.utils.allureoperator import compose


@compose(feature="微医主站", story="首页", title='主入口下方文案校验')
@pytest.mark.parametrize("way", ["registered", "inquiry", "buy_medicine"])
def test_home_text(home, way):
    """
    按钮下方文案测试
        * 挂号
        * 问诊
        * 购药
    """
    with allure.step(f"查看{getattr(home, way).desc}按钮下方文案"):
        text = home.get_text(getattr(home, f"{way}_text"))
        if way == 'registered':
            assert text == '全国7800+家\n医院'
        elif way == 'inquiry':
            assert text == '28万医生在线\n服务'
        elif way == 'buy_medicine':
            assert text == '微医自营\n购药更安心'
点一下运行就可以看到测试结果了,全程打开一次浏览器,在完成测试后关闭浏览器
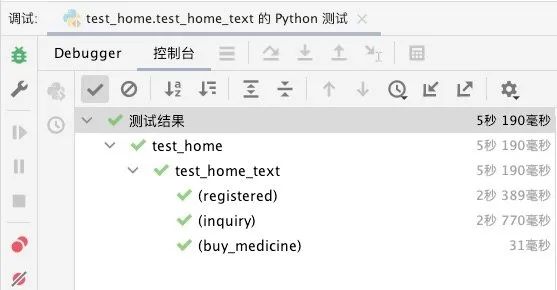
代码见first_test分支:https://gitee.com/zx660644/uitest/tree/first_test/


 2398
2398


 被折叠的 条评论
为什么被折叠?
被折叠的 条评论
为什么被折叠?
 到【灌水乐园】发言


