


引言
maven不仅仅只是项目的依赖管理工具,其强大的核心来源自丰富的插件,可以说插件才是maven工具的灵魂。本篇文章将对如何自定义maven插件进行讲解,希望对大家有所帮助。
背景
讲如何开发maven插件之前,不妨先来聊一下什么是maven的插件。
我们知道,maven中主要有三大生命周期,clean,default和report,不同的生命周期中提供了一些快捷的操作命令给开发人员去进行项目的清理、编译、打包等操作。之所以我们可以通过类似于mvn clean compile等命令快速完成项目的清理和构建,实际上是因为maven在项目核心的生命周期节点上,已经设置好了默认的运行插件,我们执行命令的时候,实际上调用的就是绑定对应生命周期的插件。
maven插件本质上就是一个jar包,不同的插件里面有着不同功能的代码,当我们调用该插件的时候,其实就是通过执行jar包中的方法,去达到对应的goal,实现我们的目的。除了官网的maven插件之外,其实maven还允许我们根据实际的项目需要,自定义去开发maven插件,从而满足我们的项目构建需要。
demo演示
创建项目
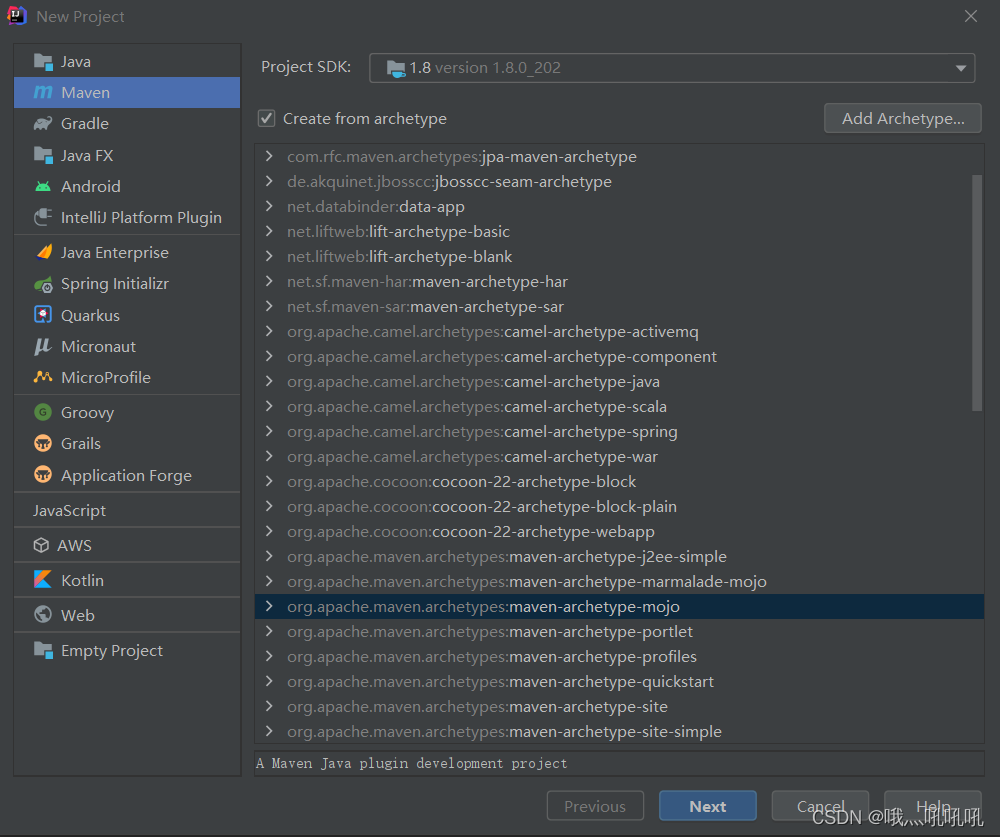
- 打开 IntelliJ IDEA 工具,点击 “File”(文件)菜单,然后选择 “New”(新建),再选择 “Project”(项目)。
- 在弹出的对话框中,选择 “Maven” 选项,然后点击 “Next”(下一步)。
- 在 “New Project” 对话框中,输入项目的基本信息,如 “GroupId”、“ArtifactId”、“Version” 等。
- 在 “Project SDK” 下拉菜单中选择合适的 JDK 版本,然后点击 “Next”(下一步)。
- 在 “Project template” 对话框中,选择 “Maven Project”,并确保勾选 “Create from archetype”(从原型创建)。
- 在 “Choose archetype” 下拉菜单中,选择 “maven-archetype-mojo”。
- 点击 “Next”(下一步),然后输入项目的 “Name”(名称)和 “Location”(位置)。
- 点击 “Finish”(完成),IntelliJ IDEA 将会创建一个基本的 Maven 插件项目结构。
创建完成后项目结构如下:
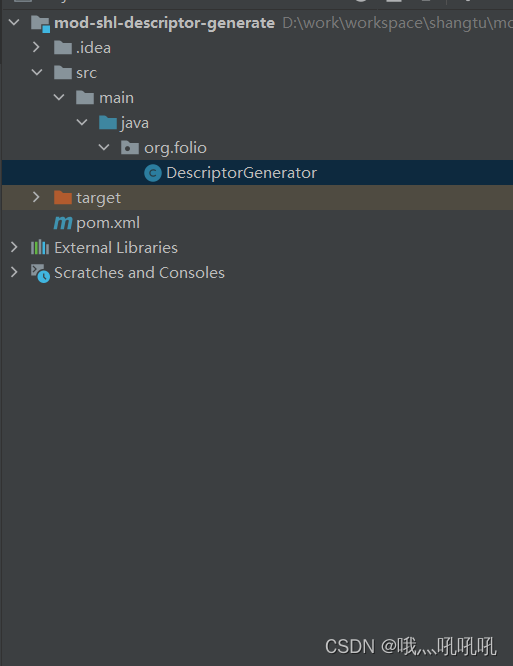
这里的DescriptorGenerator是我重命名过的了,原本应该叫MyMojo
然后我们在pom文件中引入我们需要的依赖
<dependencies>
    <dependency>
      <groupId>org.apache.maven</groupId>
      <artifactId>maven-plugin-api</artifactId>
      <version>3.0</version>
    </dependency>
    <!--这个依赖引入了插件开发需要的相关注解-->
    <dependency>
      <groupId>org.apache.maven.plugin-tools</groupId>
      <artifactId>maven-plugin-annotations</artifactId>
      <version>3.4</version>
      <scope>provided</scope>
    </dependency>
     <!--将Maven文件解析成实体类的依赖-->
    <dependency>
      <groupId>org.apache.maven</groupId>
      <artifactId>maven-project</artifactId>
      <version>2.2.1</version>
    </dependency>
     <!--FreeMarker模板填充-->
    <dependency>
      <groupId>org.freemarker</groupId>
      <artifactId>freemarker</artifactId>
      <version>2.3.31</version>
    </dependency>
  </dependencies>
然后我们回到我们开发的主类DescriptorGenerator,类上加上@Mojo(name = “DescriptorPlugin”)注解,至此我们的项目骨架已经搭建完毕
业务介绍
我们的需求其实很简单,需要将项目根目录/descriptors下的两个文件填充pom文件中的version以及artifactId,并将生成的文件保存到target目录下,至此,代码就已经呼之欲出了:
/*
 * Copyright 2001-2005 The Apache Software Foundation.
 *
 * Licensed under the Apache License, Version 2.0 (the "License");
 * you may not use this file except in compliance with the License.
 * You may obtain a copy of the License at
 *
 *      http://www.apache.org/licenses/LICENSE-2.0
 *
 * Unless required by applicable law or agreed to in writing, software
 * distributed under the License is distributed on an "AS IS" BASIS,
 * WITHOUT WARRANTIES OR CONDITIONS OF ANY KIND, either express or implied.
 * See the License for the specific language governing permissions and
 * limitations under the License.
 */

import freemarker.template.Configuration;
import freemarker.template.Template;
import freemarker.template.TemplateException;
import org.apache.maven.plugin.AbstractMojo;
import org.apache.maven.plugin.MojoExecutionException;
import org.apache.maven.plugins.annotations.Mojo;
import org.apache.maven.project.MavenProject;

import java.io.File;
import java.io.FileWriter;
import java.io.IOException;
import java.io.StringWriter;
import java.util.HashMap;
import java.util.Map;

/**
 * Goal which touches a timestamp file.
 *
 * @goal touch
 * @phase process-sources
 */
@Mojo(name = "DescriptorPlugin")
public class DescriptorGenerator extends AbstractMojo {

    public void execute() throws MojoExecutionException {
        // 获取版本号及artifactId
        MavenProject project = (MavenProject) getPluginContext().get("project");
        Map<String, Object> dataModel = new HashMap<String, Object>();
        dataModel.put("version", project.getVersion());
        dataModel.put("artifactId",project.getArtifactId());
        System.out.println("Descriptor Generator Info: version : " + project.getVersion());
        System.out.println("Descriptor Generator Info: artifactId : " + project.getArtifactId());
        fillTemplate(dataModel,"DeploymentDescriptor.json");
        fillTemplate(dataModel,"ModuleDescriptor.json");
    }


    private void fillTemplate(Map<String, Object> dataModel,String fileName){
        String renderedContent = "";
        try {
            // 读取文件内容
            Configuration configuration = new Configuration(Configuration.VERSION_2_3_31);
            configuration.setDirectoryForTemplateLoading(new File("descriptors"));
            configuration.setDefaultEncoding("UTF-8");
            // 加载模板文件
            Template template = null;
            try {
                template = configuration.getTemplate(fileName);
            } catch (IOException e) {
                System.out.println("Descriptor Generator Error: File Not Found, File Path : " + "descriptors/" +fileName);
            }
            // 执行模板渲染
            StringWriter writer = new StringWriter();
            template.process(dataModel, writer);
            // 获取渲染后的内容
            renderedContent = writer.toString();
        } catch (Exception e) {
            e.printStackTrace();
        }
        // 获取项目的 target 目录路径
        String targetDirectory = "target";
        // 创建 target 目录对象
        File targetDir = new File(targetDirectory);
        // 检查 target 目录是否存在,如果不存在则创建它
        if (!targetDir.exists()) {
            targetDir.mkdirs();
        }
        // 生成最终的文件路径
        String outputFile = targetDirectory + File.separator + fileName;
        System.out.println("Descriptor Generator Info: Output File : " + outputFile);
        FileWriter writer = null;
        try {
            writer = new FileWriter(outputFile);
            // 将处理后的文件内容写入生成的文件
            writer.write(renderedContent);
        } catch (IOException e) {
            e.printStackTrace();
        } finally {
            try {
                if(writer != null){
                    writer.close();
                }
            } catch (IOException e) {
                e.printStackTrace();
            }
        }
    }

}
Mojo已经给我们提供了一个AbstractMojo的抽象类,只需要继承于他,并且定义execute方法即可。
运行
接下去我们就将这个项目打包并且安装到本地仓库
mvn clean install
然后打开本地仓库,检查是否成功生成jar包

添加插件
我们打开我们的业务项目,在pom文件中,添加打包插件
<plugin>
    <artifactId>mod-shl-descriptor-generate</artifactId>
    <groupId>org.folio</groupId>
    <version>1.0.1</version>
    <executions>
        <execution>
            <id>test</id>
            <phase>compile</phase>
            <goals>
                <goal>DescriptorPlugin</goal>
            </goals>
        </execution>
    </executions>
</plugin>
其中DescriptorPlugin就是我们定义的@Mojo注解的值
运行
我们再业务项目中执行
mvn clean package
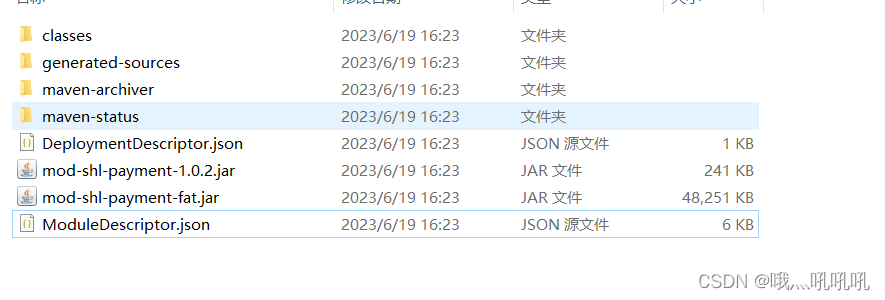
输出结果如下:

再看我们的target目录,那两个我们需要的文件也就出现在里面了
总结
至此,我们的maven插件就开发完毕了,可以看到整体开发难度并不是很高,但是可以实现的功能确十分强大。比如我们还可以通过定义注解的方式,打包阶段解析注解,生成我们想要的内容,或者提交到服务器完成类似于接口的注册等等功能。
学无止境,欢迎大家多多交流以及学习~


 1236
1236


 被折叠的 条评论
为什么被折叠?
被折叠的 条评论
为什么被折叠?
 到【灌水乐园】发言


