


 本文介绍了SpringBoot中缓存的使用,包括接口、注解和key/value策略,详细解析了如何启用缓存、整合Redis以及缓存运行流程。通过引入Redis启动器、配置Redis信息,并自定义序列化器,实现数据以JSON格式存储。同时,文章探讨了缓存原理,如自动配置的CacheManager和默认的SimpleCacheConfiguration。
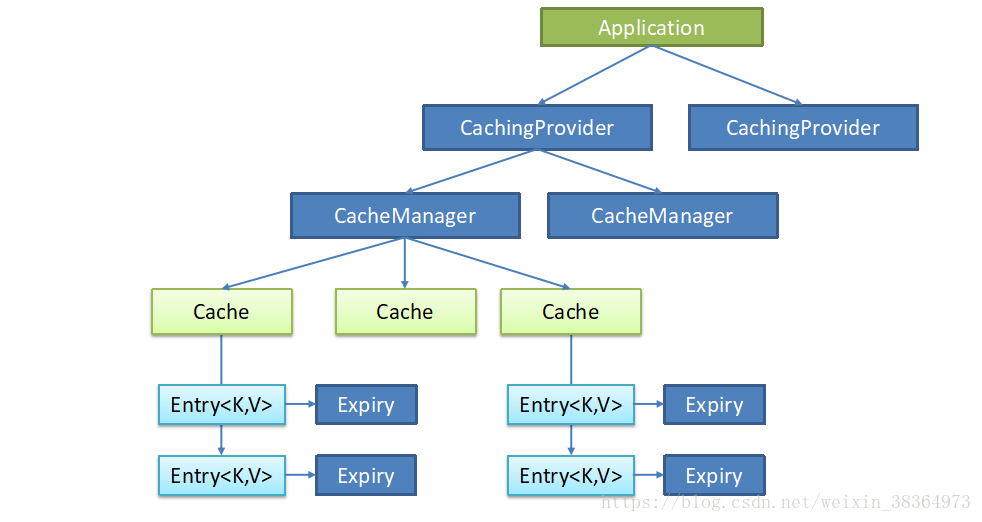
Java缓存接口标准JSR-107:Java Caching定义了5个核心接口,分别是CachingProvider(缓存提供者), CacheManager(缓存管理器), Cache(缓存组件), Entry (key-value对)和Expiry(条目有效期),他们的关系如下图所示。但是该缓存规范,整合难度较大。Spring从3.1开始定义了org.springframework.cache.Cache和org.springframework.cache.CacheManager接口来统一不同的缓存技术;
1、接口、缓存注解、key/value生成策略
| Cache | 缓存接口,定义缓存操作。实现:RedisCache、EhCache等(根据缓存技术不同来实现Cache接口) |
| CacheManager | 缓存接口,缓存管理器,管理各种缓存(Cache)组件 |
| @Cacheable | 可缓存的,标注方法,能够根据方法的请求参数对其结果进行缓存 |
| @CacheEvict | 清空缓存 |
| @CachePut | 更新缓存 |
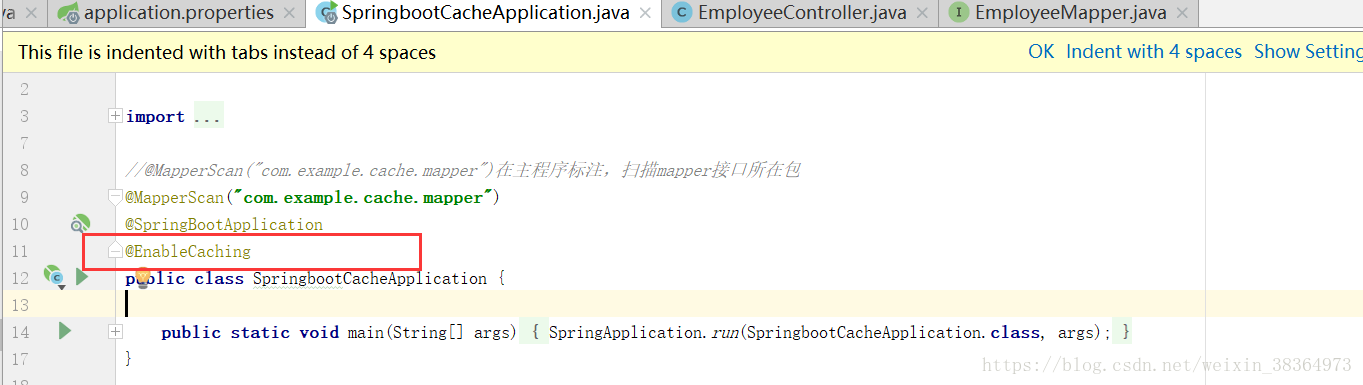
| @EnableCaching | 开启基于注解的缓存 |
| keyGenerator | 缓存数据时key生成策略 |
| serialize | 缓存数据时value序列化策略 |
2、使用cache缓存步骤(不使用缓存时,每次访问都会连接数据库)
a、引入依赖
<dependency>
	<groupId>org.springframework.boot</groupId>
	<artifactId>spring-boot-starter-cache</artifactId>
</dependency>
b、开启基于注解的缓存 @EnableCaching
c、标注缓存注解@Cacheable:标注方法可缓存;@CacheEvict:缓存清除;@CachePut:缓存更新等;支持spel表达式,
 最低0.47元/天 解锁文章


 1672
1672


 被折叠的 条评论
为什么被折叠?
被折叠的 条评论
为什么被折叠?
 到【灌水乐园】发言


