


静下心来,写下人生的第一篇博客。
(小序:文笔不好,基础Demo,大神请略过哈~~)
之前习惯用了eclipse,最近转到IDEA后,给我最大的差别就是:
eclipse有workspace的概念,而IDEA最顶层是project;这就导致了eclipse可以在同一窗口打开多个project,而IDEA只能打开一个project。后来学习找到可以通过新建一个空project的maven项目,然后添加多个Modules来实现同时打开多个project。闲话不多说,写个小Demo记录一下:
一、开发环境:
- IDEA;
- JDK1.8
- Maven-3.3.9
- SpringBoot-1.4.1
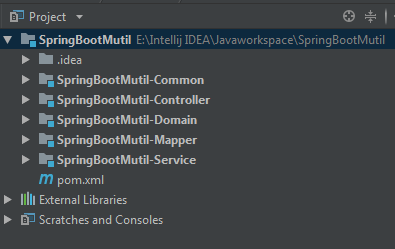
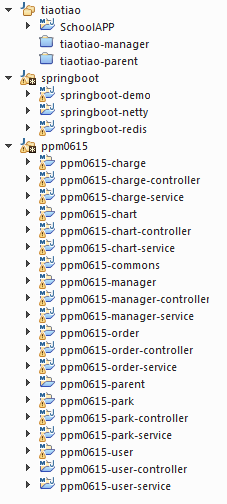
二、项目目录截图:
三、项目创建步骤:
(1)创建一个maven的project项目,File -> New -> Project,选择创建maven;名称命名为:SpringBootMutil,因为该项目只是作为聚合项目的父项目,所以删除src文件,保留pom.xml即可,并将打包方式改成pom。
(2)右键父项目名,New -> Module,依次创建各个子Module,方便识别,名称命名为SpringBootMutil-*的形式,打包方式为jar包。
(3)在父项目中添加依赖的版本信息,以及公共依赖等,最后的父pom文件:
父pom.xml
<?xml version="1.0" encoding="UTF-8"?>
<project xmlns="http://maven.apache.org/POM/4.0.0"
         xmlns:xsi="http://www.w3.org/2001/XMLSchema-instance"
         xsi:schemaLocation="http://maven.apache.org/POM/4.0.0
         http://maven.apache.org/xsd/maven-4.0.0.xsd">
    <modelVersion>4.0.0</modelVersion>

    <groupId>com.lzz</groupId>
    <artifactId>SpringBootMutil</artifactId>
    <version>1.0-SNAPSHOT</version>
    <!--打包方式为pom -->
    <packaging>pom</packaging>

    <modules>
        <module>SpringBootMutil-Service</module>
        <module>SpringBootMutil-Mapper</module>
        <module>SpringBootMutil-Domain</module>
        <module>SpringBootMutil-Common</module>
        <module>SpringBootMutil-Controller</module>
    </modules>

    <parent>
        <groupId>org.springframework.boot</groupId>
        <artifactId>spring-boot-starter-parent</artifactId>
        <version>1.4.1.RELEASE</version>
        <relativePath/> <!-- lookup parent from repository -->
    </parent>

    <properties>
        <project.build.sourceEncoding>UTF-8</project.build.sourceEncoding>
        <project.reporting.outputEncoding>UTF-8</project.reporting.outputEncoding>
        <java.version>1.8</java.version>
        <druid.version>1.0.9</druid.version>
        <mybatis.boot.starter.version>1.1.1</mybatis.boot.starter.version>
        <mysql.connector.java.version>5.1.32</mysql.connector.java.version>
    </properties>

    <!-- 依赖版本控制 -->
    <dependencyManagement>
        <dependencies>
            <!-- mybatis的依赖 -->
            <dependency>
                <groupId>org.mybatis.spring.boot</groupId>
                <artifactId>mybatis-spring-boot-starter</artifactId>
                <version>${mybatis.boot.starter.version}</version>
            </dependency>
            <!-- 添加MySQL数据库驱动依赖 -->
            <dependency>
                <groupId>mysql</groupId>
                <artifactId>mysql-connector-java</artifactId>
                <version>${mysql.connector.java.version}</version>
            </dependency>
            <!-- 数据库连接池 -->
            <dependency>
                <groupId>com.alibaba</groupId>
                <artifactId>druid</artifactId>
                <version>${druid.version}</version>
            </dependency>
        </dependencies>
    </dependencyManagement>

    <!-- 公共依赖 -->
    <dependencies>
        <dependency>
            <groupId>org.springframework.boot</groupId>
            <artifactId>spring-boot-starter-web</artifactId>
        </dependency>
        <dependency>
            <groupId>org.springframework.boot</groupId>
            <artifactId>spring-boot-starter-test</artifactId>
        </dependency>
    </dependencies>

    <!--指定使用maven打包-->
    <build>
        <plugins>
            <plugin>
                <groupId>org.apache.maven.plugins</groupId>
                <artifactId>maven-compiler-plugin</artifactId>
                <configuration>
                    <source>${java.version}</source>
                    <target>${java.version}</target>
                </configuration>
            </plugin>

            <plugin>
                <groupId>org.apache.maven.plugins</groupId>
                <artifactId>maven-surefire-plugin</artifactId>
                <version>2.18.1</version>
                <configuration>
                    <skipTests>true</skipTests><!--默认关掉单元测试 -->
                </configuration>
            </plugin>
        </plugins>
    </build>

</project>
(4)按照项目命名规则,子Module之间的依赖关系:
- Controller依赖Common、Domain、Service;
- Service依赖Common、Domain、Mapper;
- Mapper依赖Common、Domain;
- Common为公共工具类项目,因此不依赖其他Module。
[1] Common的pom.xml
<?xml version="1.0" encoding="UTF-8"?>
<project xmlns="http://maven.apache.org/POM/4.0.0"
         xmlns:xsi="http://www.w3.org/2001/XMLSchema-instance"
         xsi:schemaLocation="http://maven.apache.org/POM/4.0.0
         http://maven.apache.org/xsd/maven-4.0.0.xsd">
    <modelVersion>4.0.0</modelVersion>
    <artifactId>SpringBootMutil-Common</artifactId>
    <packaging>jar</packaging>

    <parent>
        <artifactId>SpringBootMutil</artifactId>
        <groupId>com.lzz</groupId>
        <version>1.0-SNAPSHOT</version>
        <relativePath>../pom.xml</relativePath>
    </parent>

</project>
[2] Domain的pom.xml
<?xml version="1.0" encoding="UTF-8"?>
<project xmlns="http://maven.apache.org/POM/4.0.0"
         xmlns:xsi="http://www.w3.org/2001/XMLSchema-instance"
         xsi:schemaLocation="http://maven.apache.org/POM/4.0.0
         http://maven.apache.org/xsd/maven-4.0.0.xsd">
    <modelVersion>4.0.0</modelVersion>
    <artifactId>SpringBootMutil-Domain</artifactId>
    <packaging>jar</packaging>

    <parent>
        <artifactId>SpringBootMutil</artifactId>
        <groupId>com.lzz</groupId>
        <version>1.0-SNAPSHOT</version>
        <relativePath>../pom.xml</relativePath>
    </parent>

</project>
[3] Mapper的pom.xml
注意:在Mapper项目中,要引入mybatis和数据库的依赖
<?xml version="1.0" encoding="UTF-8"?>
<project xmlns="http://maven.apache.org/POM/4.0.0"
         xmlns:xsi="http://www.w3.org/2001/XMLSchema-instance"
         xsi:schemaLocation="http://maven.apache.org/POM/4.0.0
         http://maven.apache.org/xsd/maven-4.0.0.xsd">
    <modelVersion>4.0.0</modelVersion>
    <artifactId>SpringBootMutil-Mapper</artifactId>
    <packaging>jar</packaging>

    <parent>
        <artifactId>SpringBootMutil</artifactId>
        <groupId>com.lzz</groupId>
        <version>1.0-SNAPSHOT</version>
        <relativePath>../pom.xml</relativePath>
    </parent>

    <dependencies>
        <!-- 内部依赖 -->
        <dependency>
            <groupId>com.lzz</groupId>
            <artifactId>SpringBootMutil-Common</artifactId>
            <version>1.0-SNAPSHOT</version>
        </dependency>
        <dependency>
            <groupId>com.lzz</groupId>
            <artifactId>SpringBootMutil-Domain</artifactId>
            <version>1.0-SNAPSHOT</version>
        </dependency>
        <!-- 外部依赖 -->
        <!-- mybatis的依赖 -->
        <dependency>
            <groupId>org.mybatis.spring.boot</groupId>
            <artifactId>mybatis-spring-boot-starter</artifactId>
        </dependency>
        <!-- 添加MySQL数据库驱动依赖 -->
        <dependency>
            <groupId>mysql</groupId>
            <artifactId>mysql-connector-java</artifactId>
        </dependency>
        <!-- 数据库连接池 -->
        <dependency>
            <groupId>com.alibaba</groupId>
            <artifactId>druid</artifactId>
        </dependency>
    </dependencies>

</project>
[4] Service的pom.xml
注意:在service项目中引入事务控制的依赖
<?xml version="1.0" encoding="UTF-8"?>
<project xmlns="http://maven.apache.org/POM/4.0.0"
         xmlns:xsi="http://www.w3.org/2001/XMLSchema-instance"
         xsi:schemaLocation="http://maven.apache.org/POM/4.0.0
         http://maven.apache.org/xsd/maven-4.0.0.xsd">
    <modelVersion>4.0.0</modelVersion>
    <artifactId>SpringBootMutil-Service</artifactId>
    <packaging>jar</packaging>

    <parent>
        <artifactId>SpringBootMutil</artifactId>
        <groupId>com.lzz</groupId>
        <version>1.0-SNAPSHOT</version>
        <relativePath>../pom.xml</relativePath>
    </parent>

    <dependencies>
        <!-- 内部依赖 -->
        <dependency>
            <groupId>com.lzz</groupId>
            <artifactId>SpringBootMutil-Common</artifactId>
            <version>1.0-SNAPSHOT</version>
        </dependency>
        <dependency>
            <groupId>com.lzz</groupId>
            <artifactId>SpringBootMutil-Domain</artifactId>
            <version>1.0-SNAPSHOT</version>
        </dependency>
        <dependency>
            <groupId>com.lzz</groupId>
            <artifactId>SpringBootMutil-Mapper</artifactId>
            <version>1.0-SNAPSHOT</version>
        </dependency>

        <!-- 外部依赖 -->
        <!-- 事务管理需要引入该jar包 -->
        <dependency>
            <groupId>org.springframework.boot</groupId>
            <artifactId>spring-boot-starter-jdbc</artifactId>
        </dependency>
    </dependencies>

</project>
[5] Controller的pom.xml
注意:配置maven插件,指定唯一的main方法的入口
<?xml version="1.0" encoding="UTF-8"?>
<project xmlns="http://maven.apache.org/POM/4.0.0"
         xmlns:xsi="http://www.w3.org/2001/XMLSchema-instance"
         xsi:schemaLocation="http://maven.apache.org/POM/4.0.0
         http://maven.apache.org/xsd/maven-4.0.0.xsd">
    <modelVersion>4.0.0</modelVersion>
    <artifactId>SpringBootMutil-Controller</artifactId>
    <packaging>jar</packaging>

    <parent>
        <artifactId>SpringBootMutil</artifactId>
        <groupId>com.lzz</groupId>
        <version>1.0-SNAPSHOT</version>
        <relativePath>../pom.xml</relativePath>
    </parent>

    <dependencies>
        <!-- 内部依赖 -->
        <dependency>
            <groupId>com.lzz</groupId>
            <artifactId>SpringBootMutil-Common</artifactId>
            <version>1.0-SNAPSHOT</version>
        </dependency>
        <dependency>
            <groupId>com.lzz</groupId>
            <artifactId>SpringBootMutil-Domain</artifactId>
            <version>1.0-SNAPSHOT</version>
        </dependency>
        <dependency>
            <groupId>com.lzz</groupId>
            <artifactId>SpringBootMutil-Service</artifactId>
            <version>1.0-SNAPSHOT</version>
        </dependency>
    </dependencies>

    <!--spring boot打包的话需要指定一个唯一的入门-->
    <build>
        <plugins>
            <plugin>
                <groupId>org.springframework.boot</groupId>
                <artifactId>spring-boot-maven-plugin</artifactId>
                <configuration>
                    <!-- 指定该Main Class为全局的唯一入口 -->
                    <mainClass>com.lzz.SpringBootMutilApp</mainClass>
                    <layout>ZIP</layout>
                </configuration>
                <executions>
                    <execution>
                        <!--可以把依赖的包都打包到生成的Jar包中-->
                        <goals>
                            <goal>repackage</goal>
                        </goals>
                    </execution>
                </executions>
            </plugin>
        </plugins>
    </build>

</project>
最后,将各个项目打包,(这个地方容易出现package失败的情况),最好是install到本地仓库
四、编写演示Demo
(1)在Common项目中编写一个工具类:
package com.lzz.utils;

import java.util.UUID;

/**
 * Author lzz
 * Date   2018/5/23
 */
public class IDUtils {

    public static String uuid() {
        return UUID.randomUUID().toString().replace("-", "").toUpperCase();
    }
}
(2)在Domain项目中编写一个pojo:
package com.lzz.pojo;

/**
 * Author lzz
 * Date   2018/5/23
 */
public class User {

    private String id;
    private String username;
    private String password;

    public String getId() {
        return id;
    }

    public void setId(String id) {
        this.id = id;
    }

    public String getUsername() {
        return username;
    }

    public void setUsername(String username) {
        this.username = username;
    }

    public String getPassword() {
        return password;
    }

    public void setPassword(String password) {
        this.password = password;
    }
}
(3)在Mapper项目中编写相应的mapper接口和映射xml
package com.lzz.mapper;

import com.lzz.pojo.User;

import java.util.List;

/**
 * Author lzz
 * Date   2018/5/23
 */
public interface UserMapper {

    void insert(User user);

    List<User> findAll();

}
<?xml version="1.0" encoding="UTF-8" ?>
<!DOCTYPE mapper PUBLIC "-//mybatis.org//DTD Mapper 3.0//EN"
        "http://mybatis.org/dtd/mybatis-3-mapper.dtd" >

<mapper namespace="com.lzz.mapper.UserMapper">

    <select id="findAll" resultType="com.lzz.pojo.User">
        select * from user
    </select>

    <insert id="insert" parameterType="com.lzz.pojo.User">
        insert into user(username, password, id)
        values(#{username},#{password},#{id})
    </insert>

</mapper>
(4)在Service项目中编写接口以及实现类(加入事务控制)
package com.lzz.service;

import com.lzz.pojo.User;

import java.util.List;

/**
 * Author lzz
 * Date   2018/5/23
 */
public interface UserService {

    void insert(User user);

    List<User> findAll();
}
package com.lzz.service.impl;

import com.lzz.mapper.UserMapper;
import com.lzz.pojo.User;
import com.lzz.service.UserService;
import org.springframework.beans.factory.annotation.Autowired;
import org.springframework.stereotype.Service;
import org.springframework.transaction.annotation.Transactional;

import java.util.List;

/**
 * Author lzz
 * Date   2018/5/23
 */
@Service
public class UserServiceImpl implements UserService {

    @Autowired
    private UserMapper userMapper;

    @Override
    @Transactional(rollbackFor = Exception.class)
    public void insert(User user) {
        userMapper.insert(user);
    }

    @Override
    public List<User> findAll() {
        return userMapper.findAll();
    }
}
(5)在Controller项目中编写调用接口(演示方法,使用静态数据模拟)
package com.lzz.controller;

import com.lzz.pojo.User;
import com.lzz.service.UserService;
import com.lzz.utils.IDUtils;
import org.springframework.beans.factory.annotation.Autowired;
import org.springframework.web.bind.annotation.RequestMapping;
import org.springframework.web.bind.annotation.RequestMethod;
import org.springframework.web.bind.annotation.RestController;

import java.util.List;

/**
 * Author lzz
 * Date   2018/5/23
 */
@RestController
public class UserController {

    @Autowired
    private UserService userService;

    @RequestMapping(value = "findAll", method = RequestMethod.GET)
    public List<User> findAll() {
        return userService.findAll();
    }

    @RequestMapping(value = "/insert", method = RequestMethod.GET)
    public String insert() {
        User user = new User();
        user.setId(IDUtils.uuid());
        user.setUsername("张三");
        user.setPassword("123");
        userService.insert(user);
        return "insert success";
    }
}
五、启动类编写(Controller项目中)
本项目基于SpringBoot,使用application.yml文件管理
(1)application.yml配置:
#######################################################################
server:
  port: 8080
  context-path: /

logging:
  level: debug

#######################################################################
spring:
  datasource:
    url: jdbc:mysql://localhost:3306/test?characterEncoding=utf-8
    type: com.alibaba.druid.pool.DruidDataSource
    driver-class-name: com.mysql.jdbc.Driver
    password: 123
    username: root
    dbcp2:
       min-idle: 5                         # 数据库连接池的最小维持连接数
       initial-size: 10                    # 初始化提供的连接数
       max-total: 10                       # 最大的连接数
       max-wait-millis: 200                # 等待连接获取的最大超时时间

#######################################################################
mybatis:
  config-location: classpath:mybatis/mybatis-config.xml
  mapper-locations: classpath:mapper/*.xml
  type-aliases-package: com.lzz.pojo
(2)app启动类:
package com.lzz;

import org.mybatis.spring.annotation.MapperScan;
import org.springframework.boot.SpringApplication;
import org.springframework.boot.autoconfigure.SpringBootApplication;
import org.springframework.web.bind.annotation.RequestMapping;
import org.springframework.web.bind.annotation.RequestMethod;
import org.springframework.web.bind.annotation.RestController;

import java.util.HashMap;
import java.util.Map;

/**
 * Author lzz
 * Date   2018/5/23
 */
@RestController
@MapperScan("com.lzz.mapper")
@SpringBootApplication
public class SpringBootMutilApp {

    public static void main(String[] args) {
        SpringApplication.run(SpringBootMutilApp.class, args);
    }

    @RequestMapping(value = "/", method=RequestMethod.GET)
    public Map<String, Object> showIndex() {
        Map<String, Object> map = new HashMap<>();
        map.put("Project", "SpringBootMutil");
        map.put("Author", "lzz");
        map.put("Date", "2018-05-23");
        return map;
    }
}
(3)编写了一个测试类,测试下数据库连通性
package com.lzz.test;

import com.lzz.SpringBootMutilApp;
import org.junit.Test;
import org.junit.runner.RunWith;
import org.springframework.boot.test.context.SpringBootTest;
import org.springframework.test.context.junit4.SpringJUnit4ClassRunner;
import org.springframework.test.context.web.WebAppConfiguration;

import javax.annotation.Resource;
import javax.sql.DataSource;

/**
 * Author lzz
 * Date   2018/5/24
 */
@SpringBootTest(classes = SpringBootMutilApp.class)
@RunWith(SpringJUnit4ClassRunner.class)
@WebAppConfiguration
public class DataSourceTest {

    @Resource
    private DataSource dataSource;

    @Test
    public void testConnection() {
        System.out.println(this.dataSource);
    }
}
测试结果:成功
----------------------------------------------------------------------------------------------------------------------------------
2018-05-24 16:53:09.775 INFO 7588 --- [ main] com.lzz.test.DataSourceTest : Started DataSourceTest in 3.778 seconds (JVM running for 4.593)
{
CreateTime:"2018-05-24 16:53:08",
ActiveCount:0,
PoolingCount:0,
CreateCount:0,
DestroyCount:0,
CloseCount:0,
ConnectCount:0,
Connections:[
]
}
2018-05-24 16:53:09.819 INFO 7588 --- [ Thread-1] o.s.w.c.s.GenericWebApplicationContext : Closing org.springframework.web.context.support.GenericWebApplicationContext@624ea235: startup date [Thu May 24 16:53:06 CST 2018]; root of context hierarchy
Process finished with exit code 0
----------------------------------------------------------------------------------------------------------------------------------
然后启动main函数,进入首页

测试成功!
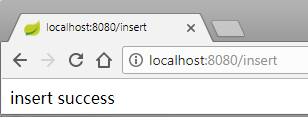
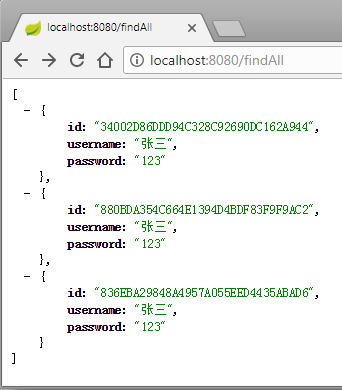
然后测试下Controller,测试成功!
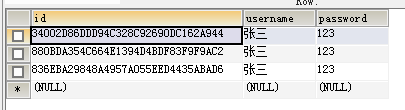
到数据库查看,一切OK!
六、总结
IDEA创建多项目:
主要是使用maven的module模块进行管理,但项目之间没有必然联系的时候不适宜用module,
比如说像eclipse中的workspace显式方式:
IDEA目前还在学习中,有了解这块的小伙伴可以留言哈~~


 8038
8038


 被折叠的 条评论
为什么被折叠?
被折叠的 条评论
为什么被折叠?
 到【灌水乐园】发言


