


PHP源码安装咱们直接看官网的文档即可,以下引用自PHP官网内容,做个记录
Compiling PHP on Ubuntu boxes.
If you would like to compile PHP from source as opposed to relying on
package maintainers, here’s a list of packages, and commands you can
runSTEP 1:
sudo apt-get install autoconf build-essential curl libtool \
libssl-dev libcurl4-openssl-dev libxml2-dev libreadline7 \
libreadline-dev libzip-dev libzip4 nginx openssl \
pkg-config zlib1g-dev
So you don’t overwrite any existing PHP installs on your system,
install PHP in your home directory. Create a directory for the PHP
binaries to livemkdir -p ~/bin/php7-latest/STEP 2:
download the latest PHP tarball, decompress it, then cd to the new directory.
STEP 3: Configure PHP. Remove any options you don’t need (like MySQL or Postgres (–with-pdo-pgsql))
./configure --prefix=$HOME/bin/php-latest \
--enable-mysqlnd \
--with-pdo-mysql \
--with-pdo-mysql=mysqlnd \
--with-pdo-pgsql=/usr/bin/pg_config \
--enable-bcmath \
--enable-fpm \
--with-fpm-user=www-data \
--with-fpm-group=www-data \
--enable-mbstring \
--enable-phpdbg \
--enable-shmop \
--enable-sockets \
--enable-sysvmsg \
--enable-sysvsem \
--enable-sysvshm \
--enable-zip \
--with-libzip=/usr/lib/x86_64-linux-gnu \
--with-zlib \
--with-curl \
--with-pear \
--with-openssl \
--enable-pcntl \
--with-readline
STEP 4:
compile the binaries by typing: make
If no errors, install by typing: make install
STEP 5: Copy the PHP.ini file to the install directory
cp php.ini-development ~/bin/php-latest/lib/STEP 6:
cd ~/bin/php-latest/etc;
mv php-fpm.conf.default php-fpm.conf
mv php-fpm.d/www.conf.default php-fpm.d/www.conf
STEP 7: create symbolic links for your for your binary files
cd ~/bin
ln -s php-latest/bin/php php
ln -s php-latest/bin/php-cgi php-cgi
ln -s php-latest/bin/php-config php-config
ln -s php-latest/bin/phpize phpize
ln -s php-latest/bin/phar.phar phar
ln -s php-latest/bin/pear pear
ln -s php-latest/bin/phpdbg phpdbg
ln -s php-latest/sbin/php-fpm php-fpm
STEP 8: link your local PHP to the php command. You will need to logout then log back in for php to switch to the local version instead of the installed version
#add this to .bashrc
if [ -d "$HOME/bin" ] ; then
  PATH="$HOME/bin:$PATH"
fi
STEP 9: Start PHP-FPM
sudo ~/bin/php7/sbin/php-fpm
第一步中的这些软件,咱们没有外网哈,只能通过编译或者二进制包来安装了
- 首先安装m4依赖包,:从https://ftp.gnu.org/gnu/m4/ 这里选择自己需要的包进行下载,
tar -zxzf m4-1.4.19.tar.gz
cd am4-1.4.19
./configure && make && sudo make install
- 安装autoconf
#autoconf 下载地址 http://mirrors.ustc.edu.cn/gnu/autoconf/autoconf-2.71.tar.gz
tar -xzf autoconf-2.71.tar.gz
cd autoconf-2.71
./configure && make && sudo make install
- 安装build-essential,此依赖包已经在前边步骤安装了,此处不做阐述
- 安装curl,这个依赖自带的,不需要安装
root@lnmp:/home/lnmp/nginx# curl --version
curl 7.68.0 (x86_64-pc-linux-gnu) libcurl/7.68.0 OpenSSL/1.1.1f zlib/1.3 brotli/1.0.7 libidn2/2.2.0 libpsl/0.21.0 (+libidn2/2.2.0) libssh/0.9.3/openssl/zlib nghttp2/1.40.0 librtmp/2.3
Release-Date: 2020-01-08
Protocols: dict file ftp ftps gopher http https imap imaps ldap ldaps pop3 pop3s rtmp rtsp scp sftp smb smbs smtp smtps telnet tftp
Features: AsynchDNS brotli GSS-API HTTP2 HTTPS-proxy IDN IPv6 Kerberos Largefile libz NTLM NTLM_WB PSL SPNEGO SSL TLS-SRP UnixSockets`
- 安装libtool 依赖包,需要先安装autotools-dev依赖包
autotools-dev下载地址: https://mirrors.tuna.tsinghua.edu.cn/ubuntu/pool/main/a/autotools-dev/autotools-dev_20220109.1_all.deb
libtool下载地址:https://mirrors.tuna.tsinghua.edu.cn/ubuntu/pool/main/libt/libtool/libtool-bin_2.4.7-7_amd64.deb
root@lnmp:/home/lnmp/php# dpkg -i autotools-dev_20220109.1_all.deb
Selecting previously unselected package autotools-dev.
(Reading database ... 77882 files and directories currently installed.)
Preparing to unpack autotools-dev_20220109.1_all.deb ...
Unpacking autotools-dev (20220109.1) ...
Setting up autotools-dev (20220109.1) ...
Processing triggers for man-db (2.9.1-1) ...

root@lnmp:/home/lnmp/php# dpkg -i libtool_2.4.7-7_all.deb
(Reading database ... 77898 files and directories currently installed.)
Preparing to unpack libtool_2.4.7-7_all.deb ...
Unpacking libtool (2.4.7-7) over (2.4.7-7) ...
Setting up libtool (2.4.7-7) ...
Processing triggers for man-db (2.9.1-1) ...
- 安装libssl-dev依赖包
- libssl3下载地址:https://cz.archive.ubuntu.com/ubuntu/pool/main/o/openssl/libssl3_3.0.8-1ubuntu1_amd64.deb
- libssl-dev下载地址:https://cz.archive.ubuntu.com/ubuntu/pool/main/o/openssl/libssl-dev_3.0.8-1ubuntu1_amd64.deb
- libxml2-dev下载: https://cz.archive.ubuntu.com/ubuntu/pool/main/libx/libxml2/libxml2-dev_2.9.10+dfsg-5ubuntu0.20.04.6_amd64.deb
- libcurl4-openssl-dev下载地址:https://cz.archive.ubuntu.com/ubuntu/pool/main/c/curl/libcurl4-openssl-dev_7.68.0-1ubuntu2.20_i386.deb
- libonig-dev下载地址:https://cz.archive.ubuntu.com/ubuntu/pool/universe/libo/libonig/libonig-dev_6.9.4-1_amd64.deb
- libonig5下载地址:https://cz.archive.ubuntu.com/ubuntu/pool/universe/libo/libonig/libonig5_6.9.4-1_amd64.deb
- libncurses-dev下载地址:https://cz.archive.ubuntu.com/ubuntu/pool/main/n/ncurses/libncurses-dev_6.2-0ubuntu2.1_amd64.deb
- icu-devtools下载地址:https://cz.archive.ubuntu.com/ubuntu/pool/main/i/icu/icu-devtools_66.1-2ubuntu2.1_amd64.deb
- libicu-dev下载地址:https://cz.archive.ubuntu.com/ubuntu/pool/main/i/icu/libicu-dev_66.1-2ubuntu2.1_amd64.deb
。。。。。。。包太多了。。。。记乱了。。。。。
后边我把所有包都上传一下吧,就不用一个个下载了,我用的是清华源资源下载的,放心使用!
依赖都装完了就开始编译了,我用的php官网的例子编译的,去掉了几项
./configure --prefix=/usr/local/php/74 \
--enable-mysqlnd --with-pdo-mysql --with-pdo-mysql=mysqlnd \
--enable-bcmath \
--enable-fpm \
--with-fpm-user=www-data \
--with-fpm-group=www-data \
--enable-mbstring \
--enable-phpdbg \
--enable-shmop \
--enable-sockets \
--enable-sysvmsg \
--enable-sysvsem \
--enable-sysvshm \
--enable-zip \ #这个扩展或报错,可能开启扩展的方式变了把,去掉了应该也没有问题,后边再添加扩展
--with-libzip=/usr/lib/x86_64-linux-gnu \ #这个扩展或报错,可能开启扩展的方式变了把,去掉了应该也没有问题,后边再添加扩展
--with-zlib \
--with-curl \
--with-pear \
--with-openssl \
--enable-pcntl \
--with-readline
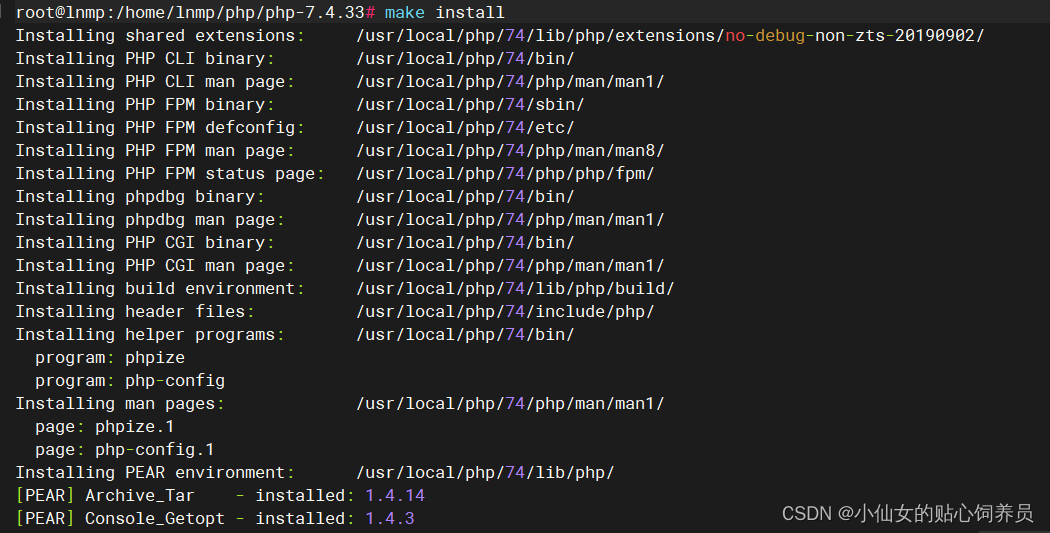
make && make install
#编译出错的话建议清除编译文件再重新编译,编译没有问题的可不要执行下边的命令
make clean
编译成功
验证结果:
root@lnmp:/home/lnmp/php/php-7.4.33# /usr/local/php/74/bin/php -v
PHP 7.4.33 (cli) (built: Oct 26 2023 07:54:56) ( NTS )
Copyright (c) The PHP Group
Zend Engine v3.4.0, Copyright (c) Zend Technologies

root@lnmp:/home/lnmp/php/php-7.4.33# /usr/local/php/74/bin/php -m
[PHP Modules]
bcmath
Core
ctype
curl
date
dom
fileinfo
filter
hash
iconv
json
libxml
mbstring
mysqlnd
openssl
pcntl
pcre
PDO
pdo_mysql
pdo_sqlite
Phar
posix
readline
Reflection
session
shmop
SimpleXML
sockets
SPL
sqlite3
standard
sysvmsg
sysvsem
sysvshm
tokenizer
xml
xmlreader
xmlwriter
zlib

[Zend Modules]
接下来编辑配置文件
root@lnmp:/home/lnmp/php/php-7.4.33# cp php.ini-production /usr/local/php/74/etc/php.ini
root@lnmp:/home/lnmp/php/php-7.4.33# cd /usr/local/php/74/etc/php-fpm.d/
root@lnmp:/usr/local/php/74/etc/php-fpm.d# ls
www.conf.default
root@lnmp:/usr/local/php/74/etc/php-fpm.d# cp www.conf.default www.conf
root@lnmp:/usr/local/php/74/etc/php-fpm.d# vim www.conf
# 这个文件中主要修改用户和组, 和Nginx保持一致即可
 user = www-data     #指定用户为 www-data
 group =  www-data

root@lnmp:/usr/local/php/74/etc/php-fpm.d# cd ..
root@lnmp:/usr/local/php/74/etc# ls
pear.conf  php-fpm.conf.default  php-fpm.d  php.ini
root@lnmp:/usr/local/php/74/etc# cp php-fpm.conf.default php-fpm.conf
官网中启动文件操作起来感觉不太方便,咱们改成自己习惯的方式疾苦,就是加个环境变量
#设置开机启动
root@lnmp:/home/lnmp/php/php-7.4.33/sapi/fpm# cp -f /home/lnmp/php/php-7.4.33/sapi/fpm/php-fpm.service /lib/systemd/system/php-fpm.service
root@lnmp:/home/lnmp/php/php-7.4.33/sapi/fpm# systemctl enable php-fpm
Created symlink /etc/systemd/system/multi-user.target.wants/php-fpm.service → /lib/systemd/system/php-fpm.service.
root@lnmp:/home/lnmp/php/php-7.4.33/sapi/fpm# systemctl start php-fpm
root@lnmp:/home/lnmp/php/php-7.4.33/sapi/fpm# systemctl status php-fpm
● php-fpm.service - The PHP FastCGI Process Manager
     Loaded: loaded (/lib/systemd/system/php-fpm.service; enabled; vendor preset: enabled)
     Active: failed (Result: exit-code) since Thu 2023-10-26 09:02:56 UTC; 10s ago
    Process: 192293 ExecStart=/usr/local/php/74/sbin/php-fpm --nodaemonize --fpm-config /usr/local/php/74/>
   Main PID: 192293 (code=exited, status=78)

Oct 26 09:02:56 lnmp systemd[1]: Started The PHP FastCGI Process Manager.
Oct 26 09:02:56 lnmp php-fpm[192293]: [26-Oct-2023 09:02:56] ERROR: failed to open error_log (/usr/local/p>
Oct 26 09:02:56 lnmp php-fpm[192293]: [26-Oct-2023 09:02:56] ERROR: failed to post process the configurati>
Oct 26 09:02:56 lnmp php-fpm[192293]: [26-Oct-2023 09:02:56] ERROR: FPM initialization failed
Oct 26 09:02:56 lnmp systemd[1]: php-fpm.service: Main process exited, code=exited, status=78/CONFIG
Oct 26 09:02:56 lnmp systemd[1]: php-fpm.service: Failed with result 'exit-code'

解决启动报错问题
root@lnmp:/usr# vim /lib/systemd/system/php-fpm.service
把
ProtectSystem=full
改成
ProtectSystem=false

然后重新加载服务

systemctl daemon-reload

原因:当这个值为true的时候,php-fpm进程将以只读的方式挂载 /usr 目录,这就是问题所在。
到这里基本就没问题了,剩下的就是配置自己的网站了


 837
837


 被折叠的 条评论
为什么被折叠?
被折叠的 条评论
为什么被折叠?
 到【灌水乐园】发言


