


Tauri2.0、VUE3路由及用户登录页设计
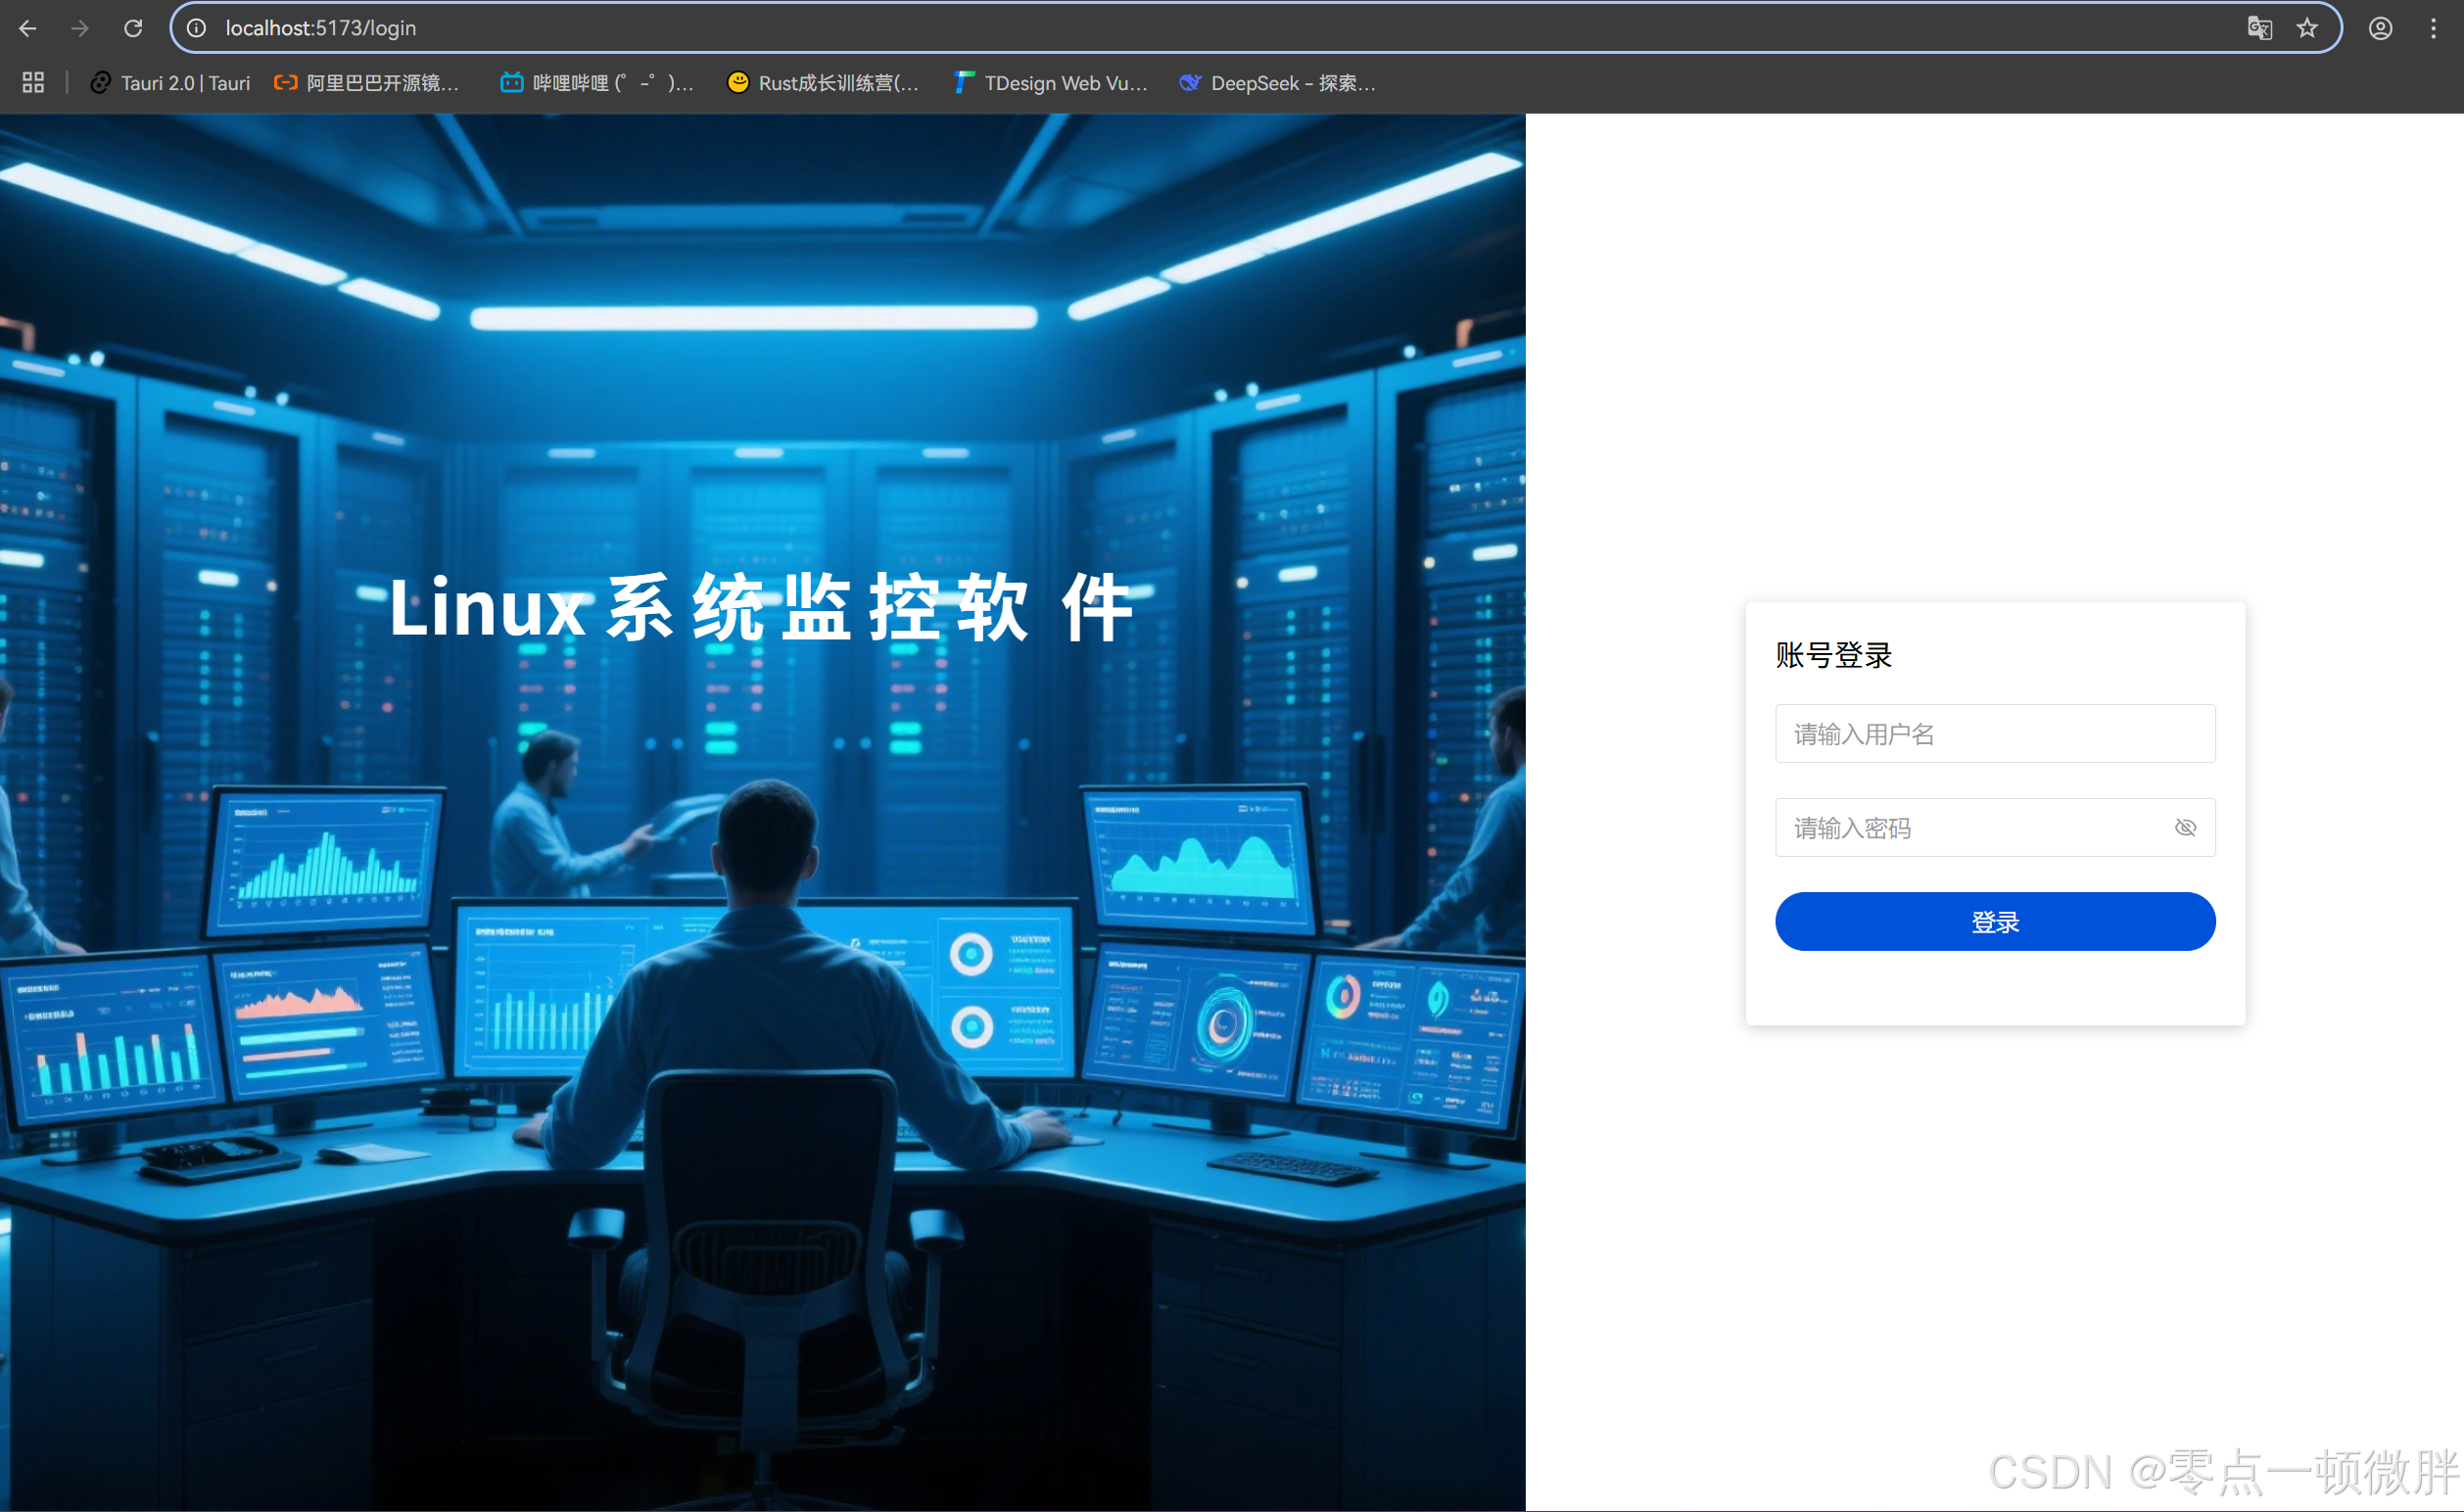
实现效果
使用图片由AI生成,不涉及版权问题
Tauri2.0实现效果

网页实现效果
一、VUE路由配置
1. VUE路由安装
pnpm install vue-router
# 或
npm install vue-router
# 或
yarn add vue-router
2. 基本配置
1. 创建路由实例
在src/router/index.ts中定义路由
import { createRouter, createWebHistory } from 'vue-router'
const router = createRouter({
  history: createWebHistory(),
  routes: [
    // 登录路由
    {
      path: '/login',
      component: () => import('@/views/login/index.vue'),
      meta: {
        title: '登录'
      }
    }
  ]
})

router.beforeEach((to, _from, _next) => {
  document.title = to.meta.title as string || 'Linux系统管理软件'
  next()
})

export default router
2. 挂载到VUE实例
在main.ts中注入路由
import { createApp } from "vue";
import App from "./App.vue";
import router from "./router";

const app = createApp(App);
app.use(router);
app.mount("#app");
3.配置路由出口
在App.vue中配置主路由出口
<script setup lang="ts">
</script>

<template>
  <router-view />
</template>

<style scoped>
</style>
二、创建登录页面
1. 配置页面样式
- 在
src中新建文件夹views并在views中新建文件夹login - 在
src/views/login/index.vue中配置页面内容
<script lang="ts" setup>
</script>
<template>
  <div class="container">
    <div class="left-container">
      <span class="logo">
        Linux
        <span style="letter-spacing: 10px"> 系统监控软</span>
        件
      </span>
    </div>

    <div class="right-container">
      <div class="form">
        <h3 class="logo">账号登录</h3>
        <t-form label-width="0">
          <t-form-item name="username">
            <t-input placeholder="请输入用户名" size="large" />
          </t-form-item>
          <t-form-item name="password">
            <t-input placeholder="请输入密码" size="large" type="password" />
          </t-form-item>
          <t-form-item>
            <t-button block shape="round" size="large">登录</t-button>
          </t-form-item>
        </t-form>
      </div>
    </div>
  </div>
</template>
<style lang="less" scoped>
.container {
  width: 100%;
  height: 100%;
  display: flex;
  flex-direction: row;

  .header {
    position: absolute;
    top: 0;
    left: 0;
    right: 0;
  }

  .left-container {
    display: flex;
    flex: 1;
    font-size: 50px;
    font-weight: bolder;
    flex-direction: column;
    justify-content: center;

    .logo {
      margin-bottom: 288px;
      user-select: none;
      color: #fff;
    }

    align-items: center;
    background: url("@/assets/login_background.png") no-repeat center;
    background-size: cover;
  }

  .right-container {
    width: 640px;
    height: 100%;
    display: flex;
    flex-direction: column;
    justify-content: center;
    align-items: center;

    .form {
      width: 340px;
      height: 288px;
      padding: 20px;
      border-radius: 4px;
      box-shadow: 0 2px 10px 0 rgba(0, 0, 0, 0.2);
      z-index: 1;

      .logo {
        font-size: 20px;
        user-select: none;
        font-weight: normal;
        margin-bottom: 20px;
      }
    }
  }

  overflow: hidden;
  font-size: 16px;
}
</style>
2. 配置头部样式(Tauri2.0配置,网页无需配置)
- 在
src中创建components文件夹 - 配置vite-plugin-svg-icons插件
- 在
src/components/Header.vue中编辑头部样式
<script lang="ts" setup>
</script>
<template>
  <div class="header-container" data-tauri-drag-region>
    <div class="logo" data-tauri-drag-region>Linux系统监控软件 v0.0.1</div>
    <div class="tools">
      <div class="svg-container">
        <svg-icon class="close" name="hidden" />
      </div>
      <div v-if="!isMax" class="svg-container">
        <svg-icon class="close" name="quanping" />
      </div>
      <div v-else class="svg-container">
        <svg-icon class="close" name="tuichuquanping" />
      </div>
      <div class="svg-container">
        <svg-icon class="close" name="close" />
      </div>
    </div>
  </div>
</template>
<style lang="less" scoped>
.header-container {
  width: 100%;
  height: 40px;
  background-color: transparent;
  display: flex;
  flex-direction: row;
  align-items: center;
  justify-content: space-between;

  .logo {
    padding: 0 10px;
    font-size: 20px;
    color: #fff;
    user-select: none;
  }

  .tools {
    height: 100%;
    overflow: hidden;
    cursor: pointer;
    display: flex;
    flex-direction: row;
    align-items: center;
    justify-content: center;

    .svg-container {
      height: 100%;
      display: flex;
      flex-direction: row;
      align-items: center;
      justify-content: center;
      padding: 0 10px;

      .close {
        width: 30px;
        height: 30px;
        transition: all 0.3s;
      }

      &:hover {
        &:last-child {
          fill: #fff;
          background-color: #c42b1c;
        }

        background-color: #cbcbcb;
        transition: all 0.3s;
      }
    }
  }
}
</style>
3. Tauri2.0自定义窗口配置(仅支持Windows及Linux)
- 取消系统的标题栏
编辑src-tauri/tauri.config.json添加以下内容
{
...
  "app": {
    "windows": [
      {
        ...
        "decorations": false,
        ...
      }
    ],
    ...
}
- 配置权限(必做,如果不做的话,前端会报错)
编辑src-tauri/capabilities/default.json文件
{
 ...
  "permissions": [
    ...
    "core:window:default",
    "core:window:allow-start-dragging",
    "core:window:allow-minimize",
    "core:window:allow-maximize",
    "core:window:allow-toggle-maximize",
    "core:window:allow-close"
  ]
}
- 编辑
src/views/login/index.vue实现系统原标题栏效果
在标签中添加data-tauri-drag-region实现窗口拖拽效果
<script lang="ts" setup>
import SvgIcon from './SvgIcon.vue'
import { onMounted, onUnmounted, ref } from 'vue'
import { listen, UnlistenFn } from '@tauri-apps/api/event'
import { Window } from '@tauri-apps/api/window'

// 窗口状态
const isMax = ref<boolean>(false)
// 取消监听函数
const listenIsMax = ref<UnlistenFn>()
// 获取窗口实例
const appWindow = new Window('main')
// 设置窗口状态
const setMax = async () => {
  isMax.value = await appWindow.isMaximized()
}
// 设置窗口最小化
const setMinimize = async () => {
  await appWindow.minimize()
}

// 设置单窗口/多窗口
const setMaximize = async () => {
  await appWindow.toggleMaximize()
}

// 关闭窗口
const closeWindow = async () => {
  await appWindow.close()
}

onMounted(async () => {
  // 监听窗口变化
  listenIsMax.value = await listen('tauri://resize', async () => {
    await setMax()
  })
})

onUnmounted(async () => {
  // 取消监听窗口变化
  if (listenIsMax.value) {
    listenIsMax.value()
  }
})
</script>
<template>
  <div class="header-container" data-tauri-drag-region>
    ...
    <div class="tools">
      <div class="svg-container" @click="setMinimize">
        <svg-icon class="close" name="hidden" />
      </div>
      <div v-if="!isMax" class="svg-container" @click="setMaximize">
        <svg-icon class="close" name="quanping" />
      </div>
      <div v-else class="svg-container" @click="setMaximize">
        <svg-icon class="close" name="tuichuquanping" />
      </div>
      <div class="svg-container" @click="closeWindow">
        <svg-icon class="close" name="close" />
      </div>
    </div>
  </div>
</template>
<style lang="less" scoped>
...
</style>


 被折叠的 条评论
为什么被折叠?
被折叠的 条评论
为什么被折叠?
 到【灌水乐园】发言


