


本文记录了ODL控制器中Notification的开发过程
1. Yang文件的编写
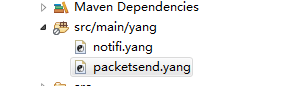
首先在api目录构建自己的yang文件:packetsend.yang
在yang文件里边编写notification服务
// Contents of "packetsend"
module packetsend {
namespace "urn:opendaylight:packetsend";
prefix "packetsend";
revision 2018-05-12 {
description "Initial revision";
}
notification send-packet{
leaf name{
type string;
}
leaf content{
type string;
}
}
notification news{
leaf content{
type string;
}
}
}通过notification关键字来创建notification服务
编写完成后保存会自动问我们生成binding接口
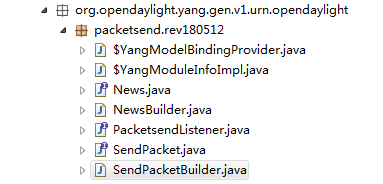
每一个notification会对应一个接口和相应的builder,这里定义了两个notification所以会有两个builder,里边的成员变量就是我们在yang文件中定义的变量,比如SendPacket和SendPacketBuilder里边会有name和content变量,然后还会生成一个PacketsendListener接口在这个接口里边定义了两个方法,分别对应了我们在yang文件中定义的两个notification,这两天方法是:
void onSendPacket(SendPacket notification);
void onNews(News notification);
接听者需要implements这个接口并实现这两个方法
2. 创建发布者
发布-订阅模式中首先需要有一个发布者,在impl下创建一个发布类Radio类,具体代码如下:
public class Radio {
NotificationPublishService publishService;// 发布需要依赖这个服务,需要在blueprint里边注入
Timer timer1 = new Timer();
Timer timer2 = new Timer();
public Radio(NotificationPublishService publishService) {
this.publishService = publishService;
broadcast();
}
private void broadcast() {
timer1.schedule(new TimerTask() {
@Override
public void run() {
//首先用notification的builder
SendPacketBuilder builder = new SendPacketBuilder();
builder.setContent("test1");
builder.setName("test1");
try {
publishService.putNotification(builder.build());
} catch (InterruptedException e) {
// TODO Auto-generated catch block
e.printStackTrace();
}
}
}, 3000,5000);
timer2.schedule(new TimerTask() {
@Override
public void run() {
NewsBuilder builder = new NewsBuilder();
builder.setContent("test2");
ListenableFuture<?> f = publishService.offerNotification(builder.build());
Futures.addCallback(f,new FutureCallback() {
// 新开一个线程异步的回调这两个方法
@Override
public void onSuccess(Object result) {
// TODO Auto-generated method stub
}
@Override
public void onFailure(Throwable t) {
// TODO Auto-generated method stub
}
});
}
}, 1300,4500);
}
}
需要用到NotificationPublishService,这里使用了Timer类来定时发送消息,通过相应的builder类来对属性赋值,最后是欧阳NotificationPublishService的putNotification方法来发送相应的notification,从这里也可以看到,发布者并不指定谁是具体的接收者,这种机制下,发布者是不关心接收者具体是谁。
打开NotificationPublishService看到有三个方法:
void putNotification(Notification notification) throws InterruptedException;
ListenableFuture<?> offerNotification(Notification notification);
ListenableFuture<?> offerNotification(Notification notification, int timeout, TimeUnit unit) throws InterruptedException;
putNotification方法是一个同步的调用,调用的时候如果发布消息的队列是空闲的就直接发送,如果这个队列是满的这个方法就会阻塞在这里,直到发布消息队列有空闲时才会执行,后边两个方法是异步调用,调用的时候不管发布队列是否空闲都会直接返回一个ListenableFuture,通过这个Future来查看是否发布成功,区别是最后一个方法会定义一个超时时间,如果超过指定的时间,就会返回失败。
3. 创建接收者
接收者需要实现相应的PacketsendListener接口并实现接收到两个不同消息的相应处理的方法,具体如下,需要在两个方法中添加相应的处理逻辑
public class Subscriber implements PacketsendListener{
Logger LOG = LoggerFactory.getLogger(Subscriber.class);
@Override
public void onSendPacket(SendPacket notification) {
LOG.info("Get:"+notification.getName()+","+notification.getContent());
}
@Override
public void onNews(News notification) {
LOG.info("Get:"+notification.getContent());
}
}
4. blueprint文件填写
<!-- 引用到服务 -->
<reference id="notificationPublishService"
interface="org.opendaylight.controller.md.sal.binding.api.NotificationPublishService"
/>
<!-- 创建bean把服务注入进去,需要在构造函数中有对应的赋值 -->
<bean id="radio" class="pub.Radio">
<argument ref="notificationPublishService"/>
</bean>
<!-- 注册接收者 -->
<bean id="subscriber" class="sub.Subscriber"/>
<odl:notification-listener ref="subscriber"/>
在blueprint文件中需要用reference标签引用到NotificationPublishService服务,然后用bean注册发布者,并通过argument标签将应用到的NotificationPublishService注入到发布者中,然后用bean注册接收者,并用odl:notification-listener标签来注册接收者。
5. 编译和测试
在工程根目录下输入mvn clean install命令对其进行编译,然后通过karaf运行控制器,启动后输入log:display命令查看日志,可以看到输出了相应的日志信息,证明接收者收到了发布者的消息


 6019
6019


 被折叠的 条评论
为什么被折叠?
被折叠的 条评论
为什么被折叠?
 到【灌水乐园】发言


