


 本文介绍如何使用Ocelot API网关进行请求头转换,包括添加、查找替换Header,利用占位符增强功能,处理302重定向及配置X-Forwarded-For。适用于.NET Core微服务架构。
请求头转换(Headers Transformation)
在阅读本文之前,建议先阅读 02-01 .net core 3.1 使用 Ocelot搭建api网关
Ocelot允许在请求下游服务之前和之后转换Header。目前Ocelot只支持查找和替换,如果们需要转发给下游的Header重添加一个key/value。
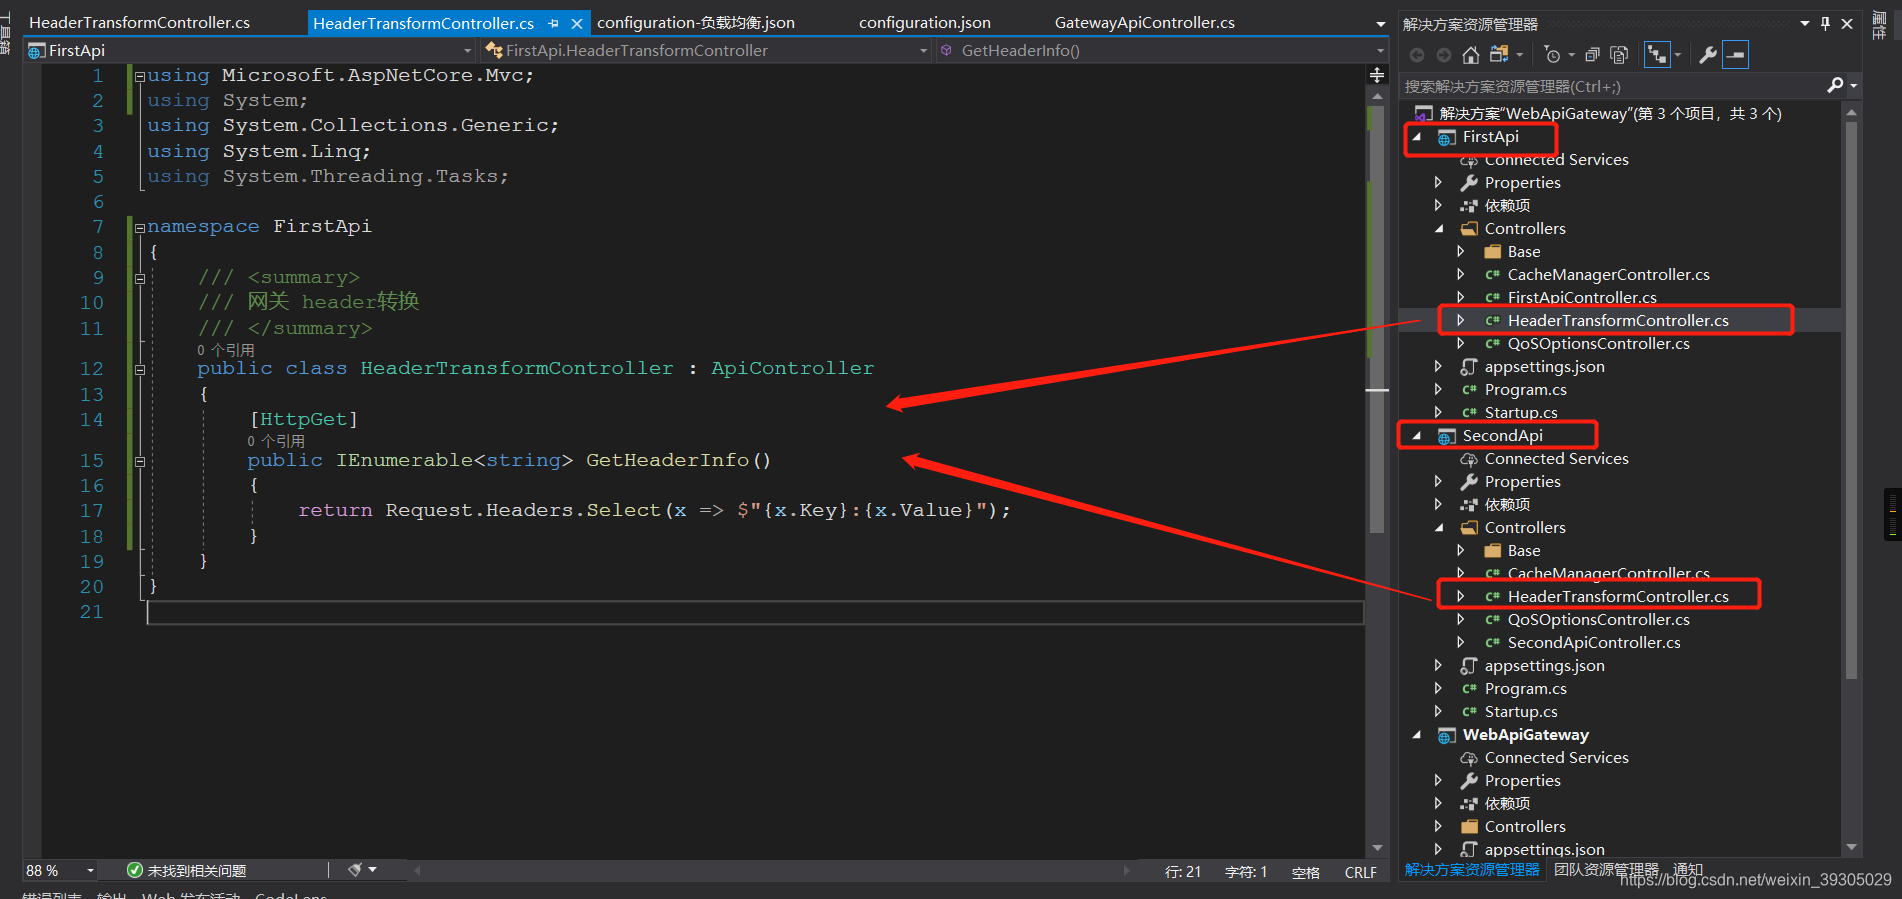
1、给下游的两个api项目分别添加HeaderTransformController
/// <summary>
/// 网关 header转换
/// </summary>
public class HeaderTransformController : ApiController
{
    [HttpGet]
    public IEnumerable<string> GetHeaderInfo()
    {
        return Request.Headers.Select(x => $"{x.Key}:{x.Value}");
    }
}
如图
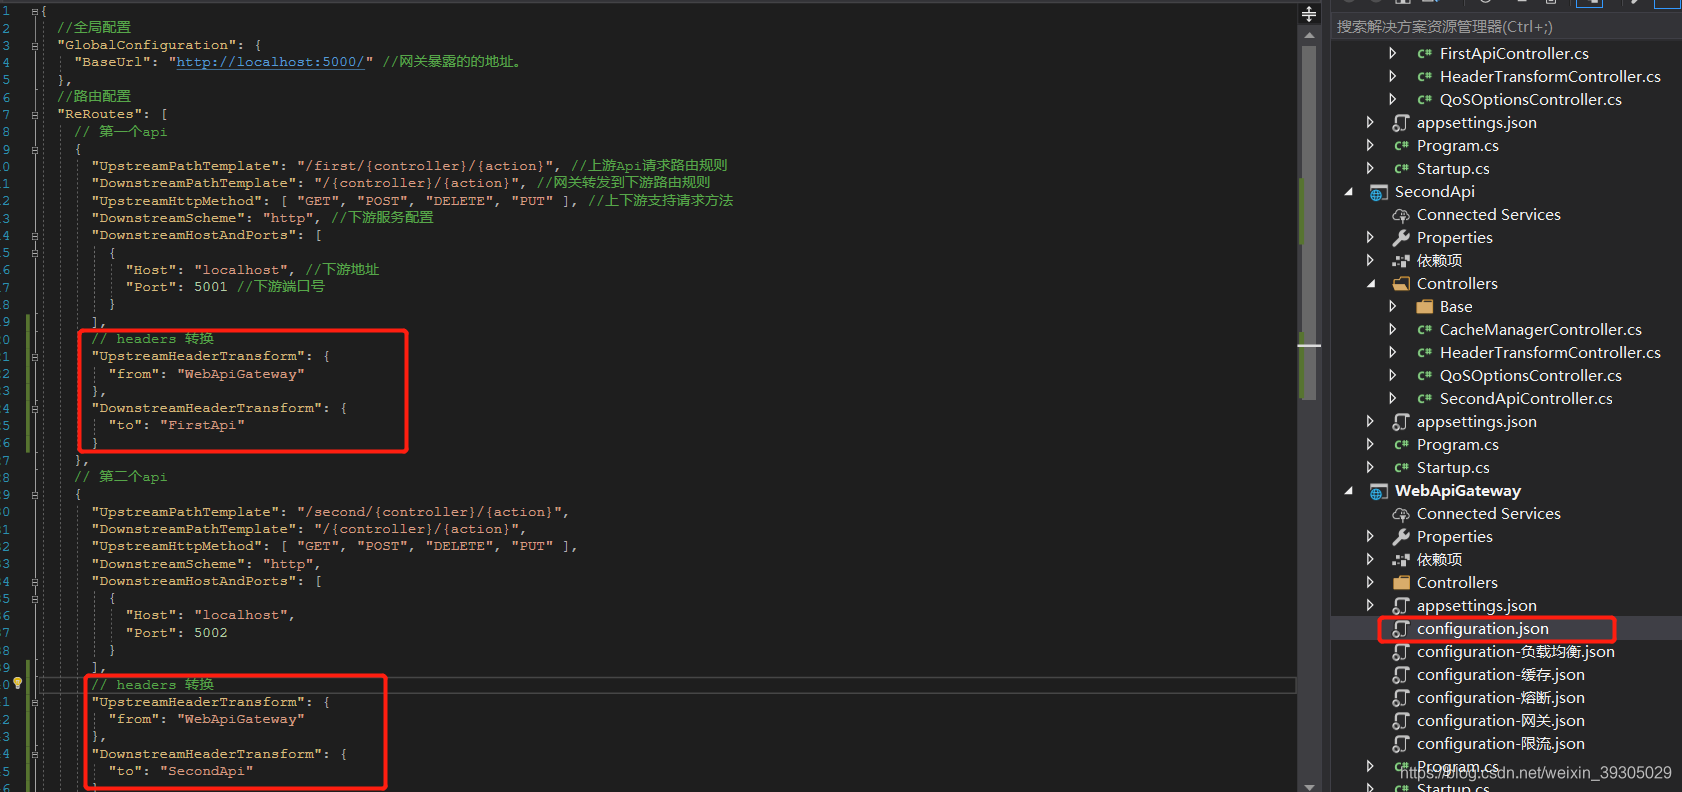
2、修改configuration.json
{
  //全局配置
  "GlobalConfiguration": {
    "BaseUrl": "http://localhost:5000/" //网关暴露的的地址。
  },
  //路由配置
  "ReRoutes": [
    // 第一个api
    {
      "UpstreamPathTemplate": "/first/{controller}/{action}", //上游Api请求路由规则
      "DownstreamPathTemplate": "/{controller}/{action}", //网关转发到下游路由规则
      "UpstreamHttpMethod": [ "GET", "POST", "DELETE", "PUT" ], //上下游支持请求方法
      "DownstreamScheme": "http", //下游服务配置
      "DownstreamHostAndPorts": [
        {
          "Host": "localhost", //下游地址
          "Port": 5001 //下游端口号
        }
      ]
    },
    // 第二个api
    {
      "UpstreamPathTemplate": "/second/{controller}/{action}",
      "DownstreamPathTemplate": "/{controller}/{action}",
      "UpstreamHttpMethod": [ "GET", "POST", "DELETE", "PUT" ],
      "DownstreamScheme": "http",
      "DownstreamHostAndPorts": [
        {
          "Host": "localhost",
          "Port": 5002
        }
      ]
    }
  ]
}
如图

3、编译并启动项目
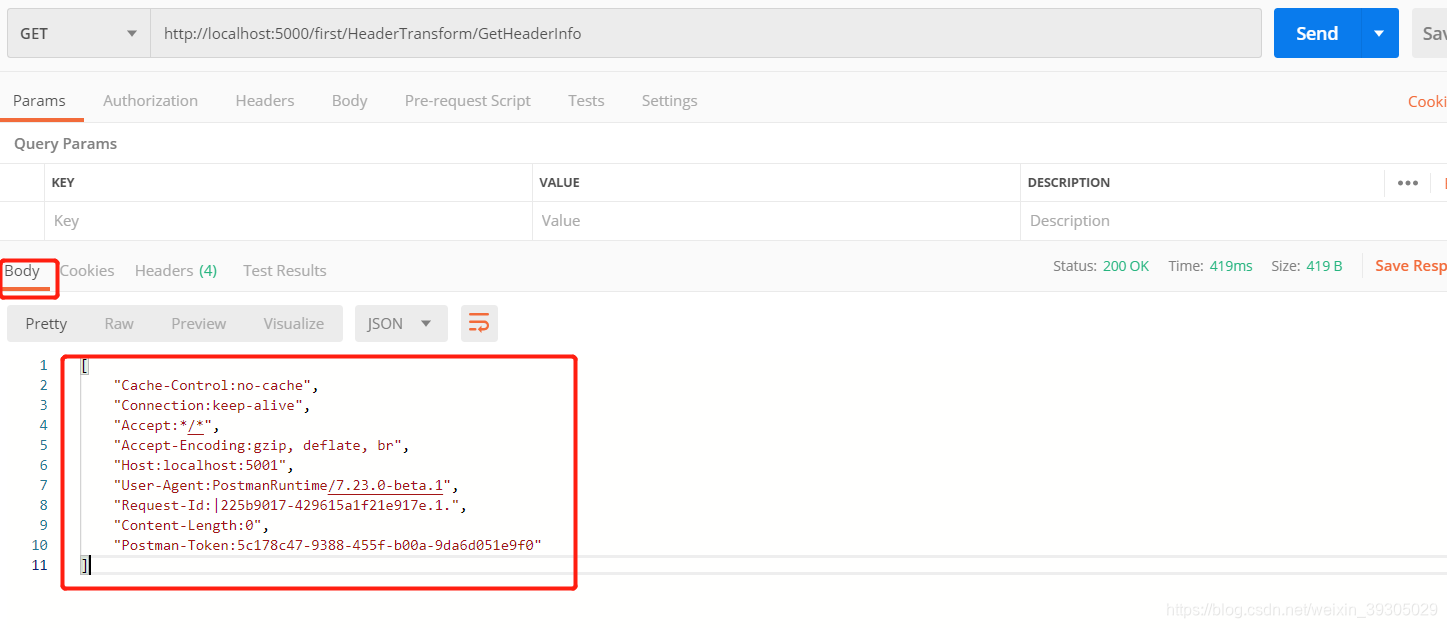
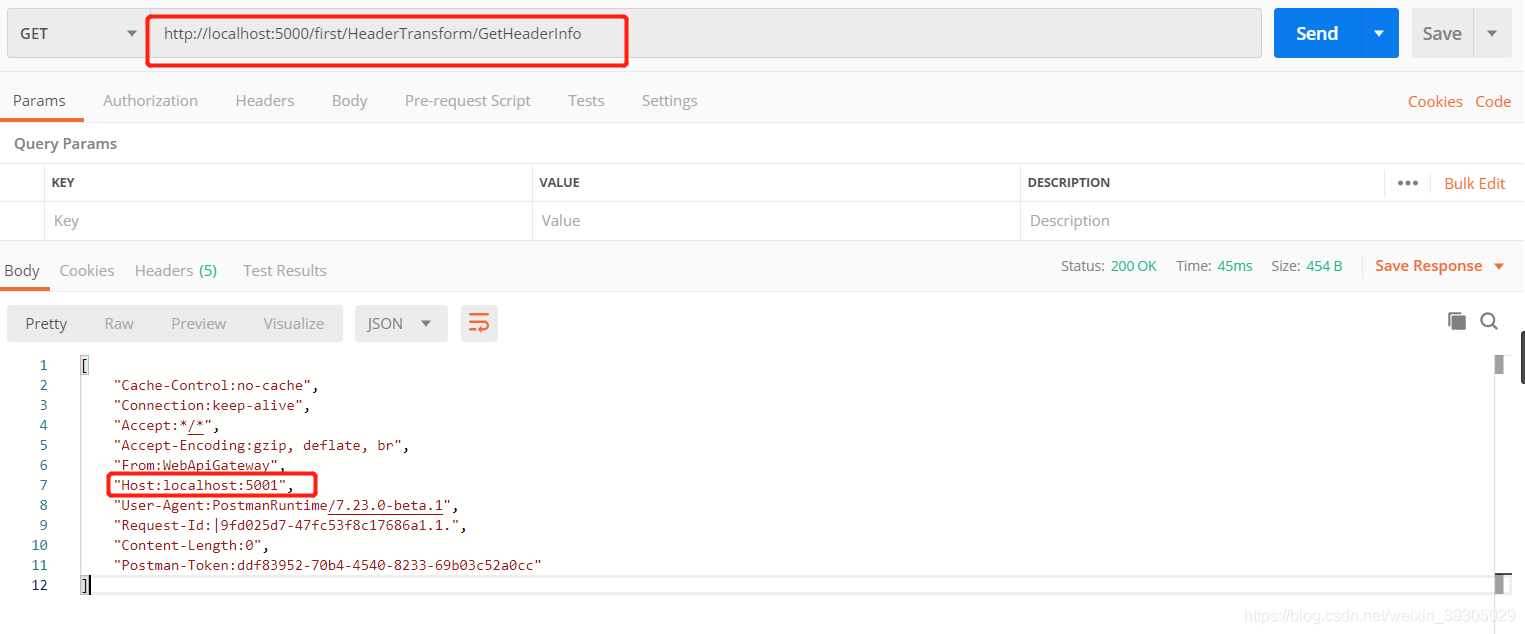
访问http://localhost:5000/first/HeaderTransform/GetHeaderInfo或者http://localhost:5000/second/HeaderTransform/GetHeaderInfo,如图得到response body(上游headers )信息。(也可以直接做成负载均衡,这样只能根据headers信息中的Host信息判断是上游headers传递给了哪一个api。)
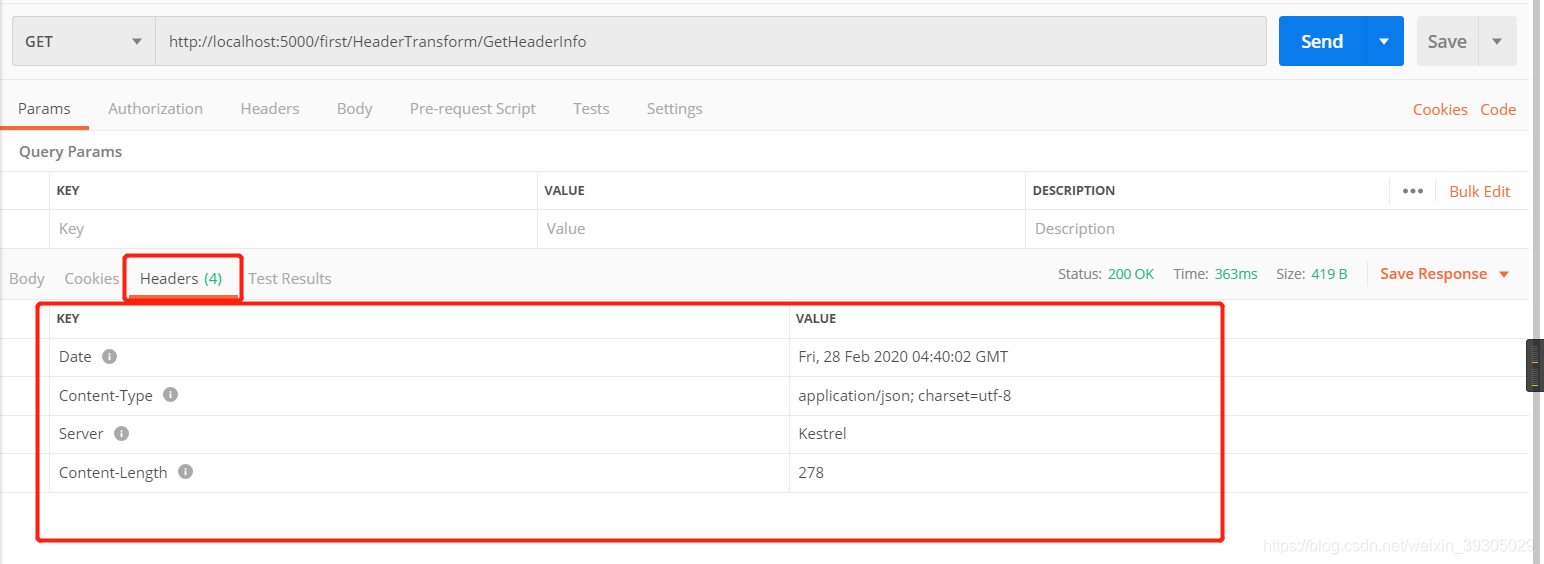
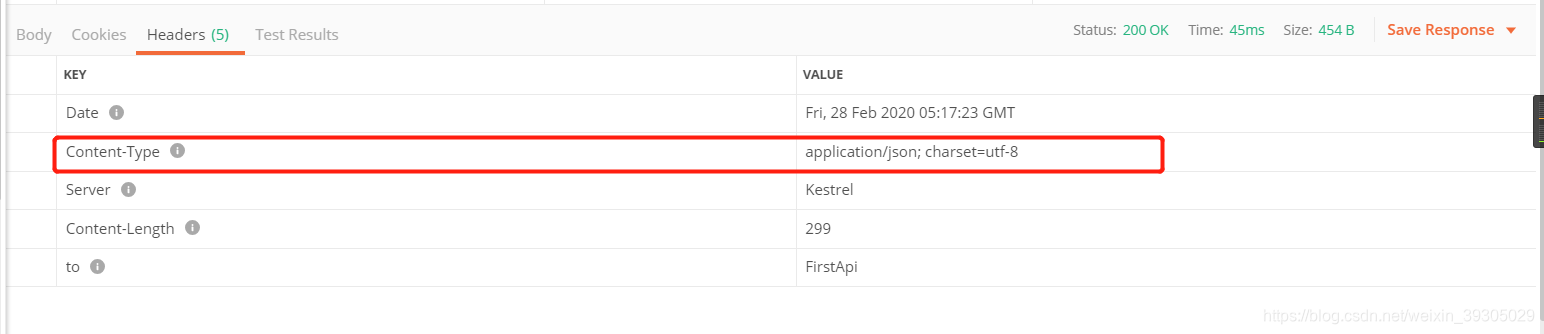
得到下游response headers (下游headers),如图
4、添加headers(key:value)
(1)修改configuration.json配置,添加以下配置
UpstreamHeaderTransform:上游headers配置DownstreamHeaderTransform:下游headers配置
{
  //全局配置
  "GlobalConfiguration": {
    "BaseUrl": "http://localhost:5000/" //网关暴露的的地址。
  },
  //路由配置
  "ReRoutes": [
    // 第一个api
    {
      "UpstreamPathTemplate": "/first/{controller}/{action}", //上游Api请求路由规则
      "DownstreamPathTemplate": "/{controller}/{action}", //网关转发到下游路由规则
      "UpstreamHttpMethod": [ "GET", "POST", "DELETE", "PUT" ], //上下游支持请求方法
      "DownstreamScheme": "http", //下游服务配置
      "DownstreamHostAndPorts": [
        {
          "Host": "localhost", //下游地址
          "Port": 5001 //下游端口号
        }
      ],
      // headers 转换
      "UpstreamHeaderTransform": {
        "from": "WebApiGateway"
      },
      "DownstreamHeaderTransform": {
        "to": "FirstApi"
      }
    },
    // 第二个api
    {
      "UpstreamPathTemplate": "/second/{controller}/{action}",
      "DownstreamPathTemplate": "/{controller}/{action}",
      "UpstreamHttpMethod": [ "GET", "POST", "DELETE", "PUT" ],
      "DownstreamScheme": "http",
      "DownstreamHostAndPorts": [
        {
          "Host": "localhost",
          "Port": 5002
        }
      ],
      // headers 转换
      "UpstreamHeaderTransform": {
        "from": "WebApiGateway"
      },
      "DownstreamHeaderTransform": {
        "to": "SecondApi"
      }
    }
  ]
}
即给上游headers添加了key为"from",value为"WebApiGateway",下游5001的headers添加了key为"to",value为"FirstApi" ,下游5002的headers添加了key为"to",value为"SecondApi"
如图:
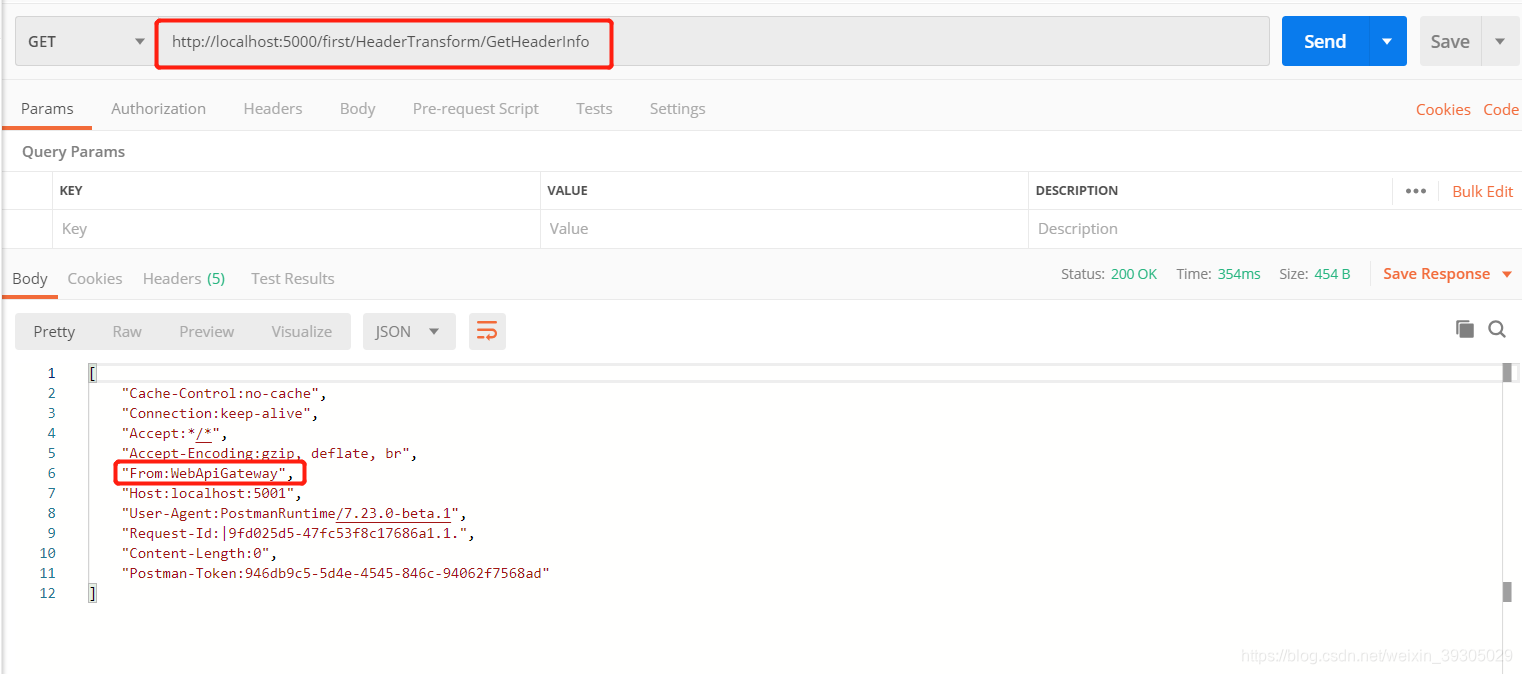
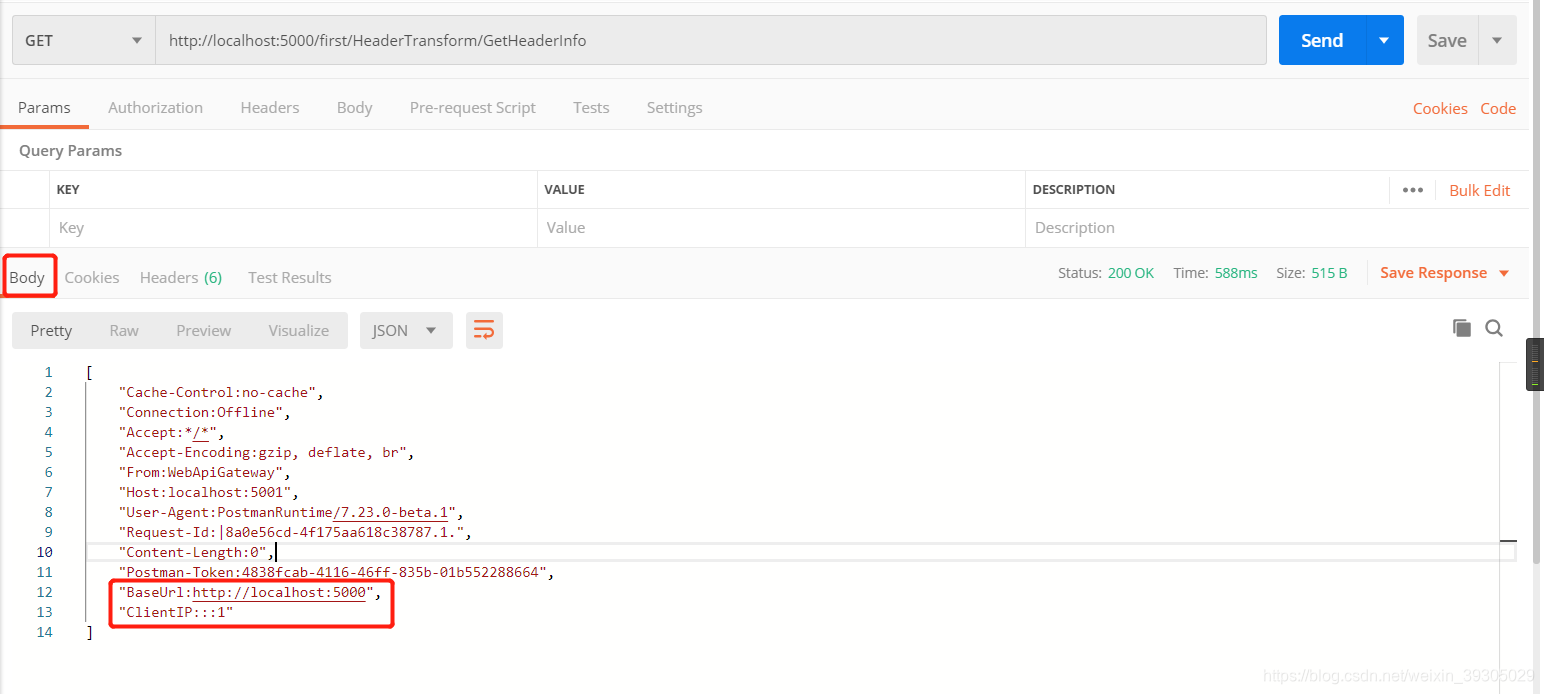
(2)编译并启动项目,访问api。
上游headers如图
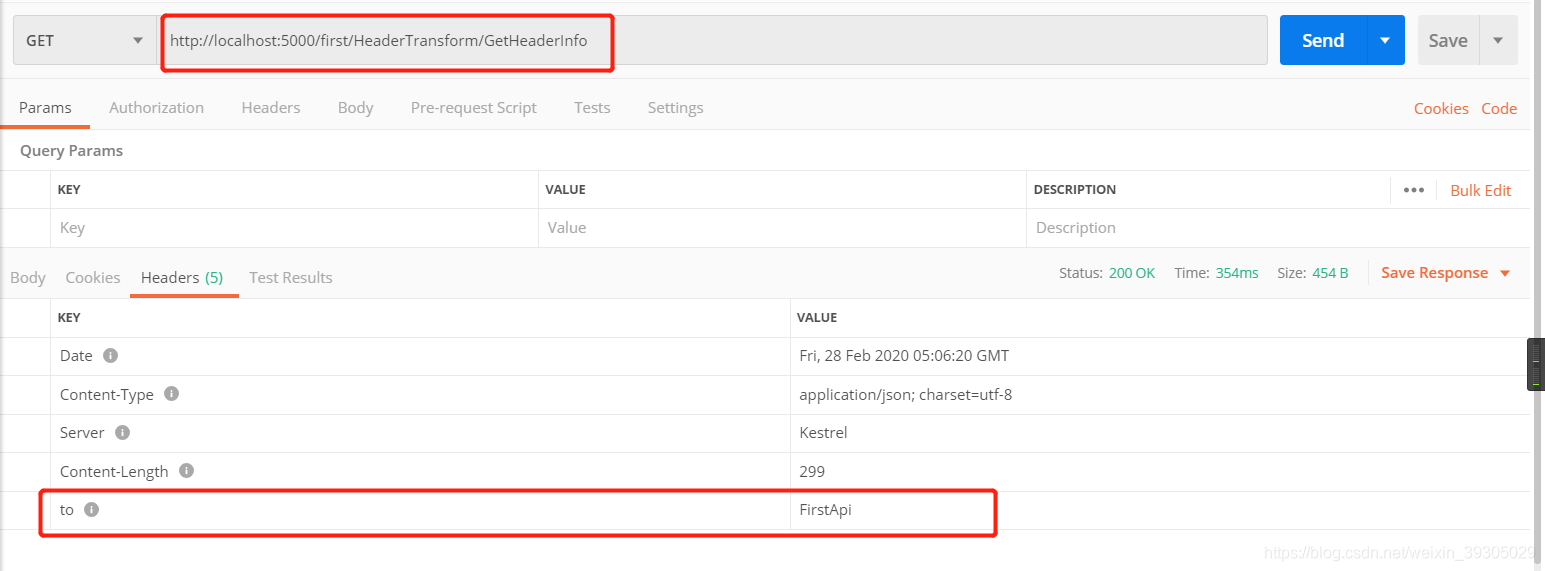
下游5001 headers如图
下游5002 headers如图
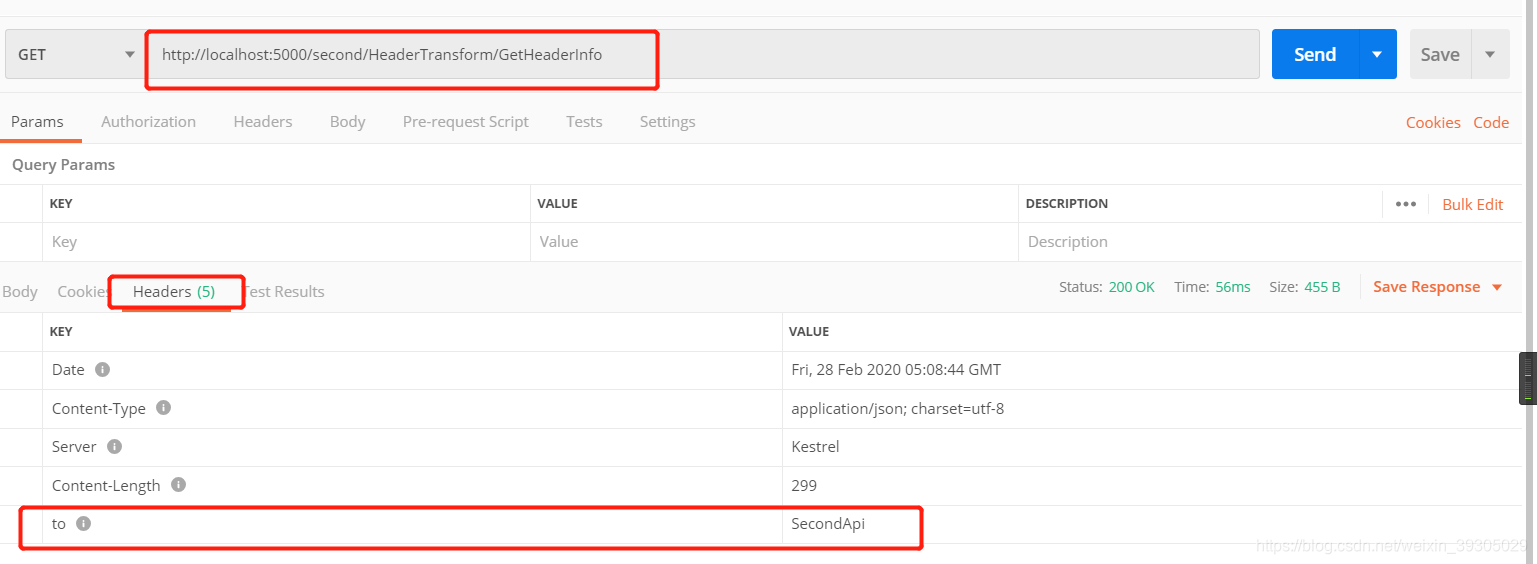
上图说明添加的headers信息已经生效
5、查找和替换headers
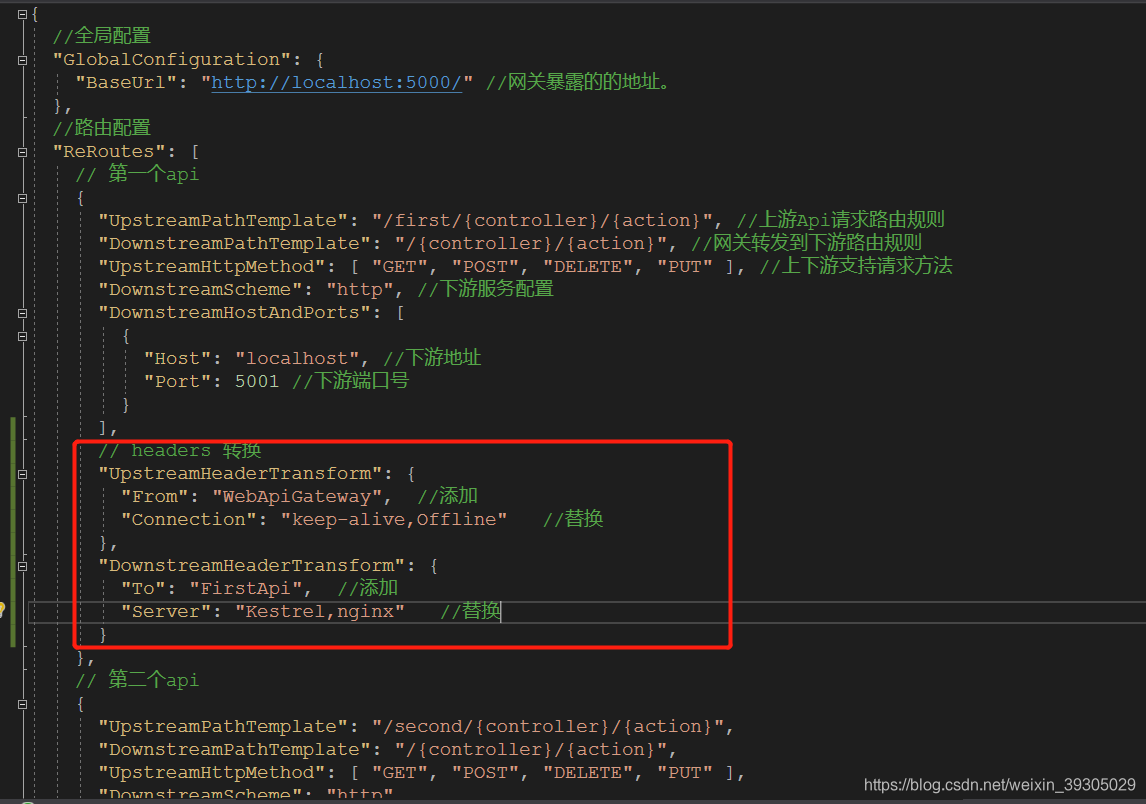
(1)修改configuration.json,修改UpstreamHeaderTransform和DownstreamHeaderTransform配置,格式为 "{key}":"{find},{replace}",本例中我们就只替换5001 headers(通过测试,部分headers信息无法替换)
// headers 转换
"UpstreamHeaderTransform": {
     "From": "WebApiGateway",  //添加
     "Connection": "keep-alive,Offline"   //查找替换
},
"DownstreamHeaderTransform": {
     "To": "FirstApi",   //添加
     "Server": "Kestrel,nginx"   //查找替换
}
如图
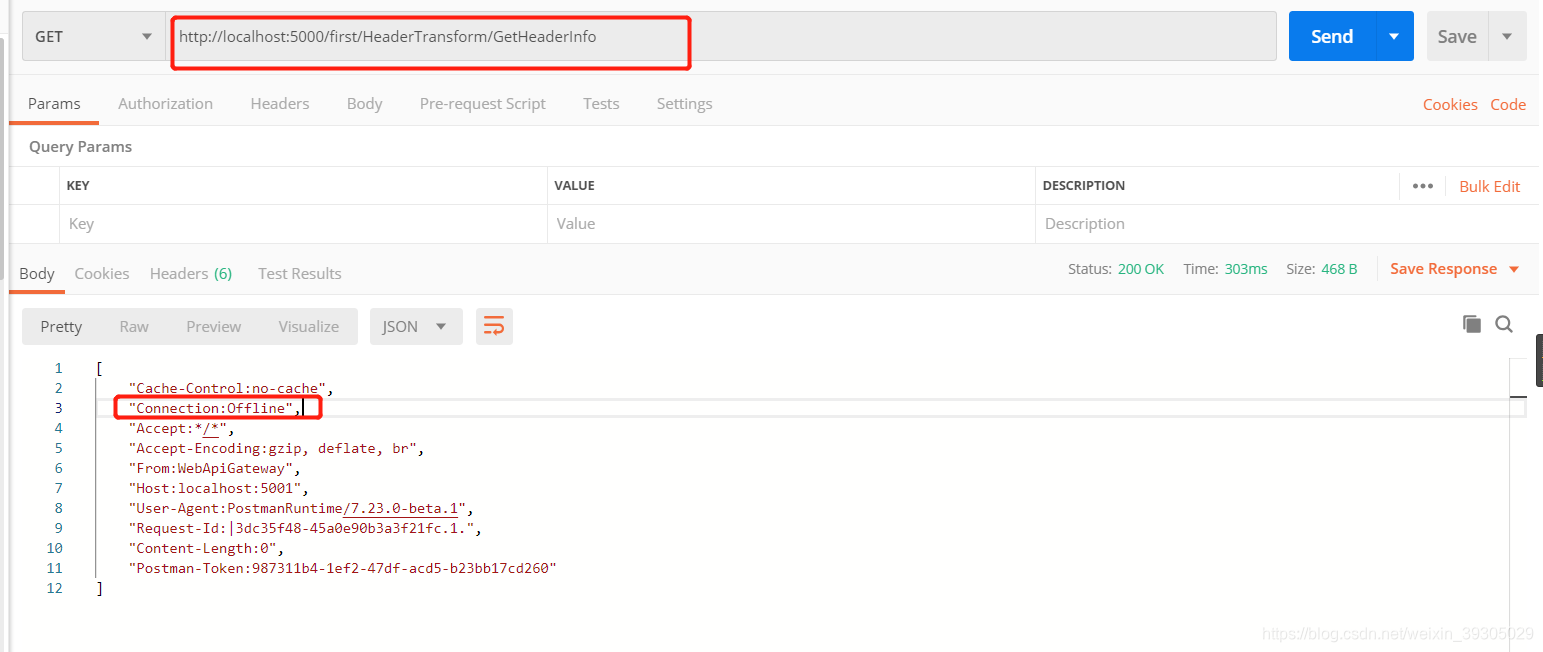
(2)编译并启动项目,访问api:http://localhost:5000/first/HeaderTransform/GetHeaderInfo
替换前上游headers
替换后上游headers
替换前下游5001 headers
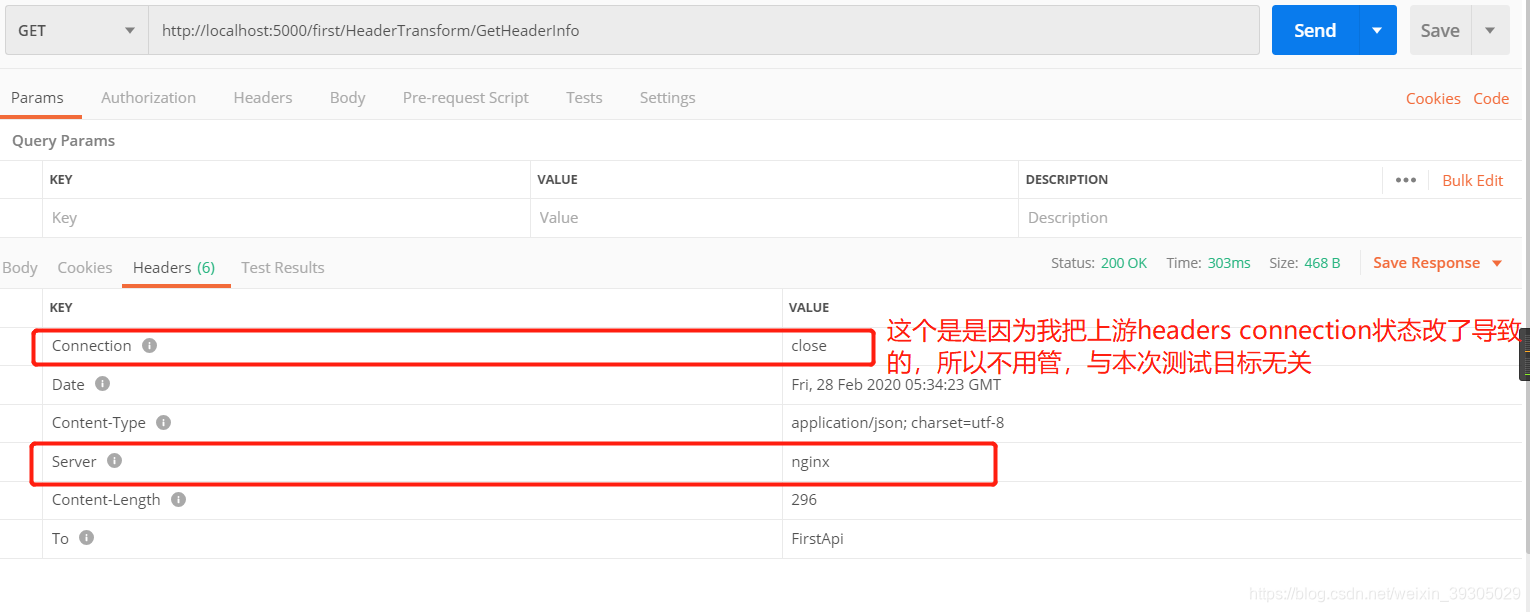
替换后下游5001 headers
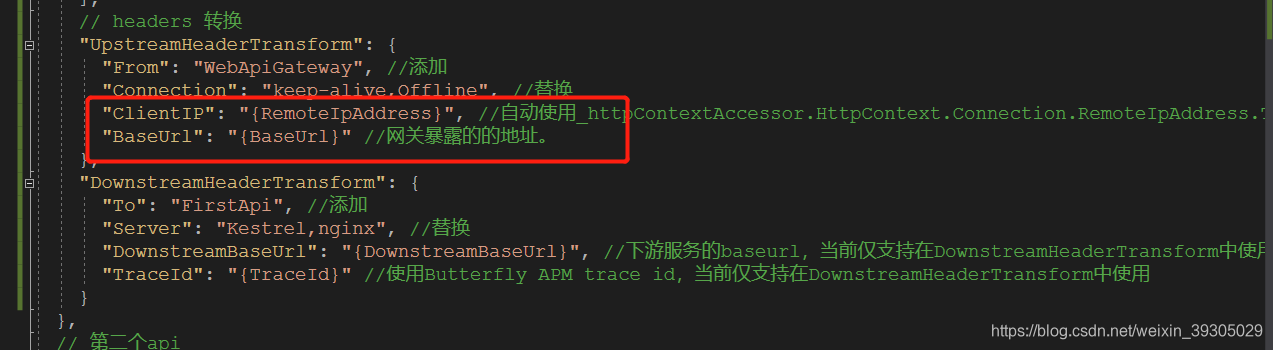
6、占位符
{RemoteIpAddress}:/自动使用_httpContextAccessor.HttpContext.Connection.RemoteIpAddress.ToString()获取客户端IP{BaseUrl}:是Ocelot暴露在外的url,如:http://localhost:5000/{DownstreamBaseUrl}:下游服务的baseurl,当前仅支持在DownstreamHeaderTransform中使用{TraceId}:使用Butterfly APM trace id,当前仅支持在DownstreamHeaderTransform中使用
// headers 转换
"UpstreamHeaderTransform": {
  "From": "WebApiGateway", //添加
  "Connection": "keep-alive,Offline", //替换
  "ClientIP": "{RemoteIpAddress}", //自动使用_httpContextAccessor.HttpContext.Connection.RemoteIpAddress.ToString()获取客户端IP
  "BaseUrl": "{BaseUrl}" //网关暴露的的地址。
},
"DownstreamHeaderTransform": {
  "To": "FirstApi", //添加
  "Server": "Kestrel,nginx", //替换
  "Location": "{DownstreamBaseUrl}, {BaseUrl}", //下游服务的baseurl,当前仅支持在DownstreamHeaderTransform中使用
}
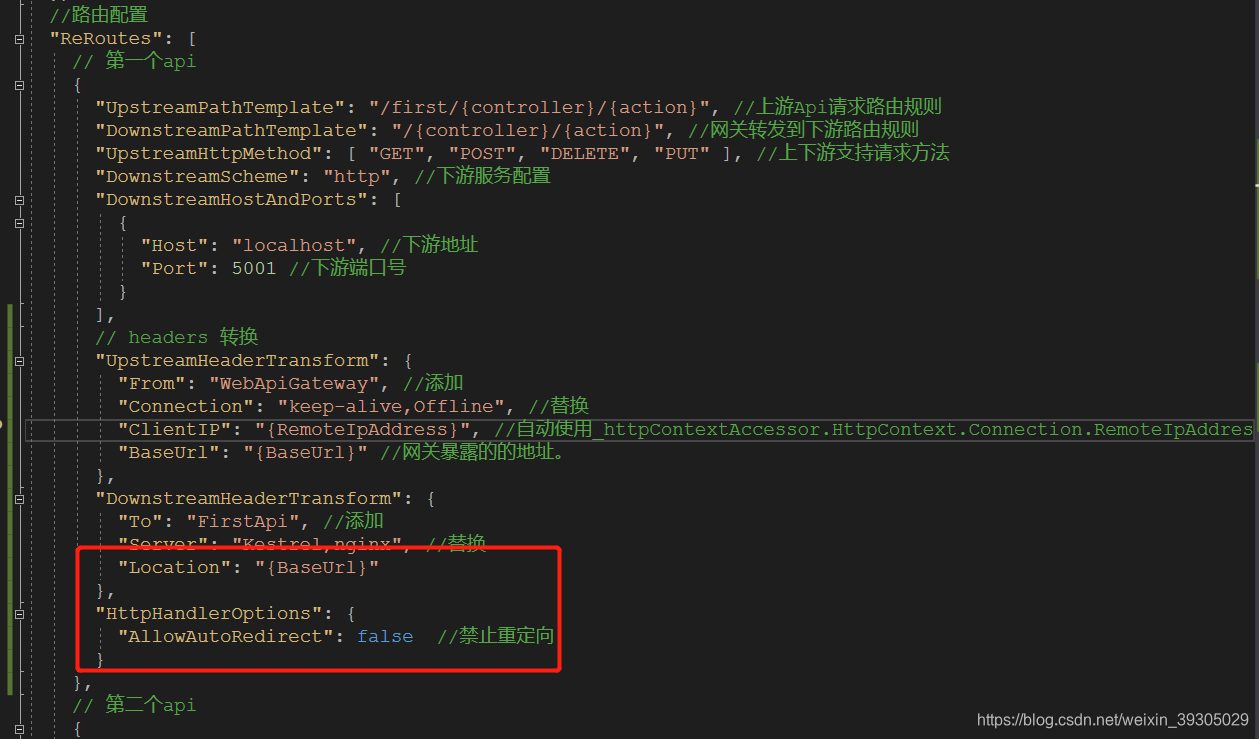
7、处理302重定向
Ocelot默认遵循重定向,如果想向客户端返回Ocelot的地址而不是下游服务的地址,需要如下配置来返回Location headers:
// headers 转换
"UpstreamHeaderTransform": {
  "From": "WebApiGateway", //添加
  "Connection": "keep-alive,Offline", //替换
  "ClientIP": "{RemoteIpAddress}", //自动使用_httpContextAccessor.HttpContext.Connection.RemoteIpAddress.ToString()获取客户端IP
  "BaseUrl": "{BaseUrl}" //网关暴露的的地址。
},
"DownstreamHeaderTransform": {
  "To": "FirstApi", //添加
  "Server": "Kestrel,nginx", //替换
  "Location": "{BaseUrl}"
},
"HttpHandlerOptions": {
  "AllowAutoRedirect": false  //禁止重定向
}
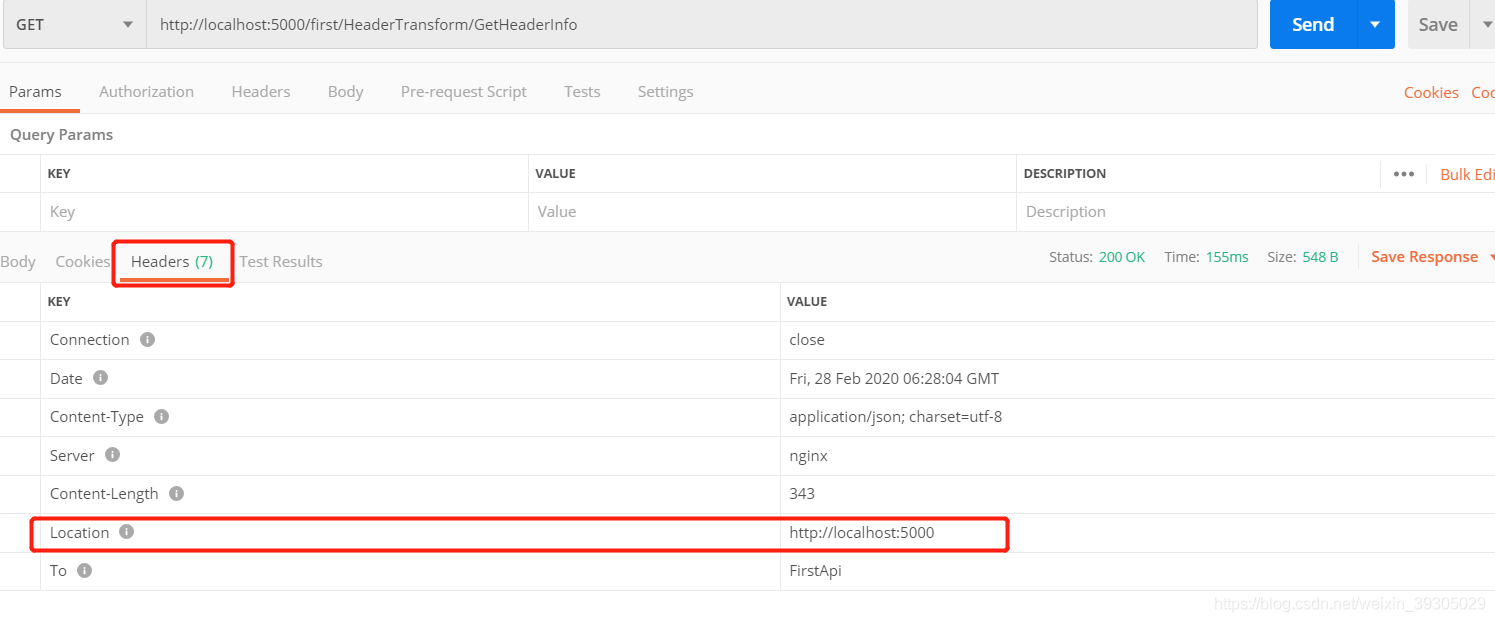
如图
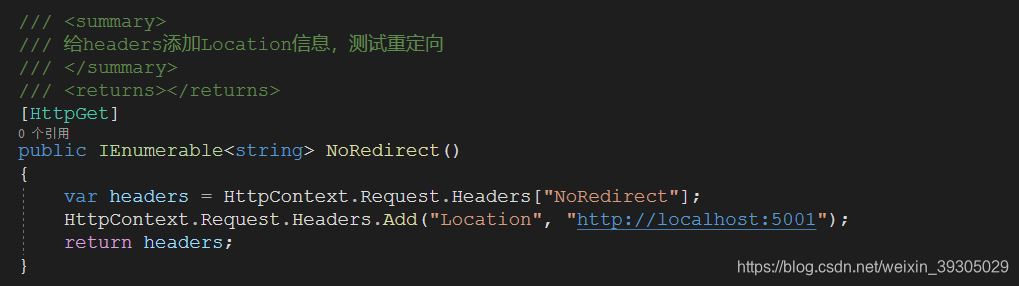
还有一种方式是给下游headers添加Location(这种方式我没成功。。。。)
HttpContext.Request.Headers.Add("Location", "http://localhost:5001");
然后配置Oeclot
"DownstreamHeaderTransform": {
        "To": "FirstApi", //添加
        "Server": "Kestrel,nginx", //替换
        "Location": "{DownstreamBaseUrl}, {BaseUrl}"
},
8、X-Forwarded-For
配置方式相同,如
"DownstreamHeaderTransform": {
  "To": "FirstApi", //添加
  "Server": "Kestrel,nginx", //替换
  "Location": "{BaseUrl}",
  "X-Forwarded-For": "{RemoteIpAddress}"
}
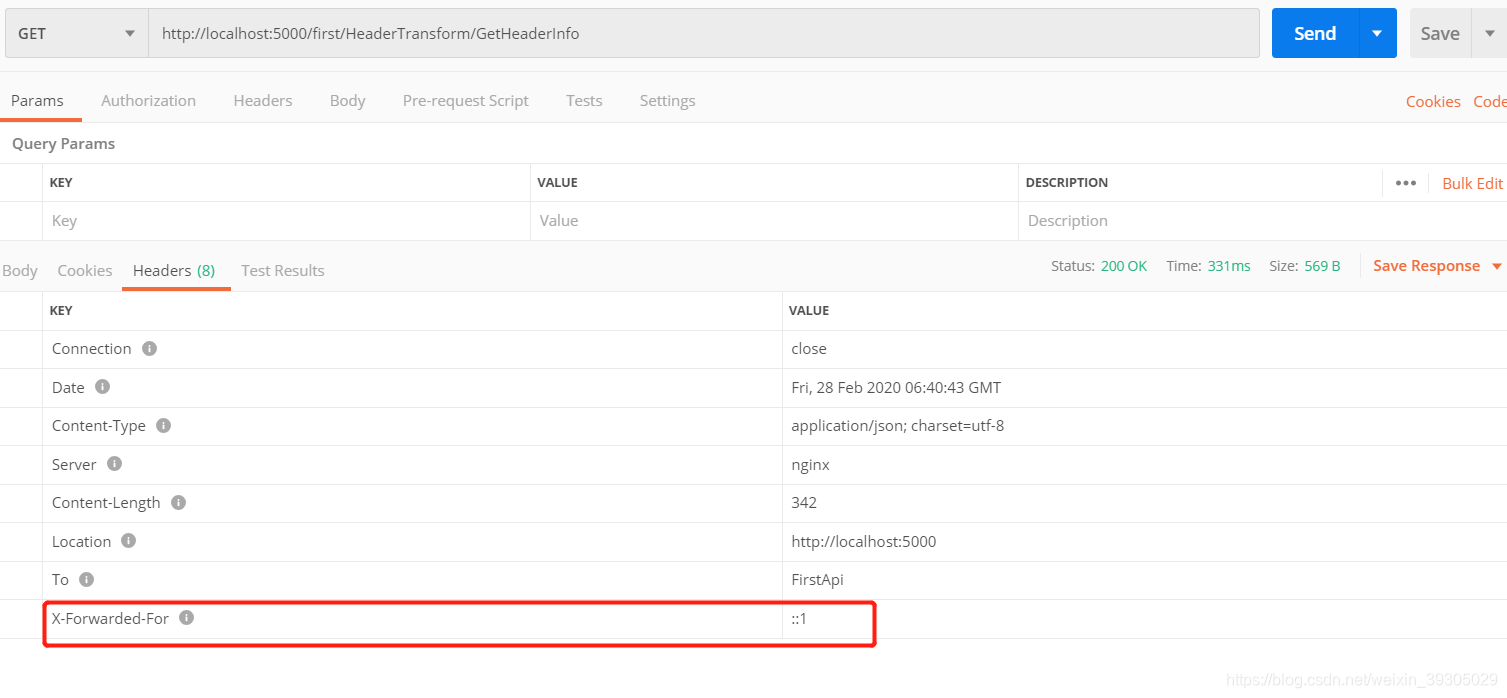
如图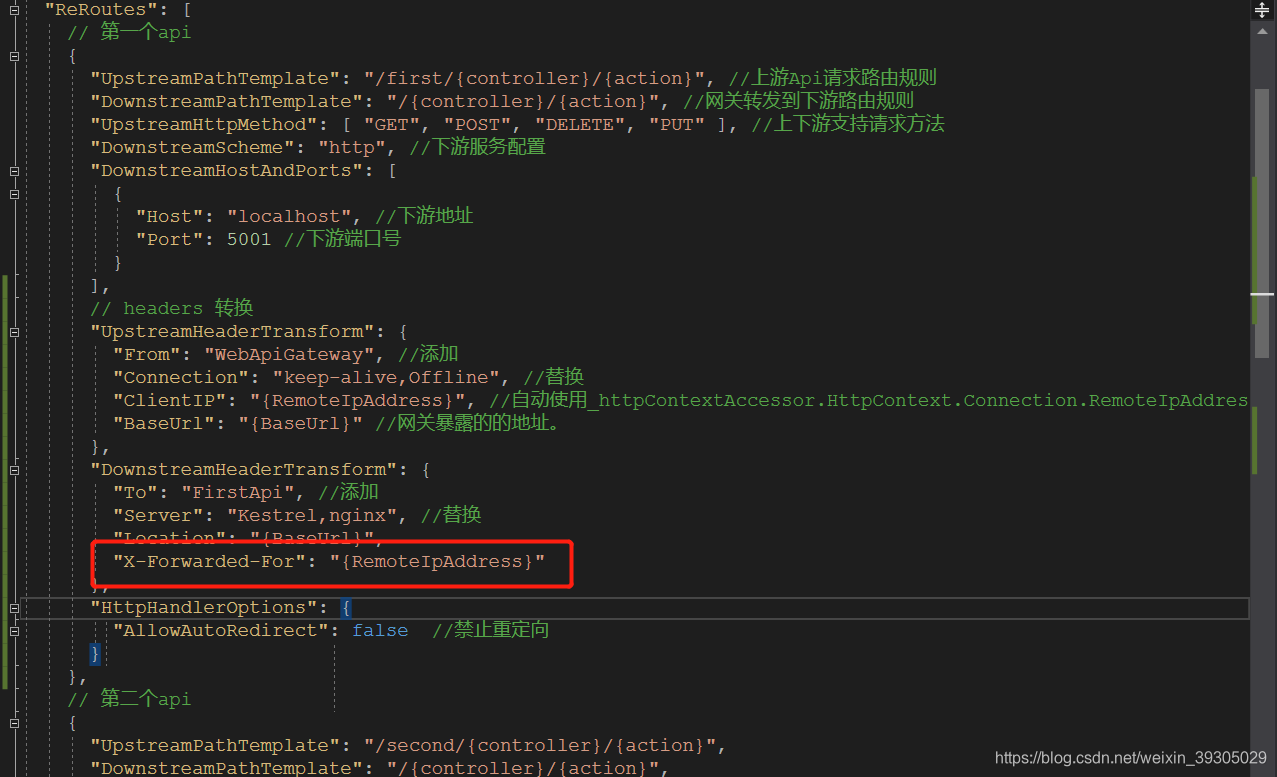
参考文章
.Netcore 2.0 Ocelot Api网关教程(10)- Headers Transformation
.Net Core使用Ocelot网关(一) -负载,限流,熔断,Header转换


 1274
1274

 被折叠的 条评论
为什么被折叠?
被折叠的 条评论
为什么被折叠?
 到【灌水乐园】发言


