


1.修改pom.xml,过滤src/main/resources目录下.properties文件
pom.xml
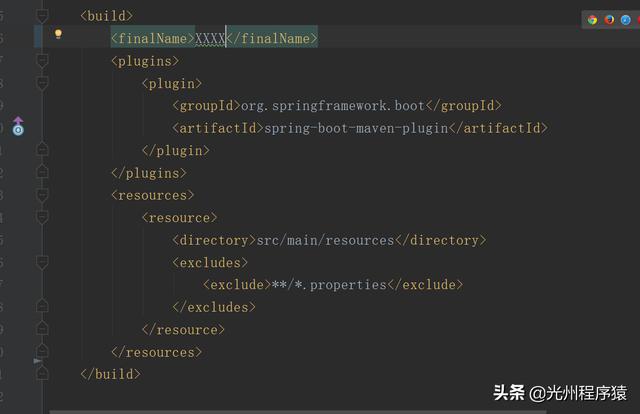
pom.xml代码:
XXXXorg.springframework.boot spring-boot-maven-plugin src/main/resources**/*.properties2.在resources目录下创建META_INF/spring.factories文件(注意META_INF文件夹也是要创建的)

spring.factories
spring.factories内容:
org.springframework.boot.env.EnvironmentPostProcessor=com.config.LocalSettingsEnvironmentPostProcessor3.新建LocalSettingsEnvironmentPostProcessor.java加载外部属性文件application.properties

LocalSettingsEnvironmentPostProcessor
LocalSettingsEnvironmentPostProcessor.java代码如下:
package com.config;import org.springframework.boot.SpringApplication;import org.springframework.boot.env.EnvironmentPostProcessor;import org.springframework.core.env.ConfigurableEnvironment;import org.springframework.core.env.MutablePropertySources;import org.springframework.core.env.PropertiesPropertySource;import org.springframework.core.io.FileSystemResource;import org.springframework.core.io.support.PropertiesLoaderUtils;import java.io.File;import java.io.IOException;import java.util.Properties;/** * @author 光州程序猿 * @version 1.0 */public class LocalSettingsEnvironmentPostProcessor implements EnvironmentPostProcessor { private static final String LOCATION = "C:甥敳獲Desktopapplication.properties"; @Override public void postProcessEnvironment(ConfigurableEnvironment configurableEnvironment, SpringApplication springApplication) { File file = new File(LOCATION); try { MutablePropertySources propertySources = configurableEnvironment.getPropertySources(); Properties properties = loadProperties(file); propertySources.addFirst(new PropertiesPropertySource("Config", properties)); } catch (Exception e) { e.printStackTrace(); } } private Properties loadProperties(File f) { FileSystemResource resource = new FileSystemResource(f); try { return PropertiesLoaderUtils.loadProperties(resource); } catch (IOException ex) { throw new IllegalStateException("Failed to load local settings from " + f.getAbsolutePath(), ex); } }}启动SpringBoot项目,指定外部application.properties启动成功。

启动结果


 10万+
10万+


 被折叠的 条评论
为什么被折叠?
被折叠的 条评论
为什么被折叠?
 到【灌水乐园】发言


