


前言
自己在搭建redis服务的时候碰到一些问题,好多人只告诉你怎么成功搭建,但是并没有整理过程中遇到的问题,所有楼主就花了点时间来整理下。
- linux环境安装redis
- 安装中的碰到的问题和解决办法
- 怎么在代码中使用安装的redis
- 设置用户名和密码
- 程序应用中碰到的问题
介绍
redis是一个key-value存储系统。和Memcached类似,它支持存储的value类型相对更多,包括string(字符串)、list(链表)、set(集合)、zset(sorted set --有序集合)和hash(哈希类型)。这些数据类型都支持push/pop、add/remove及取交集并集和差集及更丰富的操作,而且这些操作都是原子性的。在此基础上,redis支持各种不同方式的排序。与memcached一样,为了保证效率,数据都是缓存在内存中。区别的是redis会周期性的把更新的数据写入磁盘或者把修改操作写入追加的记录文件,并且在此基础上实现了master-slave(主从)同步。
Redis 是一个高性能的key-value数据库。 redis的出现,很大程度补偿了memcached这类key/value存储的不足,在部 分场合可以对关系数据库起到很好的补充作用。它提供了Java,C/C++,C#,PHP,JavaScript,Perl,Object-C,Python,Ruby,Erlang等客户端,使用很方便。
一、安装redis
1、下载安装包
cd /www/redis/wget http://download.redis.io/releases/redis-4.0.8.tar.gztar -zxvf redis-4.0.8.tar.gzmv redis-4.0.8 redis2、编译redis
cd /www/redis/redis/make MALLOC=libcmake PREFIX=/usr/local/redis install3、准备配置文件
cd /usr/local/redismkdir confcd conf/vi redis_6379.conf配置文件内容如下:
bind 127.0.0.1protected-mode noport 6379tcp-backlog 511timeout 0tcp-keepalive 300daemonize yessupervised nopidfile /www/redis/data/redis/6379/redis_6379.pidloglevel noticelogfile "/www/redis/data/redis/6379/log.log"databases 16always-show-logo yessave 900 1save 300 10save 60 10000stop-writes-on-bgsave-error yesrdbcompression yesrdbchecksum yesdbfilename dump.rdbdir /www/redis/data/redis/6379/slave-serve-stale-data yesslave-read-only yesrepl-diskless-sync norepl-diskless-sync-delay 5repl-disable-tcp-nodelay noslave-priority 100lazyfree-lazy-eviction nolazyfree-lazy-expire nolazyfree-lazy-server-del noslave-lazy-flush noappendonly yesappendfilename "appendonly.aof"appendfsync everysecno-appendfsync-on-rewrite noauto-aof-rewrite-percentage 100auto-aof-rewrite-min-size 64mbaof-load-truncated yesaof-use-rdb-preamble nolua-time-limit 5000slowlog-log-slower-than 10000slowlog-max-len 128latency-monitor-threshold 0notify-keyspace-events ""hash-max-ziplist-entries 512hash-max-ziplist-value 644、启动服务
mkdir -p /www/redis/data/redis/6379/cd ../bin/./redis-server ../conf/redis_6379.conf5、使用客户端链接
./redis-cli判断是否启动成功

6、使用
查看数据
keys *设置值
set oneKey 测试获取值
get oneKey
二、安装中的碰到的问题和解决办法
问题一:
WARNING: The TCP backlog setting of 511 cannot be enforced because /proc/sys/net/core/somaxconn is set to the lower value of 128.
临时解决办法:
echo 511 > /proc/sys/net/core/somaxconn永久解决办法
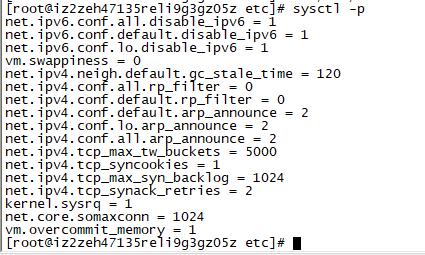
vi /etc/sysctl.conf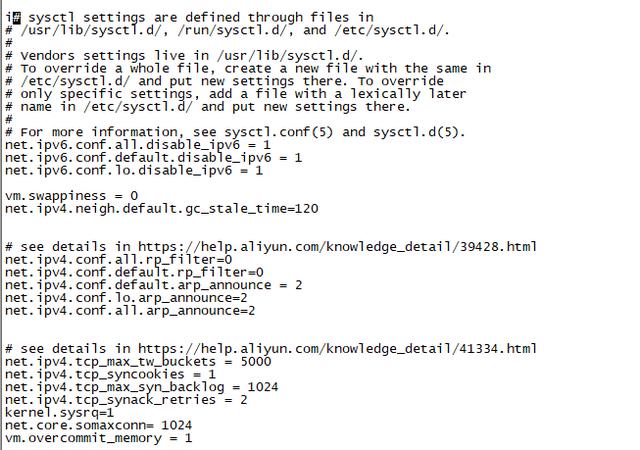
在里面添加net.core.somaxconn= 1024 然后执行sysctl -p 就可以永久消除这个warning
问题二:
WARNING overcommit_memory is set to 0! Background save may fail under low memory condition. To fix this issue add 'vm.overcommit_memory = 1' to /etc/sysctl.conf and then reboot or run the command 'sysctl vm.overcommit_memory=1' for this to take effect.
可以参考问题一的解决
问题三:
WARNING you have Transparent Huge Pages (THP) support enabled in your kernel. This will create latency and memory usage issues with Redis. To fix this issue run the command 'echo never > /sys/kernel/mm/transparent_hugepage/enabled' as root, and add it to your /etc/rc.local in order to retain the setting after a reboot. Redis must be restarted after THP is disabled
执行命令echo never>/sys/kernel/mm/transparent hugepage/enabled
永久解决添加配置文件即可
vi /etc/rc.local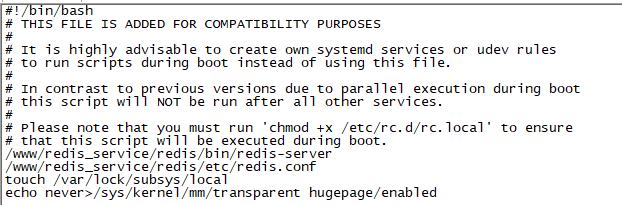
三、怎么在代码中使用安装的redis呢
需要引用的jar包有
commons-pool-1.6.jarjedis-2.9.0.jar示例代码
public static void main(String[] args) { //创建redis对象 String ip = ""; Jedis jedis=new Jedis(ip,6379);//链接redis //记录操作个数 jedis.set("name


 2788
2788


 被折叠的 条评论
为什么被折叠?
被折叠的 条评论
为什么被折叠?
 到【灌水乐园】发言


