


本文简单介绍如何在 Spring Boot 中集成 Mybatis,实现对数据库的访问。
代码:https://github.com/chenf42/spring-boot-examples/tree/master/mybatis-xml
1. 新建项目
在 Intellij IDEA 中使用 Spring Initializr 新建 Spring Boot 项目。
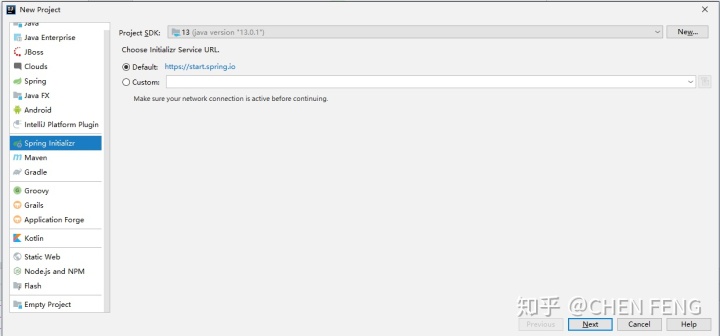
设置项目的 Group 和 Artifact,并选择 Java 版本。

在依赖中选择 Spring Web 及 Mybatis Framework。对于其他依赖,之后我们会在 pom.xml 文件中进行添加。
项目生成后,尝试运行该项目,会得到类似下方的报错信息:
***************************
APPLICATION FAILED TO START
***************************

Description:

Failed to configure a DataSource: 'url' attribute is not specified and no embedded datasource could be configured.

Reason: Failed to determine a suitable driver class


Action:

Consider the following:
	If you want an embedded database (H2, HSQL or Derby), please put it on the classpath.
	If you have database settings to be loaded from a particular profile you may need to activate it (no profiles are currently active).
这是因为,Mybatis 尝试访问数据库,但没有找到任何数据库相关的设置。
首先,我们将 src/main/resources/application.propeties 重命名为 src/main/resources/application.yml,并添加如下内容:
spring:
  datasource:
    url: jdbc:mysql://localhost:3306/mydb
    username: root
    password:
    driver-class-name: com.mysql.cj.jdbc.Driver
这里,我们设定 Mybatis 使用 MySQL 作为数据库,并指定了其 Driver 和连接信息。
同时,我们要编辑 pom.xml 添加 MySQL Driver 的依赖包,在 <dependencies> tag 中添加如下内容:
<dependency>
    <groupId>mysql</groupId>
    <artifactId>mysql-connector-java</artifactId>
    <scope>runtime</scope>
</dependency>
等依赖下载完成后,重新运行该项目,可以正常启动,但日志窗口中会出现类似这样的一条警告:
2020-02-17 14:47:43.042 WARN 17016 --- [ main] o.m.s.mapper.ClassPathMapperScanner : No MyBatis mapper was found in '[com.metaobjcet.springbootexamples.springbootmybatisxml]' package. Please check your configuration.
我们暂时不管这个警告。
2. 建立数据表
虽然我们可以用命令行或者别的工具来新建数据表,但是这一次我们可以试试 Intellij IDEA 自带的数据库操作工具。
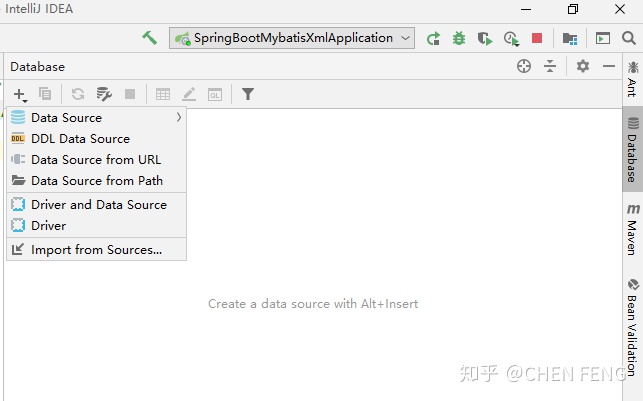
在 Data Source 中选择 MySQL,进入如下画面:
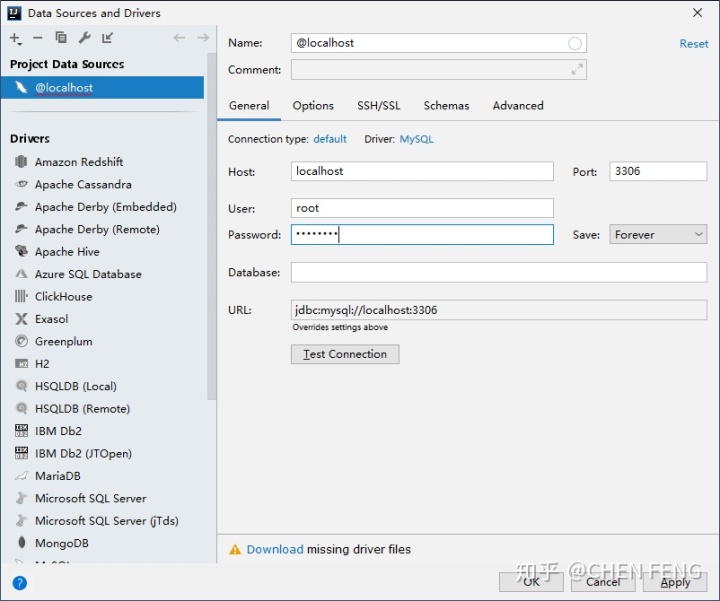
先点击 Download 来下载 driver files。 然后输入用户名/密码,并确定。在数据库连接上右击,新建名为 mydb 的 schema(数据库)。
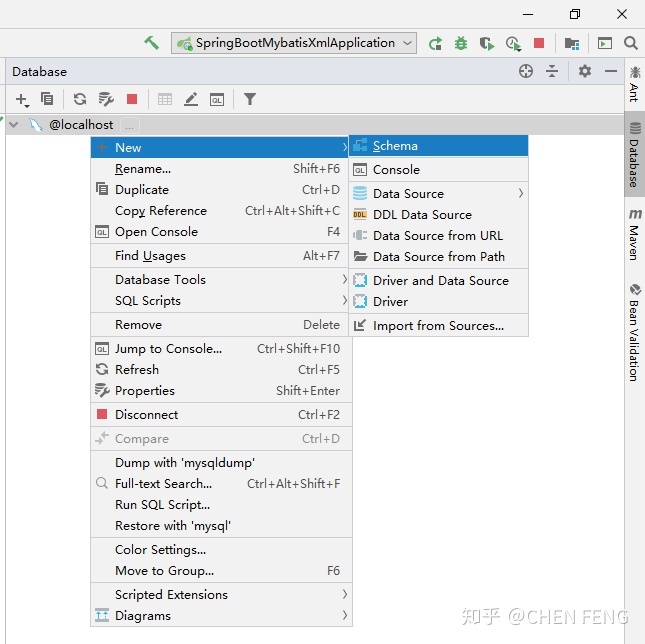
然后右击 mydb,并新建 table,如下图所示:

这样我们的数据表就建立好了。
为了方便后面的测试,我们先插入一条记录。双击 mydb,会打开数据编辑窗口:
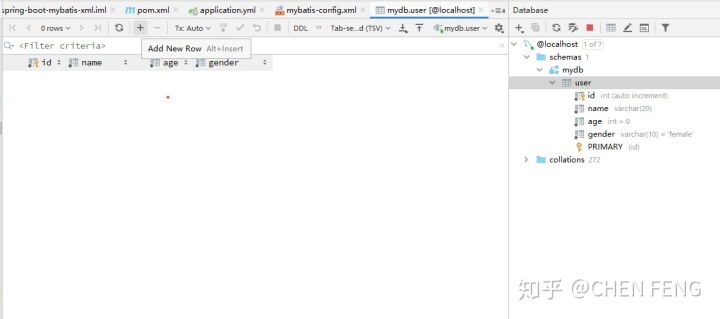
点击 + 号来添加一条记录,会弹出如下窗口:
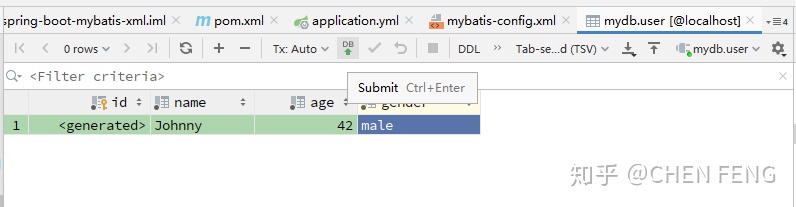
编辑完成后点击提交按钮,则记录被提交到数据库中。
3. 建立数据模型
有了数据表,我们还需要有和数据表对应的数据模型,以便我们在代码中能够方便地访问/操作数据记录。
新建 src/main/java/com/metaobject/springbootexamples/springbootmybatisxml/model/User.java文件:
package com.metaobjcet.springbootexamples.springbootmybatisxml.model;

public class User {

    private Integer id;
    private String name;
    private int age;
    private String gender;

    public Integer getId() {
        return id;
    }

    public void setId(Integer id) {
        this.id = id;
    }

    public String getName() {
        return name;
    }

    public void setName(String name) {
        this.name = name;
    }

    public int getAge() {
        return age;
    }

    public void setAge(int age) {
        this.age = age;
    }

    public String getGender() {
        return gender;
    }

    public void setGender(String gender) {
        this.gender = gender;
    }
}
4. 建立 ORM 映射
要将此 User 与数据库中 user table 建立联系,我们还需要 Mapper 对象和 mapper 文件。
新建 src/main/java/com/metaobject/springbootexamples/springbootmybatisxml/mapper/UserMapper.java 文件:
package com.metaobjcet.springbootexamples.springbootmybatisxml.mapper;

import com.metaobjcet.springbootexamples.springbootmybatisxml.model.User;
import org.apache.ibatis.annotations.Mapper;

@Mapper
public interface UserMapper {

    User getUserById(Integer id);
}
这里新建了一个 Mapper interface,它提供了 getUserById() 用于使用 id 来查询一个用户记录。@Mapper 注解使得 Mybatis 可以扫描到此 Mapper。
新建 src/main/resources/mybatis/mybatis-config.xml 文件,添加如下内容:
<?xml version="1.0" encoding="UTF-8" ?>
<!DOCTYPE configuration PUBLIC "-//mybatis.org//DTD Config 3.0//EN" "http://mybatis.org/dtd/mybatis-3-config.dtd">
<configuration>
    <typeAliases>
        <typeAlias alias="User" type="com.metaobjcet.springbootexamples.springbootmybatisxml.model.User"/>
    </typeAliases>
</configuration>
这里建立 typeAlias 来使得后面的 Mapper xml 文件中可以直接使用 User 类型,而无需写出完整的包路径。
新建 src/main/resources/mybatis/mapper/UserMapper.xml 文件,添加如下内容:
<?xml version="1.0" encoding="UTF-8" ?>
<!DOCTYPE mapper PUBLIC "-//mybatis.org//DTD Mapper 3.0//EN" "http://mybatis.org/dtd/mybatis-3-mapper.dtd" >
<mapper namespace="com.metaobject.springbootmybatisxml.mapper.UserMapper" >
    <select id="getUserById" resultType="User">
        select * from user where id=${id}
    </select>
</mapper>
这里我们声明了一个 getUserById 接口,并指定其对应的 SQL 语句。
我们还得在 src/main/resources/application.yml 中添加一些设置,使得 Mybatis 可以找到 config 和 mapper 文件:
mybatis:
  config-location: classpath:mybatis/mybatis-config.xml
  mapper-locations: classpath:mybatis/mapper/*.xml
  type-aliases-package: com.metaobject.springbootexamples.springbootmybatisxml.model
5. 试一试!
在完成了上述工作后,我们的数据已经做好被访问的准备了!
新建 src/main/java/com/metaobject/springbootexamples/springbootmybatisxml/controller/UserController.java 文件,添加如下内容:
package com.metaobjcet.springbootexamples.springbootmybatisxml.controller;

import com.metaobjcet.springbootexamples.springbootmybatisxml.mapper.UserMapper;
import com.metaobjcet.springbootexamples.springbootmybatisxml.model.User;
import org.springframework.beans.factory.annotation.Autowired;
import org.springframework.web.bind.annotation.GetMapping;
import org.springframework.web.bind.annotation.PathVariable;
import org.springframework.web.bind.annotation.RequestMapping;
import org.springframework.web.bind.annotation.RestController;

@RequestMapping("/user")
@RestController
public class UserController {

    private UserMapper userMapper;

    @Autowired
    public UserController(UserMapper userMapper) {
        this.userMapper = userMapper;
    }

    @GetMapping("/{id}")
    public User showUser(@PathVariable("id") Integer id) {
        return userMapper.getUserById(id);
    }
}
然后在浏览器中访问 http://localhost:8080/user/1,应该得到如下结果:
{"id":1,"name":"Johnny","age":42,"gender":"male"}
6. 多环境设置
我们在开发时,可能需要多种环境,比如典型的 dev(开发环境)、stage(上线前)、prod(生产环境)。在 Spring Boot 中也很容易实现。
假设我们现在在开发环境下使用 sqlite 作为数据库进行测试,而在生产环境才使用 MySQL。
首先,修改 pom.xml 文件,添加 <profiles> tag。
<profiles>
    <profile>
        <id>dev</id>
        <properties>
            <activatedProperties>dev</activatedProperties>
        </properties>
        <activation>
            <activeByDefault>true</activeByDefault>
        </activation>

        <dependencies>
            <dependency>
                <groupId>org.xerial</groupId>
                <artifactId>sqlite-jdbc</artifactId>
            </dependency>
        </dependencies>
    </profile>

    <profile>
        <id>prod</id>
        <properties>
            <activatedProperties>dev</activatedProperties>
        </properties>
    </profile>
</profiles>
这里指定了 dev 和 prod 开发环境,为 dev 环境指定了 sqlite-jdbc 的依赖,并将 dev 设置为默认环境。
然后,将 src/main/resources/application.yml 内容修改为如下:
spring:
  profiles:
    active: @activatedProperties@
mybatis:
  config-location: classpath:mybatis/mybatis-config.xml
  mapper-locations: classpath:mybatis/mapper/*.xml
  type-aliases-package: com.metaobject.springbootexamples.springbootmybatisxml.model
新建一个 src/main/resources/application-dev.yml,添加如下内容:
spring:
  datasource:
    url: jdbc:sqlite::resource:db/spring-boot-mybatis-xml.sqlite
    username:
    password:
    driver-class-name: org.sqlite.JDBC
注意这里需要 sqlite 数据库文件,我们可以使用 Intellij IDEA 的数据源工具新建此数据文件,建立 user 数据表,并添加一条记录(该记录应当与之前在 MySQL 中添加的不一样,以便我们后续可以看到差异)。
新建一个 src/main/resources/application-prod.yml,添加如下内容:
spring:
  datasource:
    url: jdbc:mysql://localhost:3306/mydb
    username: root
    password:
    driver-class-name: com.mysql.cj.jdbc.Driver
此时我们再次运行项目,并访问 http://localhost:8080/user/1,就可以获取 sqlite 中存储的记录,比如我这里是:
{"id":1,"name":"Tom","age":1,"gender":"male"}
可见,默认运行的确实是 dev 环境。
若需要更改运行环境,可以使用 Run -> Edit Configurations 菜单项打开运行设置窗口。
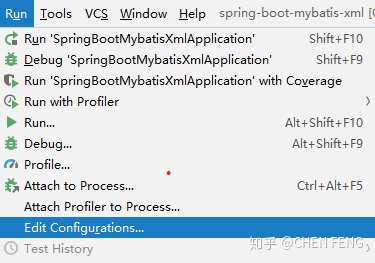
并将 Active profiles 设置为 prod 即可。

重新运行项目并访问 http://localhost:8080/user/1,又会得到之前我们存储在 MySQL 中的记录了。
当然你也可以新建不同的运行设置来针对不同的环境,而非修改之前的设置。
另外,我们还可以为不同的环境设置不同的端口,比如我们在 src/main/resources/application-dev.yml中添加如下内容:
server:
  port: 3000
我们就需要访问 http://localhost:3000/user/1 来获取用户数据了。
(完)


 5068
5068

 被折叠的 条评论
为什么被折叠?
被折叠的 条评论
为什么被折叠?
 到【灌水乐园】发言


