


本文介绍如何使用 Spring Boot CLI 快速创建一个 Web 应用,使用 Kotlin 语言编写一个简单的 “Hello World”,使用 Gradle 构建并运行起来。
欢迎工作一到五年的Java工程师朋友们加入Java程序员开发: 854393687
群内提供免费的Java架构学习资料(里面有高可用、高并发、高性能及分布式、Jvm性能调优、Spring源码,MyBatis,Netty,Redis,Kafka,Mysql,Zookeeper,Tomcat,Docker,Dubbo,Nginx等多个知识点的架构资料)合理利用自己每一分每一秒的时间来学习提升自己,不要再用"没有时间“来掩饰自己思想上的懒惰!趁年轻,使劲拼,给未来的自己一个交代!
Kotlin(https://kotlinlang.org)是由 JetBrains 创建的基于 JVM 的静态类型编程语言。 Kotlin 的一个关键目标是与 Java 互操作,以便可以在同一个项目中一起使用 Java 和 Kotlin。
Spring Boot 目前已经支持 Kotlin 编程语言,你可以通过 Spring Initializer 在 http://start.spring.io 或者 IDE(STS、IDEA) 中创建基于 Kotlin 语言开发的 Spring Boot 应用程序。
1. 介绍
内容简介: 一个简单的 Spring Boot Web 应用示例
语言框架: Kotlin、Spring Boot、Spring MVC
难度级别: L1
阅读时间: 15 分钟
2. 工具准备
- Java SDK : 8.0+
- Kotlin : 1.2.71
- Spring Boot CLI : 2.1.2
- Gradle : 4.10.2
- IntelliJ IDEA : 2018.3.3
- Curl / HTTPie
3. 实现步骤
3.1. 创建项目
首先,通过 Spring CLI 创建一个空白工程: Hello World 应用。
使用 Spring CLI 创建一个新工程
$ spring init --name hello-world --artifactId spring-boot-hello-world-kotlin --groupId org.springdev.guides --package-name org.springdev.guides.helloworld --language kotlin --build gradle --dependencies web --extract3.2. 打开项目
打开 IDEA,点击菜单 File Open,选择项目所在目录 spring-boot-hello-world-kotlin 下的 build.gradle,打开。
3.3. 项目结构
此时创建的新工程的目录结构如下:
├── build.gradle├── gradle │ └── wrapper│ ├── gradle-wrapper.jar│ └── gradle-wrapper.properties├── gradlew├── gradlew.bat├── settings.gradle└── src ├── main │ ├── kotlin │ │ └── org │ │ └── springdev │ │ └── guides │ │ └── helloworld │ │ └── HelloWorldApplication.kt │ └── resources │ ├── application.properties │ ├── static │ └── templates └── test └── kotlin └── org └── springdev └── guides └── helloworld └── HelloWorldApplicationTests.kt在工程根目录打开 build.gradle,其内容如下:
buildscript { ext { kotlinVersion = '1.2.71' 1 springBootVersion = '2.1.2.RELEASE' 2 } repositories { mavenCentral() } dependencies { classpath("org.springframework.boot:spring-boot-gradle-plugin:${springBootVersion}") classpath("org.jetbrains.kotlin:kotlin-gradle-plugin:${kotlinVersion}") classpath("org.jetbrains.kotlin:kotlin-allopen:${kotlinVersion}") }}apply plugin: 'kotlin' 3apply plugin: 'kotlin-spring'apply plugin: 'org.springframework.boot'apply plugin: 'io.spring.dependency-management'group = 'org.springdev.guides'version = '0.0.1-SNAPSHOT'sourceCompatibility = '1.8'repositories { mavenCentral()}dependencies { 4 implementation 'org.springframework.boot:spring-boot-starter-web' implementation 'com.fasterxml.jackson.module:jackson-module-kotlin' implementation "org.jetbrains.kotlin:kotlin-stdlib-jdk8" implementation "org.jetbrains.kotlin:kotlin-reflect" testImplementation 'org.springframework.boot:spring-boot-starter-test'}compileKotlin { 5 kotlinOptions { freeCompilerArgs = ['-Xjsr305=strict'] jvmTarget = '1.8' }}compileTestKotlin { kotlinOptions { freeCompilerArgs = ['-Xjsr305=strict'] jvmTarget = '1.8' }}代码说明如下:
1Kotlin 版本使用 1.2.71;
2Spring Boot 版本使用 2.1.2.RELEASE;
3使用 Gradle 插件: kotlin、kotlin-spring、org.springframework.boot;
4项目的起步依赖:web、test 以及 kotlin 相关的依赖包;
5编译 Kotlin 代码的设置。
打开应用主程序文件: HelloWorldApplication.kt,可以看到这个文件代码非常简单。
src/main/kotlin/org/springdev/guides/helloworld/HelloWorldApplication.kt
package org.springdev.guides.helloworldimport org.springframework.boot.autoconfigure.SpringBootApplicationimport org.springframework.boot.runApplication@SpringBootApplicationclass HelloWorldApplicationfun main(args: Array) { runApplication(*args)}3.4. 编写代码
3.4.1. 编写 Controller
接下来我们开始编写 Controller。在 src/main/kotlin/org/springdev/guides/helloworld/目录中新增一个 HelloController.kt,内容如下:
src/main/kotlin/org/springdev/guides/helloworld/HelloController.kt
package org.springdev.guides.helloworldimport org.springframework.web.bind.annotation.GetMappingimport org.springframework.web.bind.annotation.RestController@RestController 1class HelloController { @GetMapping("/hello") 2 fun hello(): String { return "Hello, World!" 3 }}代码说明如下:
1Spring MVC 提供了 @RestController 注解,这是一个 REST 接口类;
2
设置 Get 请求,请求地址为 /hello;
3
响应成功,并返回内容为:Hello, World!。
3.5. 单元测试
3.5.1. 编写测试用例
src/test/kotlin/org/springdev/guides/helloworld/HelloControllerTests.kt
package org.springdev.guides.helloworldimport org.junit.Testimport org.junit.runner.RunWithimport org.springframework.beans.factory.annotation.Autowiredimport org.springframework.boot.test.autoconfigure.web.servlet.WebMvcTestimport org.springframework.test.context.junit4.SpringRunnerimport org.springframework.test.web.servlet.MockMvcimport org.springframework.test.web.servlet.request.MockMvcRequestBuilders.getimport org.springframework.test.web.servlet.result.MockMvcResultHandlers.printimport org.springframework.test.web.servlet.result.MockMvcResultMatchers.contentimport org.springframework.test.web.servlet.result.MockMvcResultMatchers.status@RunWith(SpringRunner::class)@WebMvcTest 1class HelloControllerTests { @Autowired lateinit private var mockMvc: MockMvc @Test fun hello() { this.mockMvc.perform(get("/hello")) 2 .andDo(print()) .andExpect(status().isOk()) 3 .andExpect(content().string("Hello, World!")) 4 }}代码说明如下:
1Spring Boot 提供了 @WebMvcTest 注解,该注解自动会注入 MockMvc,它提供了强大的测试 MVC controller,而不需要启动 HTTP 服务器;
2调用 MockMvc 实例模拟执行请求 /hello;
3验证响应状态码为 200,表示成功;
4验证返回内容为:Hello, World!。
3.5.2. 执行单元测试
$ gradle test$ open build/reports/tests/test/index.html报告显示测试执行成功,说明功能实现正确。
4. 构建运行
你可以先打包成可执行的 JAR:
$ gradle build接着在控制台运行:
$ java -jar build/libs/spring-boot-hello-world-groovy-0.0.1-SNAPSHOT.jar或者,直接执行命令 gradle bootRun:
$ gradle bootRun控制台运行日志
. ____ _ __ _ _ / / ___'_ __ _ _(_)_ __ __ _ ( ( )___ | '_ | '_| | '_ / _` | / ___)| |_)| | | | | || (_| | ) ) ) ) ' |____| .__|_| |_|_| |___, | / / / / =========|_|==============|___/=/_/_/_/ :: Spring Boot :: (v2.1.2.RELEASE)2019-01-14 21:02:17.296 INFO 73302 --- [ main] o.s.g.h.HelloWorldApplicationKt : Starting HelloWorldApplicationKt on Michaels-MBP.lan with PID 73302 (/Users/rain/Development/springdev/guides/spring/spring-boot-hello-world-kotlin/complete/build/classes/kotlin/main started by rain in /Users/rain/Development/springdev/guides/spring/spring-boot-hello-world-kotlin/complete)2019-01-14 21:02:17.299 INFO 73302 --- [ main] o.s.g.h.HelloWorldApplicationKt : No active profile set, falling back to default profiles: default2019-01-14 21:02:18.511 INFO 73302 --- [ main] o.s.b.w.embedded.tomcat.TomcatWebServer : Tomcat initialized with port(s): 8080 (http)2019-01-14 21:02:18.547 INFO 73302 --- [ main] o.apache.catalina.core.StandardService : Starting service [Tomcat]2019-01-14 21:02:18.548 INFO 73302 --- [ main] org.apache.catalina.core.StandardEngine : Starting Servlet engine: [Apache Tomcat/9.0.14]2019-01-14 21:02:18.557 INFO 73302 --- [ main] o.a.catalina.core.AprLifecycleListener : The APR based Apache Tomcat Native library which allows optimal performance in production environments was not found on the java.library.path: [/Users/rain/Library/Java/Extensions:/Library/Java/Extensions:/Network/Library/Java/Extensions:/System/Library/Java/Extensions:/usr/lib/java:.]2019-01-14 21:02:18.646 INFO 73302 --- [ main] o.a.c.c.C.[Tomcat].[localhost].[/] : Initializing Spring embedded WebApplicationContext2019-01-14 21:02:18.647 INFO 73302 --- [ main] o.s.web.context.ContextLoader : Root WebApplicationContext: initialization completed in 1289 ms2019-01-14 21:02:18.934 INFO 73302 --- [ main] o.s.s.concurrent.ThreadPoolTaskExecutor : Initializing ExecutorService 'applicationTaskExecutor'2019-01-14 21:02:19.129 INFO 73302 --- [ main] o.s.b.w.embedded.tomcat.TomcatWebServer : Tomcat started on port(s): 8080 (http) with context path ''2019-01-14 21:02:19.133 INFO 73302 --- [ main] o.s.g.h.HelloWorldApplicationKt : Started HelloWorldApplicationKt in 2.237 seconds (JVM running for 2.619)5. 测试验证
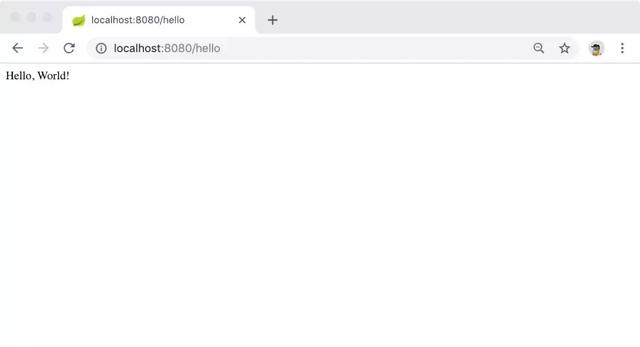
打开浏览器,访问地址: http://localhost:8080/hello 会看到下图所示的界面:
或者,通过 curl 来验证:
$ curl -v http://localhost:8080/hello* Trying ::1...* TCP_NODELAY set* Connected to localhost (::1) port 8080 (#0)> GET /hello HTTP/1.1> Host: localhost:8080> User-Agent: curl/7.54.0> Accept: */*>< HTTP/1.1 200< Content-Type: text/plain;charset=UTF-8< Content-Length: 13< Date: Mon, 14 Jan 2019 13:03:50 GMT或者,通过 HTTPie 验证:
$ http :8080/helloHTTP/1.1 200Content-Length: 13Content-Type: text/plain;charset=UTF-8Date: Mon, 14 Jan 2019 13:03:40 GMT Hello, World!6. 小结
恭喜,你已经学会了使用 Spring Boot CLI 创建一个 Web 应用,用 Kotlin 语言编写一个 Hello World 程序,并且使用 Gradle 构建运行成功。
欢迎工作一到五年的Java工程师朋友们加入Java程序员开发: 854393687
群内提供免费的Java架构学习资料(里面有高可用、高并发、高性能及分布式、Jvm性能调优、Spring源码,MyBatis,Netty,Redis,Kafka,Mysql,Zookeeper,Tomcat,Docker,Dubbo,Nginx等多个知识点的架构资料)合理利用自己每一分每一秒的时间来学习提升自己,不要再用"没有时间“来掩饰自己思想上的懒惰!趁年轻,使劲拼,给未来的自己一个交代!


 540
540


 被折叠的 条评论
为什么被折叠?
被折叠的 条评论
为什么被折叠?
 到【灌水乐园】发言


