


安装
1、下载安装包
官网下载后上传 或 使用wget 命令直接下载
[root@localhost ~]# wget https://dev.mysql.com/get/Downloads/MySQL-8.0/mysql-test-8.0.24-linux-glibc2.12-i686.tar.xz2、安装
2.1 MySQL依赖libaio库
[root@localhost tools]# yum install libaio
2.2 创建mysql用户
不需要登录的一个系统账号,启动MySQL服务时会使用该账号
[root@localhost mysql]# groupadd mysql
[root@localhost mysql]# useradd -r -g mysql -s /bin/false mysql
为什么创建mysql用户?
让MySQL运行的时候使用一个独立的账号
如果MySQL被黑了那么开始拿到的权限就是那个创建的账号而不是默认的root
我们在编译安装的时候创建一个mysql组和一个mysql用户,并把datadir和安装目录属主改为mysql
在MySQL启动的时候,单进程mysqld,该进程的属主就是mysql
这样就保证了mysql服务的独立性,即使mysql服务被黑掉,得到了mysql用户权限,也不会影响整个系统的安全
2.3 解压
[root@localhost tools]# tar -xvf /root/mysql//mysql-test-8.0.24-linux-glibc2.12-i686.tar.xz
[root@localhost tools]# mv mysql-8.0.24-linux-glibc2.12-x86_64 mysql-8.0.24 #改一下文件夹名
[root@localhost tools]# mv mysql-8.0.24 /liux/dev  #移动到想要的安装位置
2.4 修改安装mysql目录为mysql用户
[root@localhost dev]# cd /liux/dev/mysql-8.0.24
[root@localhost mysql-8.0.24]# chown -R mysql:mysql ./
2.5 mysql初始化操作 ****注意记录初始密码
[root@localhost mysql-8.0.24]# ./bin/mysqld  --initialize  --user=mysql  --basedir=/liux/dev/mysql-8.0.24  --datadir=/liux/dev//mysql-8.0.24/data

-------------------
./bin/mysqld: error while loading shared libraries: libnuma.so.1: cannot open shared object file: No such file or directory
# 初始化报错,请执行以下命令,查看是否安装齐全
yum search libaio
yum install libaio
yum -y install numactl
yum install libnuma
yum install ld-linux.so.2
yum install libaio.so.1
yum install libnuma.so.1
yum install libstdc++.so.6
yum install libtinfo.so.5
2.6 启动服务
[root@localhost mysql-8.0.24]# cd support-files
[root@localhost support-files]# ./mysql.server start
Starting MySQL.Logging to '/usr/local/mysql/data/localhost.localdomain.err'.
.. SUCCESS!

或者

[root@bogon /]# service mysql start
Starting MySQL... SUCCESS!
*启动服务不成功 错误原因如下

处理方法:创建/etc/my.cnf文件,编辑/etc/my.cnf 文件,缺少basedir 和 datadir 两个路径,在 [mysqld]组添加上mysql安装目录路径即可
#vim /etc/my.cnf
[mysqld]
...........
basedir=/liux/mysql-8.0.24
datadir=/liux/mysql-8.0.24/data
以下是my.cnf全部内容:
# Example MySQL config file for medium systems.
#
# This is for a system with little memory (32M - 64M) where MySQL plays
# an important part, or systems up to 128M where MySQL is used together with
# other programs (such as a web server)
#
# MySQL programs look for option files in a set of
# locations which depend on the deployment platform.
# You can copy this option file to one of those
# locations. For information about these locations, see:
# http://dev.mysql.com/doc/mysql/en/option-files.html
#
# In this file, you can use all long options that a program supports.
# If you want to know which options a program supports, run the program
# with the "--help" option.
# The following options will be passed to all MySQL clients
[client]
default-character-set=utf8
#password = your_password
port = 3306
socket = /tmp/mysql.sock
# Here follows entries for some specific programs
# The MySQL server
[mysqld]
character-set-server=utf8
init_connect='SET NAMES utf8
port = 3306
socket = /tmp/mysql.sock
skip-external-locking
key_buffer_size = 16M
max_allowed_packet = 1M
table_open_cache = 64
sort_buffer_size = 512K
net_buffer_length = 8K
read_buffer_size = 256K
read_rnd_buffer_size = 512K
myisam_sort_buffer_size = 8M
character-set-server=utf8
init_connect='SET NAMES utf8'
basedir=/liux/mysql-8.0.24
datadir=/liux/mysql-8.0.24/data
# Don't listen on a TCP/IP port at all. This can be a security enhancement,
# if all processes that need to connect to mysqld run on the same host.
# All interaction with mysqld must be made via Unix sockets or named pipes.
# Note that using this option without enabling named pipes on Windows
# (via the "enable-named-pipe" option) will render mysqld useless!
#
#skip-networking
# Replication Master Server (default)
# binary logging is required for replication
log-bin=mysql-bin
# binary logging format - mixed recommended
binlog_format=mixed
# required unique id between 1 and 2^32 - 1
# defaults to 1 if master-host is not set
# but will not function as a master if omitted
server-id = 1
# Replication Slave (comment out master section to use this)
#
# To configure this host as a replication slave, you can choose between
# two methods :
#
# 1) Use the CHANGE MASTER TO command (fully described in our manual) -
# the syntax is:
#
# CHANGE MASTER TO MASTER_HOST=, MASTER_PORT=,
# MASTER_USER=, MASTER_PASSWORD= ;
#
# where you replace , , by quoted strings and
# by the master's port number (3306 by default).
#
# Example:
#
# CHANGE MASTER TO MASTER_HOST='125.564.12.1', MASTER_PORT=3306,
# MASTER_USER='joe', MASTER_PASSWORD='secret';
#
# OR
#
# 2) Set the variables below. However, in case you choose this method, then
# start replication for the first time (even unsuccessfully, for example
# if you mistyped the password in master-password and the slave fails to
# connect), the slave will create a master.info file, and any later
# change in this file to the variables' values below will be ignored and
# overridden by the content of the master.info file, unless you shutdown
# the slave server, delete master.info and restart the slaver server.
# For that reason, you may want to leave the lines below untouched
# (commented) and instead use CHANGE MASTER TO (see above)
#
# required unique id between 2 and 2^32 - 1
# (and different from the master)
# defaults to 2 if master-host is set
# but will not function as a slave if omitted
#server-id = 2
#
# The replication master for this slave - required
#master-host =
#
# The username the slave will use for authentication when connecting
# to the master - required
#master-user =
#
# The password the slave will authenticate with when connecting to
# the master - required
#master-password =
#
# The port the master is listening on.
# optional - defaults to 3306
#master-port =
#
# binary logging - not required for slaves, but recommended
#log-bin=mysql-bin
# Uncomment the following if you are using InnoDB tables
#innodb_data_home_dir = /usr/local/mysql/data
#innodb_data_file_path = ibdata1:10M:autoextend
#innodb_log_group_home_dir = /usr/local/mysql/data
# You can set .._buffer_pool_size up to 50 - 80 %
# of RAM but beware of setting memory usage too high
#innodb_buffer_pool_size = 16M
#innodb_additional_mem_pool_size = 2M
# Set .._log_file_size to 25 % of buffer pool size
#innodb_log_file_size = 5M
#innodb_log_buffer_size = 8M
#innodb_flush_log_at_trx_commit = 1
#innodb_lock_wait_timeout = 50
[mysqldump]
quick
max_allowed_packet = 16M
[mysql]
no-auto-rehash
# Remove the next comment character if you are not familiar with SQL
#safe-updates
default-character-set=utf8
[myisamchk]
key_buffer_size = 20M
sort_buffer_size = 20M
read_buffer = 2M
write_buffer = 2M
[mysqlhotcopy]
interactive-timeout
关闭服务
使用 service 启动:service mysql stop
使用 mysqld 脚本启动:/etc/init.d/mysql stop
2.7 配置mysql环境 编辑/etc/profile加入以下内容
[root@localhost ~]# vi /etc/profile

xport MYSQL_HOME=/liux/dev/mysql-8.0.24
export MYSQL_PATH=${MYSQL_HOME}/bin:${MYSQL_HOME}/lib
export PATH=$PATH:/liux/dev/mysql-8.0.24/bin
shutdown -r now 重启下服务器或者 source /etc/profile 均可使环境变量生效
2.8 系统配置
cp /usr/local/mysql/support-files/mysql.server   /etc/init.d/mysql   //拷贝mysql.server
chmod +x  /etc/init.d/mysql           //添加可执行权限。
chkconfig  --add mysql               // 注册启动服务
chkconfig  --list   //查看是否添加成功
2.9 mysql安装成功 修改初始密码
[root@localhost ~]# mysql -uroot -p
Enter password:        //这里输入刚刚初始化操作时的初始密码

mysql> alter user 'root'@'localhost' identified by '你的新密码';
Query OK, 0 rows affected (0.02 sec)
#设置允许远程登录
mysql> user mysql
mysql> update user set user.Host='%' where user.User='root';
mysql> flush privileges;        //刷新生效
防火墙开关
# firewall防火墙
systemctl status firewalld
# 查看转态
firewall-cmd --state
# 开启
service firewalld start
# 重启
service firewalld restart
# 关闭
service firewalld stop
#注意分清楚linux的版本 命令会有所不同
#查看防火墙规则
firewall-cmd --list-all
远程连接
远程连接时报错
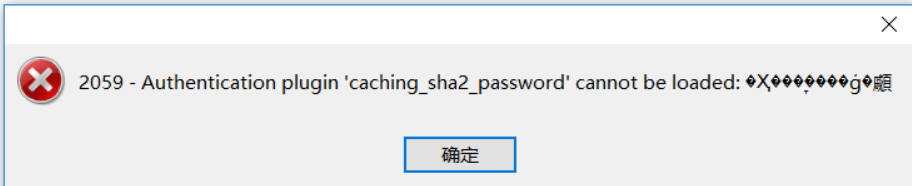
或

原因:mysql8 之前的版本中加密规则是mysql_native_password,而在mysql8之后,加密规则是caching_sha2_password
解决办法
#更改加密方式
mysql> alter user 'root'@'%' identified by '密码' password expire never;
Query OK, 0 rows affected (0.01 sec)
#更新用户密码
mysql> ALTER USER 'root'@'%' IDENTIFIED WITH mysql_native_password BY '密码';
Query OK, 0 rows affected (0.01 sec)

mysql> flush privileges;
Query OK, 0 rows affected (0.00 sec)
连接成功!
删除mysql
1、检查mariadb,如无则跳过下面一条
[root@localhost ~]# rpm -qa|grep mariadb2、删除mariadb
[root@localhost ~]# rpm -e --nodeps mariadb-server
[root@localhost ~]# rpm -e --nodeps mariadb
[root@localhost ~]# rpm -e --nodeps mariadb-libs
3、检查mysql
[root@localhost ~]# rpm -qa|grep mysql
mysql-community-client-8.0.22-1.el7.x86_64
mysql-community-common-8.0.22-1.el7.x86_64
mysql-community-client-plugins-8.0.22-1.el7.x86_64
mysql-community-libs-compat-8.0.22-1.el7.x86_64
mysql80-community-release-el7-3.noarch
mysql-community-libs-8.0.22-1.el7.x86_64
mysql-community-server-8.0.22-1.el7.x86_64
4、删除mysql
[root@localhost ~]# rpm -e --nodeps xxx


 1048
1048


 被折叠的 条评论
为什么被折叠?
被折叠的 条评论
为什么被折叠?
 到【灌水乐园】发言


