


系统环境:Centos6.5_x86_64
ldap服务器:10.0.10.30 版本:openldap-2.4.40-12.el6.x86_64
GitLab服务器:10.0.10.78 版本:gitlab-ce-8.8.5-ce.1.el6.x86_64.rpm
ldap Web管理客户端工具版本: ldap-account-manager-4.8.tar.bz2
关闭防火墙和SELINUX
/etc/init.d/iptables stop
setenforce 0
sed -i 's/SELINUX=enforcing/SELINUX=disabled/g' /etc/selinux/config
Yum安装ldap服务器:
yum upgrade nss-softokn-freebl -y
yum install openldap openldap* nss-* -y
复制slapd.conf配置文件:
cp /usr/share/openldap-servers/slapd.conf.obsolete /etc/openldap/slapd.conf
创建管理员密码:
slappasswd -s swper|sed -e "s#{SSHA}#rootpw\t{SSHA}#g" >>/etc/openldap/slapd.conf
salpd.conf 配置修改:[修改或添加]
把配置文件中:dc=my-domain,dc=com 修改成自己的域名; dc=58jb,dc=org ;cn=Manager就是管理员账号;
database bdb
suffix "dc=58jb,dc=org"
checkpoint 1024 15
rootdn "cn=Manager,dc=58jb,dc=org"
loglevel Stats #增加一个日志记录
cachesize 1000 #缓存大小
快速替换上面关键字;
sed -i 's/dc=my-domain/dc=58jb/g' /etc/openldap/slapd.conf
sed -i 's/dc=com/dc=org/g' /etc/openldap/slapd.conf
配置数据库信息:[复制配置文件]
cp /usr/share/openldap-servers/DB_CONFIG.example /var/lib/ldap/DB_CONFIG
chown ldap:ldap /var/lib/ldap/DB_CONFIG
chmod 700 /var/lib/ldap
配置rsyslog日志记录ldap的日志;
echo "local4.* /var/log/ldap.log" >>/etc/rsyslog.conf
/etc/init.d/rsyslog restart
启动服务:
/etc/init.d/slapd start
重新生成配置文件;
rm -rf /etc/openldap/slapd.d/*
slaptest -f /etc/openldap/slapd.conf -F /etc/openldap/slapd.d/
修改权限:
chown -R ldap.ldap /etc/openldap/slapd.d/
重新启动服务:
/etc/init.d/slapd restart
测试一下认证:
slaptest -u
日志检查:
tail -10 /var/log/ldap.log
再检查ldap的连接测试:
ldapsearch -LLL -W -x -H ldap://58jb.org -D "cn=Manager,dc=58jb,dcdc=org" -b "dc=58jb,dc=org" "(uid=*)"
输入密码后返回信息:No such object (32) 表示成功!
Yum安装lamp环境;
yum install httpd php php-ldap php-gd -y
修改配置文件:
sed -i 's@#ServerName www.example.com:80@ServerName 127.0.0.1:80@g' /etc/httpd/conf/httpd.conf
启动httpd服务:
/etc/init.d/httpd start
chkconfig httpd on
安装ldap Web管理客户端工具:[5.0以上要求php要大于5.4以上的]
ldap-account-manager-4.8.tar.bz2
tar xf ldap-account-manager-4.8.tar.bz2 -C /var/www/html
mv /var/www/html/ldap-account-manager-4.8.tar.bz2 /var/www/html/ldap
复制配置文件:
cd /var/www/html/ldap/config
cp config.cfg.sample config.cfg
cp lam.conf.sample lam.conf
修改配置文件:
sed -i "s#dc=my-domain#dc=58jb#g" /var/www/html/ldap/config/lam.conf
sed -i "s#dc=com#dc=org#g" /var/www/html/ldap/config/lam.conf
sed -i "s#dc=yourdomain#dc=58jb#g" /var/www/html/ldap/config/lam.conf
启动httpd服务;
service httpd restart
先添加一个组,再添加用户,添加用户时最好填上邮件地址,因为Gitlab要使用邮件地址;
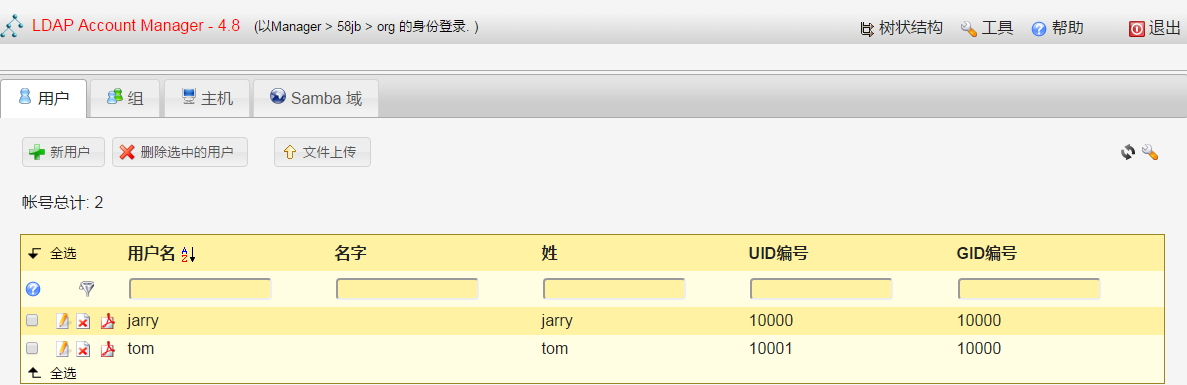
再命令行下测试效果:
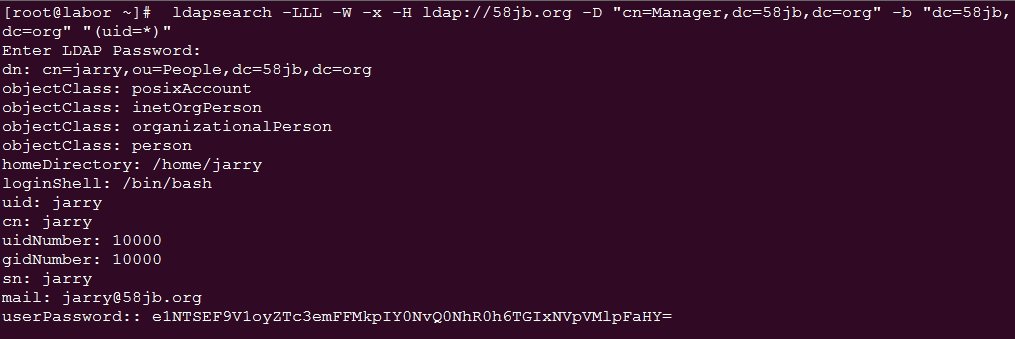
上面成功返回了刚在Web界面创建的用户信息;到此ldap服务器上的配置基本完成。
接下来是Gitlab服务器上的配置;
yum install openssh-server openssh-clients postfix cronie -y
service postfix start
chkconfig postfix on
使用rpm包安装gitldb服务,这样方便,如果使用yum也可以,但是网络不稳定的情况下可能会很久;
[root@gitlab soft]# rpm -ivh gitlab-ce-8.8.5-ce.1.el6.x86_64.rpm
Preparing... ########################################### [100%]
1:gitlab-ce ########################################### [100%]
hostname: Unknown host
gitlab: Thank you for installing GitLab!
gitlab: To configure and start GitLab, RUN THE FOLLOWING COMMAND:
sudo gitlab-ctl reconfigure
gitlab: GitLab should be reachable at http://gitlab.example.com
gitlab: Otherwise configure GitLab for your system by editing /etc/gitlab/gitlab.rb file
gitlab: And running reconfigure again.
gitlab:
gitlab: For a comprehensive list of configuration options please see the Omnibus GitLab readme
gitlab: https://gitlab.com/gitlab-org/omnibus-gitlab/blob/master/README.md
gitlab:
It looks like GitLab has not been configured yet; skipping the upgrade script.
修改配置文件:
external_url 'http://gitlab.example.com'
改成自己的域名或者IP地址:
external_url 'http://10.0.10.78'
101-150段中,把101和121的注释去掉,并作如下修改:记得后面的EOS是跟102的对应的;
gitlab_rails['ldap_enabled'] = true
gitlab_rails['ldap_servers'] = YAML.load <
main: # 'main' is the GitLab 'provider ID' of this LDAP server
label: 'LDAP'
host: '10.0.10.30'
port: 389
uid: 'uid'
method: 'plain' # "tls" or "ssl" or "plain"
bind_dn: 'cn=Manager,dc=58jb,dc=org'
password: '_the_password_of_the_bind_user'
active_directory: true
allow_username_or_email_login: false
block_auto_created_users: false
base: 'dc=58jb,dc=org'
user_filter: ''
attributes:
username: ['uid', 'userid', 'sAMAccountName']
email: ['mail', 'email', 'userPrincipalName']
name: 'cn'
first_name: 'givenName'
last_name: 'sn'
EOS
初始化配置:
gitlab-ctl reconfigure
注意最后的几行信息,如果没有异常就成功了;
Running handlers:
Running handlers complete
Chef Client finished, 3/277 resources updated in 03 seconds
gitlab Reconfigured!
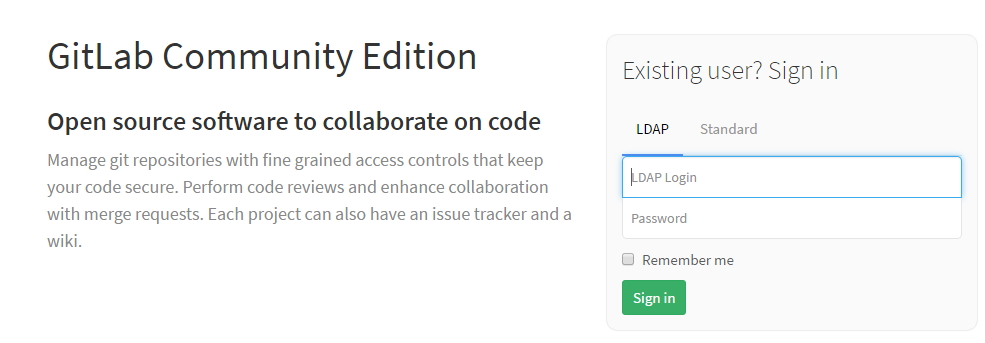
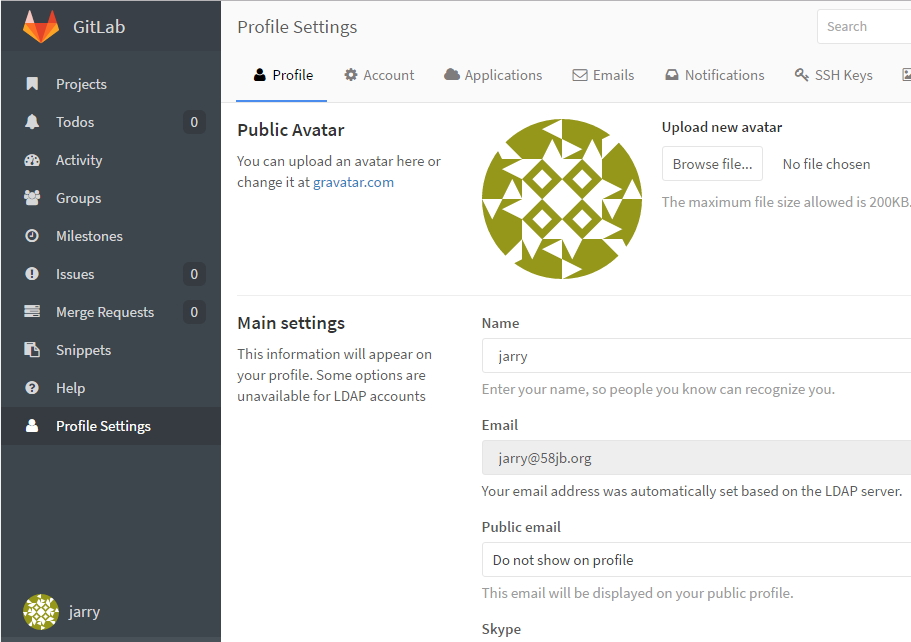
打开浏览器:http://10.0.10.78, 第一次会要求配置root的密码,至少8位以上;修改完后再用ldap上的用户登陆;
中途遇到的异常,如果按照上面的配置方法是不会出错的;
gitlab使用ldap用户登陆时报的错误:
Could not authenticate you from Ldapmain because "No route to host - connect(2) for "10.0.10.30" port 389".
原因:可能是ldap服务监听的IP为本机,或者是防火墙问题,清空一下规则;
iptables -F
错误二,也是登陆验证是失败:
Could not authenticate you from Ldapmain because "Invalid credentials".
一般都是gitlab.rb配置文件中的配置有问题,或者修改完配置后要把gitlab的服务全停止后,重新初始化一次再启动;


 4141
4141


 被折叠的 条评论
为什么被折叠?
被折叠的 条评论
为什么被折叠?
 到【灌水乐园】发言


