


前言
接到需求的第一时间,这么通用的东西,应该有人已经造过轮子了吧,赶紧上gayhub看看,果然有——vue-tour。
https://github.com/pulsardev/vue-tour
看了官方效果,怎么看都像是个气泡组件,效果和api都中规中矩。
然而我司ui比较骚气,搞了自定义的内容,差距挺大的,作罢,还是得自己撸。
思路
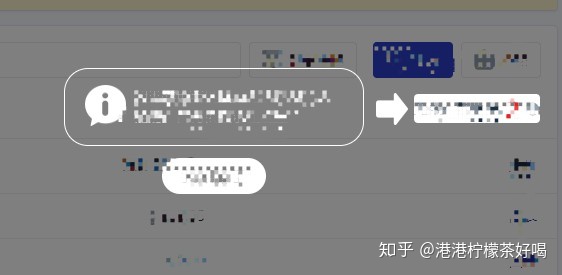
想要在屏幕遮罩层上高亮一个区域,需要在原位置上盖一个样式完全相同的dom元素,且自定义的提示内容需要环绕这个区域。 那么我们需要的零件包括: - 高亮元素的坐标信息
获取元素自身宽高,距离浏览器视窗顶部和左边的距离。
- 高亮元素的拷贝
这里用cloneNode操作dom肯定是不合适的,最后的样式还不一定生效,最好是能给这个元素拍张照片

那么我们就得用到html2canvas工具库了,将dom元素生成一个canvas对象,再配合canvas的toDataURL方法,来生成一个base64图片,完美。
html2canvas(document.body).then(function(canvas) {
    // 生成base64图片
    let img = canvas.toDataURL('image/png')
});
https://github.com/niklasvh/html2canvas
组件设计
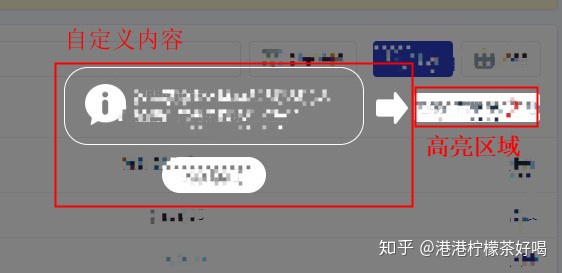
理想状态下,传入一个id,自动生成高亮dom元素的base64图片(照片),盖在原对象的正上方,自定义内容通过插槽自己实现,有较高的自由度。
实现代码
- 获取坐标
// xx.vue
//获取元素的纵坐标
getTop(e) {
  let offset = e.offsetTop
  if (e.offsetParent !== null) offset += this.getTop(e.offsetParent)
  return offset
},
//获取元素的横坐标
getLeft(e) {
  let offset = e.offsetLeft
  if (e.offsetParent !== null) offset += this.getLeft(e.offsetParent)
  return offset
},
getImgBase64 (idStr) {
    let _el = document.querySelector(`#${idStr}`)
    let style = window.getComputedStyle(_el)
    // 宽
    this.width = parseInt(style.width)
    // 高
    this.height = parseInt(style.height)
    // 顶部距离
    this.offsetTop = vm.getTop(_el)
    // 左边距离
    this.offsetLeft = vm.getLeft(_el)
}
生成高清截图(拍照)
// xx.vue
getImgBase64(idStr) {
      let vm = this
      let _canvas = document.createElement('canvas')
      let _el = document.querySelector(`#${idStr}`)
      let style = window.getComputedStyle(_el)
      this.width = parseInt(style.width)
      this.height = parseInt(style.height)
      let context = _canvas.getContext('2d')
      //以下代码是获取根据屏幕分辨率,来设置canvas的宽高以获得高清图片,兼容多倍屏
      // 屏幕的设备像素比
      let devicePixelRatio = window.devicePixelRatio || 2
      // 浏览器在渲染canvas之前存储画布信息的像素比
      let backingStoreRatio =
        context.webkitBackingStorePixelRatio || context.mozBackingStorePixelRatio || context.msBackingStorePixelRatio || context.oBackingStorePixelRatio || context.backingStorePixelRatio || 1
      // canvas的实际渲染倍率
      let ratio = devicePixelRatio / backingStoreRatio
      _canvas.width = this.width * ratio
      _canvas.height = this.height * ratio
      _canvas.style.width = this.width + 'px'
      _canvas.style.height = this.height + 'px'
      html2canvas(_el, {
        canvas: _canvas
      }).then(function (canvas) {
        // 照片在这里
        let imgData = canvas.toDataURL('image/png')
      })
    }
这里注意,必须等到父组件的异步数据结束,dom更新后才能执行这个方法。
this.$nextTick(() =>{
    this.getImgBase64('id')
})
需要解决的问题
- 浏览器拉伸,高亮区域跟随移动
created() {
    window.addEventListener('resize', this.resetPos)
},
beforeDestroy() {
    window.removeEventListener('resize', this.resetPos)
},
methods: {
    resetPos() {
      let vm = this
      let _el = document.querySelector(`#${vm.idStr}`)
      let style = window.getComputedStyle(_el)
      this.width = parseInt(style.width)
      this.height = parseInt(style.height)
      this.offsetTop = vm.getTop(_el)
      this.offsetLeft = vm.getLeft(_el)
    }
}- 用户指引何时出现
通过本地缓存操作时间,自行自行判断合适的间隔,比如一周。
- 如何方便父组件调用
通过组件内的open方法和close方法来控制展示的时机。
组件完整代码
<template>
  <section class="tips-dialog" v-show="showBtn">
    <span class="bg"></span>
    <div class="target" :style="posStyle">
      <img v-imgErr @click="close" :src="domImg" />
      <div class="content" :style="`${pos === 'left' ? 'right' : 'left'}:${width}px`">
        <slot name="content"></slot>
      </div>
    </div>
  </section>
</template>
<script>
import html2canvas from 'html2canvas'
export default {
  name: 'tips-dialog',
  data() {
    return {
      // 元素节点截图
      domImg: '',
      // 展示开关
      showBtn: false,
      offsetTop: 0,
      offsetLeft: 0,
      width: 0,
      height: 0
    }
  },
  props: {
    idStr: {
      type: String,
      required: true
    },
    pos: {
      type: String,
      default: () => {
        return 'left'
      }
    }
  },
  watch: {
    idStr() {
      this.getImgBase64()
    }
  },
  computed: {
    posStyle() {
      return `left:${this.offsetLeft}px;top:${this.offsetTop}px;width:${this.width}px;height:${this.height}px;`
    }
  },
  created() {
    window.addEventListener('resize', this.resetPos)
  },
  beforeDestroy() {
    window.removeEventListener('resize', this.resetPos)
  },
  methods: {
    //获取元素的纵坐标
    getTop(e) {
      let offset = e.offsetTop
      if (e.offsetParent !== null) offset += this.getTop(e.offsetParent)
      return offset
    },
    //获取元素的横坐标
    getLeft(e) {
      let offset = e.offsetLeft
      if (e.offsetParent !== null) offset += this.getLeft(e.offsetParent)
      return offset
    },
    open() {
      !this.domImg && this.getImgBase64()
      if (this.domImg) {
        this.showBtn = true
      }
    },
    close() {
      this.showBtn = false
      this.$emit('close')
    },
    resetPos() {
      let vm = this
      let _el = document.querySelector(`#${vm.idStr}`)
      let style = window.getComputedStyle(_el)
      this.width = parseInt(style.width)
      this.height = parseInt(style.height)
      this.offsetTop = vm.getTop(_el)
      this.offsetLeft = vm.getLeft(_el)
    },
    getImgBase64() {
      let vm = this
      let _canvas = document.createElement('canvas')
      let _el = document.querySelector(`#${vm.idStr}`)
      let style = window.getComputedStyle(_el)
      let w = parseInt(style.width)
      this.width = w
      let h = parseInt(style.height)
      this.height = h
      this.offsetTop = vm.getTop(_el)
      this.offsetLeft = vm.getLeft(_el)
      //可以按照自己的需求,对context的参数修改,translate指的是偏移量
      let context = _canvas.getContext('2d')
      //以下代码是获取根据屏幕分辨率,来设置canvas的宽高以获得高清图片
      // 屏幕的设备像素比
      let devicePixelRatio = window.devicePixelRatio || 2
      // 浏览器在渲染canvas之前存储画布信息的像素比
      let backingStoreRatio =
        context.webkitBackingStorePixelRatio || context.mozBackingStorePixelRatio || context.msBackingStorePixelRatio || context.oBackingStorePixelRatio || context.backingStorePixelRatio || 1
      // canvas的实际渲染倍率
      let ratio = devicePixelRatio / backingStoreRatio
      _canvas.width = w * ratio
      _canvas.height = h * ratio
      _canvas.style.width = w + 'px'
      _canvas.style.height = h + 'px'
      html2canvas(_el, {
        canvas: _canvas
      }).then(function (canvas) {
        vm.domImg = canvas.toDataURL('image/png')
        let imgEl = document.createElement('img')
        imgEl.onload = function () {
          setTimeout(() => {
            vm.showBtn = true
          }, 20)
        }
        imgEl.setAttribute('src', vm.domImg)
      })
    }
  }
}
</script>
<style lang="stylus" scoped>
.tips-dialog
  position fixed
  top 0
  left 0
  width 100%
  height 100%
  z-index 1001
  .bg
    position relative
    display block
    width 100%
    height 100%
    background rgba(0, 0, 0, 0.5)
  .target
    position absolute
    img
      display block
      width 100%
      height 100%
      cursor pointer
    .content
      position absolute
      top 50%
</style>
组件使用
<!-- HTML -->
<tips-dialog idStr="domId" ref="tipsDialog" pos="left">
  <template v-slot:content>
    <div class="user-explan">
    <!-- 你自己的用户指引内容 -->
    </div>
  </template>
</tips-dialog>
<!-- js -->
// 异步结束后
this.$nextTick(() => {
    // 打开用户指引
    this.$refs.tipsDialog.open()
})
<!-- CSS -->
// 插槽内容要记得补全位置偏移的样式
至此,实现了一个较为简单的灯箱引导组件。但还留有拓展空间,比如
- 用户指引有多个步骤怎么办?
已经实现了0到1,至于1到100,原理是一样的,除非有需求,我应该不会继续拓展这个组件了,多几根头发还是香的。

- 自定义内容能不能自动定位,减少样式的编写?
可以跟vue-tour一样,组件内提供一套规范的提示模板和api,满足简单的需求。
至于自定义,需求是多变的,还是自己写吧。


 146
146

 被折叠的 条评论
为什么被折叠?
被折叠的 条评论
为什么被折叠?
 到【灌水乐园】发言


