


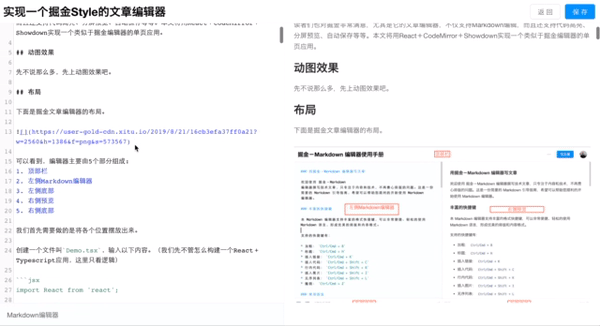
前言
我是一个掘金重度用户,不仅经常在掘金上挖掘含金量高的文章,偶尔还在掘金上创作技术文章。相信读者们也对掘金非常满意,尤其是它的文章编辑器,不仅支持Markdown编辑,而且还支持代码高亮、分屏预览、自动保存等等。本文将用React+CodeMirror+Showdown实现一个类似于掘金编辑器的单页应用。
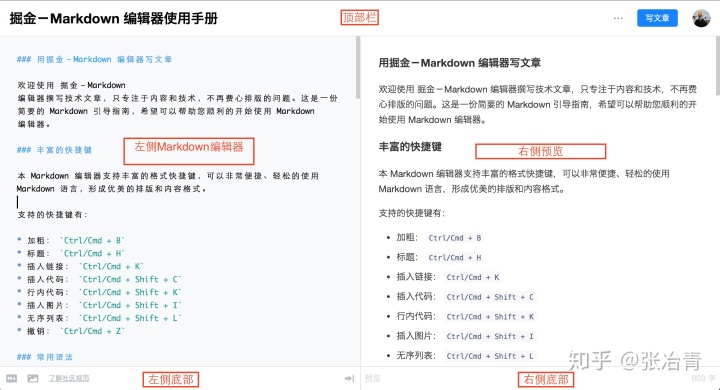
动图效果
先不说那么多,先上动图效果吧。
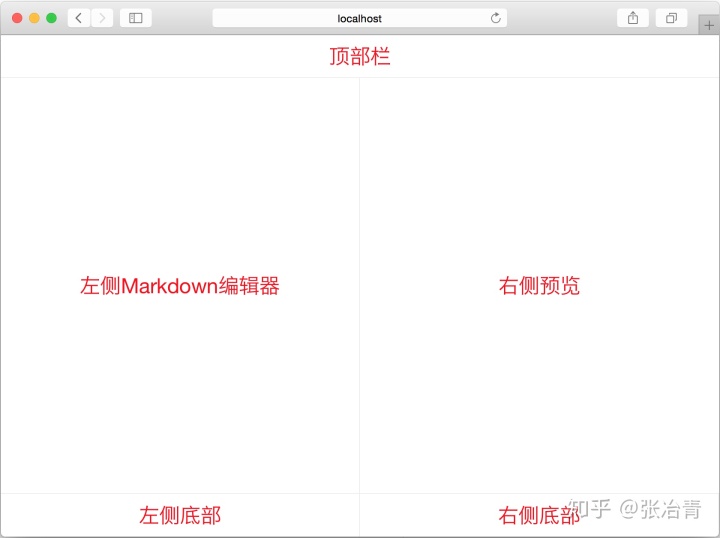
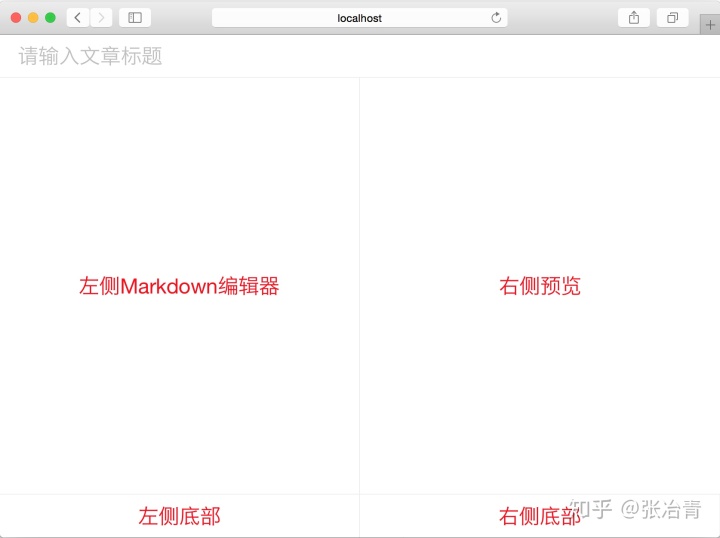
布局
下面是掘金文章编辑器的布局。
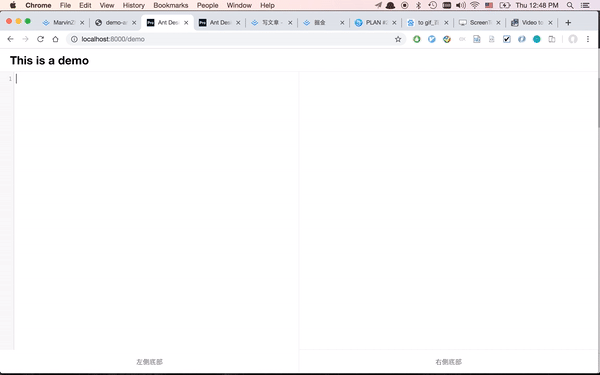
可以看到,编辑器主要由5个部分组成: 1. 顶部栏 2. 左侧Markdown编辑器 3. 左侧底部 4. 右侧预览 5. 右侧底部
我们首先需要做的是将各个位置摆放出来。
创建一个文件叫Demo.tsx,输入以下内容。(我们先不管怎么构建一个React+Typescript应用,这里只看逻辑)
import React from 'react';

// 引入样式
import style from './Demo.scss';

const Demo: React.FC = () => {
  return (
    <div className={style.articleEdit}>
      <div className={style.topBar}>
        顶部栏
      </div>

      <div className={style.main}>
        <div className={style.editor}>
          <div className={style.markdown}>
            左侧Markdown编辑器
          </div>
          <div className={style.footer}>
            左侧底部
          </div>
        </div>

        <div id="preview" className={style.preview}>
          <div
            id="content"
            className={style.content}
          >
            右侧预览
          </div>
          <div className={style.footer}>
            右侧底部
          </div>
        </div>
      </div>
    </div>
  );
};

export default Demo;这里的React.FC是FunctionComponent的简写,表示一个函数型组件。在组件中返回的是jsx中的模版内容。style.xxx是React独有的引用样式的一种方式,即样式封装在className中,在React组件中直接通过className来引用,就可以将其涵盖的样式(包括伪类)“继承”过来。
然后,我们在样式文件Demo.scss中输入以下样式内容。
.articleEdit {
  height: 100vh;
  color: red;
  font-size: 24px;
}

.topBar {
  display: flex;
  align-items: center;
  justify-content: center;
  height: 50px;
  border-bottom: 1px solid #eee;
}

.main {
  display: flex;
}

.editor {
  flex: 1 1 50%;
}

.markdown {
  display: flex;
  align-items: center;
  justify-content: center;
  height: calc(100vh - 100px);
  border-right: 1px solid #eee;
  border-bottom: 1px solid #eee;
}

.preview {
  flex: 1 1 50%;
}

.content {
  display: flex;
  align-items: center;
  justify-content: center;
  height: calc(100vh - 100px);
  border-bottom: 1px solid #eee;
}

.footer {
  display: flex;
  align-items: center;
  justify-content: center;
  height: 50px;
  border-right: 1px solid #eee;
}在样式中,我采用了弹性布局display: flex来做分屏。对于如何自动填充高度,稍稍有些麻烦,不过最后通过100vh解决了。vh这个单位其实是浏览器视野中高度的百分比单位。假设浏览器屏幕高度为640px,1vh就代表6.4px。因此,顶部高度50px,底部高度50px,中间的高度设置为height: calc(100% - 100px)就能让中间部分填满屏幕高度了。
效果如下。
顶部标题输入框
我们需要在顶部加入标题输入框。将className为topBar的div标签替换为下面内容。其中Input是antd中的组件。
<div className={style.topBar}>
    <Input className={style.title} placeholder="请输入文章标题"/>
</div>在Demo.scss中加入以下内容。
.title {
  margin-left: 10px !important;
  font-size: 24px !important;
  border: none !important;
}

.title:focus {
  box-shadow: none !important;
}这里important是为了覆盖antd的默认样式。
效果如下。
左侧Markdown编辑器
我们用很受欢迎的CodeMirror来做Markdown编辑器支持。在React中我们引用react-codemirror2封装好的第三方封库。
我们更改一下Demo.tsx为以下内容。
import React from 'react';
import {Input} from "antd";
import {UnControlled as CodeMirror} from 'react-codemirror2'

// 引入样式
import style from './Demo.scss';

// 引入CodeMirror样式
import 'codemirror/mode/markdown/markdown';

const Demo: React.FC = () => {
  // 调整CodeMirror高度
  setTimeout(() => {
    const $el = document.querySelector('.CodeMirror');
    if ($el) {
      $el.setAttribute('style', 'min-height:calc(100vh - 100px);box-shadow:none');
    }
  }, 100);

  return (
    <div className={style.articleEdit}>
      <div className={style.topBar}>
        <Input className={style.title} placeholder="请输入文章标题"/>
      </div>

      <div className={style.main}>
        <div className={style.editor}>
          <div className={style.markdown}>
            <CodeMirror
              className={style.codeMirror}
              options={{
                mode: 'markdown',
                theme: 'eclipse',
                lineNumbers: true,
                smartIndent: true,
                lineWrapping: true,
              }}
            />
          </div>
          <div className={style.footer}>
            左侧底部
          </div>
        </div>

        <div id="preview" className={style.preview}>
          <div
            id="content"
            className={style.content}
          >
            右侧预览
          </div>
          <div className={style.footer}>
            右侧底部
          </div>
        </div>
      </div>
    </div>
  );
};

export default Demo;在这里,我们引用了CodeMirror中Markdown的样式,然后在代码中引用了UnControlled为CodeMirror组件,并加入相应的配置。另外,由于第三方组件是将.CodeMirro写死为height: 300px,我们需要手动将该高度调整为我们需要的高度,用了document.querySelector以及$el.setAttribute这两个方法(见以上代码)。
在Demo.scss引入CodeMirror的CSS样式,内容如下。
@import '../../../node_modules/codemirror/lib/codemirror.css';
@import '../../../node_modules/codemirror/theme/eclipse.css';

...

.codeMirror {
  width: 100%;
}
右侧预览
这次我们将用showdown来做预览模块。
这次我们还是首先改造一下Demo.tsx。加入一部分引入逻辑和监听函数。
import showdown from 'showdown';

showdown.setOption('tables', true);
showdown.setOption('tasklists', true);
showdown.setFlavor('github');

...

const Demo: React.FC = () => {
  ...

  // markdown to html转换器
  const converter = new showdown.Converter();

  // 内容变化回调
  const onContentChange = (editor: Editor, data: EditorChange, value: string) => {
    const $el = document.getElementById('content');
    if (!$el) return;
    $el.innerHTML = converter.makeHtml(value);
  };

  return (
    ...
        <CodeMirror
          className={style.codeMirror}
          options={{
            mode: 'markdown',
            theme: 'eclipse',
            lineNumbers: true,
            smartIndent: true,
            lineWrapping: true,
          }}
          onChange={onContentChange}
        />
    ...
        <div
        id="content"
        className={style.content}
        >
            <article
              id="content"
              className={style.content}
            />
        </div>
    ...
  )
};其中,我们在CodeMirror中加入了onContentChange回调,每一次Markdown中内容更新时,会利用showdown来生成HTML代码,并加入到#content的innerHTML中。这样,就可以实时预览编辑的内容了。
另外,我们还需要自定义一下预览模块的CSS内容,我们在Demo.scss中加入以下内容。
...

article {
  height: 100%;
  padding: 20px;
  overflow-y: auto;
  line-height: 1.7;
}

h1 {
  font-weight: bolder;
  font-size: 32px;
}

h2 {
  font-weight: bold;
  font-size: 24px;
}

h3 {
  font-weight: bold;
  font-size: 20px;
}

h4 {
  font-weight: bold;
  font-size: 16px;
}

h5 {
  font-weight: bold;
  font-size: 14px;
}

h6 {
  font-weight: bold;
  font-size: 12px;
}

ul {
  list-style: inherit;
}

ol {
  list-style: inherit;
}

pre {
  overflow-x: auto;
  color: #333;
  font-family: Monaco, Consolas, Courier New, monospace;
  background: #f8f8f8;
}

img {
  max-width: 100%;
  margin: 10px 0;
}

table {
  max-width: 100%;
  overflow: auto;
  font-size: 14px;
  border: 1px solid #f6f6f6;
  border-collapse: collapse;
  border-spacing: 0;

  thead {
    color: #000;
    text-align: left;
    background: #f6f6f6;
  }
}

td,
th {
  min-width: 80px;
  padding: 10px;
}

tbody tr:nth-of-type(odd) {
  background: #fcfcfc;
}

tbody tr:nth-of-type(even) {
  background: #f6f6f6;
}
效果如下。
这样,我们就可以在左边编辑Markdown的时候右边预览跟着一起实时渲染了。
底部
底部相对来说比较简单,就是往里填充内容就可以了。
在Demo.tsx的footer部分分别填入如下内容。
...
<label style={{marginLeft: 20}}>Markdown编辑器</label>
...
<label style={{marginLeft: 20}}>预览</label>
...在Demo.scss中的.footer中去掉justify-content: center,让其按照默认的左对齐。
效果如下。
Markdown和预览滑动联动
编辑功能做好了,但是我们想让Markdown编辑器和右边的预览同步。
在Demo.tsx中加入一个函数,挂在CodeMirror组件上。
...
  // 监听左右侧上下滑动
  const onEditorScroll = (editor: Editor, scrollInfo: ScrollInfo) => {
    const $el = document.querySelector('#content') as HTMLDivElement;
    if (!$el) return;
    $el.scrollTo(0, Math.round(scrollInfo.top / scrollInfo.height * ($el.scrollHeight + $el.clientHeight)));
  };

...
    <CodeMirror
      className={style.codeMirror}
      options={{
        mode: 'markdown',
        theme: 'eclipse',
        lineNumbers: true,
        smartIndent: true,
        lineWrapping: true,
      }}
      onChange={onContentChange}
      onScroll={onEditorScroll}
    />
...这里,我们利用了scrollTo的方法。这个方法接收x和y参数。由于我们是垂直滚动,因此只用了y参数。
总结
这样,我们就实现了一个简易的掘金风格的文章编辑器。当然,掘金编辑器还有很多功能(例如自动保存、展开收缩、字数统计等等),这里只实现了一部分主要功能。
本文里实现的文章编辑器是我的新开源项目ArtiPub(意为Article Publisher)其中一部分。该项目旨在解决文章发布管理困难的问题,希望实现多平台文章发布,现正在不断开发中。感兴趣的可以关注一下,加我微信tikazyq1或扫下方二维码注明ArtiPub加入交流群。
- 本文编辑器源码: https://github.com/crawlab-team/artipub/tree/master/frontend/src/pages/Demo
- ArtiPub Github: https://github.com/crawlab-team/artipub

本篇文章由一文多发平台ArtiPub自动发布


 2186
2186


 被折叠的 条评论
为什么被折叠?
被折叠的 条评论
为什么被折叠?
 到【灌水乐园】发言


