


CDH:全称Cloudera’s Distribution Including Apache Hadoop。
CDH版本衍化
hadoop是一个开源项目,所以很多公司在这个基础进行商业化,Cloudera对hadoop做了相应的改变。
Cloudera公司的发行版,我们将该版本称为CDH(Cloudera Distribution Hadoop)。
Apache Hadoop 不足之处:
版本管理混乱
部署过程繁琐、升级过程复杂
兼容性差
安全性低
Hadoop 发行版:
Apache Hadoop
Cloudera’s Distribution Including Apache Hadoop(CDH)
Hortonworks Data Platform (HDP)
MapR
EMR
Cloudera's Distribution, including Apache Hadoop(CDH):
是Hadoop众多分支中的一种,由Cloudera维护,基于稳定版本的Apache Hadoop构建
提供了Hadoop的核心
可扩展存储
分布式计算
基于Web的用户界面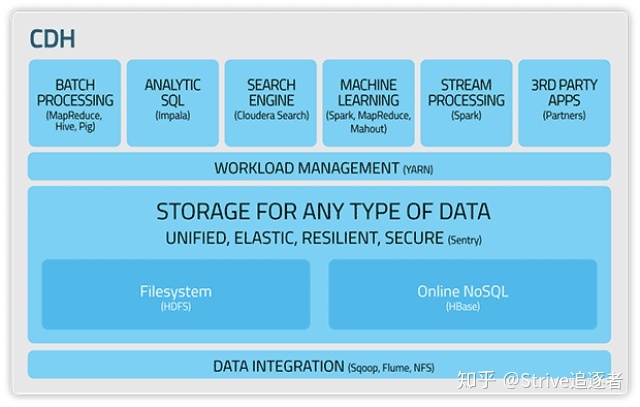
CDH的优点:
版本划分清晰
版本更新速度快
支持Kerberos安全认证
文档清晰
支持多种安装方式(Cloudera Manager方式)
安装方式有:
Cloudera Manager
Yum
Rpm
Tarball
网址:
CDH5.4
http://archive.cloudera.com/cdh5/

Cloudera Manager5.4.3:
http://www.cloudera.com/downloads/manager/5-4-3.html
安装:
首先准备三台虚拟机:
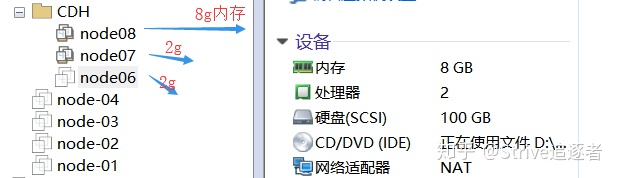
这给出的内存已经很少了,因为只是模拟,在公司里面,都是物理,内存都是64以上的。。
还有:
首先得在你安装的磁盘中空闲出最少50g的内存,如: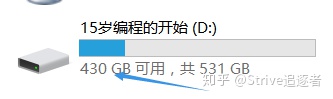
我现在三台虚拟机什么都没装,也没启动,先启动,
它会先开辟预存12g占位,这还算少的了。。。。

启动后配置好静态IP,这个以前的文章有,然后开始SSH免密钥登录。
三台虚拟机,先把ssh给打理出来。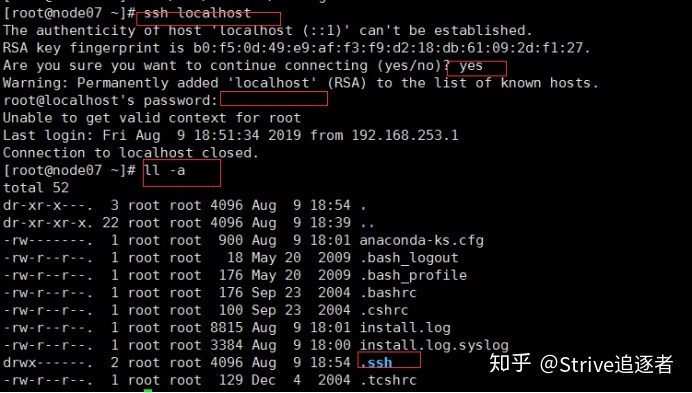
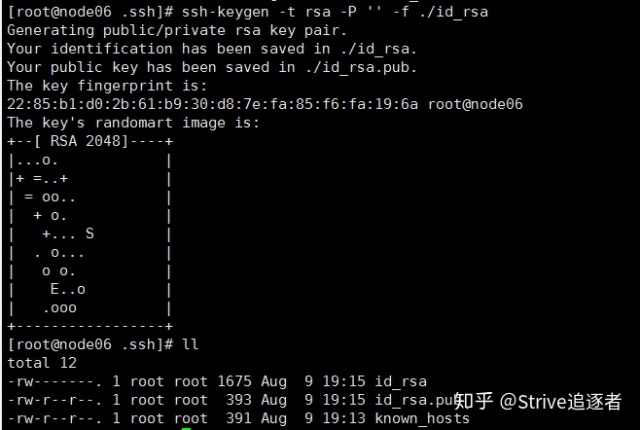


然后在node07上自己免密自己,在08上免密07.
最后拷贝公钥文件到06和08:
scp authorized_keys node06:`pwd`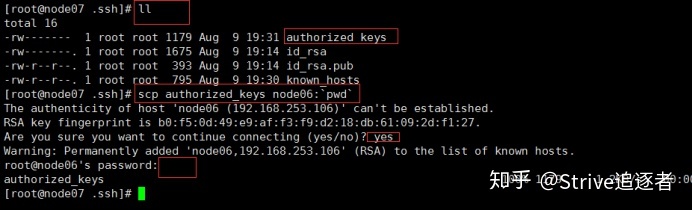
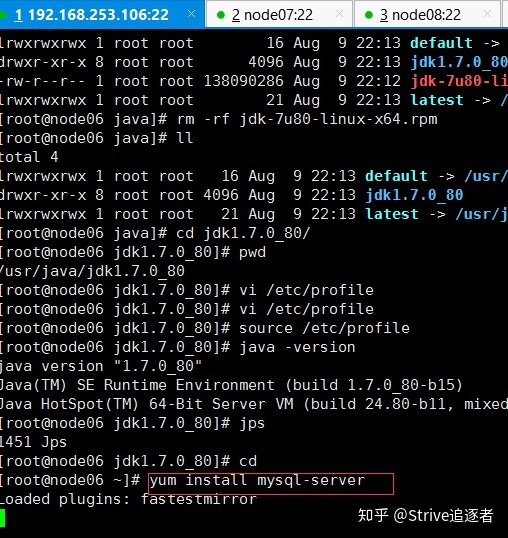
然后配置好后安装JDK:
https://www.cnblogs.com/underwing/p/linux-an-zhuang-rpm-dejdk.html然后记得对上ntp时间。
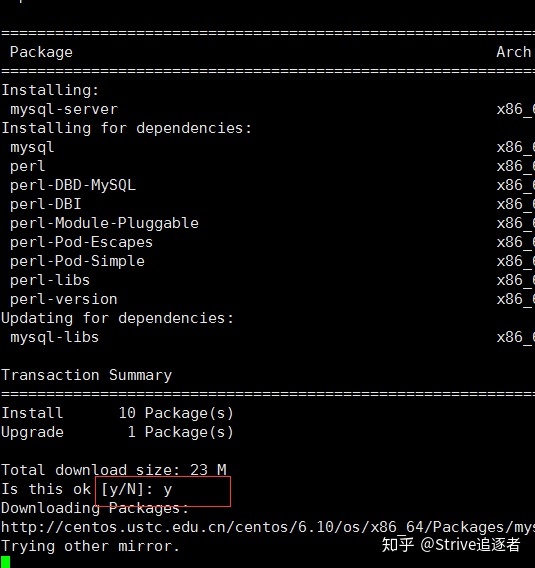
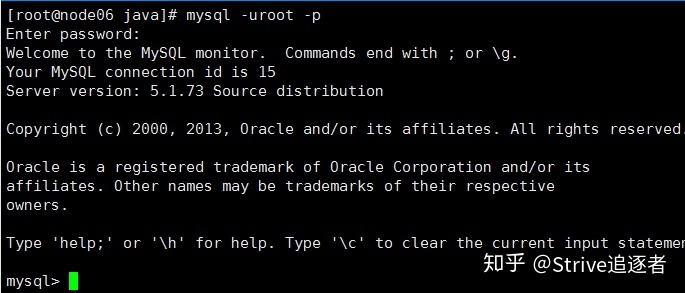
在安装mysql:
安装完成之后启动:

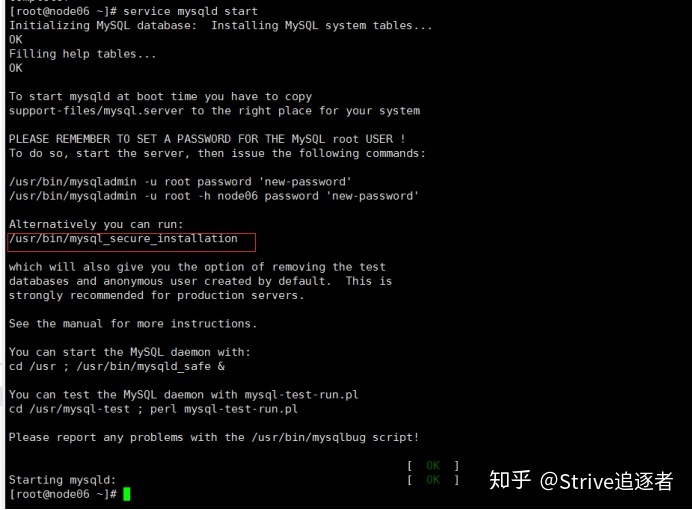
复制刚才那个路径;设置密码


GRANT ALL PRIVILEGES ON *.* TO 'root'@'%' IDENTIFIED BY 'root' WITH GRANT OPTION;
之后三台虚拟机的~下执行命令:
yum install -y chkconfig python bind-utils psmisc libxsltzlib sqlite cyrus-sasl-plain cyrus-sasl-gssapi fuse fuse-libs redhat-lsb
安装Cloudera Manager Server、Agent
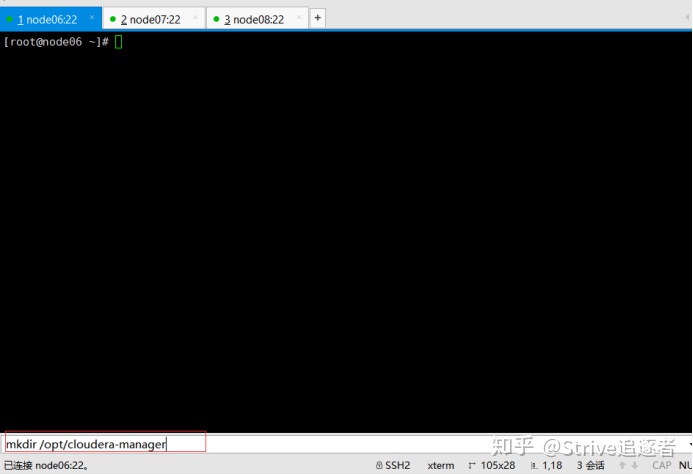
所有节点创建:

然后上传文件:
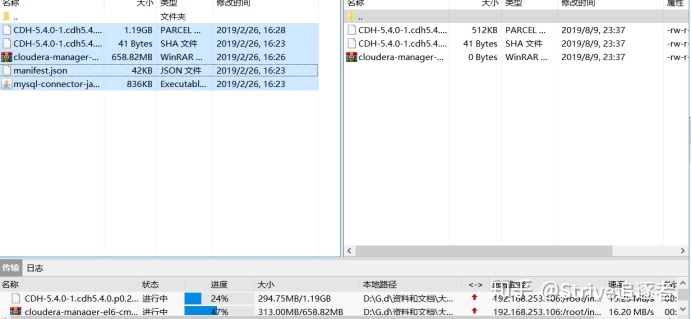
文件:
链接:https://pan.baidu.com/s/19KSjEflWqYuDKN13ZVbklA
提取码:wm3b
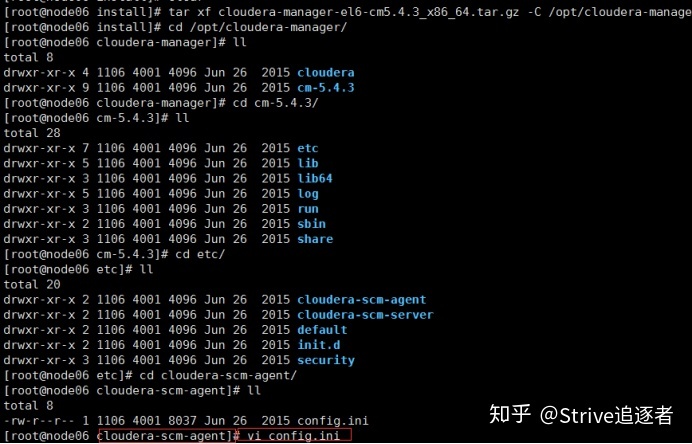
上传后解压:

解压后:
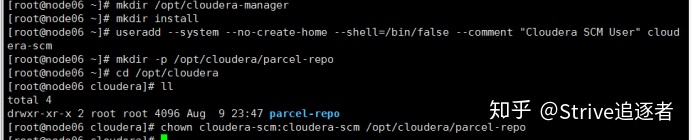
之后给所有节点创建用户:
useradd --system --no-create-home --shell=/bin/false --comment "Cloudera SCM User" cloudera-scm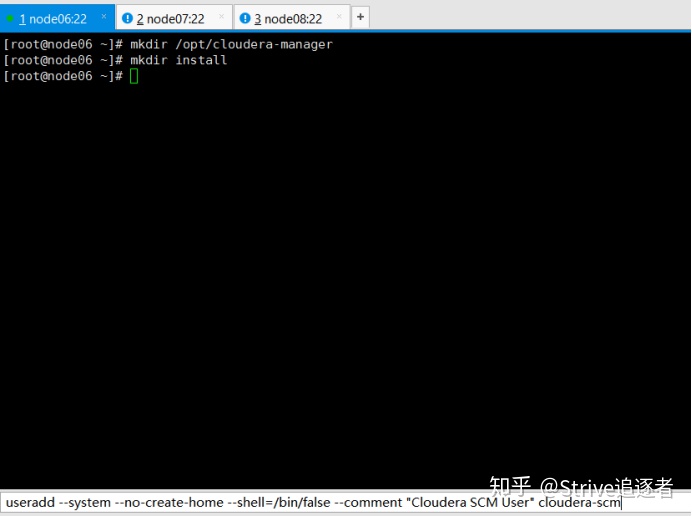
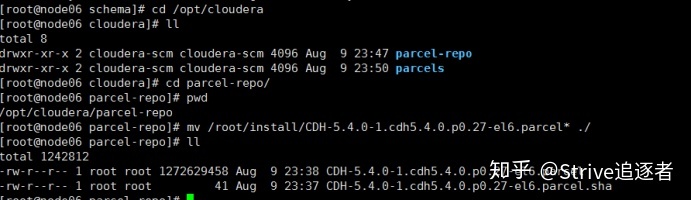
创建Parcel目录,Server节点(node06):
mkdir -p /opt/cloudera/parcel-repo
chown cloudera-scm:cloudera-scm /opt/cloudera/parcel-repo
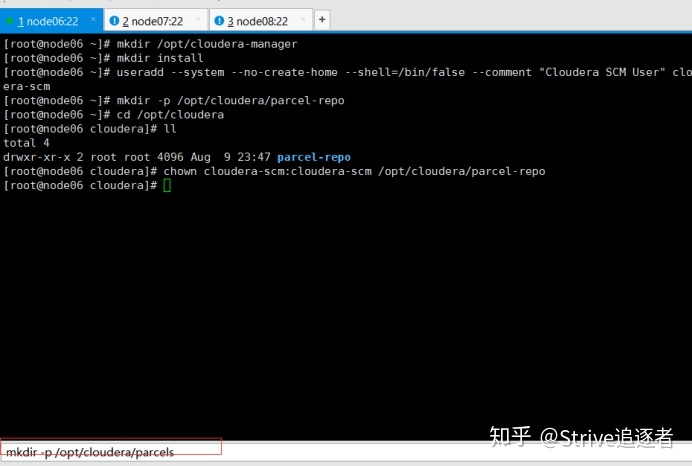
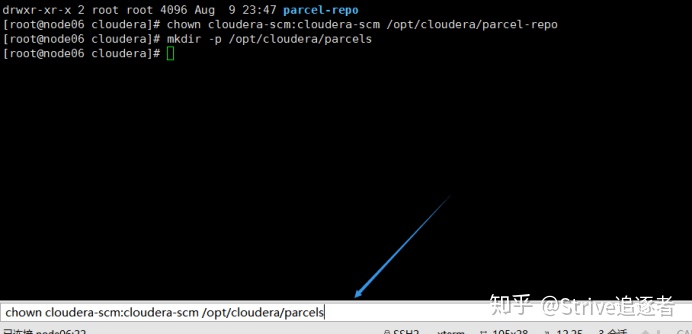
Agent节点(所有节点):
mkdir -p /opt/cloudera/parcels
chown cloudera-scm:cloudera-scm /opt/cloudera/parcels
配置CM Server数据库:
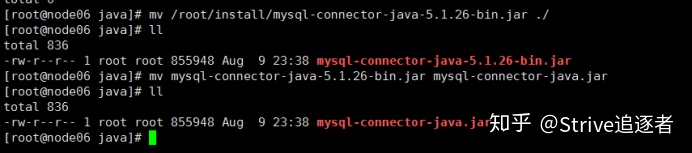
拷贝mysql jar文件到目录 /usr/share/java/(没有就创建)

导入mysql,注意jar包名称要修改为mysql-connector-java.jar
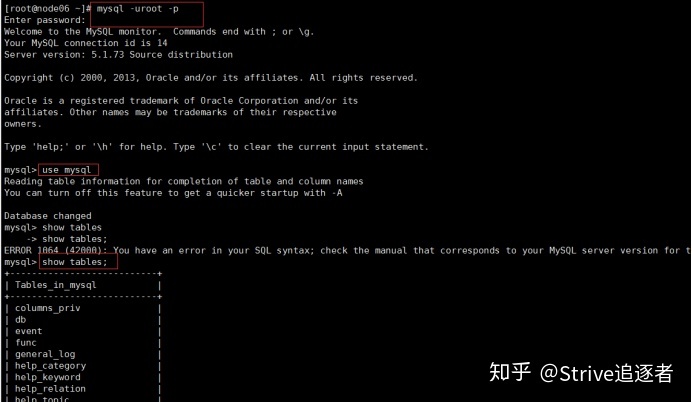
连接mysql,创建一个用户:
grant all on *.* to 'temp'@'%' identified by 'temp' with grant option;
cd /opt/cloudera-manager/cm-5.4.3/share/cmf/schema/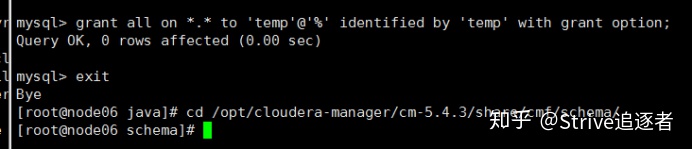
./scm_prepare_database.sh mysql temp -h node06 -utemp -ptemp --scm-host node06 scm scm scm


启动CM Server、Agent:
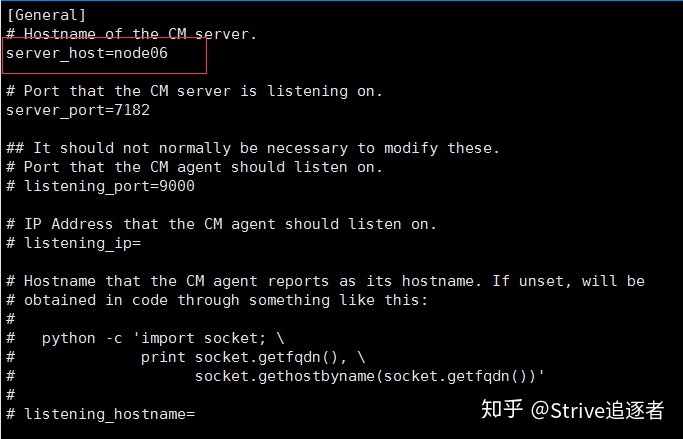
cd /opt/cloudera-manager/cm-5.4.3/etc/init.d/
./cloudera-scm-server start
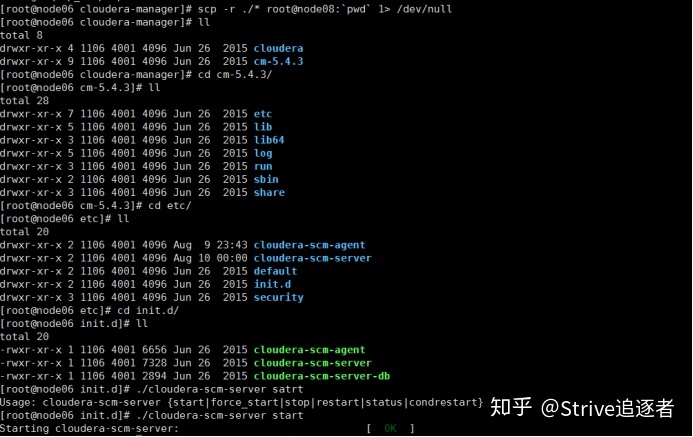
Sever首次启动会自动创建表以及数据,不要立即关闭或重启,否则需要删除所有表及数据重新安装
然后在所有节点上启动agent:

./cloudera-scm-agent start

格式:数据库类型、数据库、数据库服务器、用户名、密码、cm server服务器
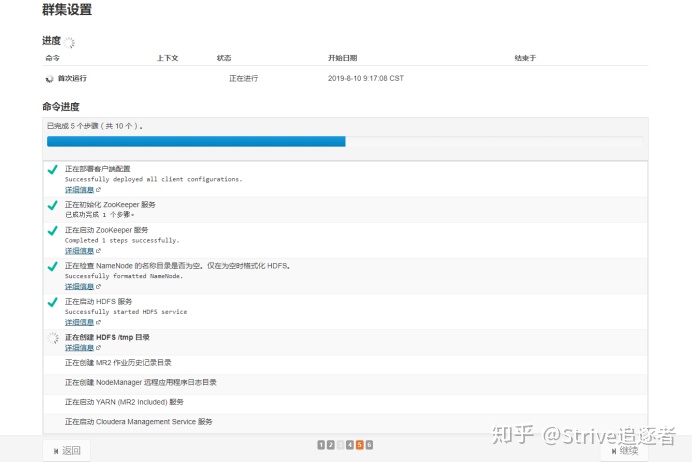
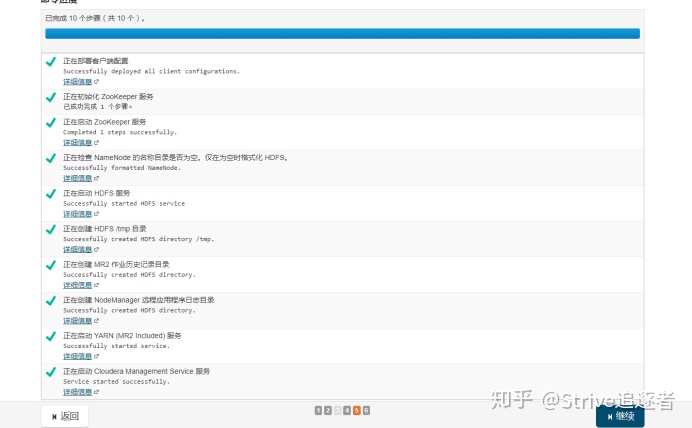
启动时间,短至几分钟,长至十几二十分钟,看电脑配置而定
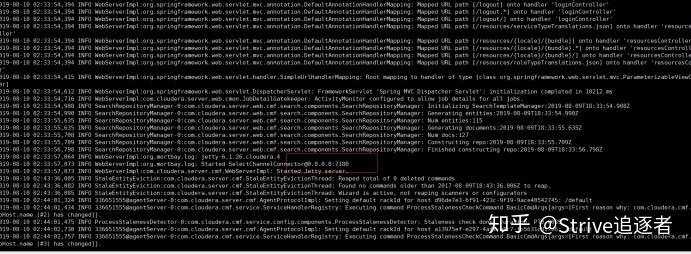
出现这个端口代表你可以访问了,
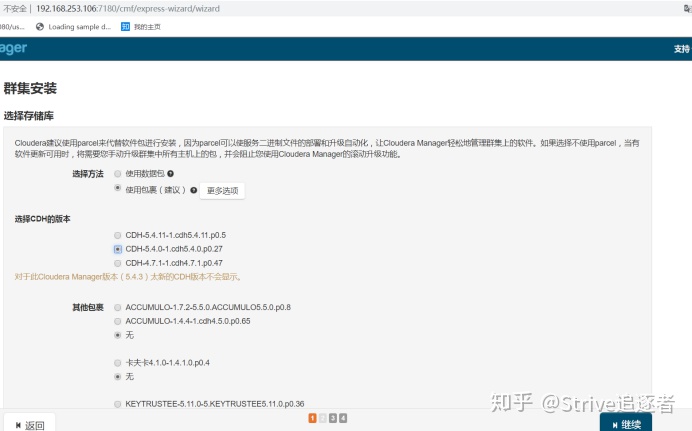
然后就可以安装你想要安装的了,

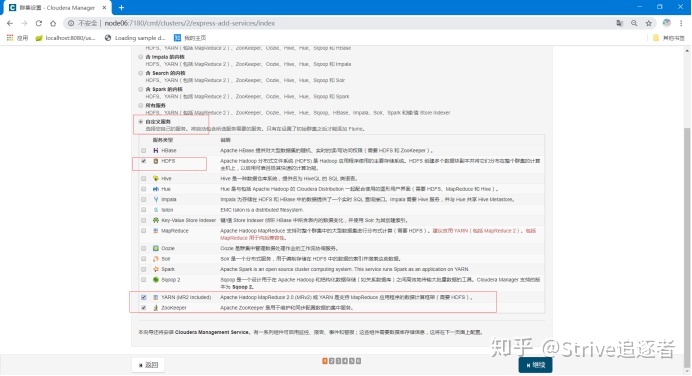
模拟的话我们就只安装几个就好了,我内存也不大,就16g,上面很多都直接能把我安蹦的
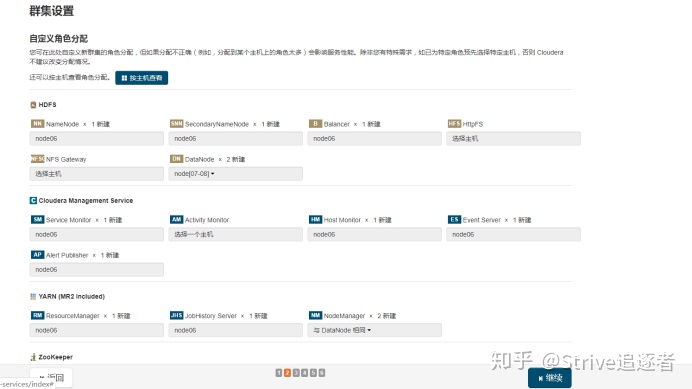
这是根据你节点分配的,没什么要改的(在公司不一样),一直继续,
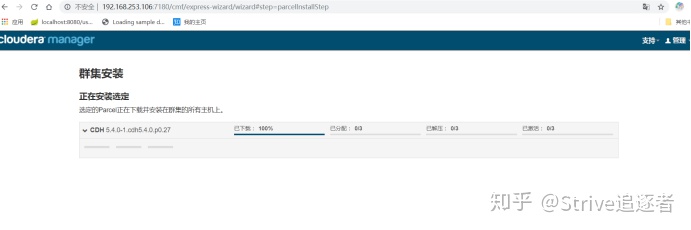
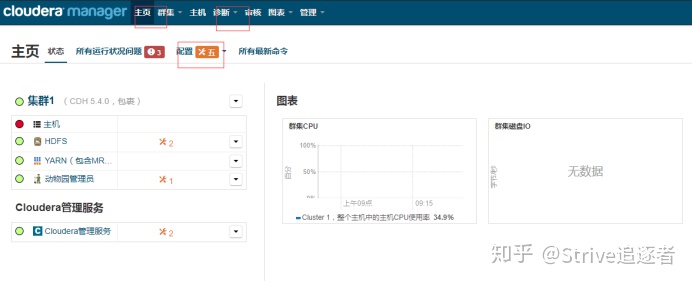
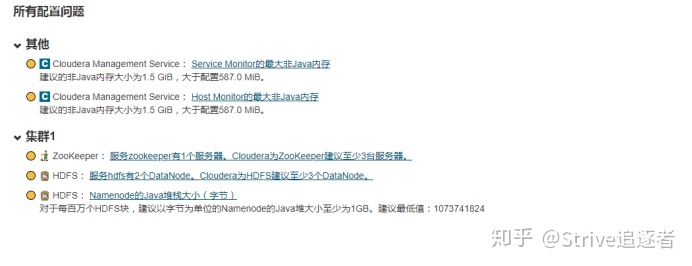
如果其中失败了,就去诊断看原因,去首页,找到安装那个配置,去看下。


 5535
5535


 被折叠的 条评论
为什么被折叠?
被折叠的 条评论
为什么被折叠?
 到【灌水乐园】发言


