


QuEST(Quantum ExactSimulation Toolkit)是由牛津大学研发的一款通用量子模拟器。QuEST由C语言编写,并且采用多种并行化技术(OpenMP、MPI和CUDA)进行了优化。因此,QuEST能够非常方便且高效地在笔记本和超级计算机上运行。
但是,QuEST并没有采用向量化的方法进行优化,而Intel的量子模拟器qHiPSTER却支持SIMD优化方法,这大概是由于Intel长期以来在处理器优化方面有着非常深厚的功底。
QuEST的源代码在下面的链接给出:
https://github.com/QuEST-Kit/QuEST
编译QuEST源代码非常方便,通过cmake工具生成Makefile文件后再执行make即可。
QuEST自带了一个demo程序。在执行完make之后,就会生成一个可执行程序demo。该程序对应的源代码为/examples/tutorial_example.c。
QuEST的使用也较为方便简洁:
1. 创建QuEST环境;
QuESTEnv env = createQuESTEnv();之所以要使用QuEST环境,是因为QuEST支持MPI,因此,需要用于多个计算节点之间的数据通信和同步。
2. 准备量子系统。
Qureg qubits = createQureg(3, env);initZeroState(qubits);上面的代码创建了3个量子比特,并且完成了对这3个量子比特的初始化。
在QuEST中,Qureg表示一组量子比特的状态。
Qureg结构体如下所示:
typedef struct Qureg{ //! Whether this instance is a density-state representation int isDensityMatrix; //! The number of qubits represented in either the state-vector or density matrix int numQubitsRepresented; //! Number of qubits in the state-vector - this is double the number represented for mixed states int numQubitsInStateVec; //! Number of probability amplitudes held in stateVec by this process //! In the non-MPI version, this is the total number of amplitudes long long int numAmpsPerChunk; //! Total number of amplitudes, which are possibly distributed among machines long long int numAmpsTotal; //! The position of the chunk of the state vector held by this process in the full state vector int chunkId; //! Number of chunks the state vector is broken up into -- the number of MPI processes used int numChunks; //! Computational state amplitudes - a subset thereof in the MPI version ComplexArray stateVec; //! Temporary storage for a chunk of the state vector received from another process in the MPI version ComplexArray pairStateVec; //! Storage for wavefunction amplitudes in the GPU version ComplexArray deviceStateVec; //! Storage for reduction of probabilities on GPU qreal *firstLevelReduction, *secondLevelReduction; //! Storage for generated QASM output QASMLogger* qasmLog;} Qureg;在创建量子比特时,需要为3个量子比特创建状态。如下代码所示。numAmps 值为2^numQubits。众所周知,n个量子比特可以表示2^n个状态。而量子态中包含实部和虚部两部分,因此,需要分配对应的内存空间。
long long int numAmps = 1LL << numQubits; long long int numAmpsPerRank = numAmps/env.numRanks; if (numAmpsPerRank > SIZE_MAX) { printf("Could not allocate memory (cannot fit numAmps into size_t)!"); exit (EXIT_FAILURE); } size_t arrSize = (size_t) (numAmpsPerRank * sizeof(*(qureg->stateVec.real))); qureg->stateVec.real = malloc(arrSize); qureg->stateVec.imag = malloc(arrSize);将量子态初始化为|0>态的代码如下所示。这段代码相对较容易理解。就是将所有状态的实部设置为1,虚部设置为0。
statevec_initBlankState(qureg); if (qureg.chunkId==0){ // zero state |0000..0000> has probability 1 qureg.stateVec.real[0] = 1.0; qureg.stateVec.imag[0] = 0.0; }3. 进行各种门操作
接下来就是对该线路进行一系列的门操作,如下代码所示:
hadamard(qubits, 0); controlledNot(qubits, 0, 1); rotateY(qubits, 2, .1);QuEST并没有像Qiskit那样提供图形化接口能够对量子线路进行可视化操作,后续Vincent会带领几名学生来完成量子程序的可视化操作,有兴趣的朋友欢迎与我联系并积极参与。
QuEST在门操作接口中提供的功能较为全面且详细,使用也非常方便。
例如,hadamard函数接受两个参数,Qureg类型的量子比特组和要进行操作的量子比特。其他的函数在这里不再进行赘述。
Hadamard函数的具体实现如下代码所示:
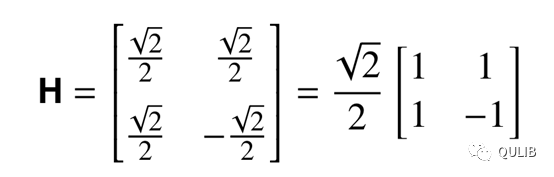
void statevec_hadamardLocal(Qureg qureg, const int targetQubit){ long long int sizeBlock, sizeHalfBlock; long long int thisBlock, // current block indexUp,indexLo; // current index and corresponding index in lower half block qreal stateRealUp,stateRealLo,stateImagUp,stateImagLo; long long int thisTask; const long long int numTasks=qureg.numAmpsPerChunk>>1; // set dimensions sizeHalfBlock = 1LL << targetQubit; sizeBlock = 2LL * sizeHalfBlock; // Can't use qureg.stateVec as a private OMP var qreal *stateVecReal = qureg.stateVec.real; qreal *stateVecImag = qureg.stateVec.imag; qreal recRoot2 = 1.0/sqrt(2);# ifdef _OPENMP# pragma omp parallel \ default (none) \ shared (sizeBlock,sizeHalfBlock, stateVecReal,stateVecImag, recRoot2) \ private (thisTask,thisBlock ,indexUp,indexLo, stateRealUp,stateImagUp,stateRealLo,stateImagLo)# endif {# ifdef _OPENMP# pragma omp for schedule (static)# endif for (thisTask=0; thisTask thisBlock = thisTask / sizeHalfBlock; indexUp = thisBlock*sizeBlock + thisTask%sizeHalfBlock; indexLo = indexUp + sizeHalfBlock; stateRealUp = stateVecReal[indexUp]; stateImagUp = stateVecImag[indexUp]; stateRealLo = stateVecReal[indexLo]; stateImagLo = stateVecImag[indexLo]; stateVecReal[indexUp] = recRoot2*(stateRealUp + stateRealLo); stateVecImag[indexUp] = recRoot2*(stateImagUp + stateImagLo); stateVecReal[indexLo] = recRoot2*(stateRealUp - stateRealLo); stateVecImag[indexLo] = recRoot2*(stateImagUp - stateImagLo); } }}从代码中很直观的可以看到hadamard操作采用了OpenMP多线程优化方法。
Hadamard门操作实质上是一个矩阵H作用在一个量子比特上。因此,上面的代码中recRoot2 表示的就是矩阵中开根号的操作。
此外,如果只使用一个节点运行程序,numAmpsPerChunk等于2^numQubits,这也就是为什么当QuEST中使用的量子比特数目较多的时候程序运行的会非常慢的原因。
上面的代码主要描述了hadamard门在CPU上采用多线程进行优化。QuEST在CUDA上执行hadamard门的代码如下所示:
void statevec_hadamard(Qureg qureg, const int targetQubit) { int threadsPerCUDABlock, CUDABlocks; threadsPerCUDABlock = 128; CUDABlocks = ceil((qreal)(qureg.numAmpsPerChunk>>1)/threadsPerCUDABlock); statevec_hadamardKernel<<>>(qureg, targetQubit);}4. 测量操作
测量操作的代码如下所示:
int outcome = measure(qubits, 0);这里我们来分析到底measure函数是如何实现的。测量函数本质上是对所有量子态的概率进行计算,其代码如下所示。因此,通过代码也就不难理解为什么测量在模拟的时候也非常耗时。
qreal statevec_findProbabilityOfZeroLocal (Qureg qureg, const int measureQubit){ // ----- sizes long long int sizeBlock, // size of blocks sizeHalfBlock; // size of blocks halved // ----- indices long long int thisBlock, // current block index; // current index for first half block // ----- measured probability qreal totalProbability; // probability (returned) value // ----- temp variables long long int thisTask; long long int numTasks=qureg.numAmpsPerChunk>>1; // ---------------------------------------------------------------- // // dimensions // // ---------------------------------------------------------------- // sizeHalfBlock = 1LL << (measureQubit); // number of state vector elements to sum, // and then the number to skip sizeBlock = 2LL * sizeHalfBlock; // size of blocks (pairs of measure and skip entries) // initialise returned value totalProbability = 0.0; qreal *stateVecReal = qureg.stateVec.real; qreal *stateVecImag = qureg.stateVec.imag;# ifdef _OPENMP# pragma omp parallel \ shared (numTasks,sizeBlock,sizeHalfBlock, stateVecReal,stateVecImag) \ private (thisTask,thisBlock,index) \ reduction ( +:totalProbability )# endif {# ifdef _OPENMP# pragma omp for schedule (static)# endif for (thisTask=0; thisTask thisBlock = thisTask / sizeHalfBlock; index = thisBlock*sizeBlock + thisTask%sizeHalfBlock; totalProbability += stateVecReal[index]*stateVecReal[index] + stateVecImag[index]*stateVecImag[index]; } } return totalProbability;}5. 释放内存
代码如下。这部分操作在这里不再进行赘述。
destroyQureg(qubits, env);destroyQuESTEnv(env);参考:
Jones, T., Brown, A., Bush, I. et al. QuEST and High Performance Simulation ofQuantum Computers. Sci Rep 9, 10736(2019) doi:10.1038/s41598-019-47174-9
https://github.com/QuEST-Kit/QuEST
Nathan Killoran,Quantum Machine Learning,Xanadu


 371
371


 被折叠的 条评论
为什么被折叠?
被折叠的 条评论
为什么被折叠?
 到【灌水乐园】发言


