


nginx学习是一个程序员必经之路,直接笔记
大纲:
1、nginx的基本概念
1)nginx是什么?做什么事?
2)反向代理
3)负载均衡
4)动静分离
2、nginx安装、常用命令和配置文件
1)在linux系统中安装nginx
2)nginx常用命令
3)nginx配置文件
3、nginx配置实例1:反向代理
4、nginx配置实例2:负载均衡
5、nginx配置实例3:动静分离
6、nginx配置高可用集群
7、nginx原理
- nginx简介
1,什么是nginx
nginx是一个高性能HTTP和反向代理服务器,特点是占用内存少,并发能力强。能经受高负载的考验,有报告表明其能支持最高50000个并发连接数;
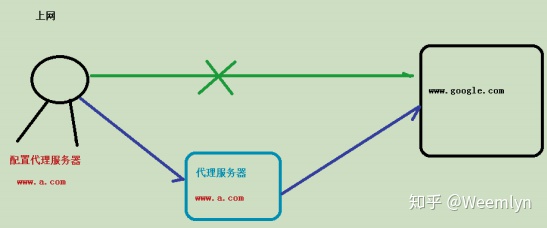
2、正向代理
需要在客户端配置代理服务器进行指定网站访问
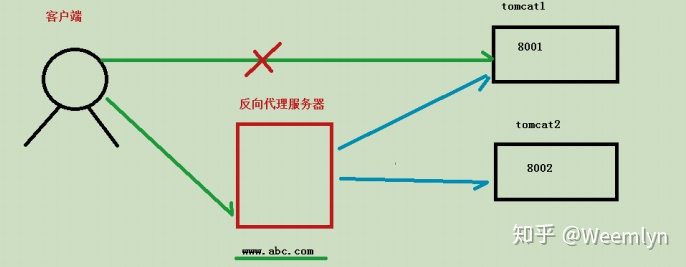
3、反向代理
暴露的是代理服务器地址,隐藏了真实服务器 IP 地址。
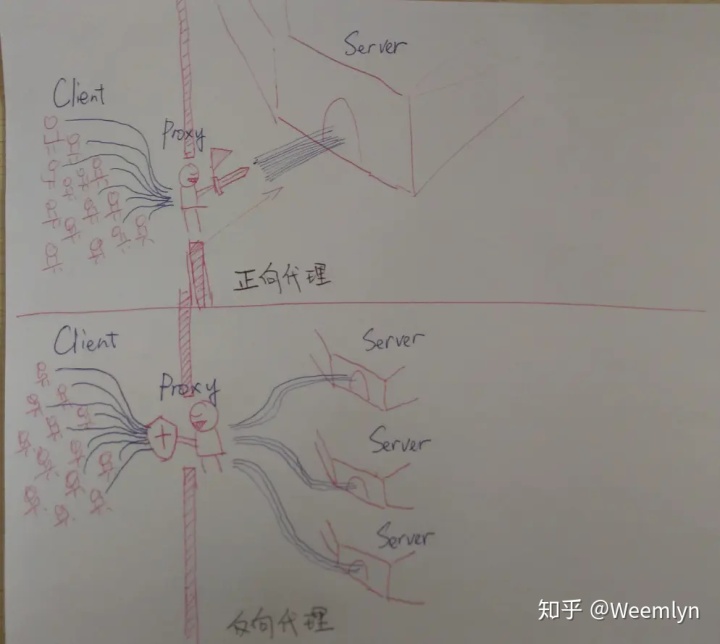
百度正向代理和反向代理的区别,在网上看到这个图很有意思
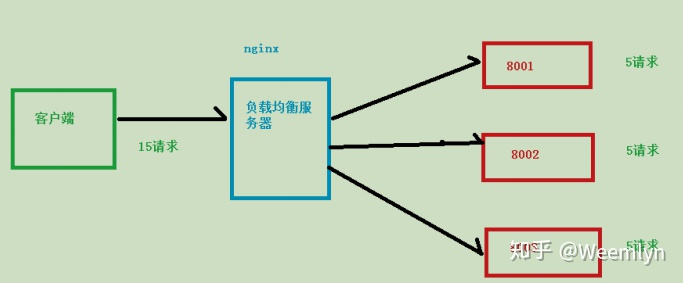
4、负载均衡
增加服务器的数量,然后将请求分发到各个服务器上,将原先请求集中到单个服务器上的
情况改为将请求分发到多个服务器上,将负载分发到不同的服务器,也就是我们所说的负
载均衡
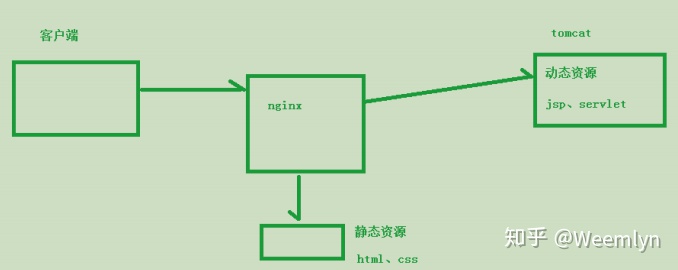
5、动静分离
为了加快网站的解析速度,可以把动态页面和静态页面由不同的服务器来解析,加快解析速度,降低原来单个服务器的压力。
- Nginx 的安装
1.准备工作
(1)打开虚拟机,目前我用的Linux系统是CentOS,使用xshell或者secureCRTportable进行ssh远程连接。
(2)下载好nginx的tar包,到 nginx 官网下载软件:http://nginx.org/ 。我使用的是nginx/1.12.2,把tar包传至Linux的usr/src文件夹下。
2.开始安装
(1)安装pcre依赖
联网下载pcre压缩文件依赖:wget http://downloads.sourceforge.net/project/pcre/pcre/8.37/pcre-8.37.tar.gz
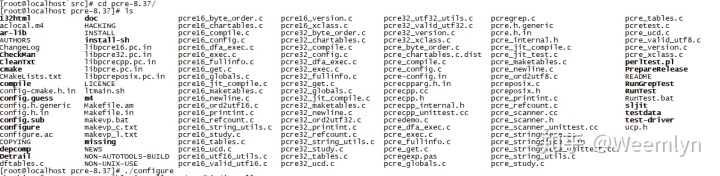
解压压缩文件:tar -xvf pcre-8.37.tar.gz

进入pcre文件夹执行./configure命令后
这一步,我安装时出现插曲

我的系统中缺少C++环境,解决:联网条件下,使用yum下载安装:yum install -y gcc gcc-c++,再重试./configure,将出现结果:
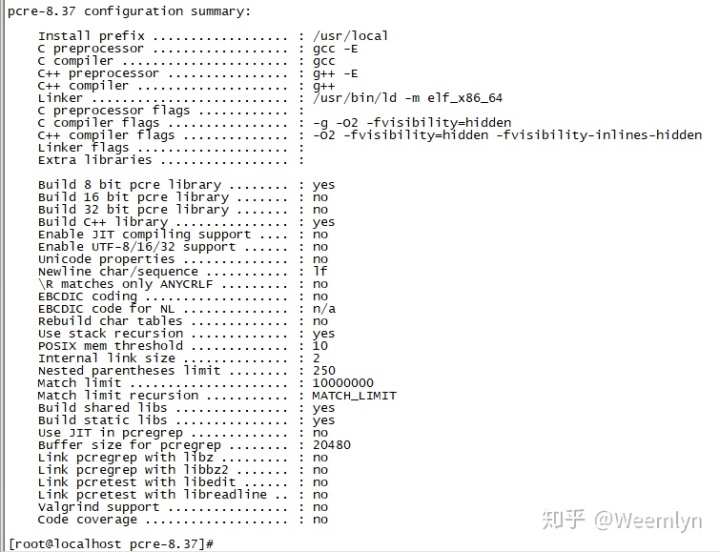
安装pcre:make && make install
long story and wait until

确认安装完毕,查看版本:pcre-config --version

(2)安装 openssl 、zlib 、 gcc 依赖 (联网)
yum -y install make zlib zlib-devel gcc-c++ libtool openssl openssl-devel
until:

(3)安装nginx
回到/usr/src文件夹解压tar包:tar -xvf nginx-1.12.2.tar.gz

进入nginx-1.12.2文件夹执行./configure
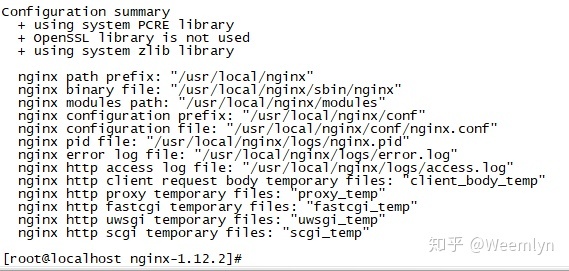
安装nginx命令:make && make install
until:

(4)启动nginx
进入文件夹 cd /usr/local/nginx/sbin
常用命令:
1.查看版本号: ./nginx -v

2.启动nginx: ./nginx
通过 ps -ef | grep nginx命令查看nginx的进程查看是否在运行

3.停止nginx: ./nginx -s stop

4.重新加载nginx: ./nginx -s reload
进入CentOS使用浏览器:访问localhost默认80端口
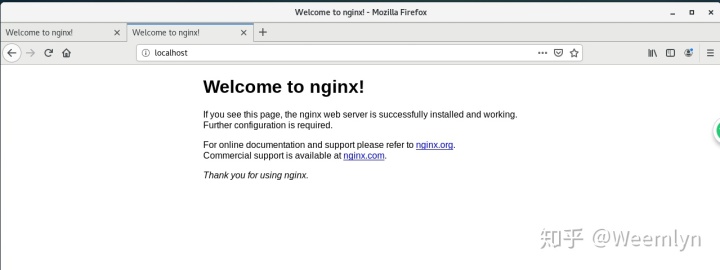
此时在windows系统无法请求该端口,因为防火墙问题,centos需放开80端口
a.查看开放的端口号
firewall-cmd --list-all
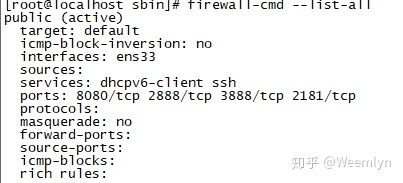
b.设置开放的端口号
firewall-cmd --add-service=http –permanent
firewall-cmd --add-port=80/tcp --permanent

c.重启防火墙
firewall-cmd --reload

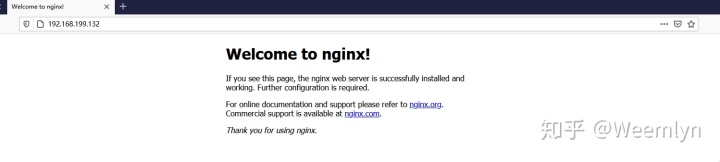
我的虚拟机的ip为192.168.199.132,开放端口后可直接访问
- Nginx的配置文件
1.配置文件位置
打开文件夹cd /usr/local/nginx/conf

2、配置文件中的内容
包含三部分内容 :全局块,events块,http块
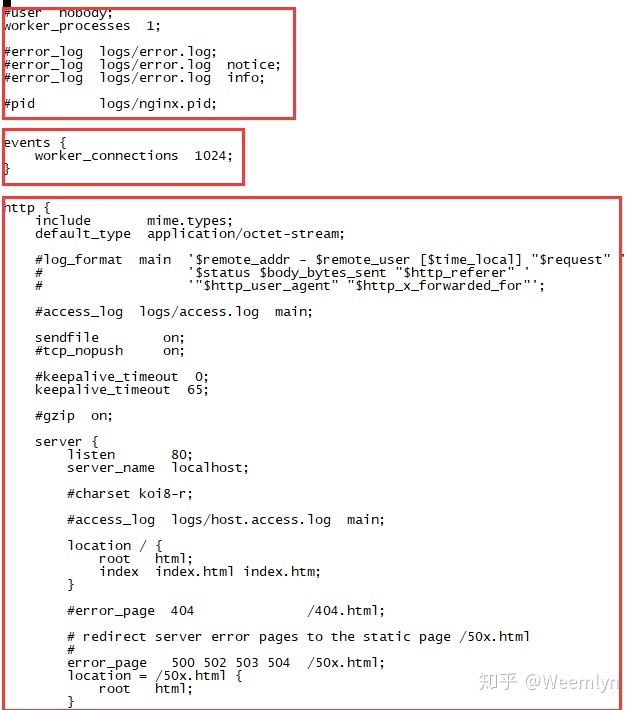
(1)全局块:配置服务器整体运行的配置指令
比如 worker_processes 1;处理并发数的配置
(2)events 块:影响 Nginx 服务器与用户的网络连接
比如 worker_connections 1024; 支持的最大连接数为 1024
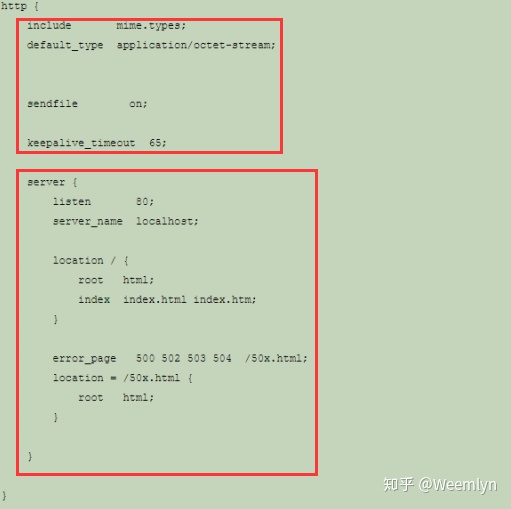
(3)http 块
还包含两部分:
http 全局块
http 全局块配置的指令包括文件引入、MIME-TYPE 定义、日志自定义、连接超时时间、单链接请求数上限
server 块
每个 http 块可以包括多个 server 块,而每个 server 块就相当于一个虚拟主机。
而每个 server 块也分为全局 server 块,以及可以同时包含多个 locaton 块。
- nginx配置实例-反向代理1
1.实现效果
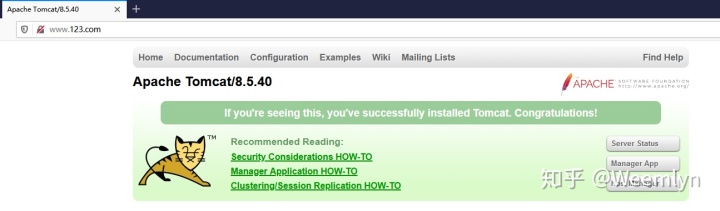
(1)打开浏览器,输入地址http://www.123.com直接跳转linux系统tomcat主页。
2.准备工作
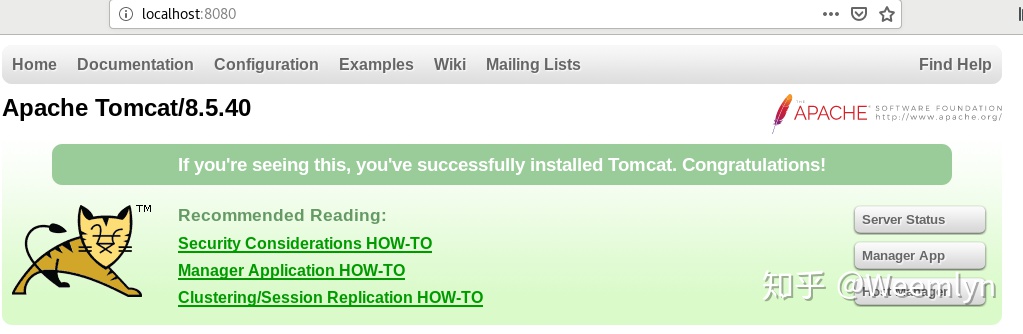
(1)在linux系统安装tomcat,使用默认端口8080
tomcat安装文件放在文件夹/usr/src/中,使用tar -xvf 安装文件名解压
进入tomcat的bin目录中,./startup.sh启动tomcat服务器
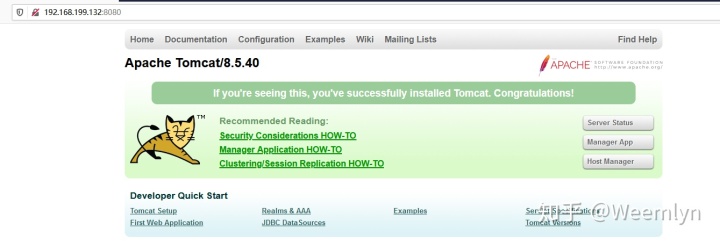
(2)对外开放端口8080;
(3)在window系统浏览器访问tomcat服务器
3.解析访问过程
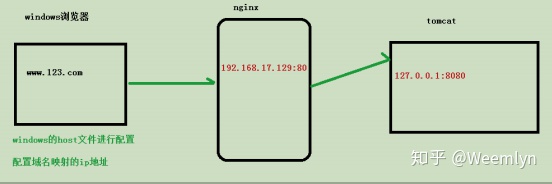
在浏览器访问时,会先查看hosts文件,看是否有域名对应的IP,不存在再在网络上搜索DNS服务上对应的域名IP;
4.具体过程
a)修改host文件

添加内容在hosts文件中

b)在nginx进行请求转发的配置(反向代理配置)
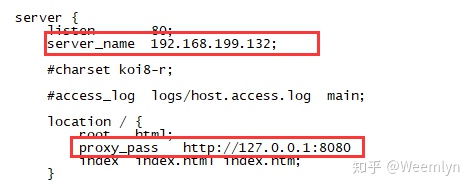
保存退出nginx.conf后,重启nginx: ./nginx -s reload
尝试浏览器请求http://www.123.com
- nginx配置实例-反向代理2
1.实现效果
使用使用 nginx 反向代理,根据访问的路径跳转到不同端口的服务中
nginx监听端口9001
访问 http://192.168.199.132:9001/aaa/ 跳转到127.0.0.1:8080
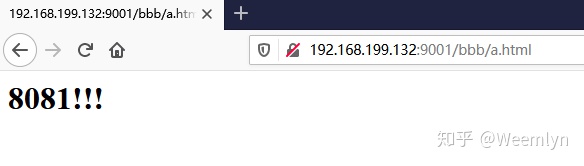
访问 http://192.168.199.132:9001/bbb/ 跳转到127.0.0.1:8081
2.准备工作
(1)准备两个tomcat(双tomcat部署方式)(先将前面测试的tomcat中的../bin中关闭tomcat:./shutdown.sh)
在/usr/src/下创建两个文件夹tomcat8080,tomcat8081

在两个文件夹下分别放入tomcat安装包,先在tomcat8080中tar开,然后再在../bin/中启动./startup.sh
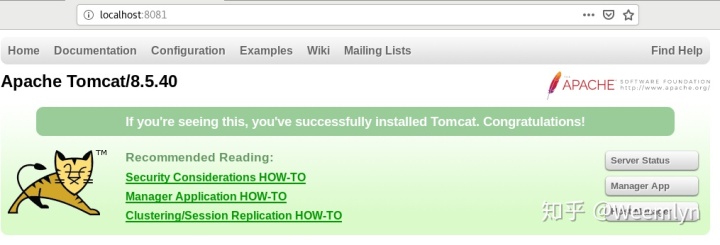
再在tomcat8081文件夹中tar开安装包,先修改server.xml中的各端口号


然后启动此tomcat,在../bin/中启动./startup.sh
查看启动情况:
(2)在两个tomcat的webapps中创建文件夹和测试文件
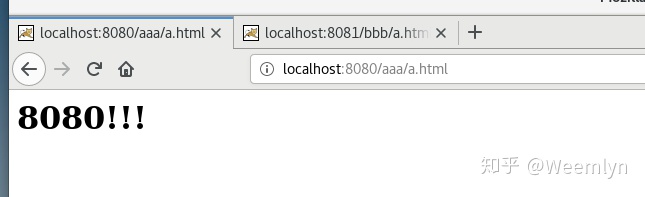
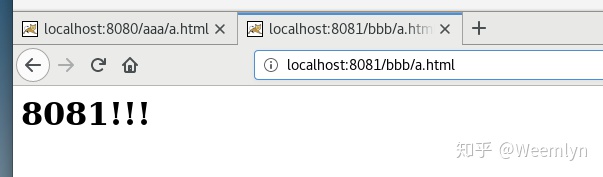
tomcat8080:创建文件夹aaa,放入文件a.html,在此文件中写上h1标签:“8080!!!”;
tomcat8081:创建文件夹bbb,放入文件a.html,在此文件中写上h1标签:“8081!!!”
效果如下:
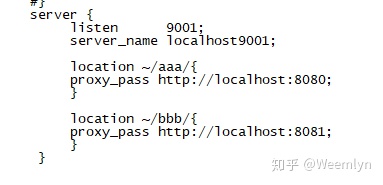
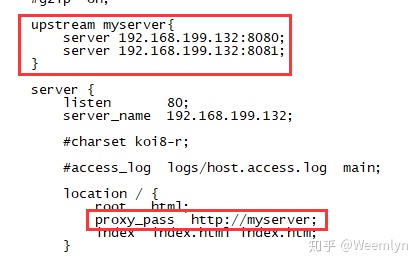
3.具体配置
在nginx.conf中编写server,将9001作为监听端口,通过设置location信息将不同的请求指向不同的tomcat
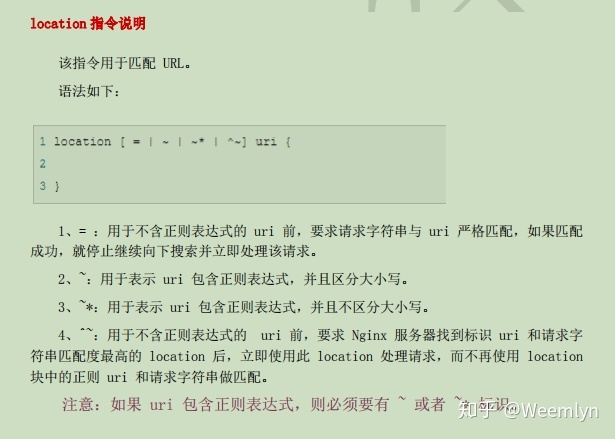
location指令说明:
实现效果:
请求端口9001,url中间地址为aaa,访问的是8080
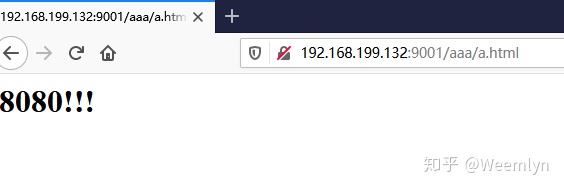
请求端口9001,url中间地址为bbb,访问的是8081
- nginx配置实例-负载均衡
1.实现效果
(1)通过浏览器地址栏输入地址192.168.199.132/ccc/a.html,负载均衡效果,请求会分摊到tomcat8080和8081两个服务器上去;
2.准备工作
(1)准备两个tomcat服务器,tomcat8080和tomcat8081;
(2)在两个tomcat都创建一个ccc文件夹,都在文件夹中放一个a.html文件用作测试,而两个a.html里对应的内容是8080和8081。
3.实现配置
vim nginx.conf文件,进行负载均衡配置
保存后,再使用nginx的reload命令重启nginx,实现效果


由上面两图可以看出,当访问同一个路径时,其实质上是交替访问的tomcat8080和tomcat8081,实现了负载均衡。
4.nginx分配服务器策略
第一种 轮询(默认)
按照请求次序分别逐一分配到不同普通服务器,如果后端服务器挂了,能自动删除;
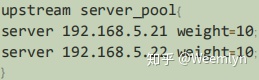
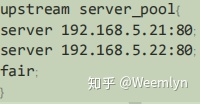
第二种 权重
设置weight,默认为1,权重越高,被分配的客户就越多;
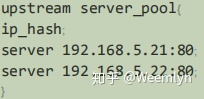
第三种 ip_hash
按照请求的ip按照哈希算法分配到固定的服务器,每个访问者只会访问到固定的服务器,可以解决session问题
第四种 fair(第三方)
按照后端服务器的响应时间来分配请求,响应时间短的优先分配。
- nginx配置实例-动静分离
- nginx的原理解析
1.master和worker

2.worker如何工作
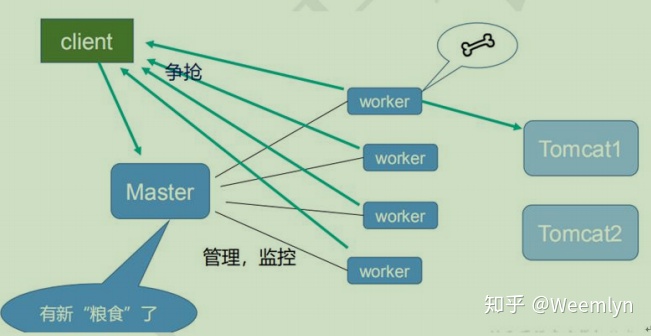
3.一个master多个worker的好处
(1)可以使用nginx -s reload热部署;利用nginx热部署操作;
(2)每个worker是独立的进程,如果其中一个worker出现问题,不会影响其他worker工作而使服务中断
4.多少worker比较合适
worker数和cpu数相同是最适宜的、
5.连接数work_connection
第一个:发送请求,占用了worker的几个链接数?
答案:2个或4个
2个:请求静态资源,客户端和worker建立输入输出两个连接;4个:http反向代理请求动态数据,比如请求tomcat接口,客户端和worker建立输入输出两个连接,tomcat和worker建立输入输出两个连接。
第二个:nginx有一个master.4个worker,每个worker支持的最大连接数是1024,支持的最大并发数是多少?
静态资源请求:workerconnection * workerprocess/2
http反向代理:workerconnection * workerprocess/4


 875
875


 被折叠的 条评论
为什么被折叠?
被折叠的 条评论
为什么被折叠?
 到【灌水乐园】发言


