


1.Neo4j简介
Neo4j是一个高性能的,NOSQL图形数据库,它将结构化数据存储在网络上而不是表中。它是一个嵌入式的、基于磁盘的、具备完全的事务特性的Java持久化引擎,但是它将结构化数据存储在网络(从数学角度叫做图)上而不是表中。Neo4j也可以被看作是一个高性能的图引擎,该引擎具有成熟数据库的所有特性。程序员工作在一个面向对象的、灵活的网络结构下而不是严格、静态的表中——但是他们可以享受到具备完全的事务特性、企业级的数据库的所有好处。
Neo4j的官方网站:http://www.neo4j.org
2.安装Neo4j
网上安装教程很多,本文是在mac电脑下使用docker+Kitematic安装的,步骤大致如下:
1.启动docker
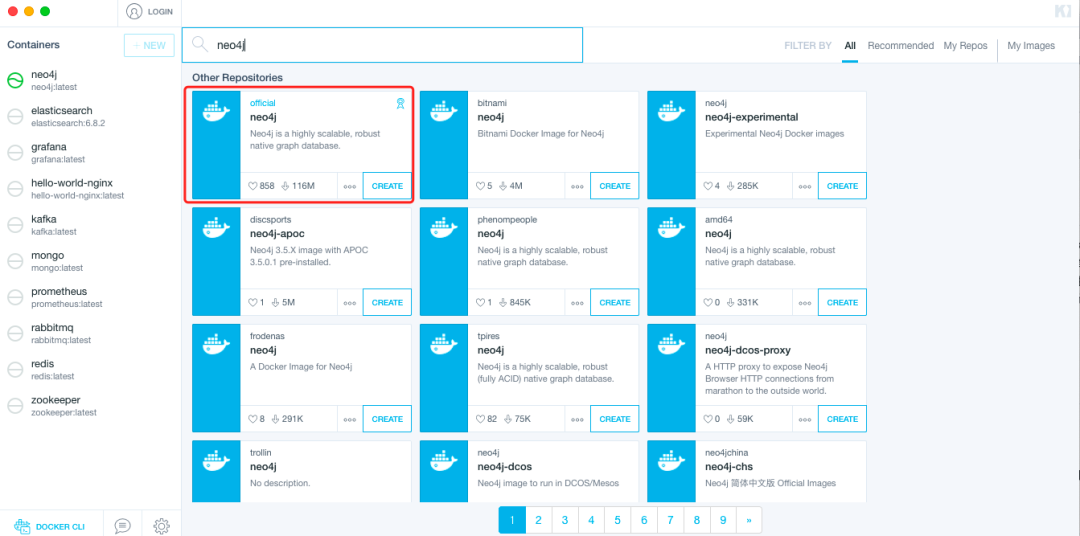
2.在Kitematic中搜索Neo4j镜像并安装,这里安利一下这个软件,安装一些镜像非常方便,如下图:
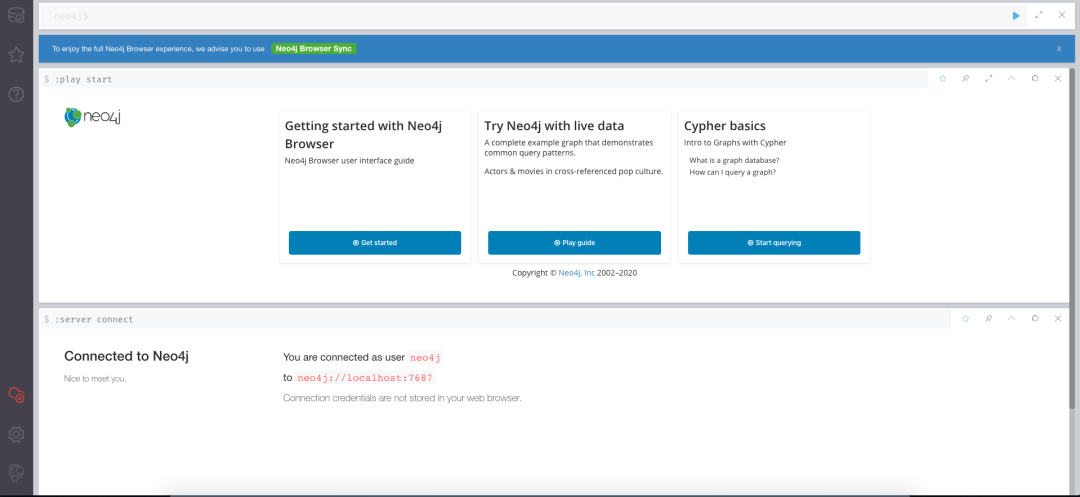
3.安装完成后,访问对应web地址,如下:
3.SpringBoot整合
接下来介绍SpringBoot中如何视同Neo4j。
3.1 添加Neo4j依赖
创建项目,pom文件中引入依赖,如下:
org.springframework.boot
spring-boot-starter-data-neo4j
3.2 配置文件
在配置文件中配置Neo4j相关配置,如下:
# neo4j配置
spring.data.neo4j.uri= bolt://localhost:7687
spring.data.neo4j.username=neo4j
spring.data.neo4j.password=neo4j
3.3 创建对应entity
这里以部门为例,要创建一个如下的图:
* CEO
* -设计部
* - 设计1组
* - 设计2组
* -技术部
* - 前端技术部
* - 后端技术部
* - 测试技术部
那么这里简单创建一个部门实体和一个关系实体。
其中部门实体,如下:
@NodeEntity(label = "dept")
@Data
@Builder
public class Dept {
@Id
@GeneratedValue
private Long id;
@Property(name = "deptName")
private String deptName;
}
关系实体如下:
@RelationshipEntity(type = "relationShip")
@Data
@Builder
public class RelationShip {
@Id
@GeneratedValue
private Long id;
@StartNode
private Dept parent;
@EndNode
private Dept child;
}
这里说明一下几个注解的意思:
@NodeEntity:标明是一个节点实体
@RelationshipEntity:标明是一个关系实体
@Id:实体主键
@Property:实体属性
@GeneratedValue:实体属性值自增
@StartNode:开始节点(可以理解为父节点)
@EndNode:结束节点(可以理解为子节点)
3.4 repository
由于使用的spring-data操作neo4j,所以实现逻辑类似,创建接口继承Neo4jRepository。
DeptRepository如下:
import org.springframework.data.neo4j.repository.Neo4jRepository;
import org.springframework.stereotype.Repository;
@Repository
public interface DeptRepository extends Neo4jRepository<Dept,Long> {
}
RelationShipRepository如下:
import org.springframework.data.neo4j.repository.Neo4jRepository;
import org.springframework.stereotype.Repository;
@Repository
public interface RelationShipRepository extends Neo4jRepository<RelationShip, Long> {
}
3.5 基本使用
这里创建了一些基础方法,使用方式和spring-data-jpa类似,由于需要构建一个本文3.1所描述的图,所以创建了一个create方法来初始化数据,完整代码如下:
@RestController
public class TestController {
@Resource
private DeptRepository deptRepository;
@Resource
private RelationShipRepository relationShipRepository;
/**
* CEO
* -设计部
* - 设计1组
* - 设计2组
* -技术部
* - 前端技术部
* - 后端技术部
* - 测试技术部
*/
@GetMapping("create")
public void create(){
Dept CEO = Dept.builder().deptName("CEO").build();
Dept dept1 = Dept.builder().deptName("设计部").build();
Dept dept11 = Dept.builder().deptName("设计1组").build();
Dept dept12 = Dept.builder().deptName("设计2组").build();
Dept dept2 = Dept.builder().deptName("技术部").build();
Dept dept21 = Dept.builder().deptName("前端技术部").build();
Dept dept22 = Dept.builder().deptName("后端技术部").build();
Dept dept23 = Dept.builder().deptName("测试技术部").build();
List<Dept> depts = new ArrayList<>(Arrays.asList(CEO,dept1,dept11,dept12,dept2,dept21,dept22,dept23));
deptRepository.saveAll(depts);
RelationShip relationShip1 = RelationShip.builder().parent(CEO).child(dept1).build();
RelationShip relationShip2 = RelationShip.builder().parent(CEO).child(dept2).build();
RelationShip relationShip3 = RelationShip.builder().parent(dept1).child(dept11).build();
RelationShip relationShip4 = RelationShip.builder().parent(dept1).child(dept12).build();
RelationShip relationShip5 = RelationShip.builder().parent(dept2).child(dept21).build();
RelationShip relationShip6 = RelationShip.builder().parent(dept2).child(dept22).build();
RelationShip relationShip7 = RelationShip.builder().parent(dept2).child(dept23).build();
List<RelationShip> relationShips = new ArrayList<>(Arrays.asList(relationShip1,relationShip2,relationShip3,relationShip4,relationShip5
,relationShip6,relationShip7));
relationShipRepository.saveAll(relationShips);
}
@GetMapping("get")
public RelationShip get(Long id){
Optional<RelationShip> byId = relationShipRepository.findById(id);
return byId.orElse(null);
}
@GetMapping("deleteRelationShip")
public void deleteRelationShip(Long id){
relationShipRepository.deleteById(id);
}
@GetMapping("deleteDept")
public void deleteDept(Long id){
deptRepository.deleteById(id);
}
@GetMapping("deleteAll")
public void deleteAll(){
deptRepository.deleteAll();
relationShipRepository.deleteAll();
}
}
执行create方法初始化数据,结果如下图所示:
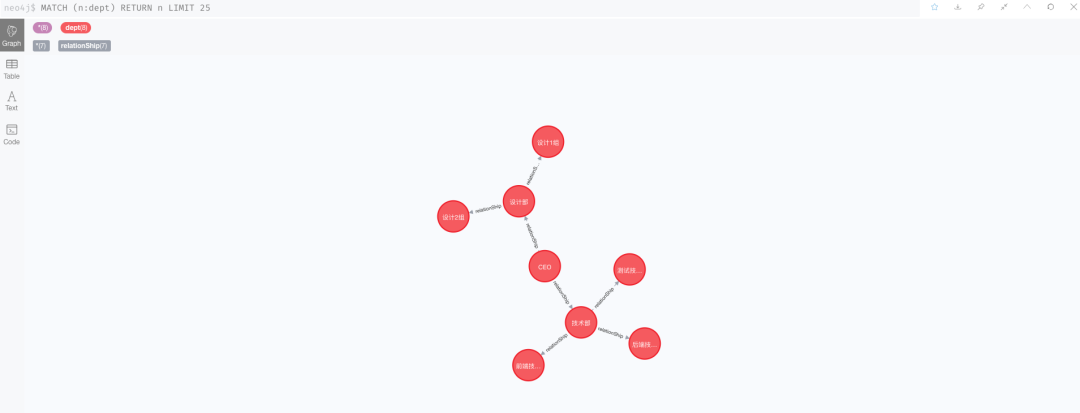
其余测试方法这里就不在演示了,可以自行测试。
4.Neo4j基本命令
4.1 操作命令简介
接下来介绍一下Neo4j的基本操作命令。
CREATE命令:创建节点命令
MATCH命令:查询命令
RETURN命令:返回数据命令
DELETE命令:删除命令,可以用于删除节点和关联节点信息
REMOVE命令:可以用于删除标签和属性
4.2 简单练习
创建命令,可以用来创建节点和关系节点,比如我们要在创建一个部门,秘书部,如下,执行如下命令:
CREATE (d:dept {deptName:"秘书部"})
操作后如下图所示:
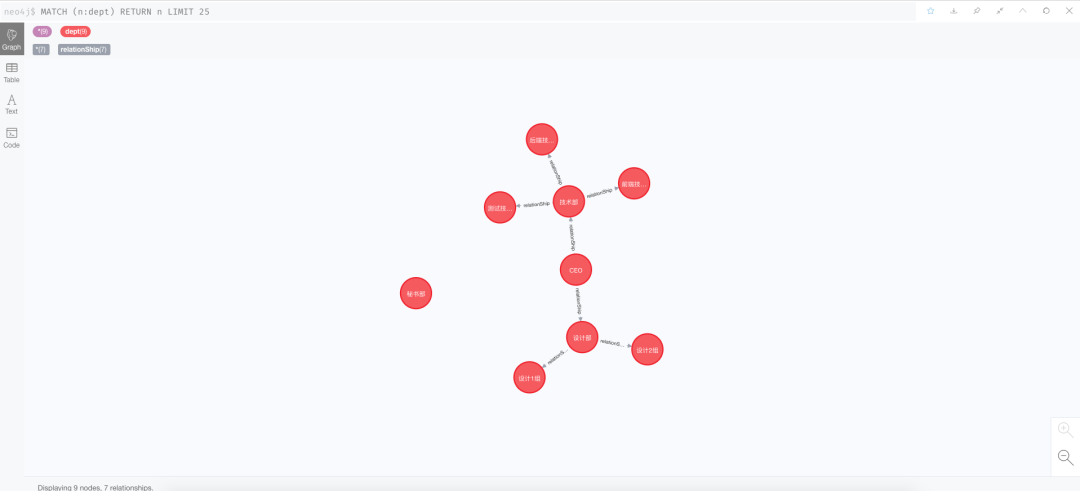
目前可以看到,秘书部和其余节点是没有关系的,那么接下来将秘书部与CEO创建关系,执行如下命令:
MATCH (n:dept {deptName:"CEO"}),(m:dept {deptName:"秘书部"}) CREATE (n)-[r:relationShip]->(m) return r;
查看结果如图:
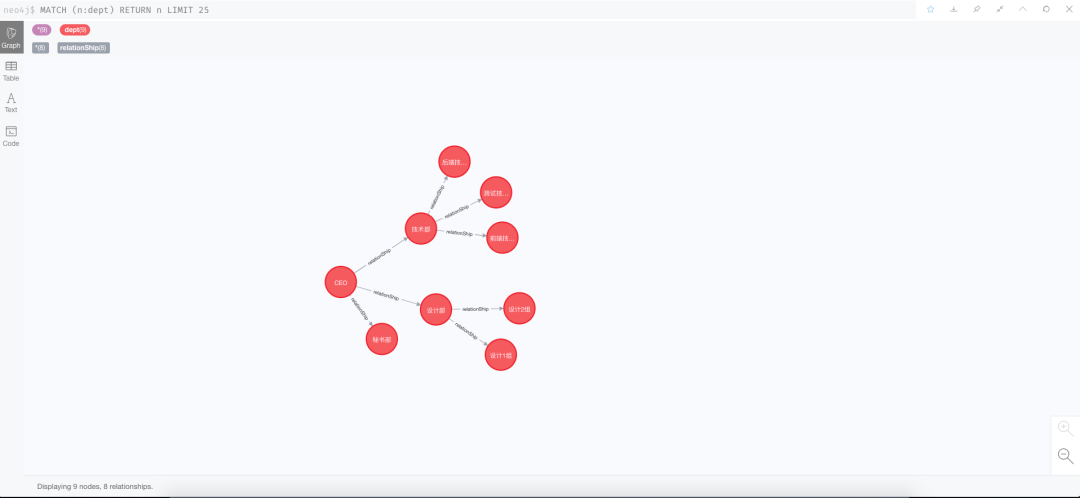
可以看到秘书部已经挂在了CEO节点下。
其中从上面就可以看出,CQL语句大致结构如下:
MATCH RETURN:查询命中结果返回;
MATCH CREATE RETURN:查询后创建关系返回;
MATCH DELETE:查询命中删除;
...
5.源码
源码地址:https://gitee.com/dalaoyang/springbootlearn/tree/master/springboot2neo4j
6.参考
参考地址:
https://baike.baidu.com/item/Neo4j/9952114?fr=aladdin
http://www.neo4j.org


 227
227


 被折叠的 条评论
为什么被折叠?
被折叠的 条评论
为什么被折叠?
 到【灌水乐园】发言


