


Vagrant 是我们的虚拟机管理软件, 它对接了 Vmware , VirtualBox, parallel box等等。一般来说我们使用 Virtual Box比较多,所以如果你要使用Vagrant,首先你必须在本机装上 virtual box或者是vmware,或者是其他的虚拟机厂商提供的虚拟机软件,然后Vagrant上给我们提供了命令行的方式,来管理这些虚拟机软件.
Vagrant,需要本地的 Web 应用环境,可以使用 Vagrant,通过命令行,去安装 CentOS 虚拟机的镜像,这个镜像在 Vagrant 里面称为 box ,我们可以使用命令,去管理这些 box ,添加,删除,启动,还有停止。
用 Vagrant 启动虚拟机以后,还可以使用 ssh 连接到虚拟机,虚拟机与本地电脑之间会有一个同步的目录,也就是你可以把项目的文件直接放到本地电脑上的某个目录下面,然后使用在虚拟机上配置的环境去运行它。
1. Vagrant 设置
1.1 下载 Vagrant 和 virtualBox(需要sec放行)
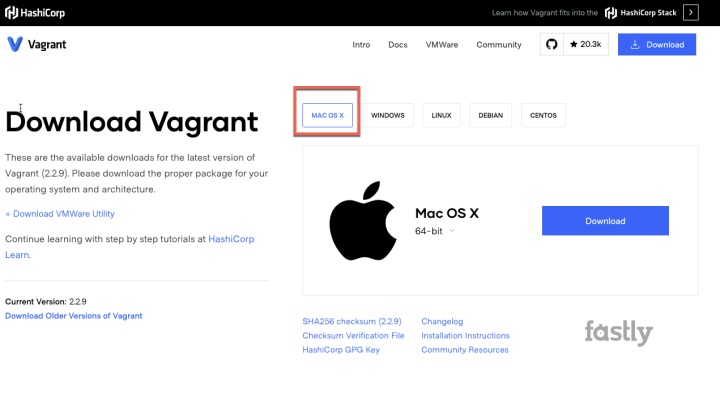
1.1.1 下载 vitrualbox VirtualBox 6.0.14 (released October 15 2019) 1.1.2 下载 Vagrant Vagrant 2.2.9下载 下载它并安装
x5s-iMac:~ x5$ vagrant box list
There are no installed boxes! Use `vagrant box add` to add some.
查找所需的box 使用成熟的bento/centos-6.8
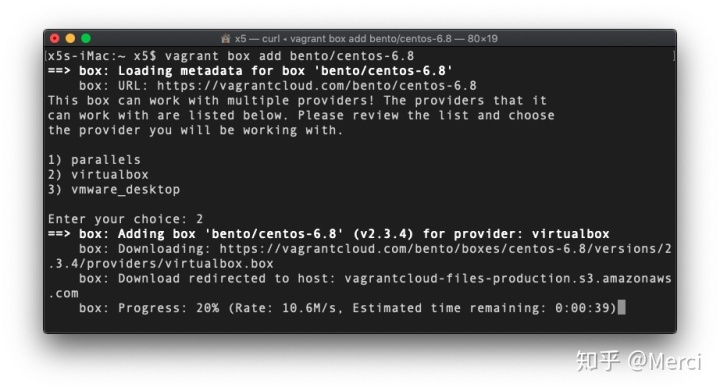
如果你下载网速过慢, 请使用下载工具下载: 直接下载链接
- 共三个版本,请使用第2个 virtualbox的版本
- 使用 vagrant box list 命令查看下载好的版本
1.2 Vgrant 安装
1.2.1 在桌面创建 项目的文件夹
mkdir wordpresser
cd wordpressor
1.2.2 安装 bento/centos-6.8
vagrant init bento/centos-6.8
x5s-iMac:wordpresser x5$ vagrant init bento/centos-6.8
A `Vagrantfile` has been placed in this directory. You are now
ready to `vagrant up` your first virtual environment! Please read
the comments in the Vagrantfile as well as documentation on
`vagrantup.com` for more information on using Vagrant.
打开桌面的wordpresser这个文件夹,可以看到这个目录里创建了一个 vigrantfile的文件
使用命令行可见:
x5s-iMac:wordpresser x5$ ls
Vagrantfile
1.3. 启动 Vagrant
Vagrant up
x5s-iMac:wordpresser x5$ vagrant up
Bringing machine 'default' up with 'virtualbox' provider...
==> default: Importing base box 'bento/centos-6.8'...
==> default: Matching MAC address for NAT networking...
==> default: Checking if box 'bento/centos-6.8' version '2.3.4' is up to date...
==> default: Setting the name of the VM: wordpresser_default_1577977630498_13614
Vagrant is currently configured to create VirtualBox synced folders with
the `SharedFoldersEnableSymlinksCreate` option enabled. If the Vagrant
guest is not trusted, you may want to disable this option. For more
information on this option, please refer to the VirtualBox manual:

  https://www.virtualbox.org/manual/ch04.html#sharedfolders

This option can be disabled globally with an environment variable:

  VAGRANT_DISABLE_VBOXSYMLINKCREATE=1

or on a per folder basis within the Vagrantfile:

  config.vm.synced_folder '/host/path', '/guest/path', SharedFoldersEnableSymlinksCreate: false
==> default: Clearing any previously set network interfaces...
==> default: Preparing network interfaces based on configuration...
    default: Adapter 1: nat
==> default: Forwarding ports...
    default: 22 (guest) => 2222 (host) (adapter 1)
==> default: Booting VM...
==> default: Waiting for machine to boot. This may take a few minutes...
    default: SSH address: 127.0.0.1:2222
    default: SSH username: vagrant
    default: SSH auth method: private key
    default:
    default: Vagrant insecure key detected. Vagrant will automatically replace
    default: this with a newly generated keypair for better security.
    default:
    default: Inserting generated public key within guest...
    default: Removing insecure key from the guest if it's present...
    default: Key inserted! Disconnecting and reconnecting using new SSH key...
==> default: Machine booted and ready!
==> default: Checking for guest additions in VM...
    default: The guest additions on this VM do not match the installed version of
    default: VirtualBox! In most cases this is fine, but in rare cases it can
    default: prevent things such as shared folders from working properly. If you see
    default: shared folder errors, please make sure the guest additions within the
    default: virtual machine match the version of VirtualBox you have installed on
    default: your host and reload your VM.
    default:
    default: Guest Additions Version: 5.1.18
    default: VirtualBox Version: 6.0
==> default: Mounting shared folders...  挂载共享目录-对应的是项目目录
    default: /vagrant => /Users/x5/Desktop/wordpresser 两个目录是同步的
x5s-iMac:wordpresser x5$ --结束
这一步骤实际是从下载的虚拟机bento/centos-6.8中复制了一份到这个项目的特定目录下, 我们所做的任何改变都只限于这个项目使用的这个虚拟机。
vagrant ssh
使用 vagrant 用户连接到这个centos
Vagrant 之 Ubuntu
系统环境: macOS Mojave 10.14.
- 安装 Vagrant
- 安装 VirtualBox
查找所需的虚拟机镜像, 比如 ubuntu.
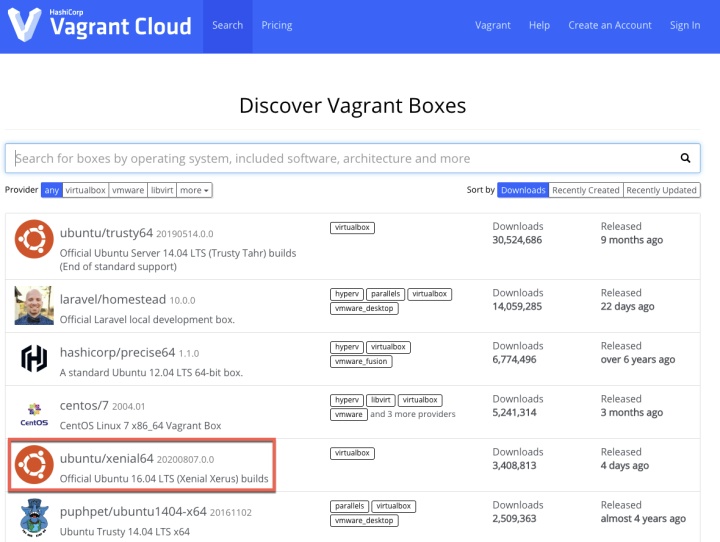
点击进入 xenial64的页面, 查看安装所需命令:
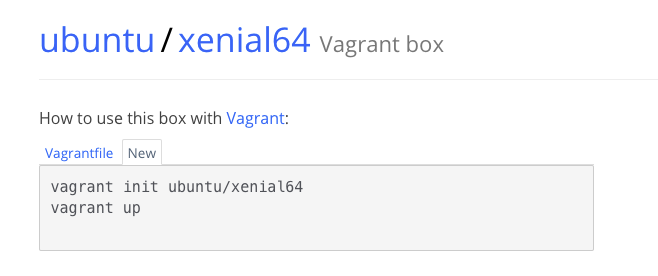
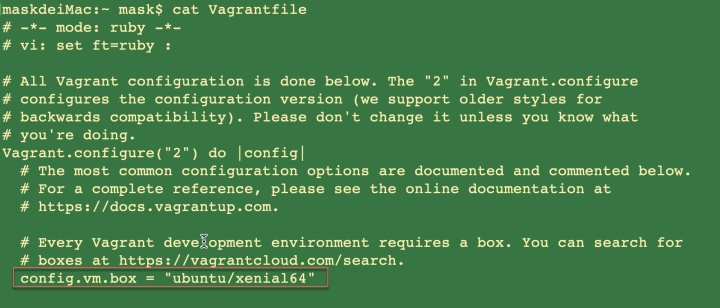
vagrant init ubuntu/xenial64这样就下载了配置文件 Vagrantfile. cat 命令查看可以看到设置的
default: SSH address: 127.0.0.1:2222          地址
    default: SSH username: vagrant            用户名
    default: SSH auth method: private key     密钥
    default:
    default: Vagrant insecure key detected. Vagrant will automatically replace
    default: this with a newly generated keypair for better security.
    default:
    default: Inserting generated public key within guest...
    default: Removing insecure key from the guest if it's present...
    default: Key inserted! Disconnecting and reconnecting using new SSH key...
==> default: Machine booted and ready!
==> default: Checking for guest additions in VM...
    default: The guest additions on this VM do not match the installed version of
    default: VirtualBox! In most cases this is fine, but in rare cases it can
    default: prevent things such as shared folders from working properly. If you see
    default: shared folder errors, please make sure the guest additions within the
    default: virtual machine match the version of VirtualBox you have installed on
    default: your host and reload your VM.
    default:
    default: Guest Additions Version: 5.1.38
    default: VirtualBox Version: 6.1
==> default: Mounting shared folders...
    default: /vagrant => /Users/mask
安装完毕, 通过 vagrant ssh 进入虚拟机
命令行终端提示变化为虚拟机环境

vagrant@ubuntu-xenial:~$
安装完毕.
至此, 本文提示了 CentOS 以及 Ubuntu 的 Vagrant 安装.


 346
346


 被折叠的 条评论
为什么被折叠?
被折叠的 条评论
为什么被折叠?
 到【灌水乐园】发言


